|
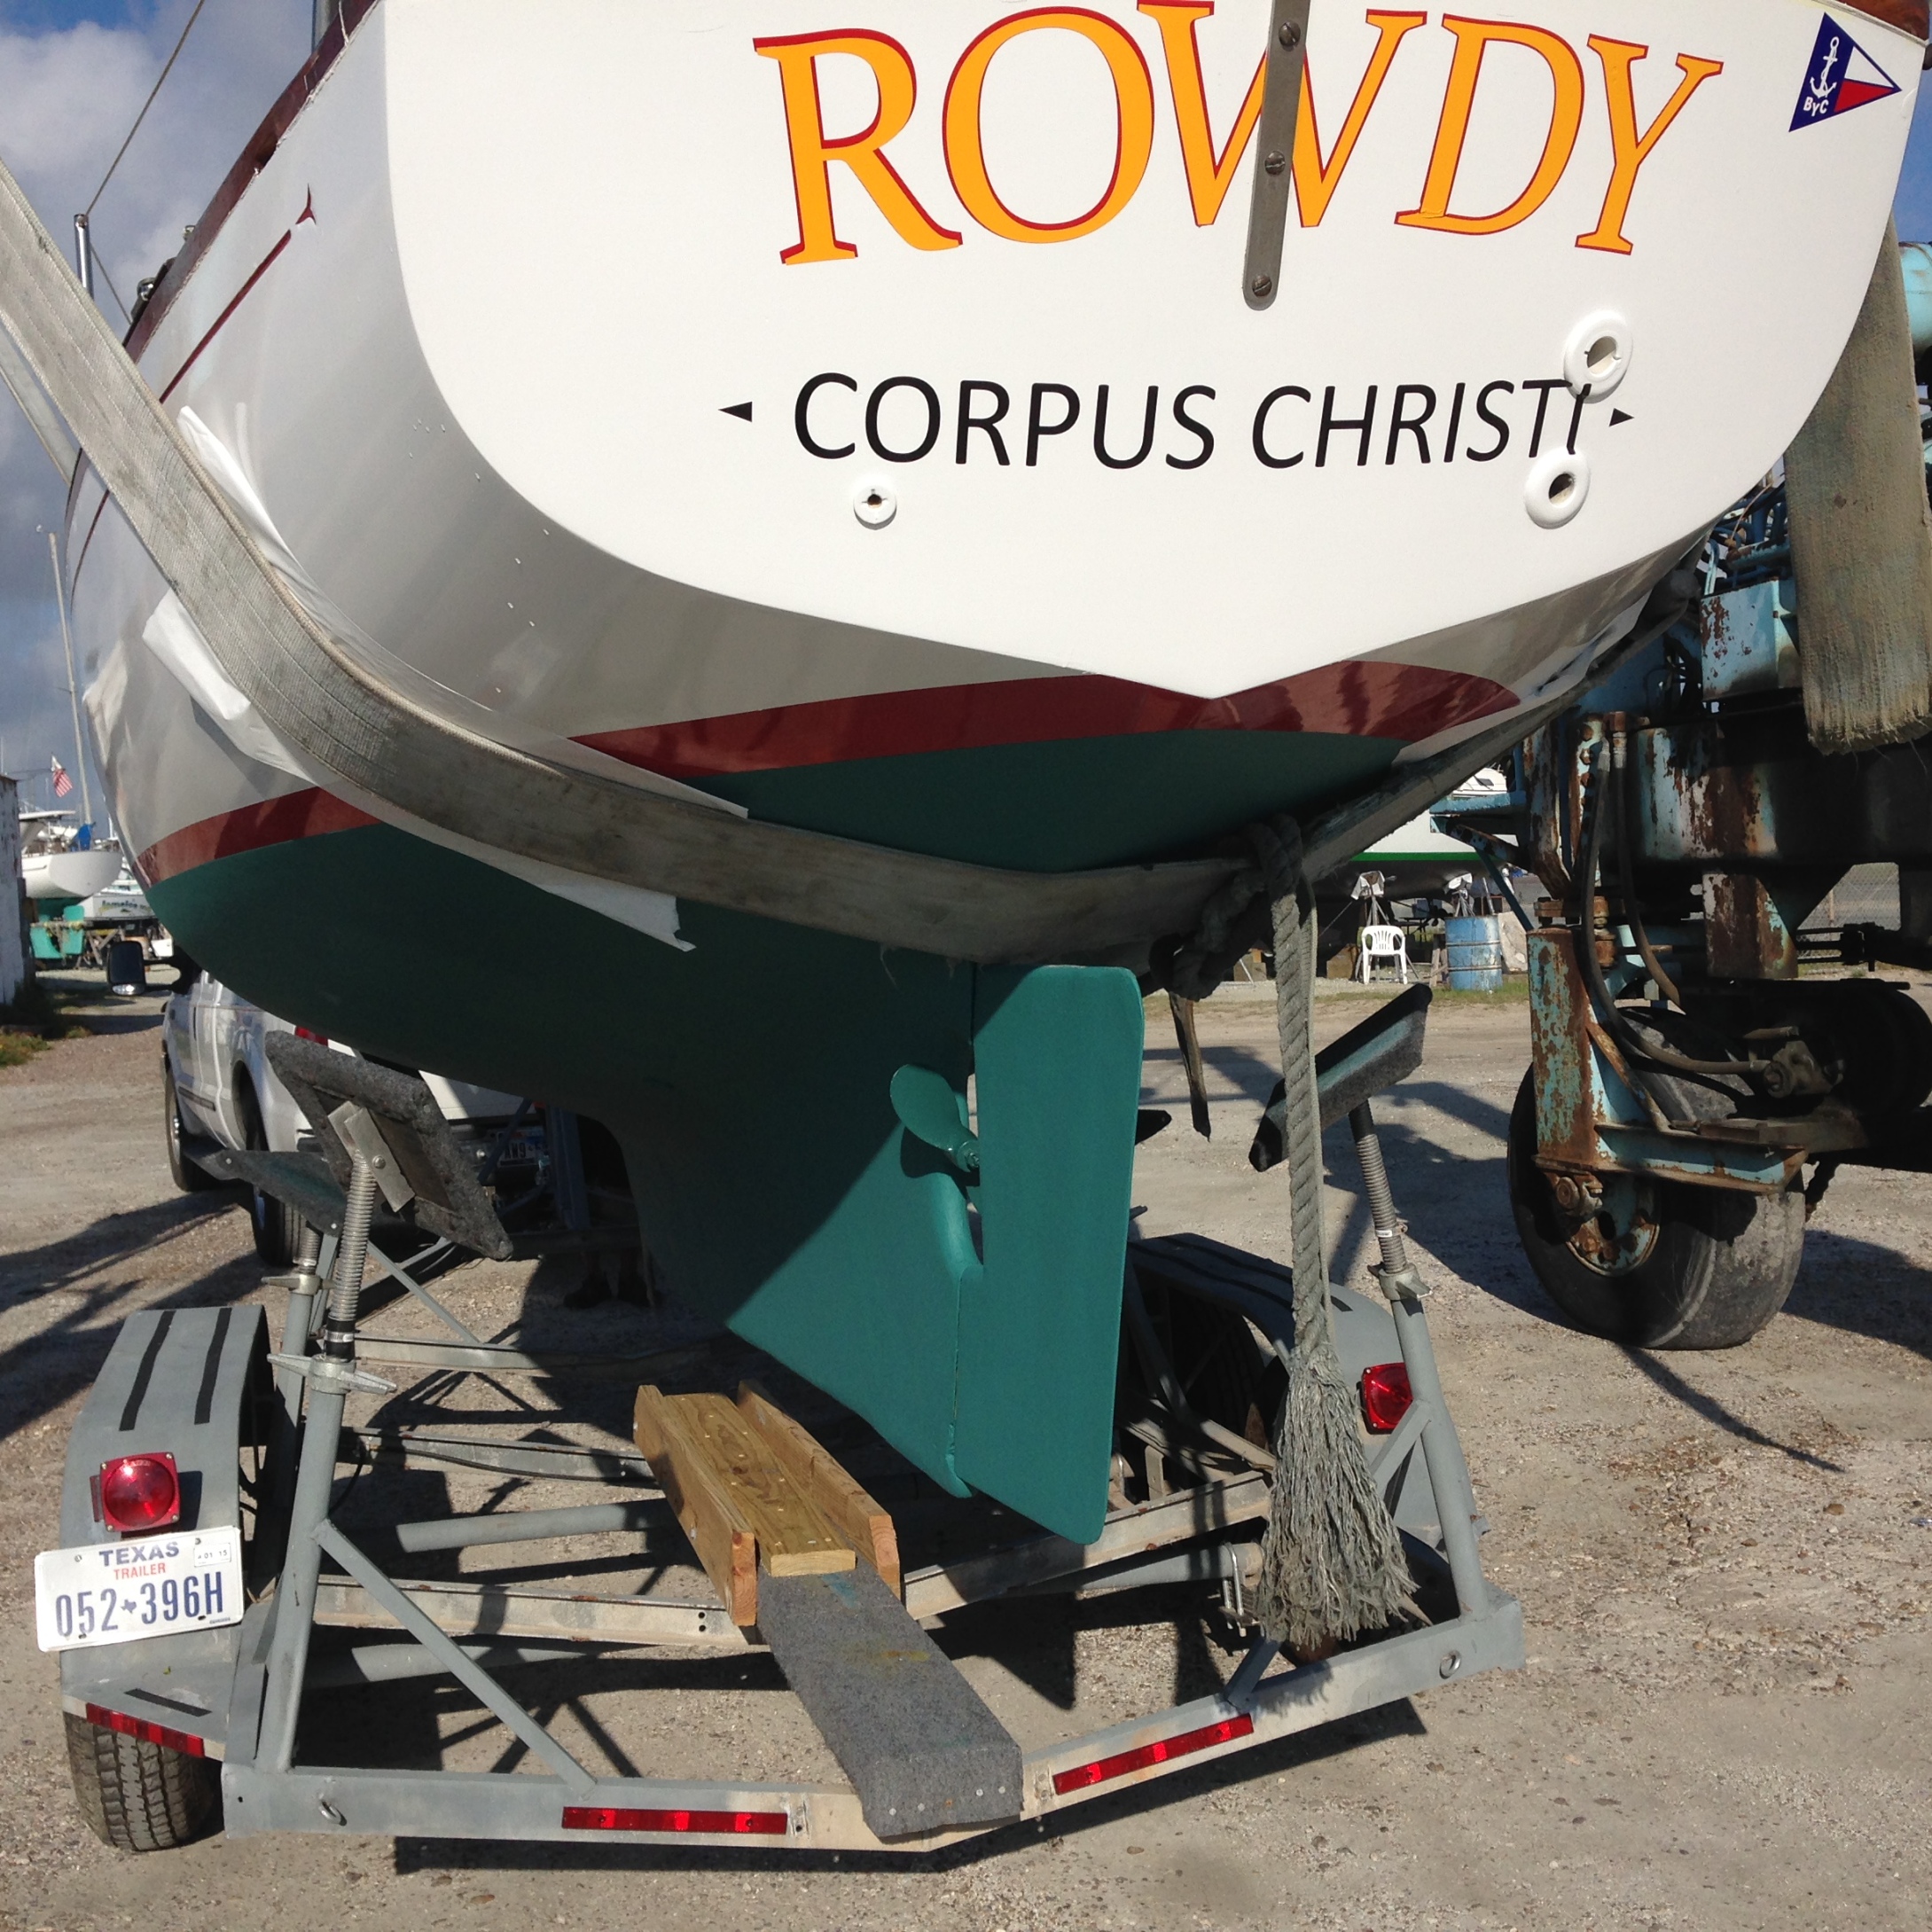
May 25, 2021 - We got the following email from Tracy - we'll set up a new page for Dolphin #5 and her new owners as soon as they check in. Update June 7, 2021 - here's Mood Indigo!) .
I'm happy to announce that Michelle, Hailey, and Marie Pellon have purchased Rowdy, soon to be Mood Indigo! They are a wonderful family.
Marie is eight years old and taking sailing lessons. In as much as we will miss Rowdy. Rowdy is in really good hands now. Pictures to follow
when we splash her.
Thanks Ron,
Tracy Mross
Fair Winds Tracy and Dan!
Welcome aboard Michele, Hailey and Marie Pellon!!!
***************************************
March 25, 2021. We got the following email from Tracy
Hi Ron
Tracy and Dan here. We are about six weeks out from restoring Rowdy. We are also trying to find a glass dome shaped side navigation lite in red.
If anyone has an interest in purchasing Rowdy they are welcome to contact me at 832.914.3348. Ask for Tracy. Rowdy is located in Cypress, Texas for now while we are finishing her up.
Thank you
Tracy
*************************************
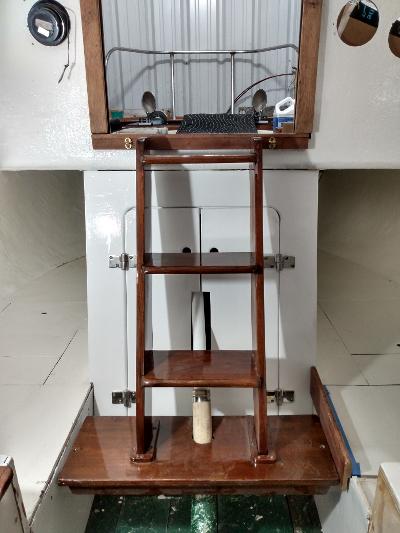
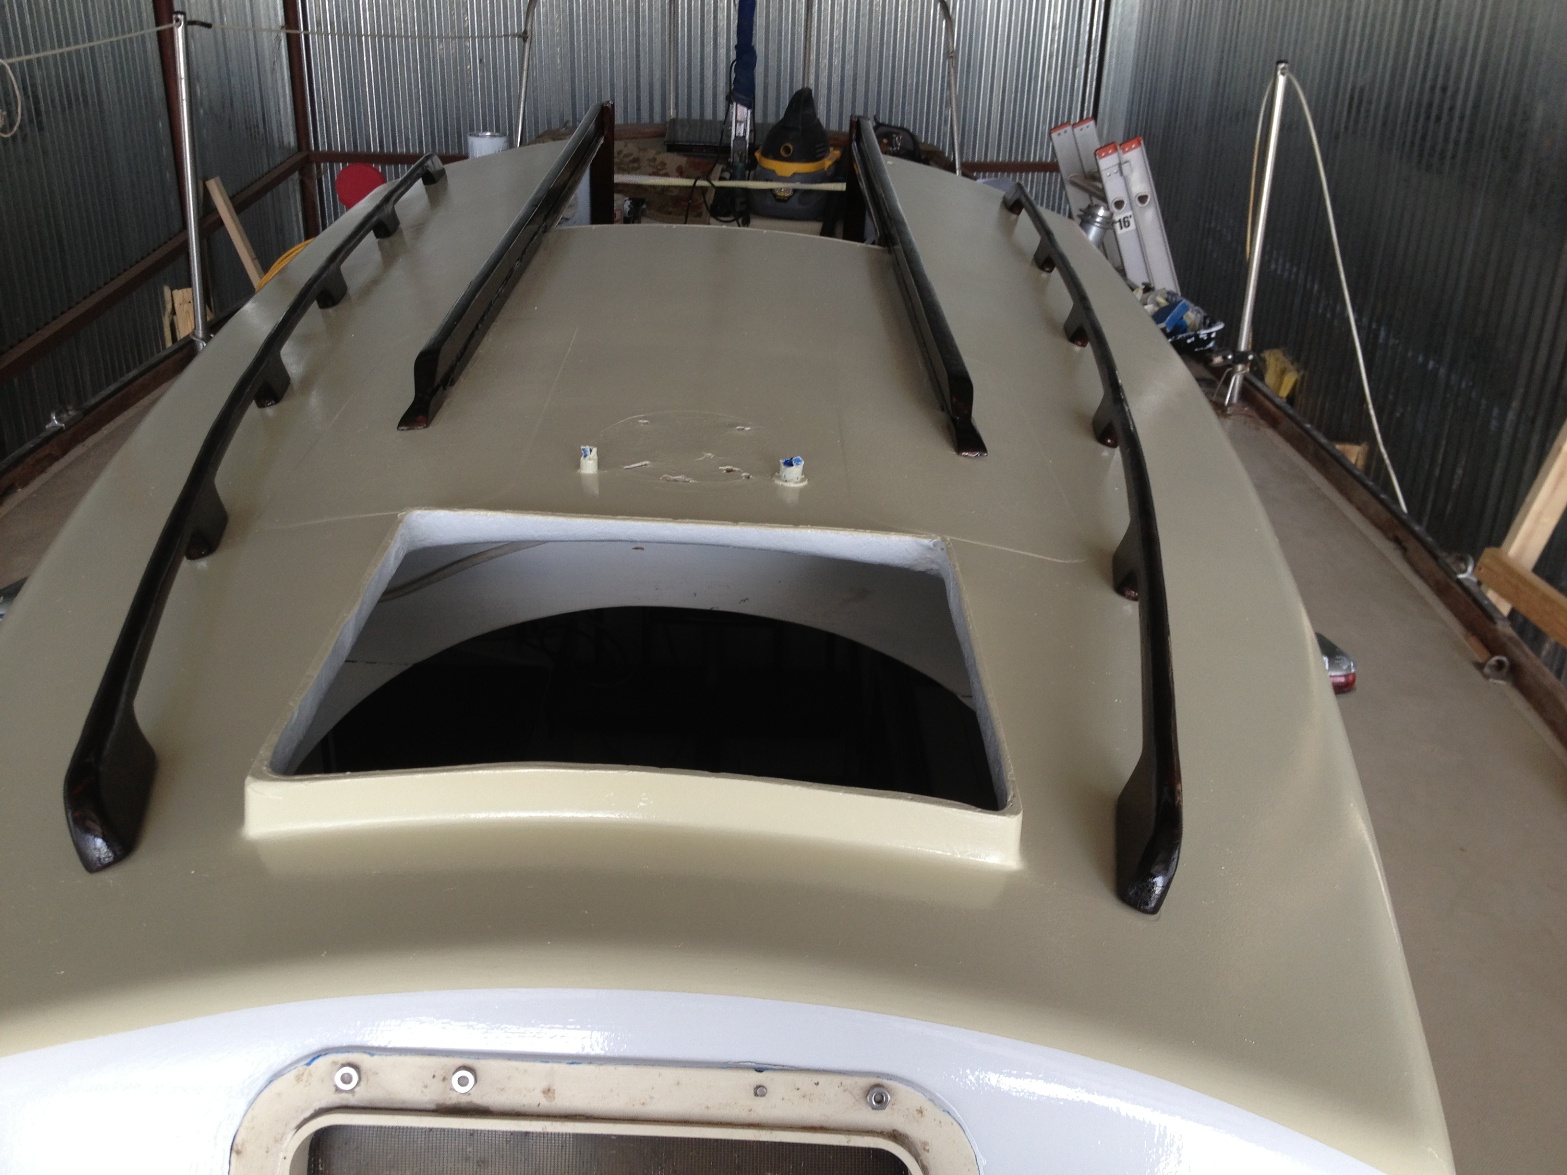
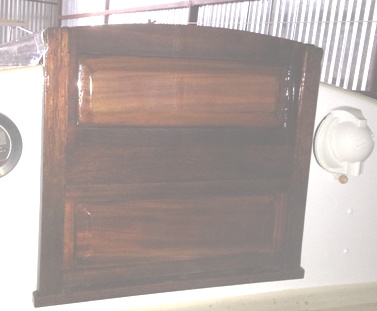
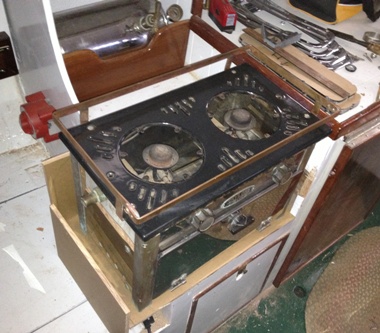
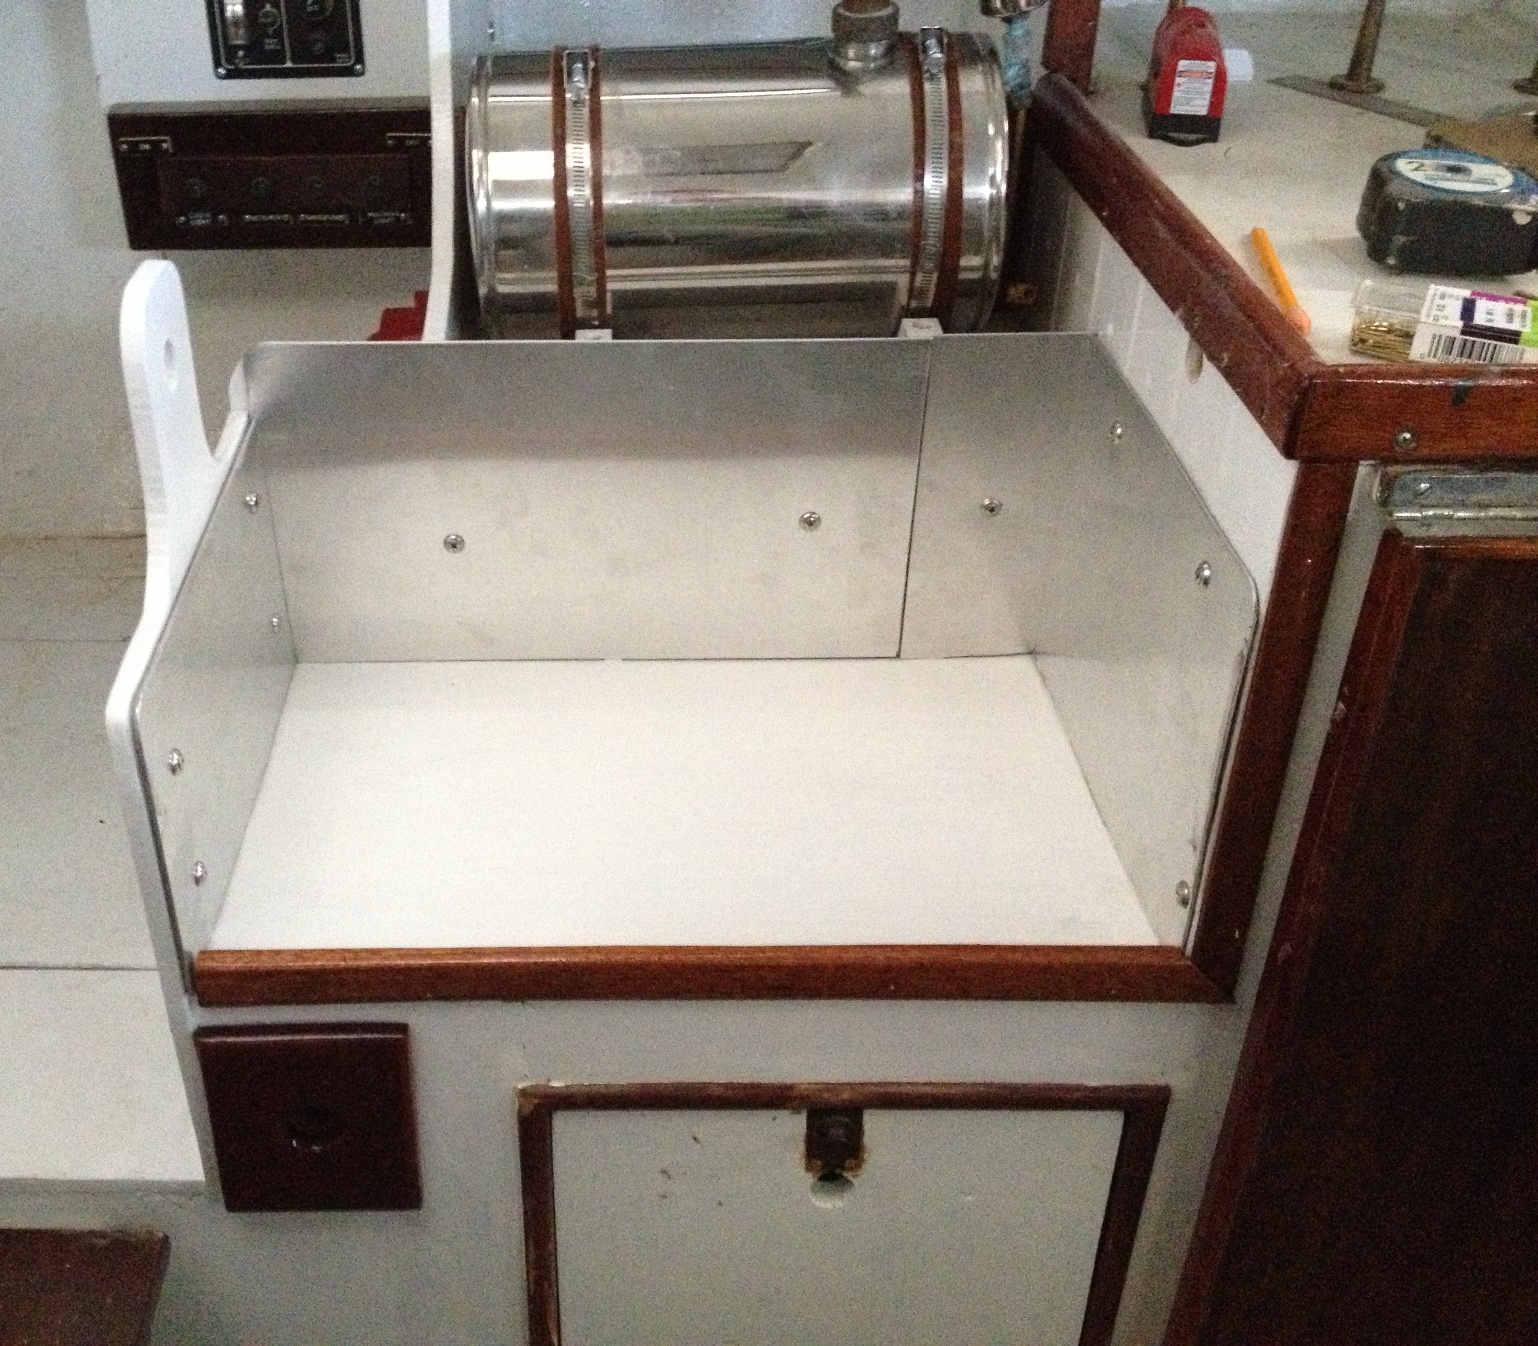
May 15, 2021 Work continues......
Right - Aft locker with new wood
Below left - Aft locker with all new wood - note newly chrome dorades.
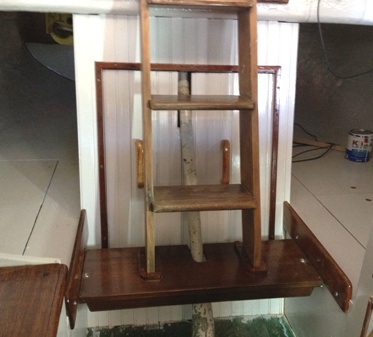
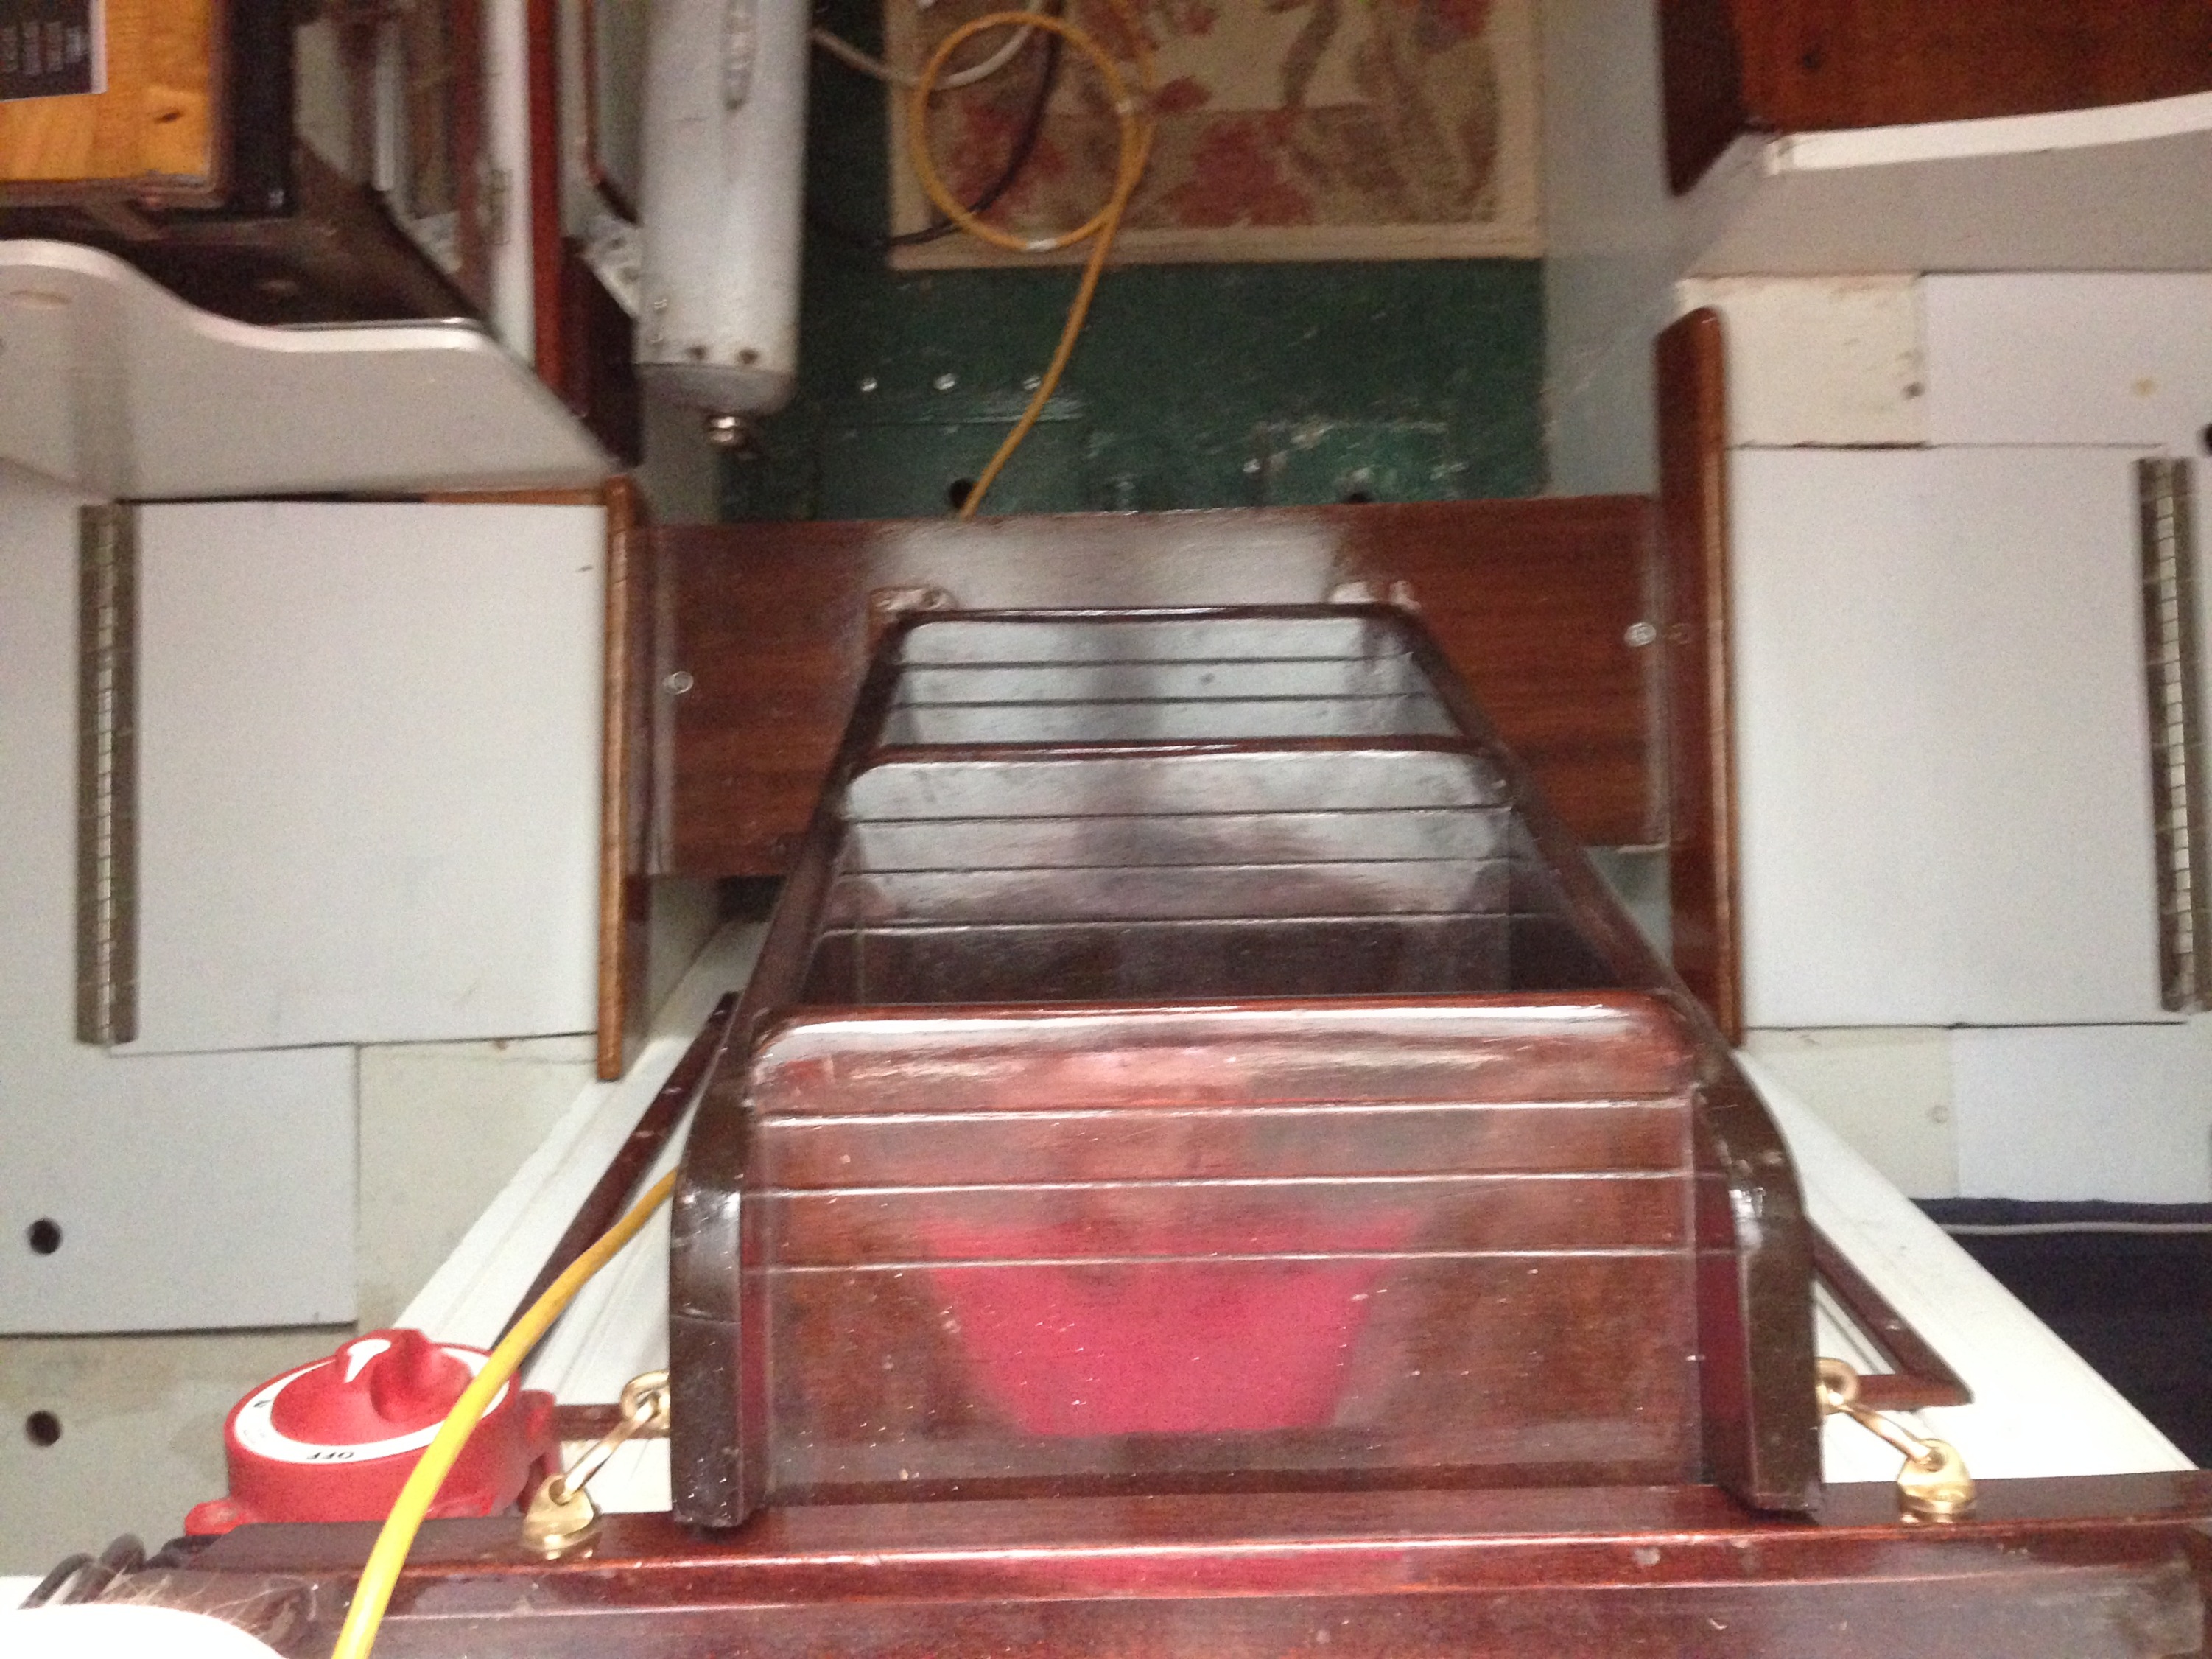
Below right - New cabinet for the engine room. Newly varnished ladder.
|
|
|
|
stay tuned
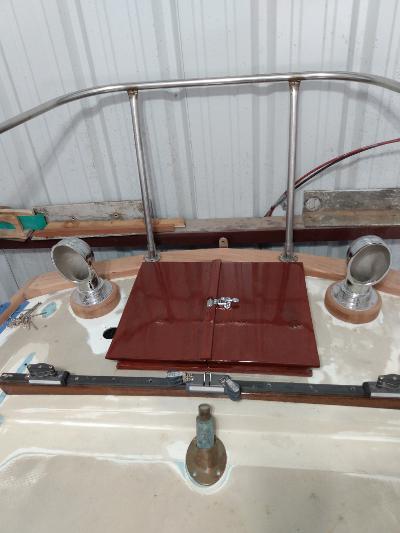
May 22, 2021 - more work.....
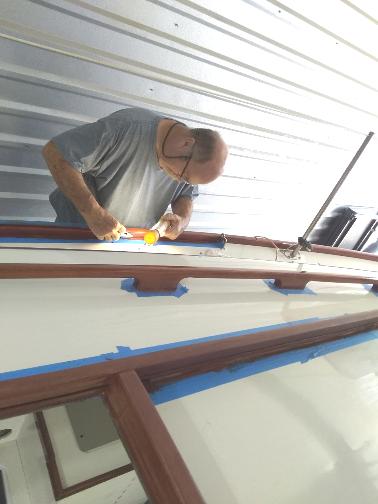
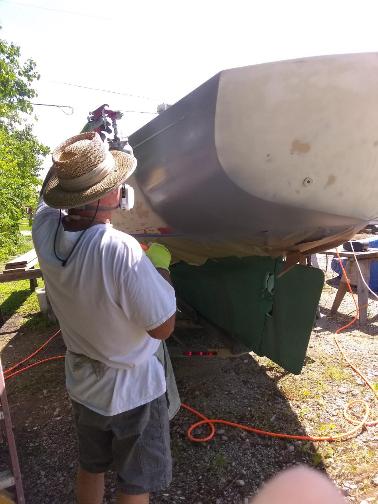
Dan removing tape from the varnish work. |
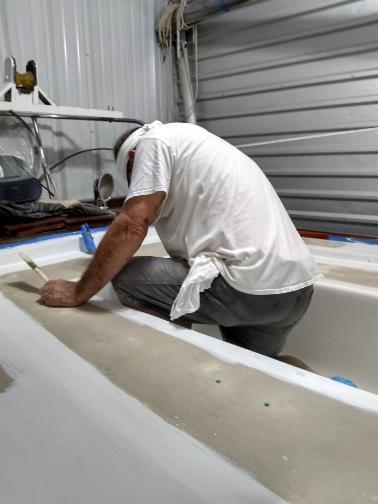
Dan painting the cockpit. |
Stay Tuned
***********************************************
************************************************************************
March 11, 2020. We got the following emails from new owners Dan Tingley and Tracy Lynn Ross.
Hello
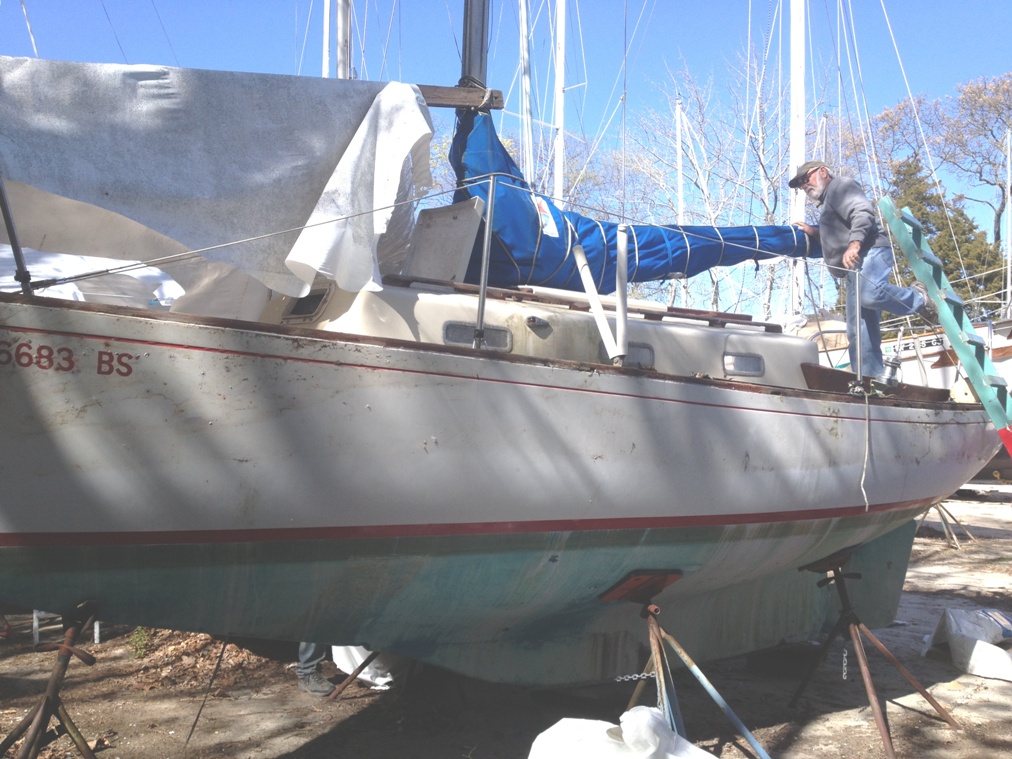
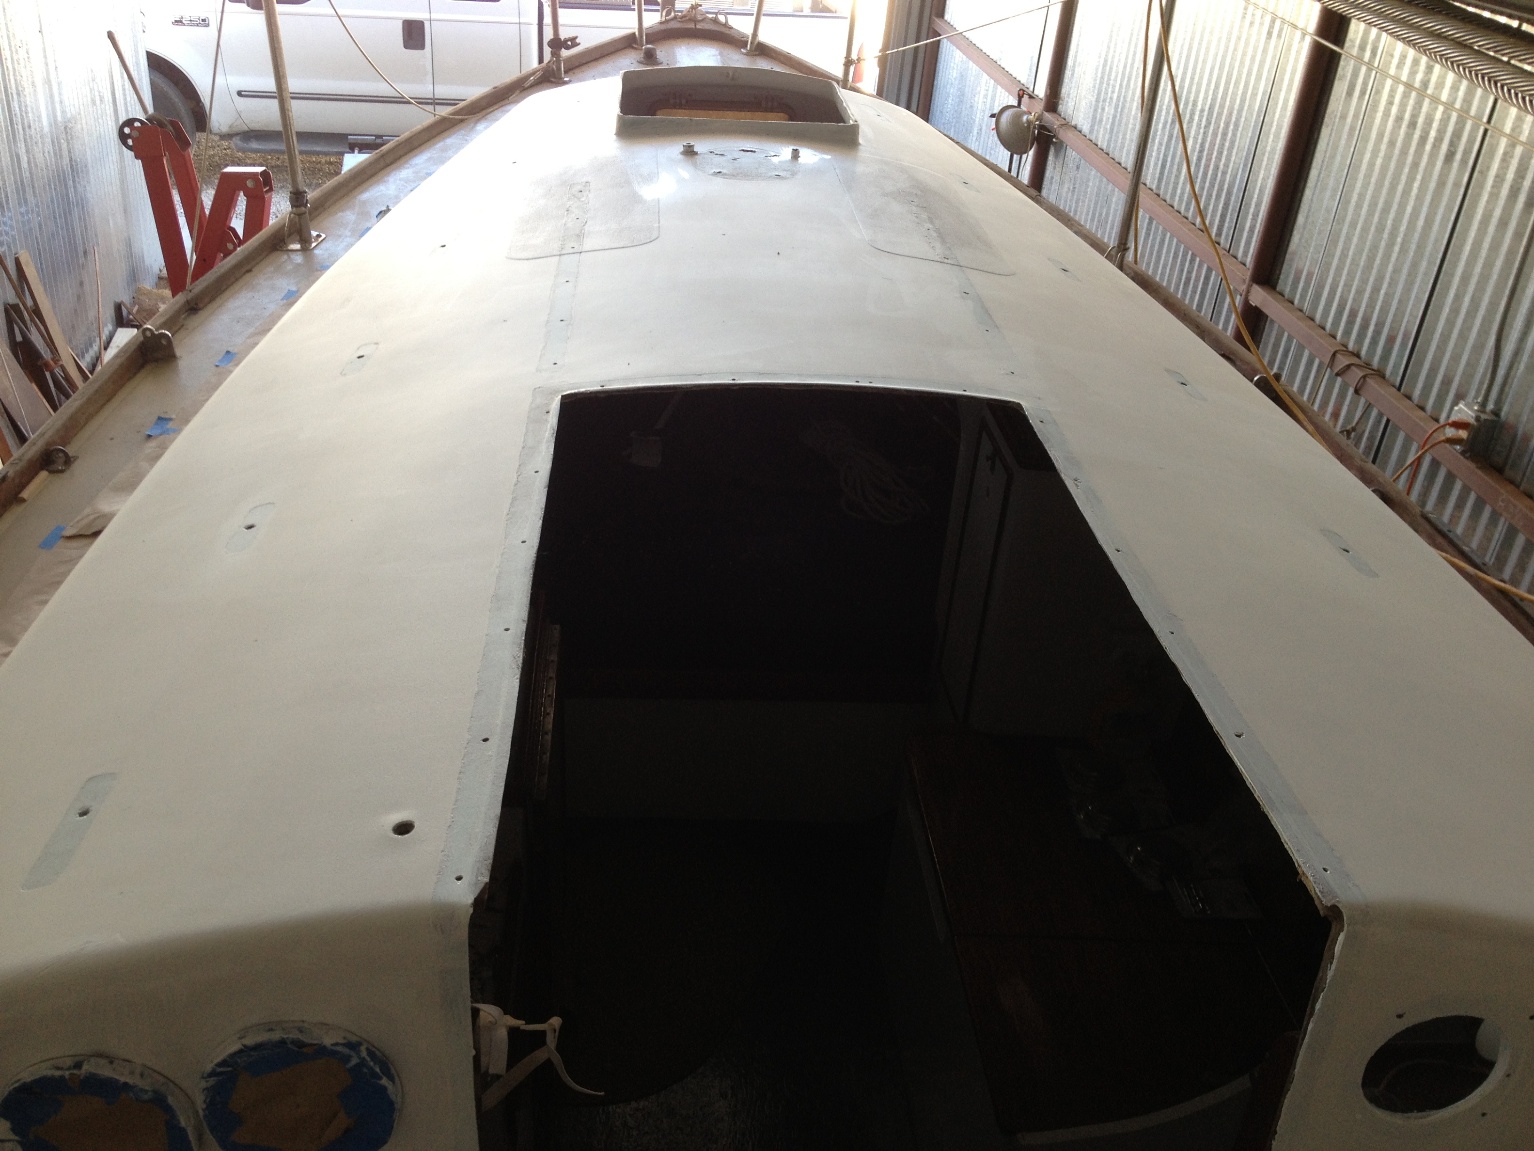
We purchased Rowdy last October. We'll be writing you to give updates on Rowdy's progress. At this point we are doing a lot of sanding and fiberglass work prior to painting her. We have removed everything in order to paint the deck. The fiberglass work is to join the hull and deck. The boat had some very bad leaks and we wanted to address those issues before sanding and painting her. Rowdy is a Marscot Dolphin hull # 5.
Pictures will follow soon in order to see her progress as we go along. Thank you for giving us Dolphin owners a way to communicate. Thank you for your effort to give us a platform. We'll keep you posted.
Thanks
Dan
ps Rowdy is currently in Kemah Texas. We will be moving her to Cypress, Texas in April. Dan and Tracy are the new owners. We went to Maryland in October last year and bought her from the previous owner who lives in San Antonio. He had Rowdy in a boatyard in Cambridge, Maryland. We love Rowdy and are working diligently to restore her to the proper yacht she will ultimately turn out to be... We will keep you updated and send you some pics soon.
Thanks
Tracy
Welcome Aboard Dan and Tracy
Fair Winds Jerry
March 12, 2020 Some pics
.......
Click on the above photos for a larger image

Dan working
******************************************
March 13, 2020 More pics from Tracy.....Click on the photos below for a larger image
|

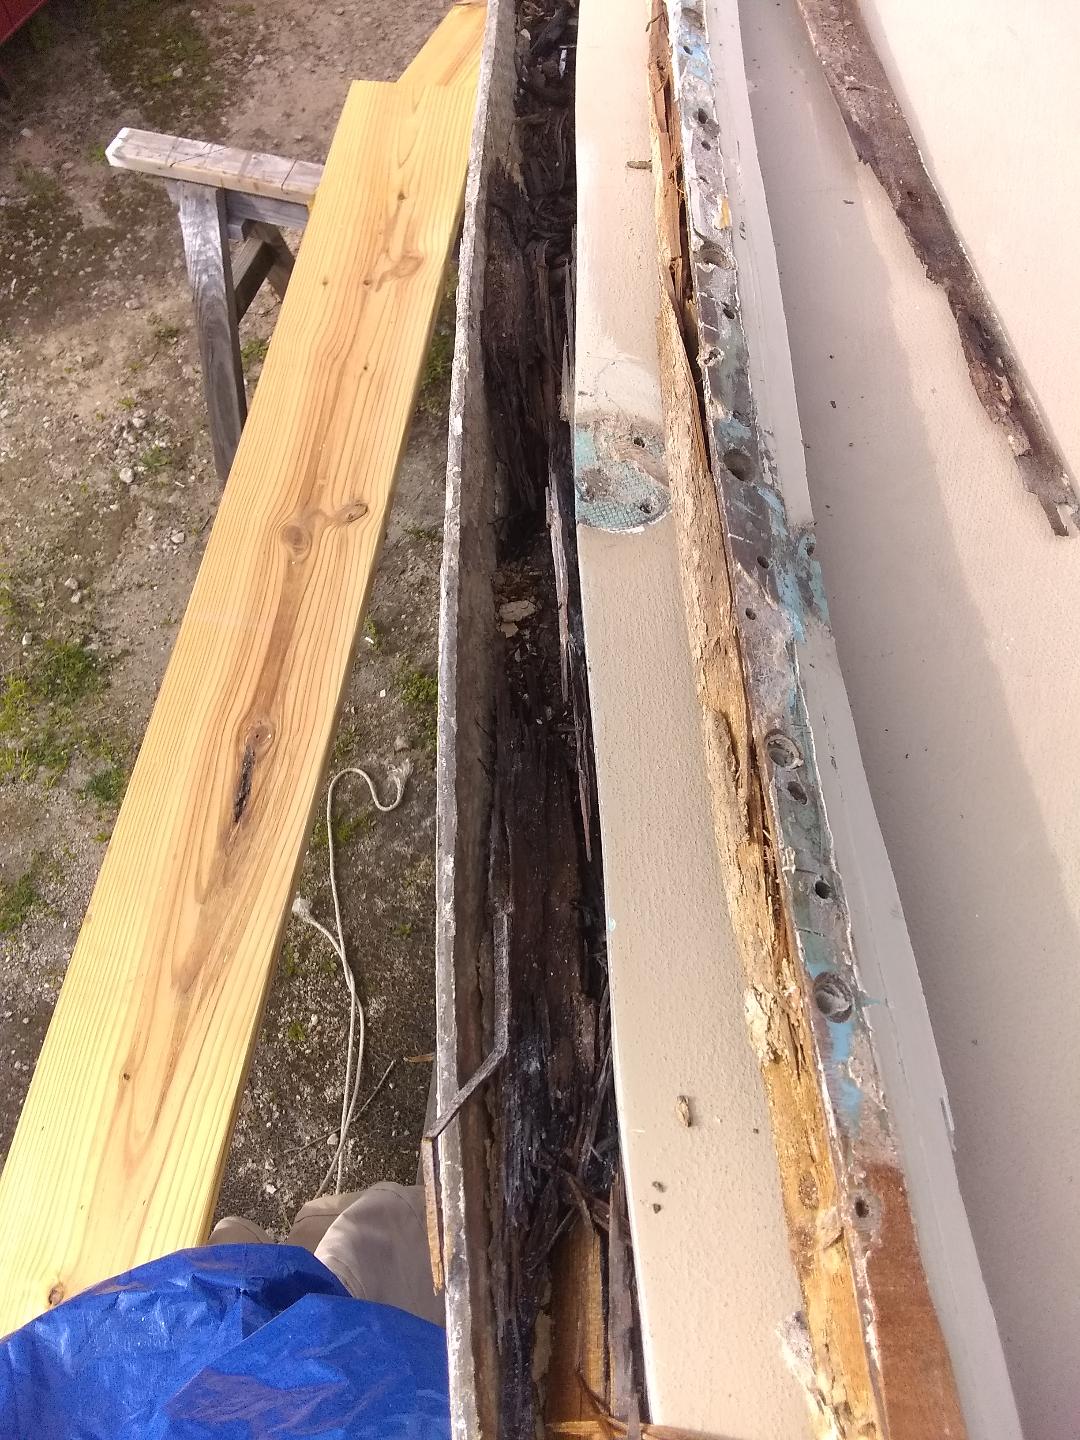
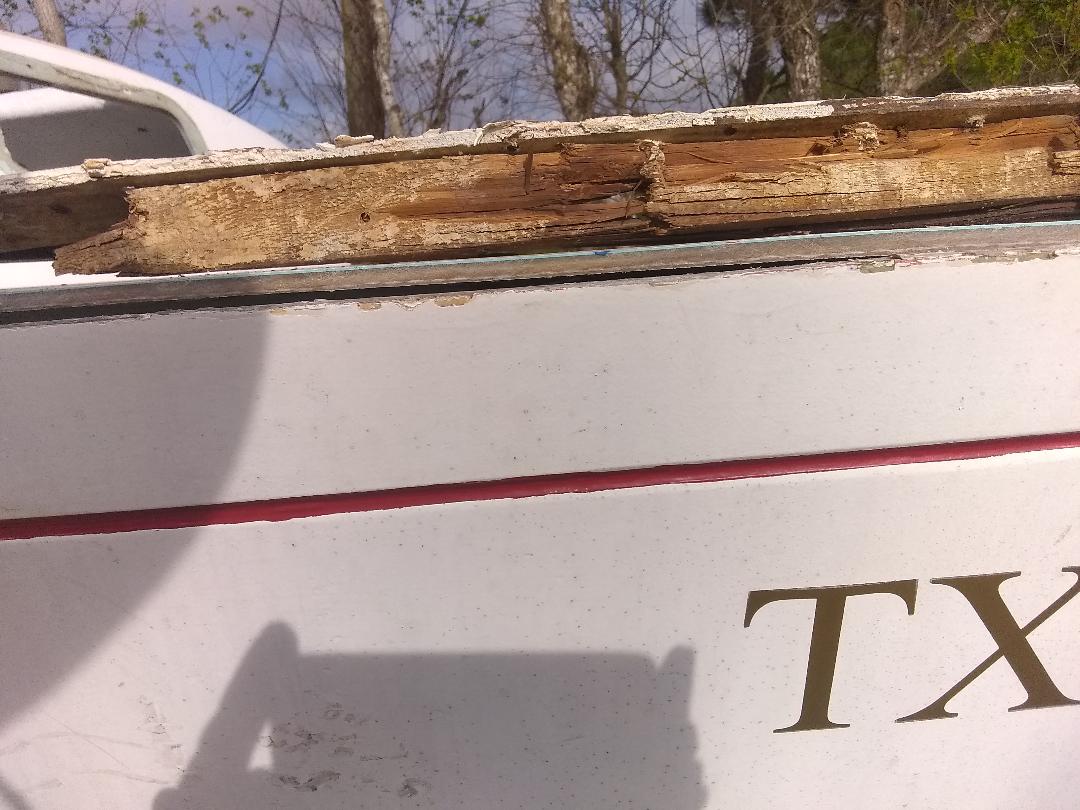
Left - Dan had to cut a 5 inch wide / 4 foot long section of the fiberglass deck that joins to the hull in order to replace the wood.
Above - Section of hull/deck to be replaced with new wood. Ongoing leaks over the years rotted the wood under the fiberglass.
|
|
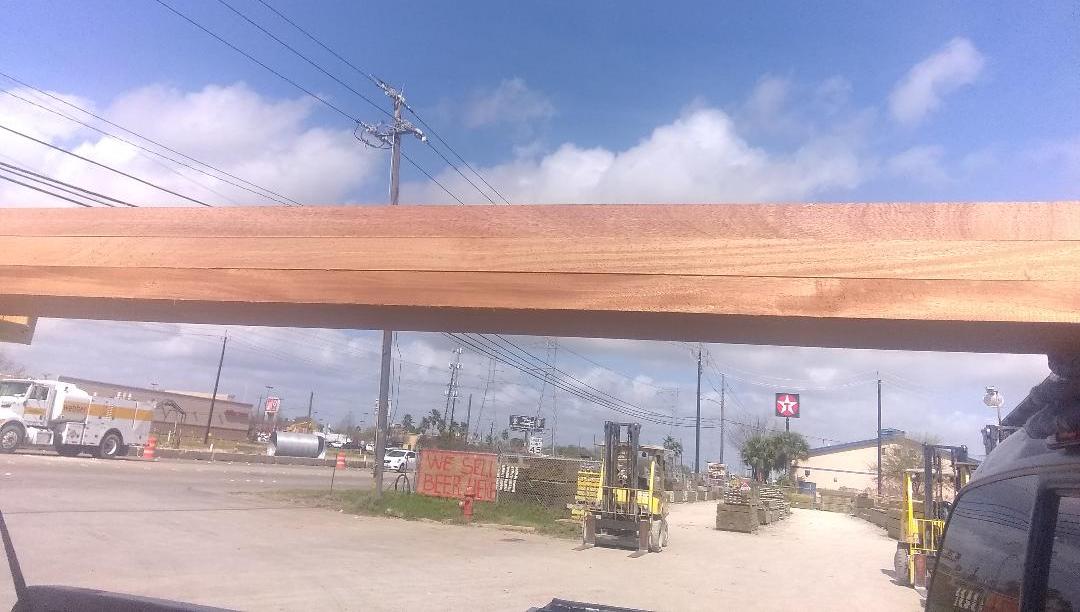
Left - New mahogany for the Wood Handrails, Toe rails, Hatch, ecetra....for the deck. We are replacing all wood |
*********************************
March 24, 2020 Tracy sent in the following update and photo.
Hi Ron
Just a quick update on Rowdy. Dan replaced the wood on the port side hull/deck area with red oak. Now he's laying fiberglass over it.
It's starting to get warm down here in Kemah!
I'll send a picture of the starboard side once he installs the wood.
Tracy
*******************************************
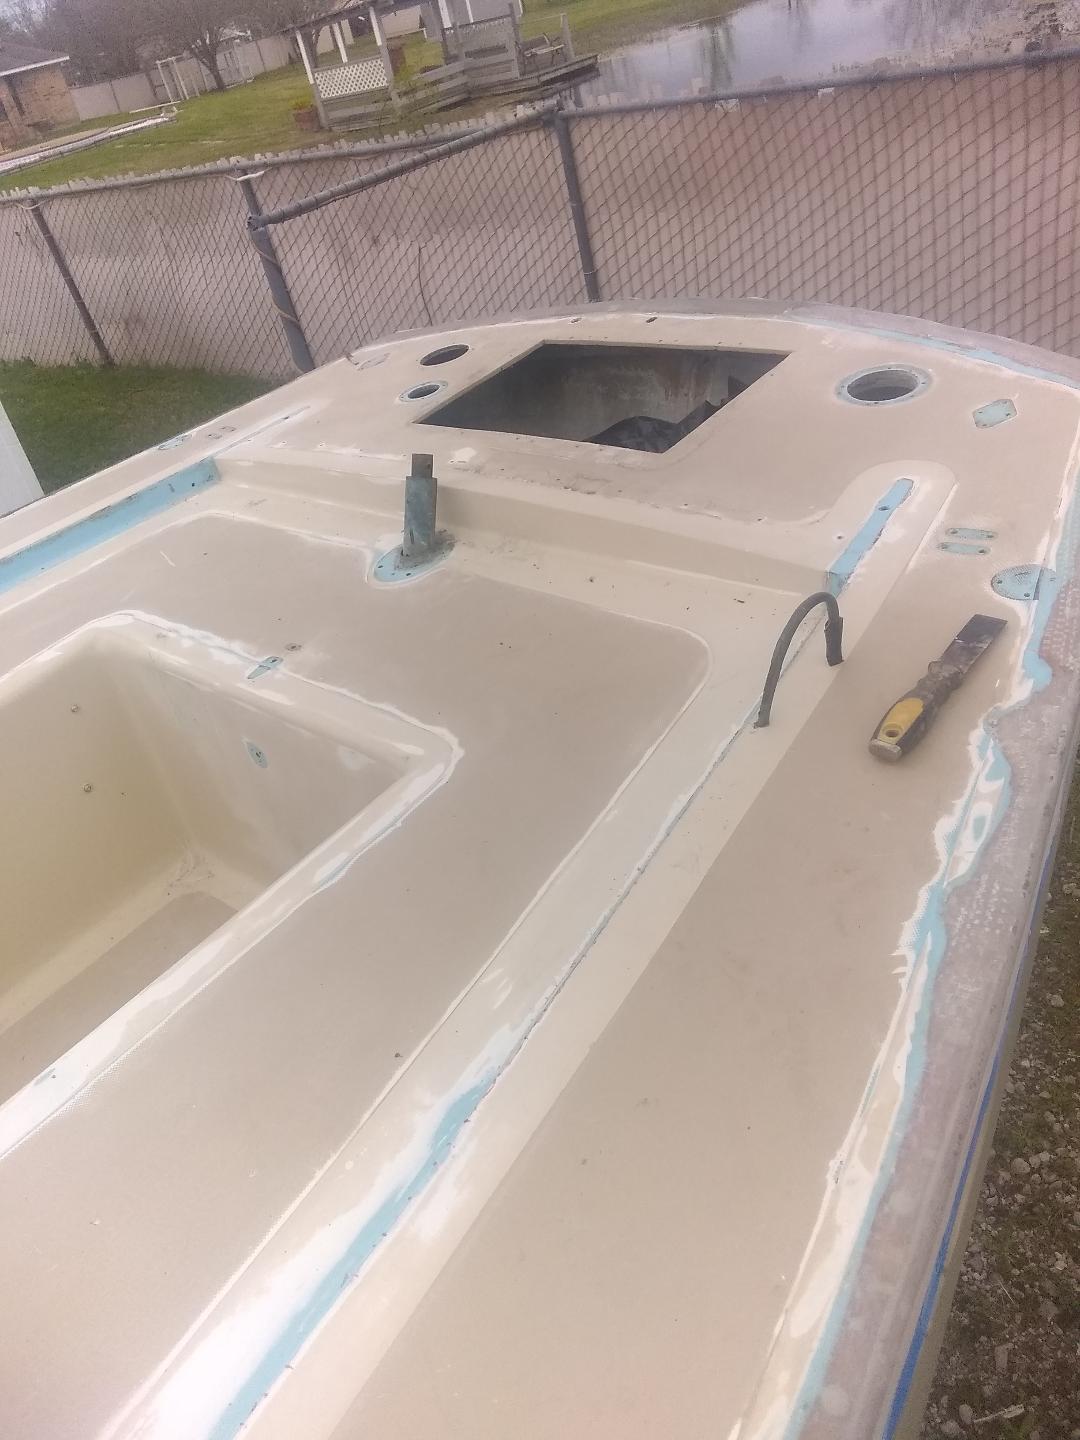
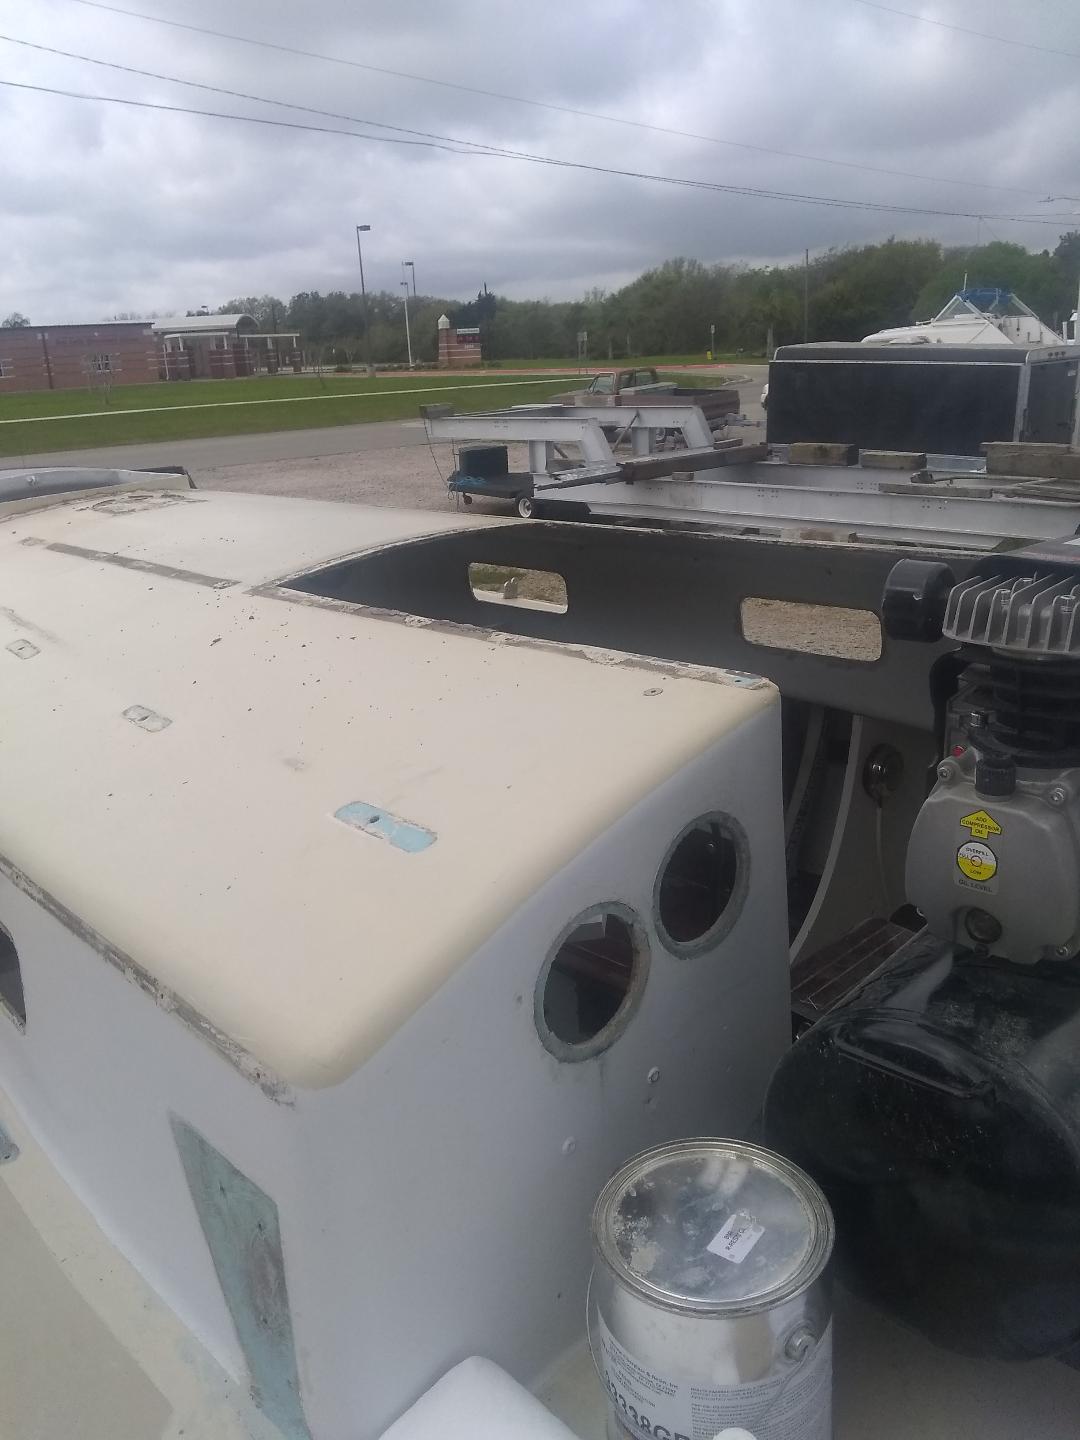
May 18, 2020 Tracy sent in the following update.
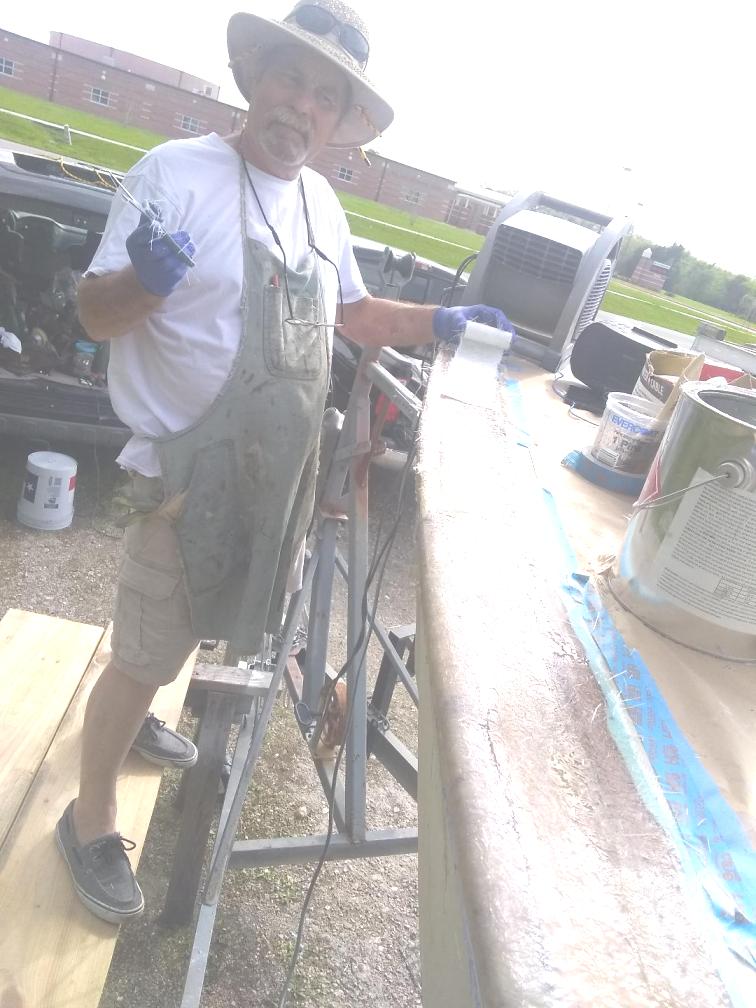
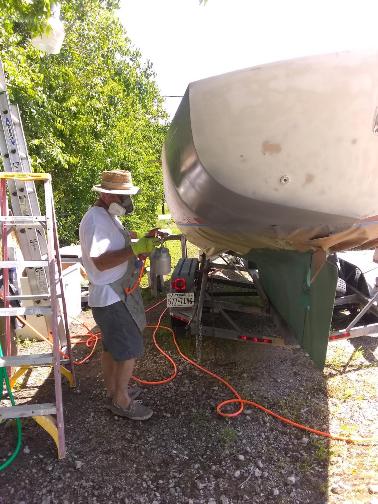
Finally finished with all of the fiberglass work on the hull deck joint around the whole boat. Rowdy is sanded and ready for primer
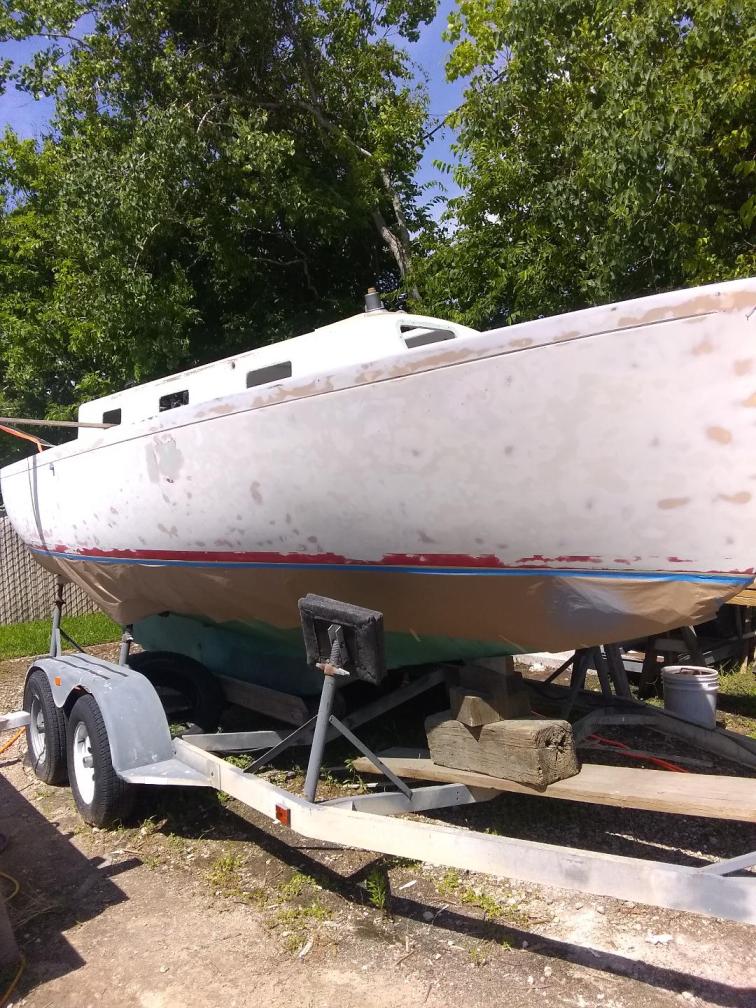
Dan is shooting the primer coat on.
We are getting close to painting the hull.
It is hot here in Texas!
We are pushing forward though ??
STAY TUNED
|
|
|
|
May 20, 2020 Postscript
Dan has finished priming the hull and we are giving Rowdy a light sanding and cleaning before shooting the hull and water line with the final paint. It's getting exciting! Can't wait till the hull is painted!

**************************
May 24, 2020 Update from Tracy
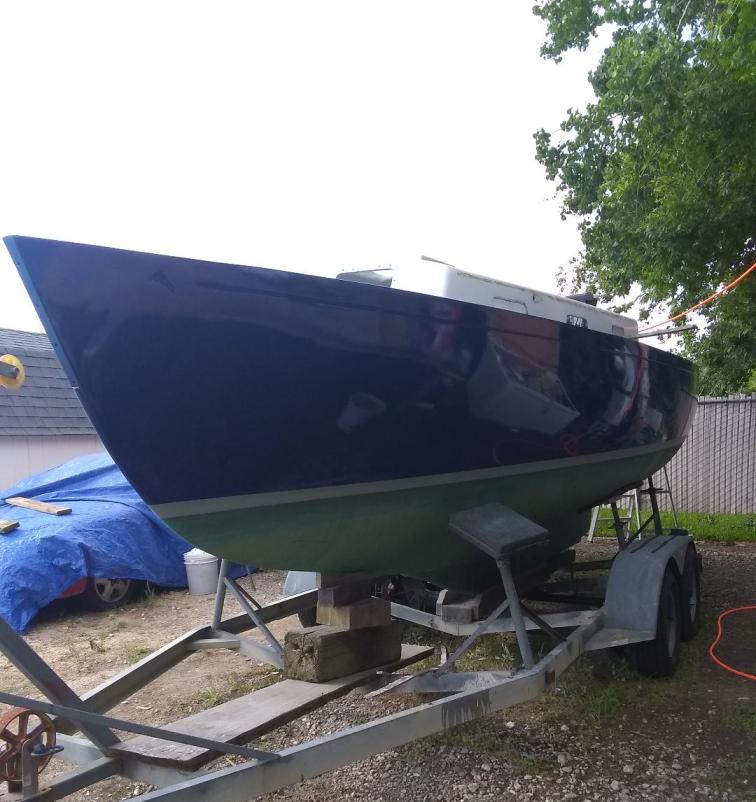
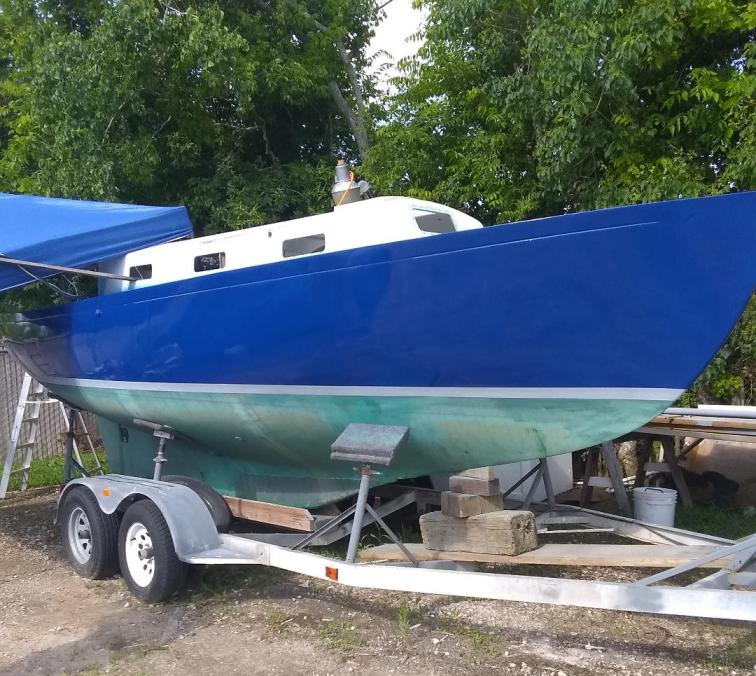
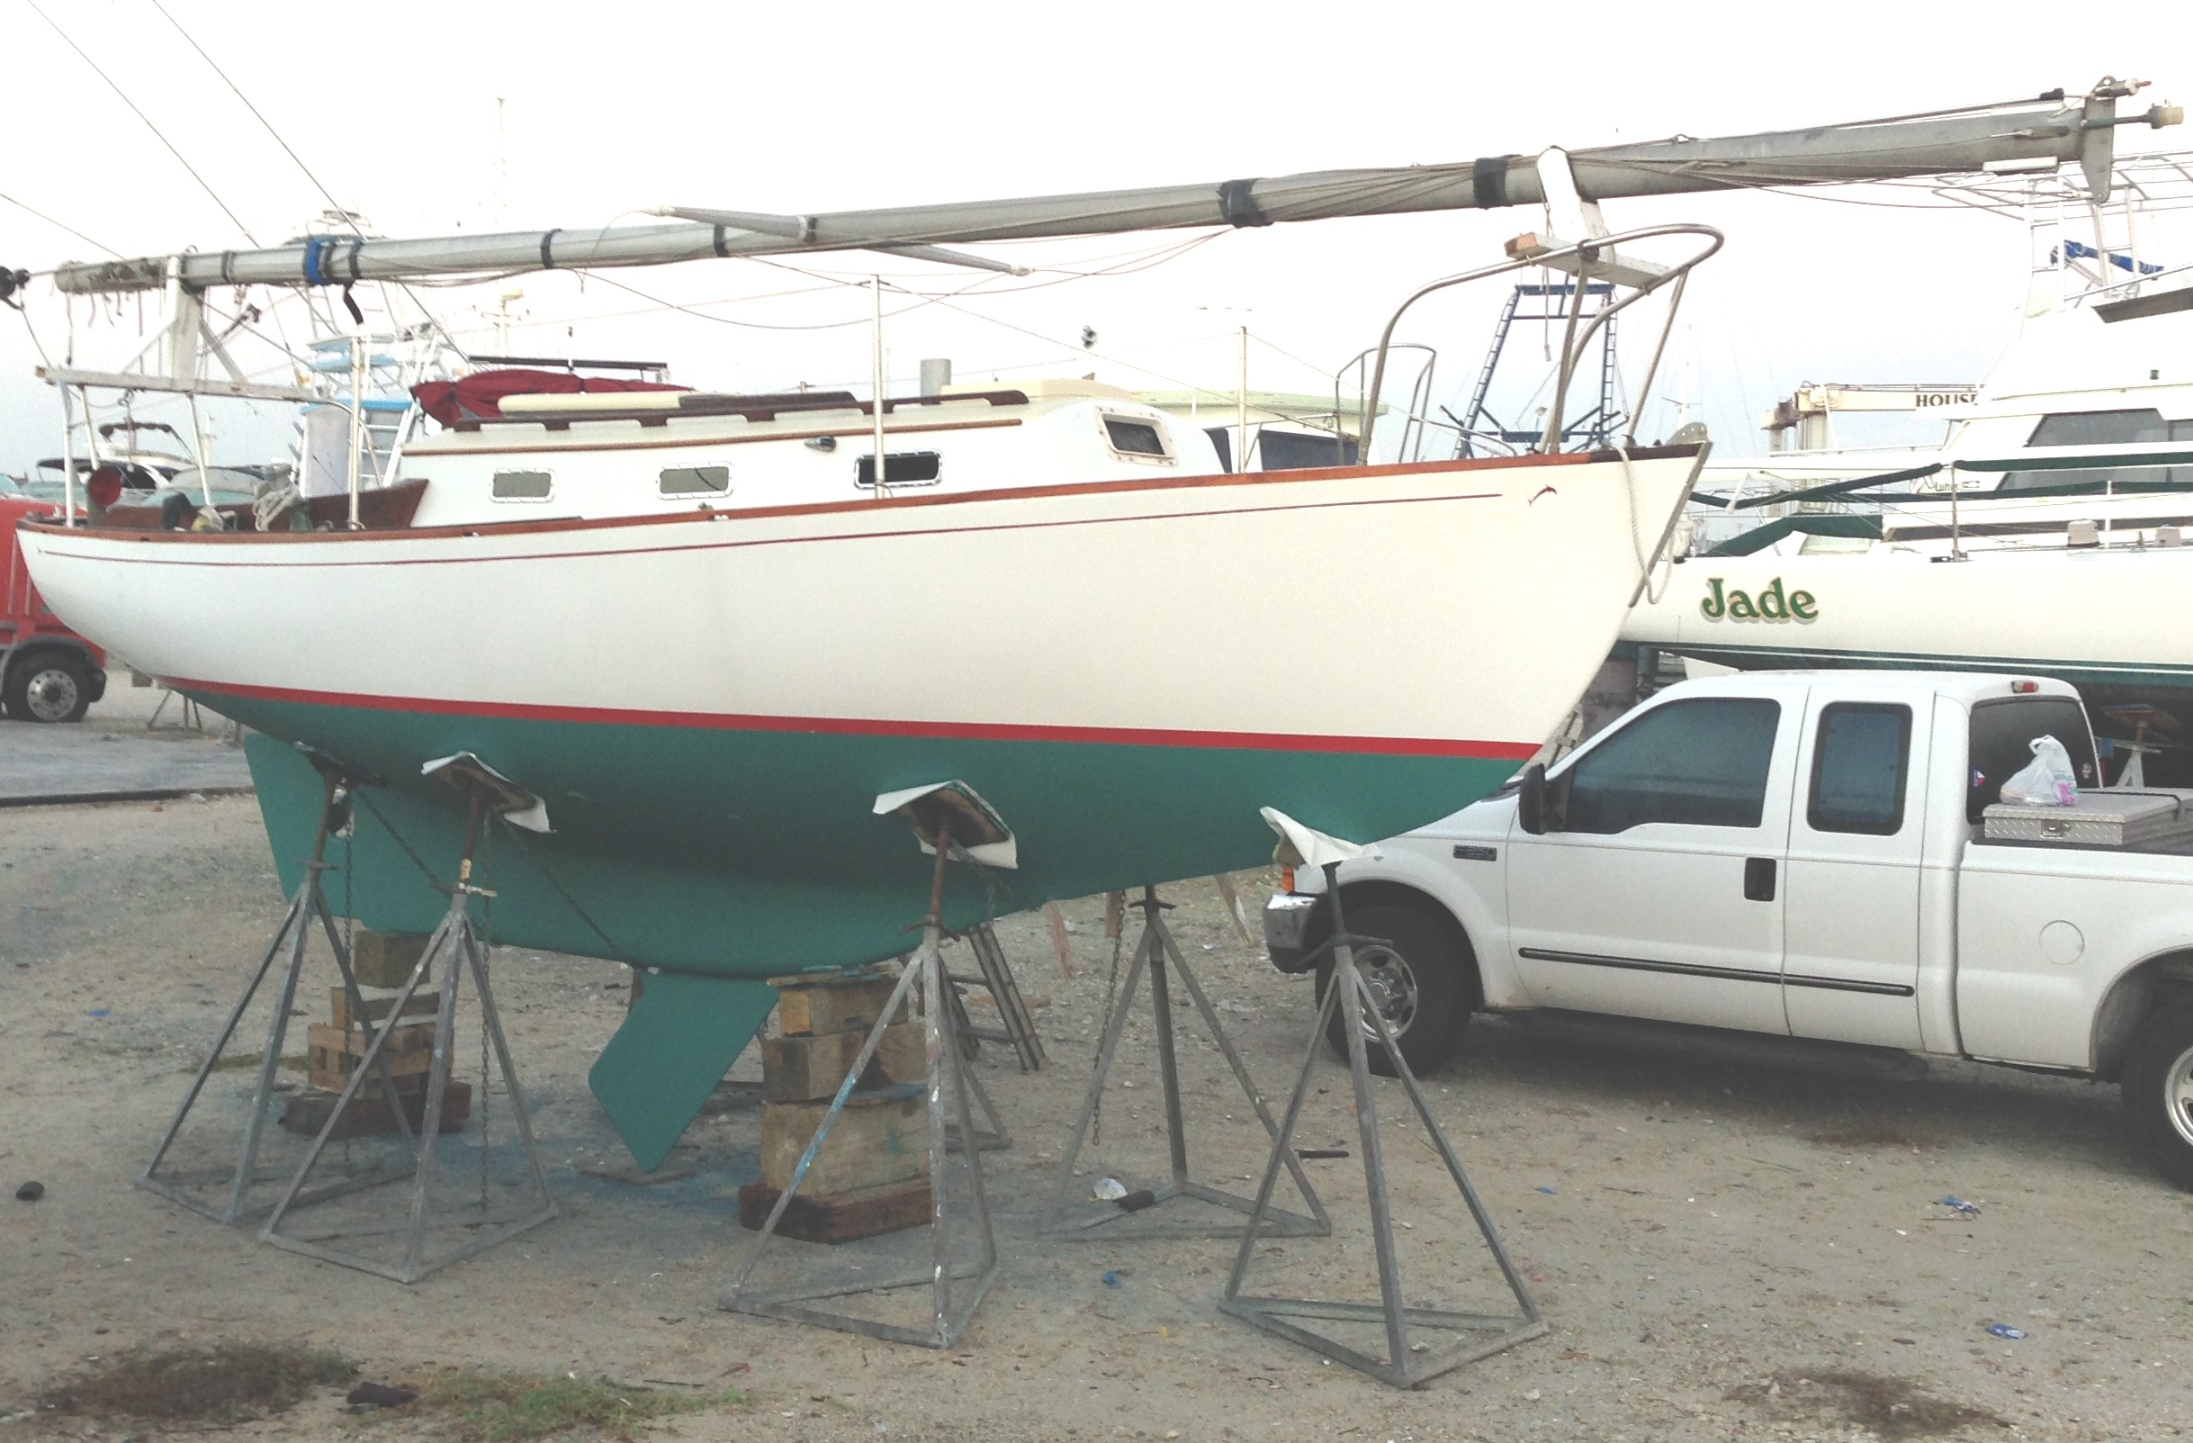
Rowdy has a new blue hull! We are painting the white water line today. Yay!
WOW!!
***************************************
June 9, 2020 - Just in from Tracy
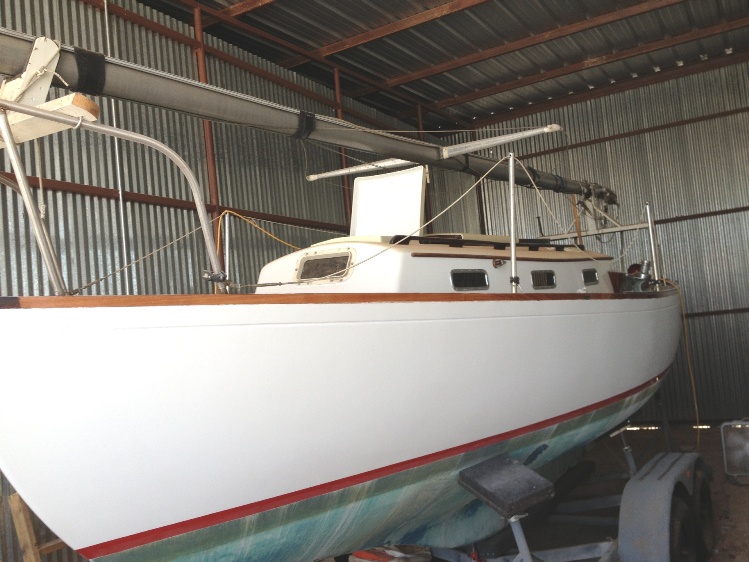
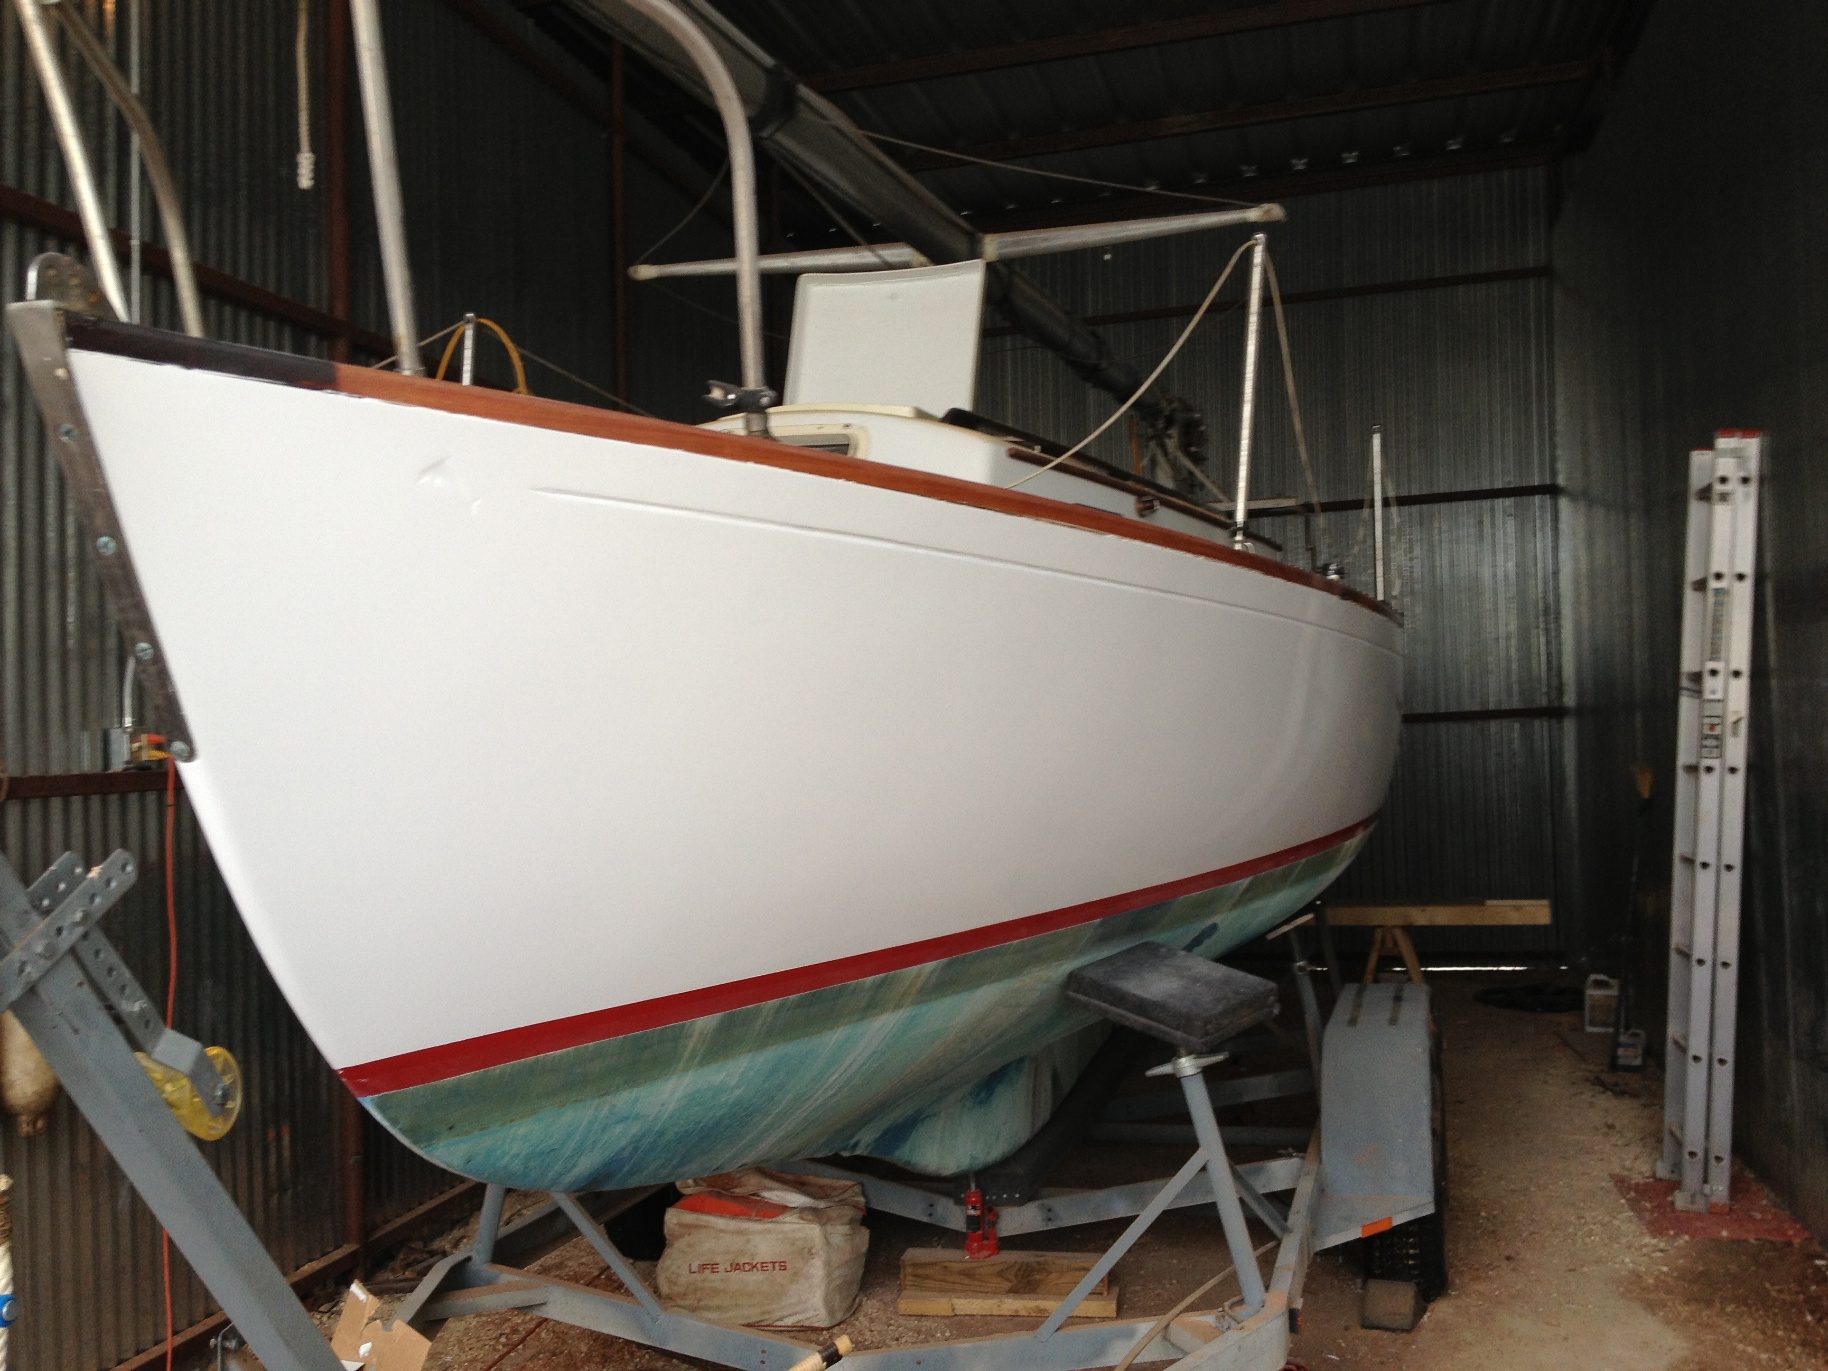
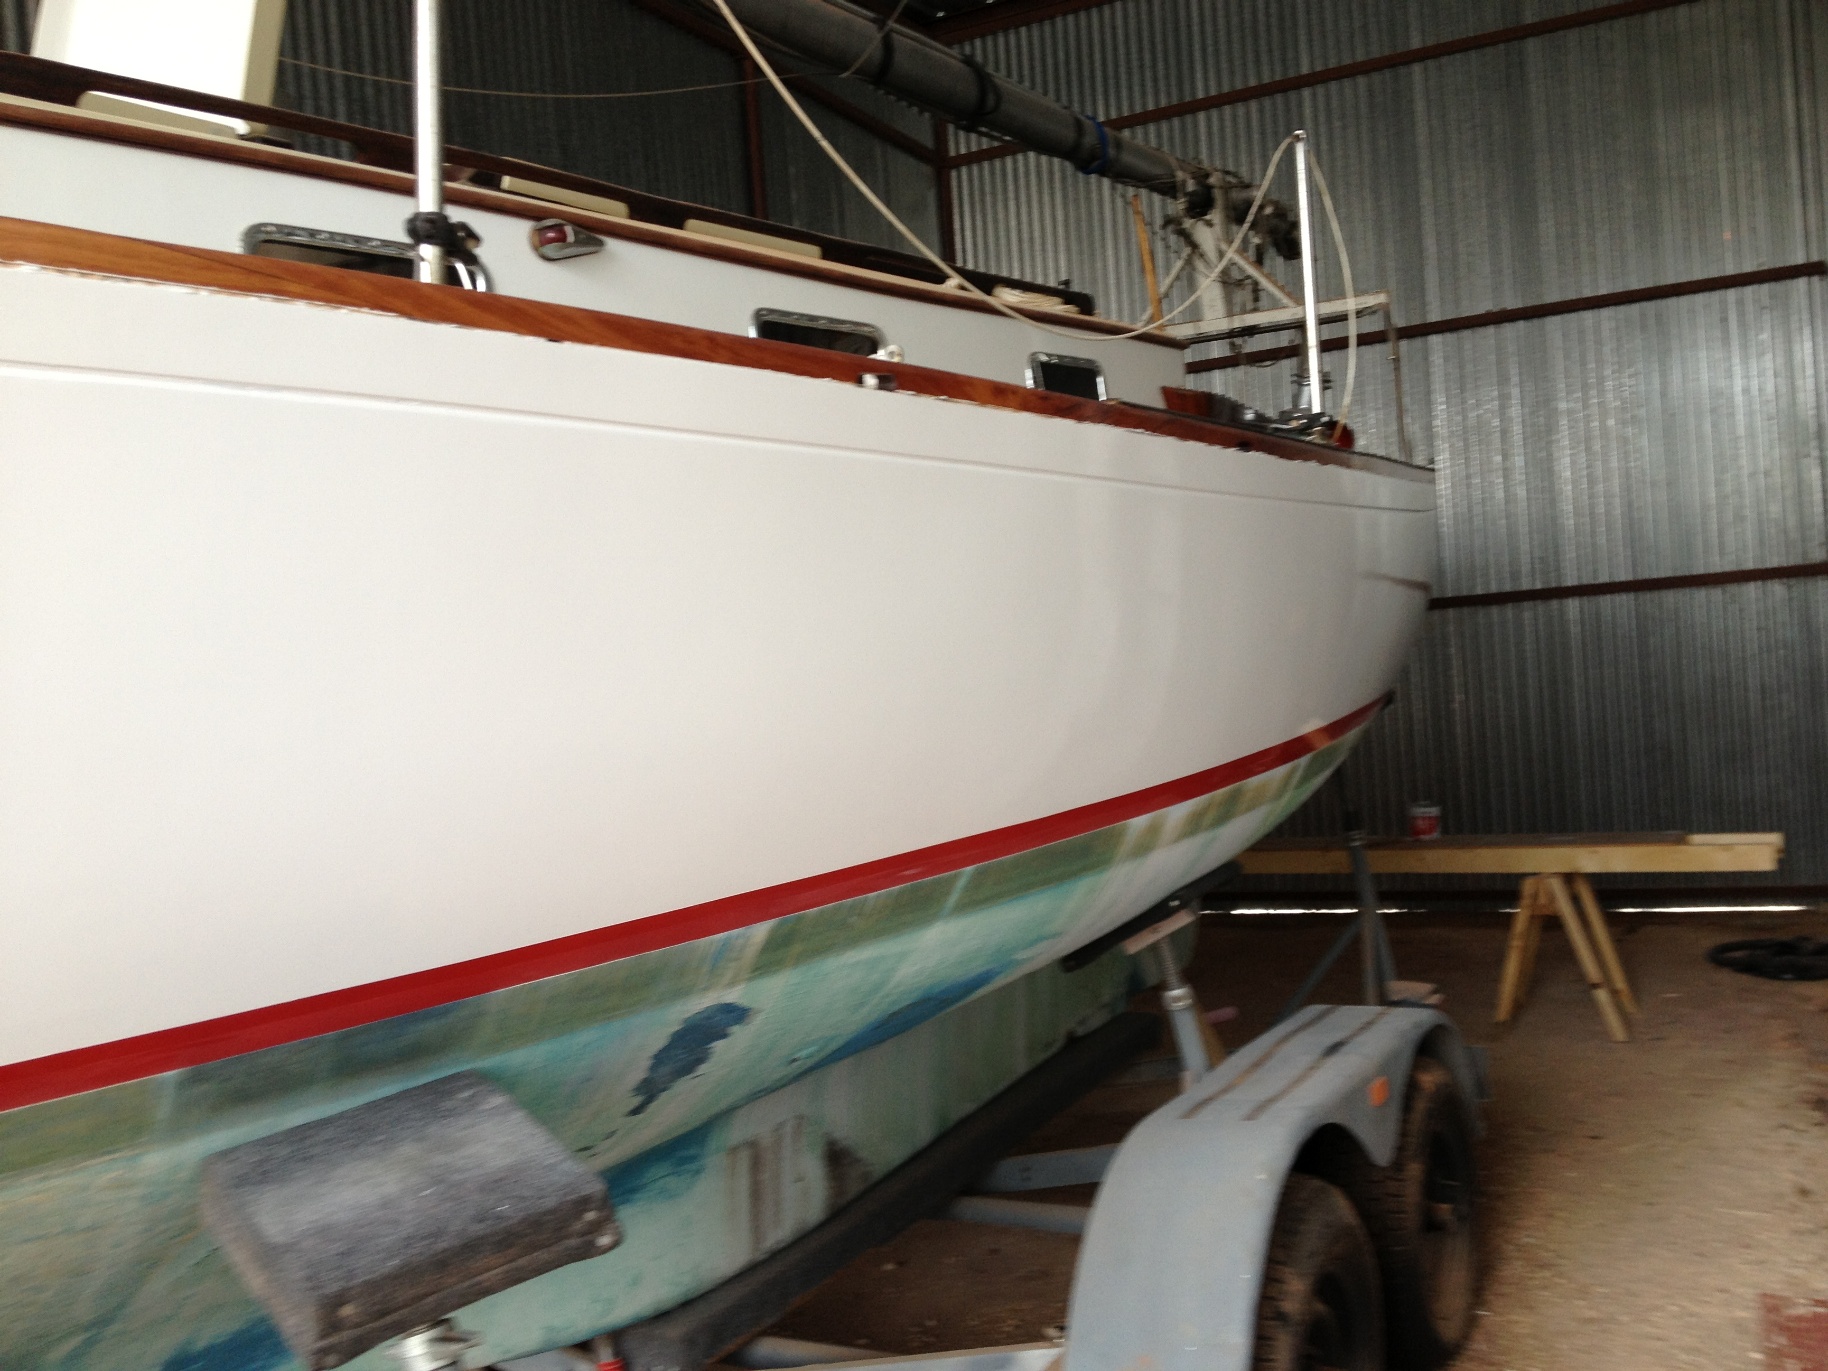
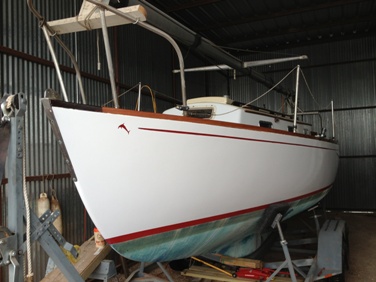
Rowdys new paint job. She is a proper Dolphin now ! It's getting very hot here in Texas. We might have to wait until fall to complete her restoration.

******************************************
March 25, 2021. We got the following email from Tracy
Hi Ron
Tracy and Dan here. We are about six weeks out from restoring Rowdy. We are also trying to find a glass dome shaped side navigation lite in red.
If anyone has an interest in Rowdy they may contact me at 832.914.3348. Ask for Tracy. Rowdy is located in Cypress, Texas for now while we are finishing her up.
Thank you
Tracy
************************************
April 11, 2021
Tracy has another update.....
Hi Ron
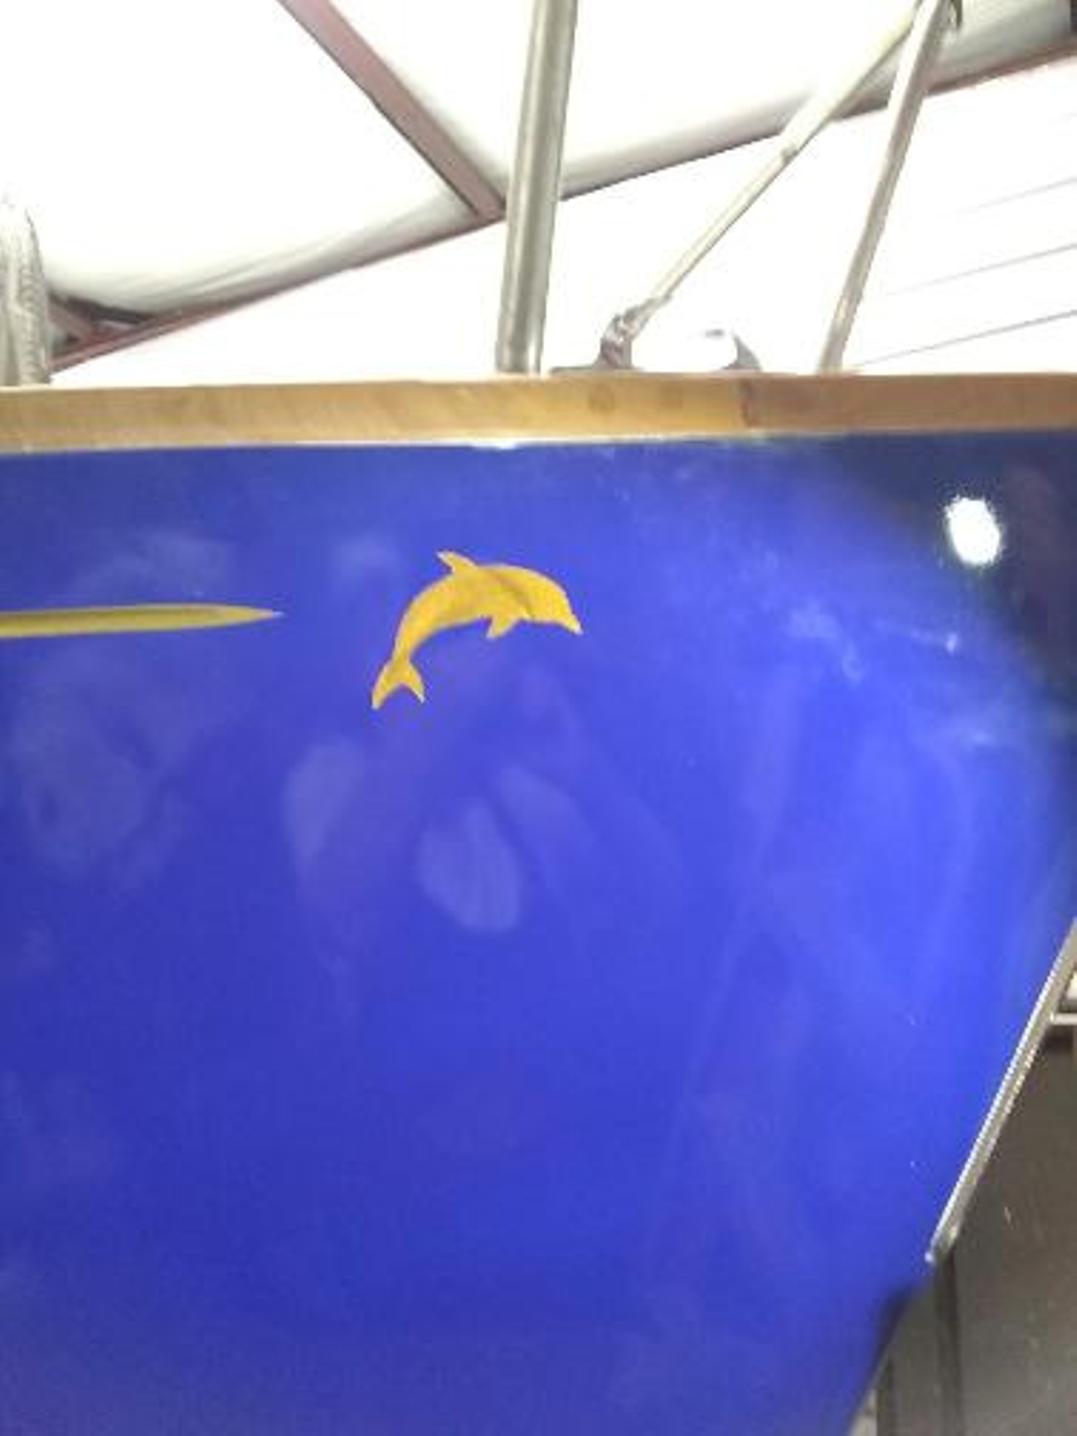
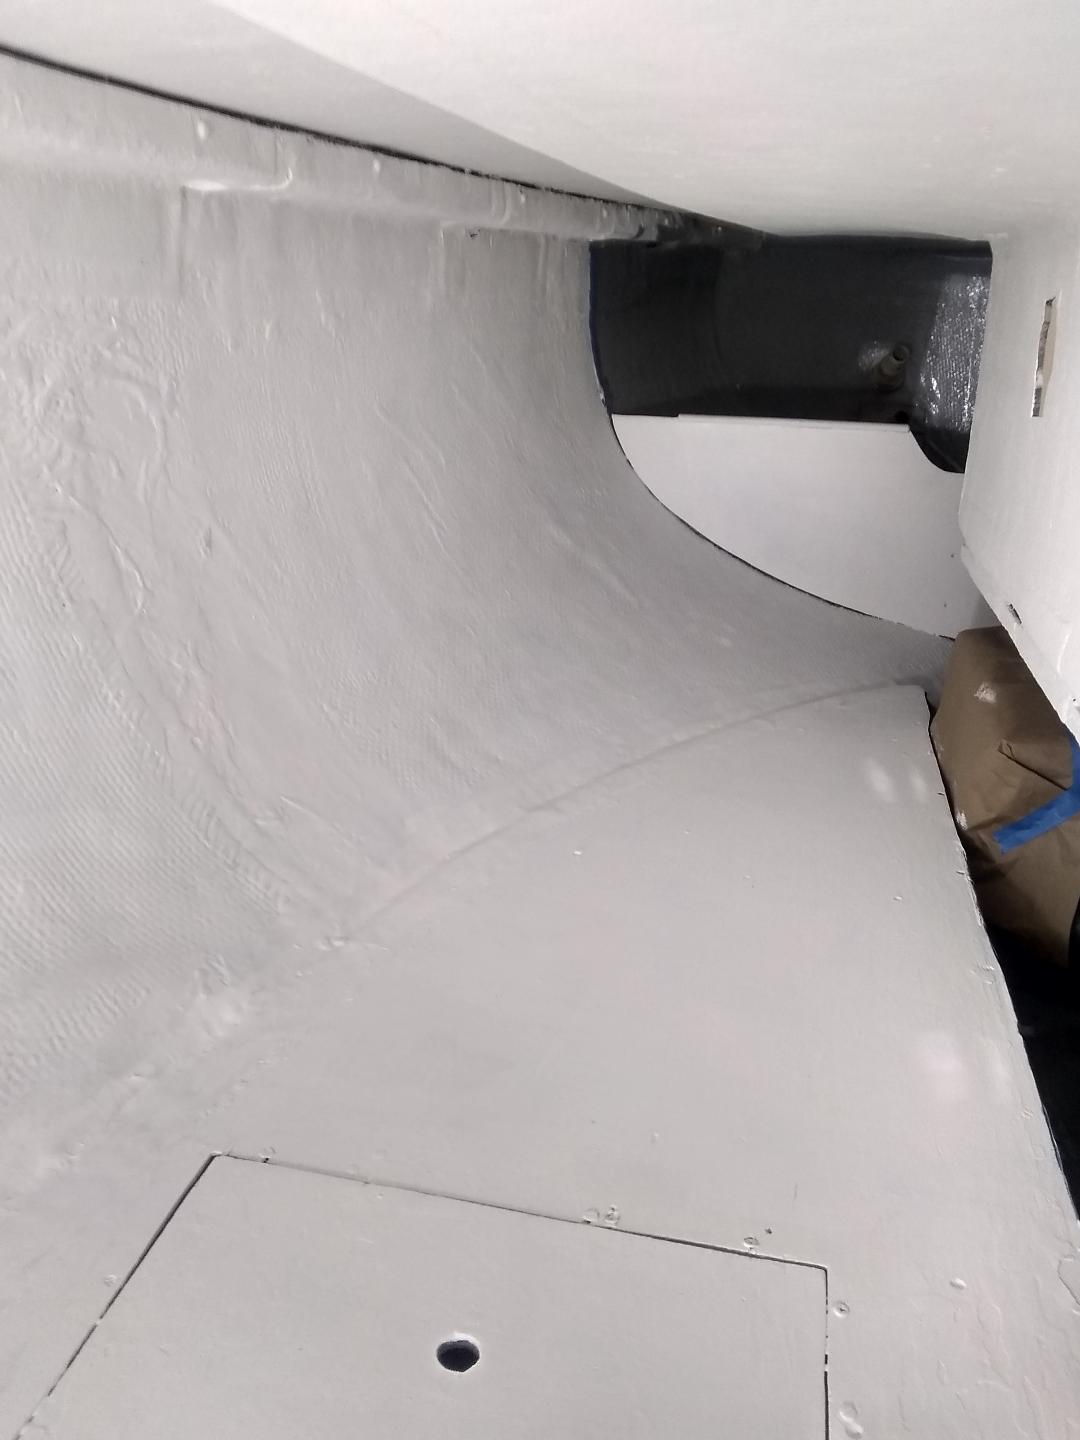
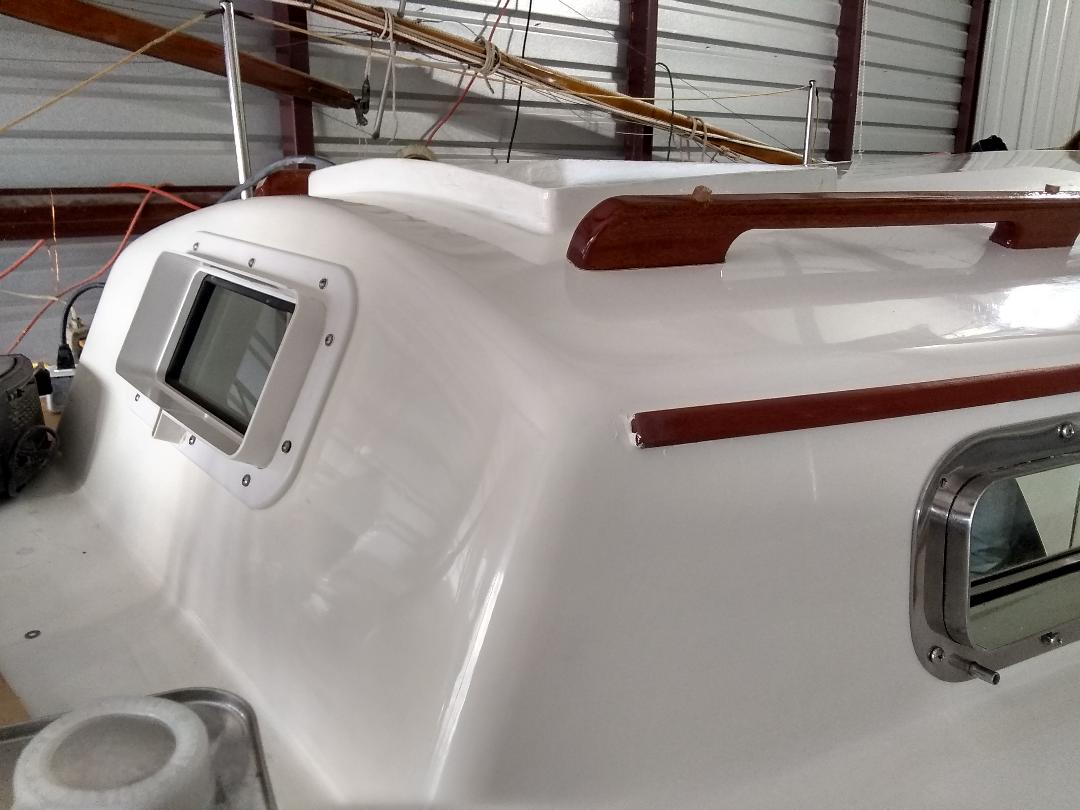
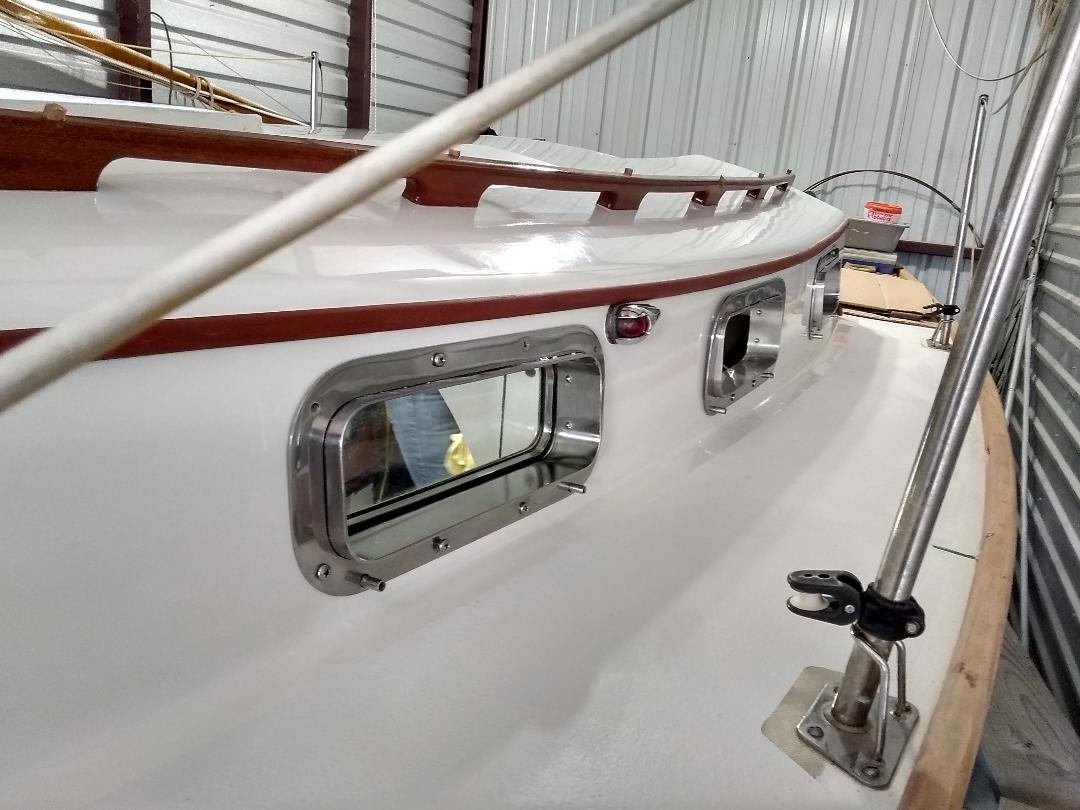
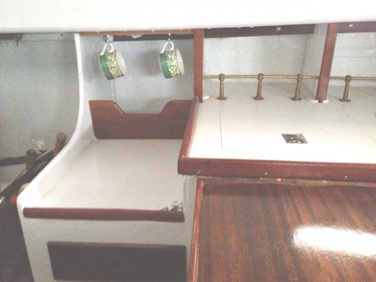
Just wanted to send some pics to update on Rowdys progress. Got the dolphins on and the quarter berths painted. Installed operational portholes for better circulation. We replaced the hand rails, toe rails, and eyebrows.
More pics to come as we go along.
Tracy
Click on the photos for a larger image
April 21 postscript -
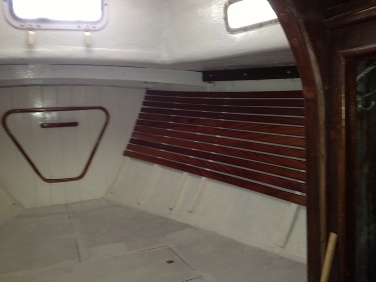
We finally finished the V BERTH! New Paint, and new varnish.

***********************************
**************************************
*****************************************************************
***************************
This is the history we have on ROWDY
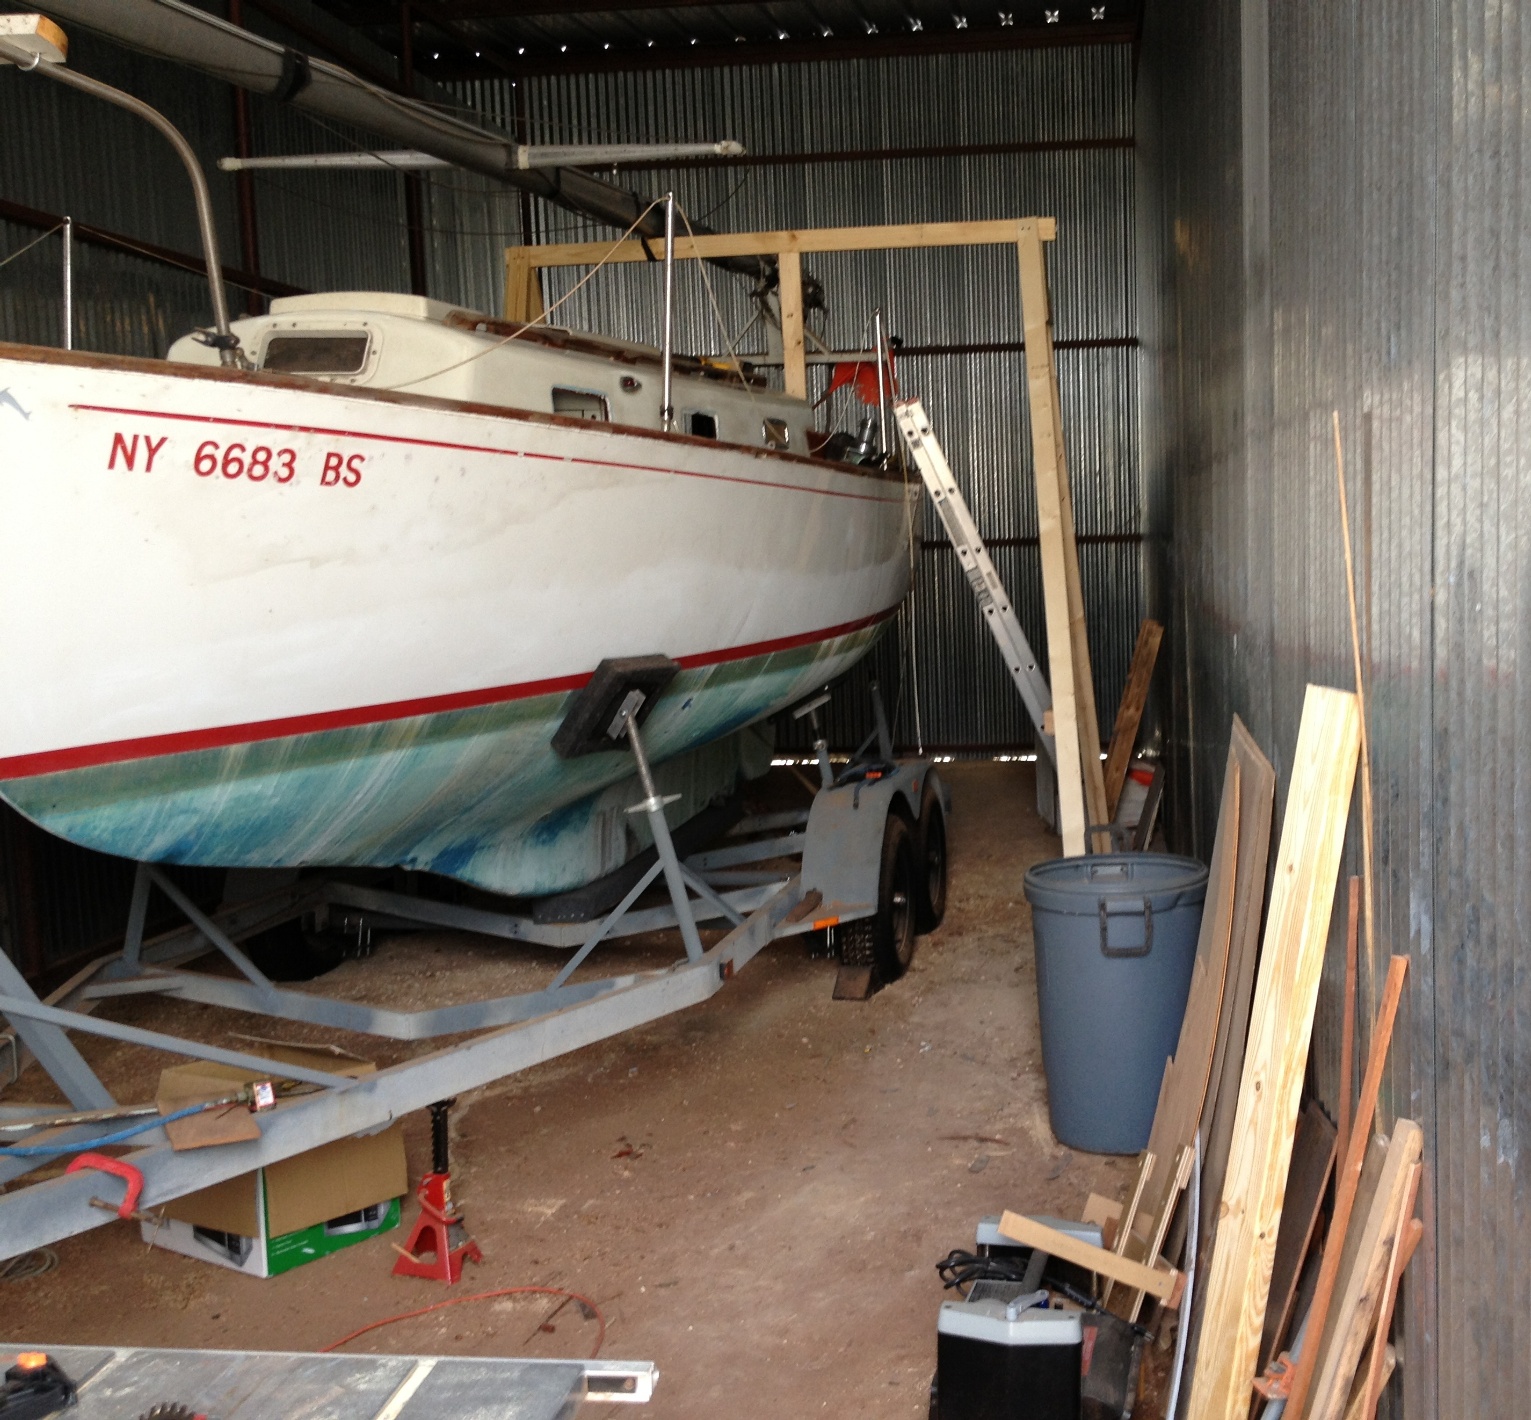
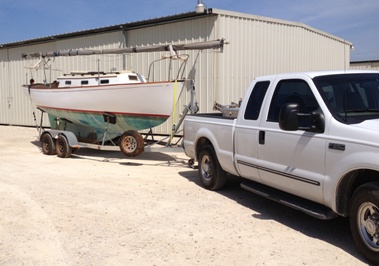
January 17, 2013. Jerry Slaughter of San Antonio, Texas advises he will be the new owner of a Dolphin 24 located at Weeks Yacht Yard in Patchogue, New York, currently known to us as the Patchogue Dolphin. Jerry has been looking for a Dolphin for a while and has exchanged several emails with us over the past several weeks.
He has picked up a used tanden trailer that he plans on modifying and hopes to trailer the boat down to San Antonio in the Spring. He has used the website's Technical Section as a resource for information. He will name her ROWDY.
We are hoping for more information on the history of this boat..
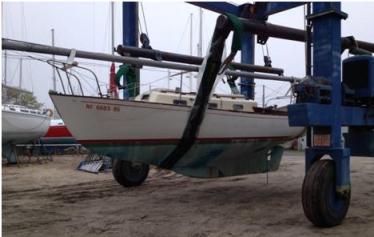
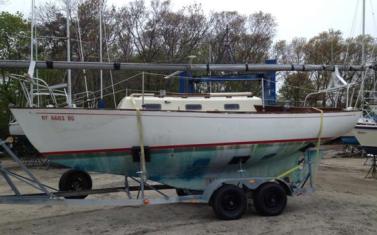
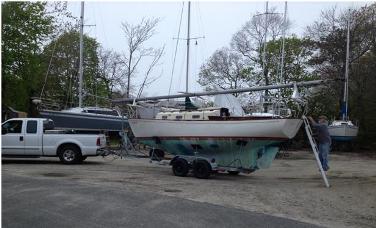
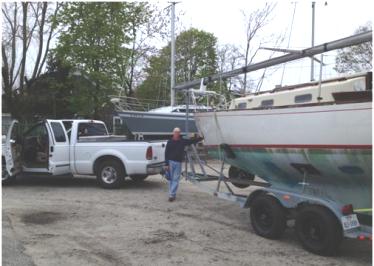
above - ROWDY at Weeks Yacht Yard, Patchogue, Long Island, New York
below, 18+ months later and after an incredible work log, is ROWDY

OK, back on our timeline - Jerry's last email had an interesting question regarding tire specs for his 'new trailer' (minor edits)
Hi Ron,
I found a used tandem trailer to use for the Week's Yacht Yard Dolphin. I've got a lot of work ahead to get it ready but I will not pick up the boat until the spring. I've got to get tires - should I get bias or radial? A friend said bias tires track better and I should look for 6 or more ply. I didn't see any mention of types on the web site. I've got hydralic brakes on the front axle and an Attwood actuator that still needs checking. I'll also need to find four screw jacks to get welded in place. There is a Dolphin on a trailer in Corpus Christi that I'll use for some of my measurements but experience based ideas are very valuable to me, so if anyone wants to throw out two cents worth of advice, I'll take it.
Thanks, Jerry
PS. The new boat will be named ROWDY
*********************************
January 18, 2013 Jerry sent in a report on his 'new' trailer'. Jerry promised pictures when his trailer is road tested so we are going to add Rowdy's 'new' trailer to our Technical Section/Trailers. Click here to go there.
*********************************
February 18, 2013 We have an updated report on Jerry's trailer in our Technical Section/Trailers. Click here to go there. Indicative of what can happen, when you buy a Dolphin 24 to restore, is this excerpt of his email - deserving of a place on Rowdy's home page
"I had been looking for a 3/4 ton cargo van for pulling the boat but went with a 3/4 ton super duty V10 Ford for the job. About the time I registered the truck the price of gas started going up and up but everyone knows yachtsmen have unlimited funds available."
****************************
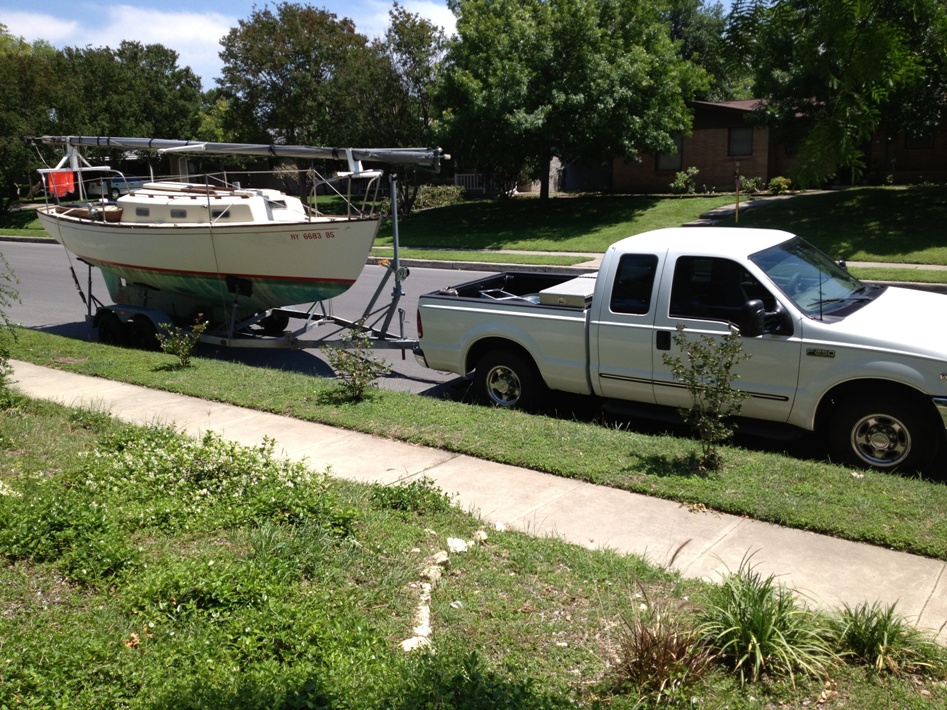
May 13, 2013. Rowdy has arrived in her new home. Here's Jerry's report
Well Ron, ROWDY is sitting on her trailer in front of my house. It was one heck of a trip from the Weeks Yacht Yard and I can't tell you how glad I am that it is over. The papers show the boat to be a 1960 Marscot Dolphin. The New York registration has a 24 notation that could be the length. There is a DN 387373 number, what ever that is. The prior owner was John Grasso and prior to him, someone named Vasoll in Manhasset Bay. There are a few other numbers on the registration card if more research is needed.
The boat's prior name was FROG'S LEAP, she has an aft lazzaret (sp), hand rails with loops rather than clam shell, the main hatch has straight sides and is rather wide. the dog house has a front port that is located rather high, and the mast step is not hinged but rather is an oval base with a mast insert that is about 6 inches high. The interior is quarter berths and head under counter on the starboard side and galley stuff on the port side. Let me know what you think, In the meantime I'll see if I can get some pictures for you, in the "before" condition.
Jerry
Webmaster Note: We'll need to get those pictures but will get website technical staff working trying to better identify this boat.
***********************************
May 16, 2013. Jerry has provided more clues to the number of this boat (below). Thanks to the support of their Commodore we have the Historian of tke Manhasset Bay YC working on this end. Staff will analyze the data....
Hi Ron,
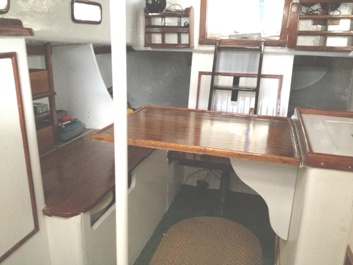
I found a companion way ladder in the boat but it appeared to be too short. I recalled seeing some interior pictures of an early Dolphin in the "Stories" section of the web site and looked at the "black book photos" page. Similarities between that boat and ROWDY were numerous, i.e. hatch and mast step, tiller fitting and location, gas fill on aft deck, traveler base same, galley set up with hinged table, switches by main hatch, and ladder and chain locker same. Apparently the ladder mounted on a lower step and I do recall seeing cleats for a bottom step. One difference I found was the hand rail design, mine are looped.
I still can't find anything on the number. I checked the tiller plate, as one of our guys noted a number stamped there, but nothing. The main sail has number 5 on it but no logo. I go back to the boat tomorrow and maybe something new will turn up.
Jerry
**************************
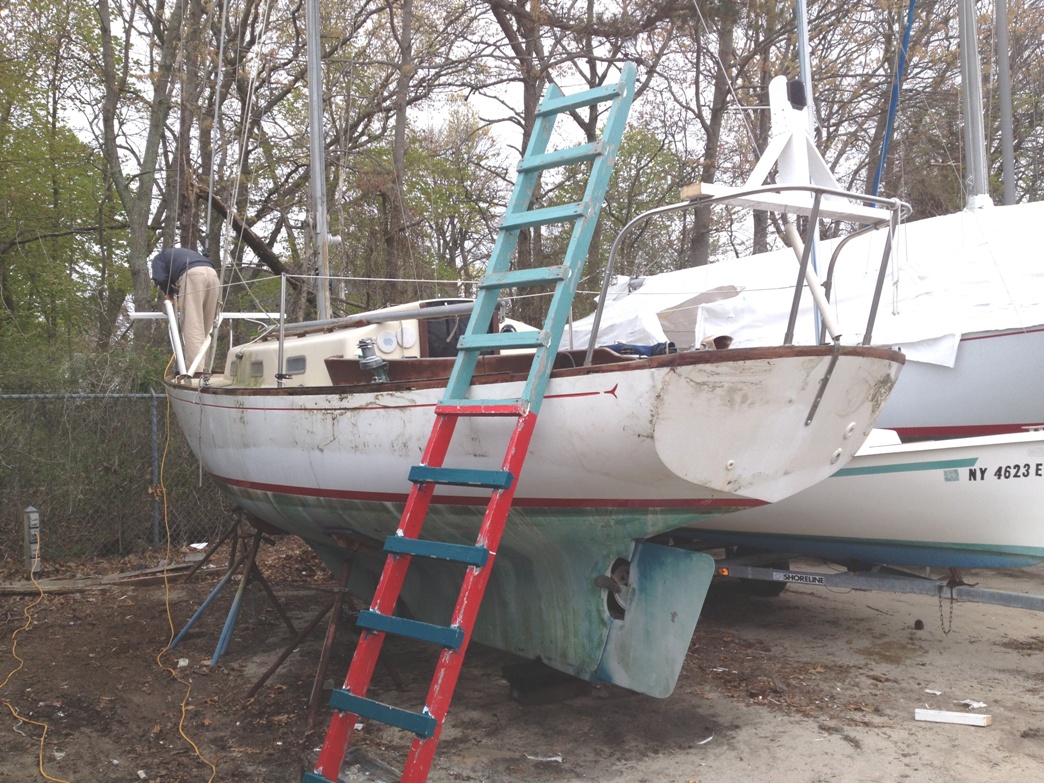
May 19, 2013. Jerry sent in a bunch of pictures showing the boat as he picked her in Patchogue, Long Island, New York. We selected a few 'Before' to show you here. Click on the pictures for a larger view
So, Jerry cleaned her up a bit to make her ready for the 2000 mile trip to San Antonio, Texas. Unfortunately, these pictures are not available in a large format. You can try your Zoom button to get a larger view.
ROWDY's Road Trip was a story we had to get. Click here to go to it
*********************************
May 29, 2013. Jerry and Dolphin24.org headquarters staff have been working on trying to find out about Rowdy's past. A flurry of emails over the last couple of days resulted and now we are almost convinced that Rowdy, ex the "Patchogue Dolphin" was once #5 Greyling! The first indicator was when Jerry found an old mainsail and spinnaker with the #5 on them. This put the missing Greyling immediately in our sights.
Ron, I had a reason to dig out ROWDY's spinnaker and noted the sail number "5" on it. I recall mentioning that the mainsail also has a "5" on it. Looking at the roster by hull number it appears that GREYLING is designated #5. Got any ideas what is up? Is GREYLING's position supported by a builders plate or sail number?
I have not, as of yet, found anything on the boat to support a hull number other than the sails, but will keep my eyes peeled. I don't think owners or sail makers arbitrarily assigned numbers but stranger things have happened.
Jerry
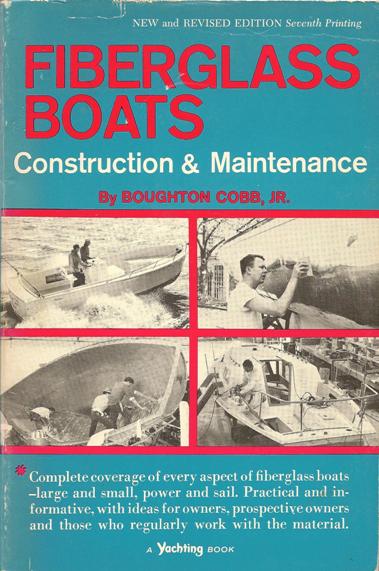
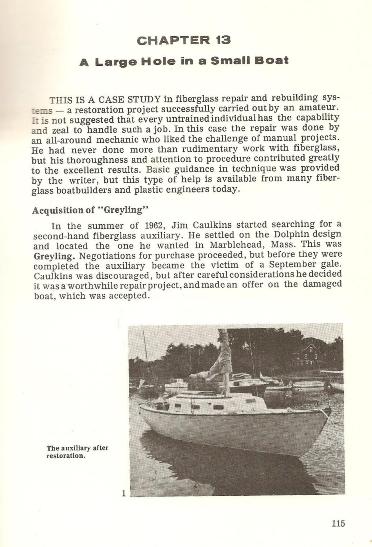
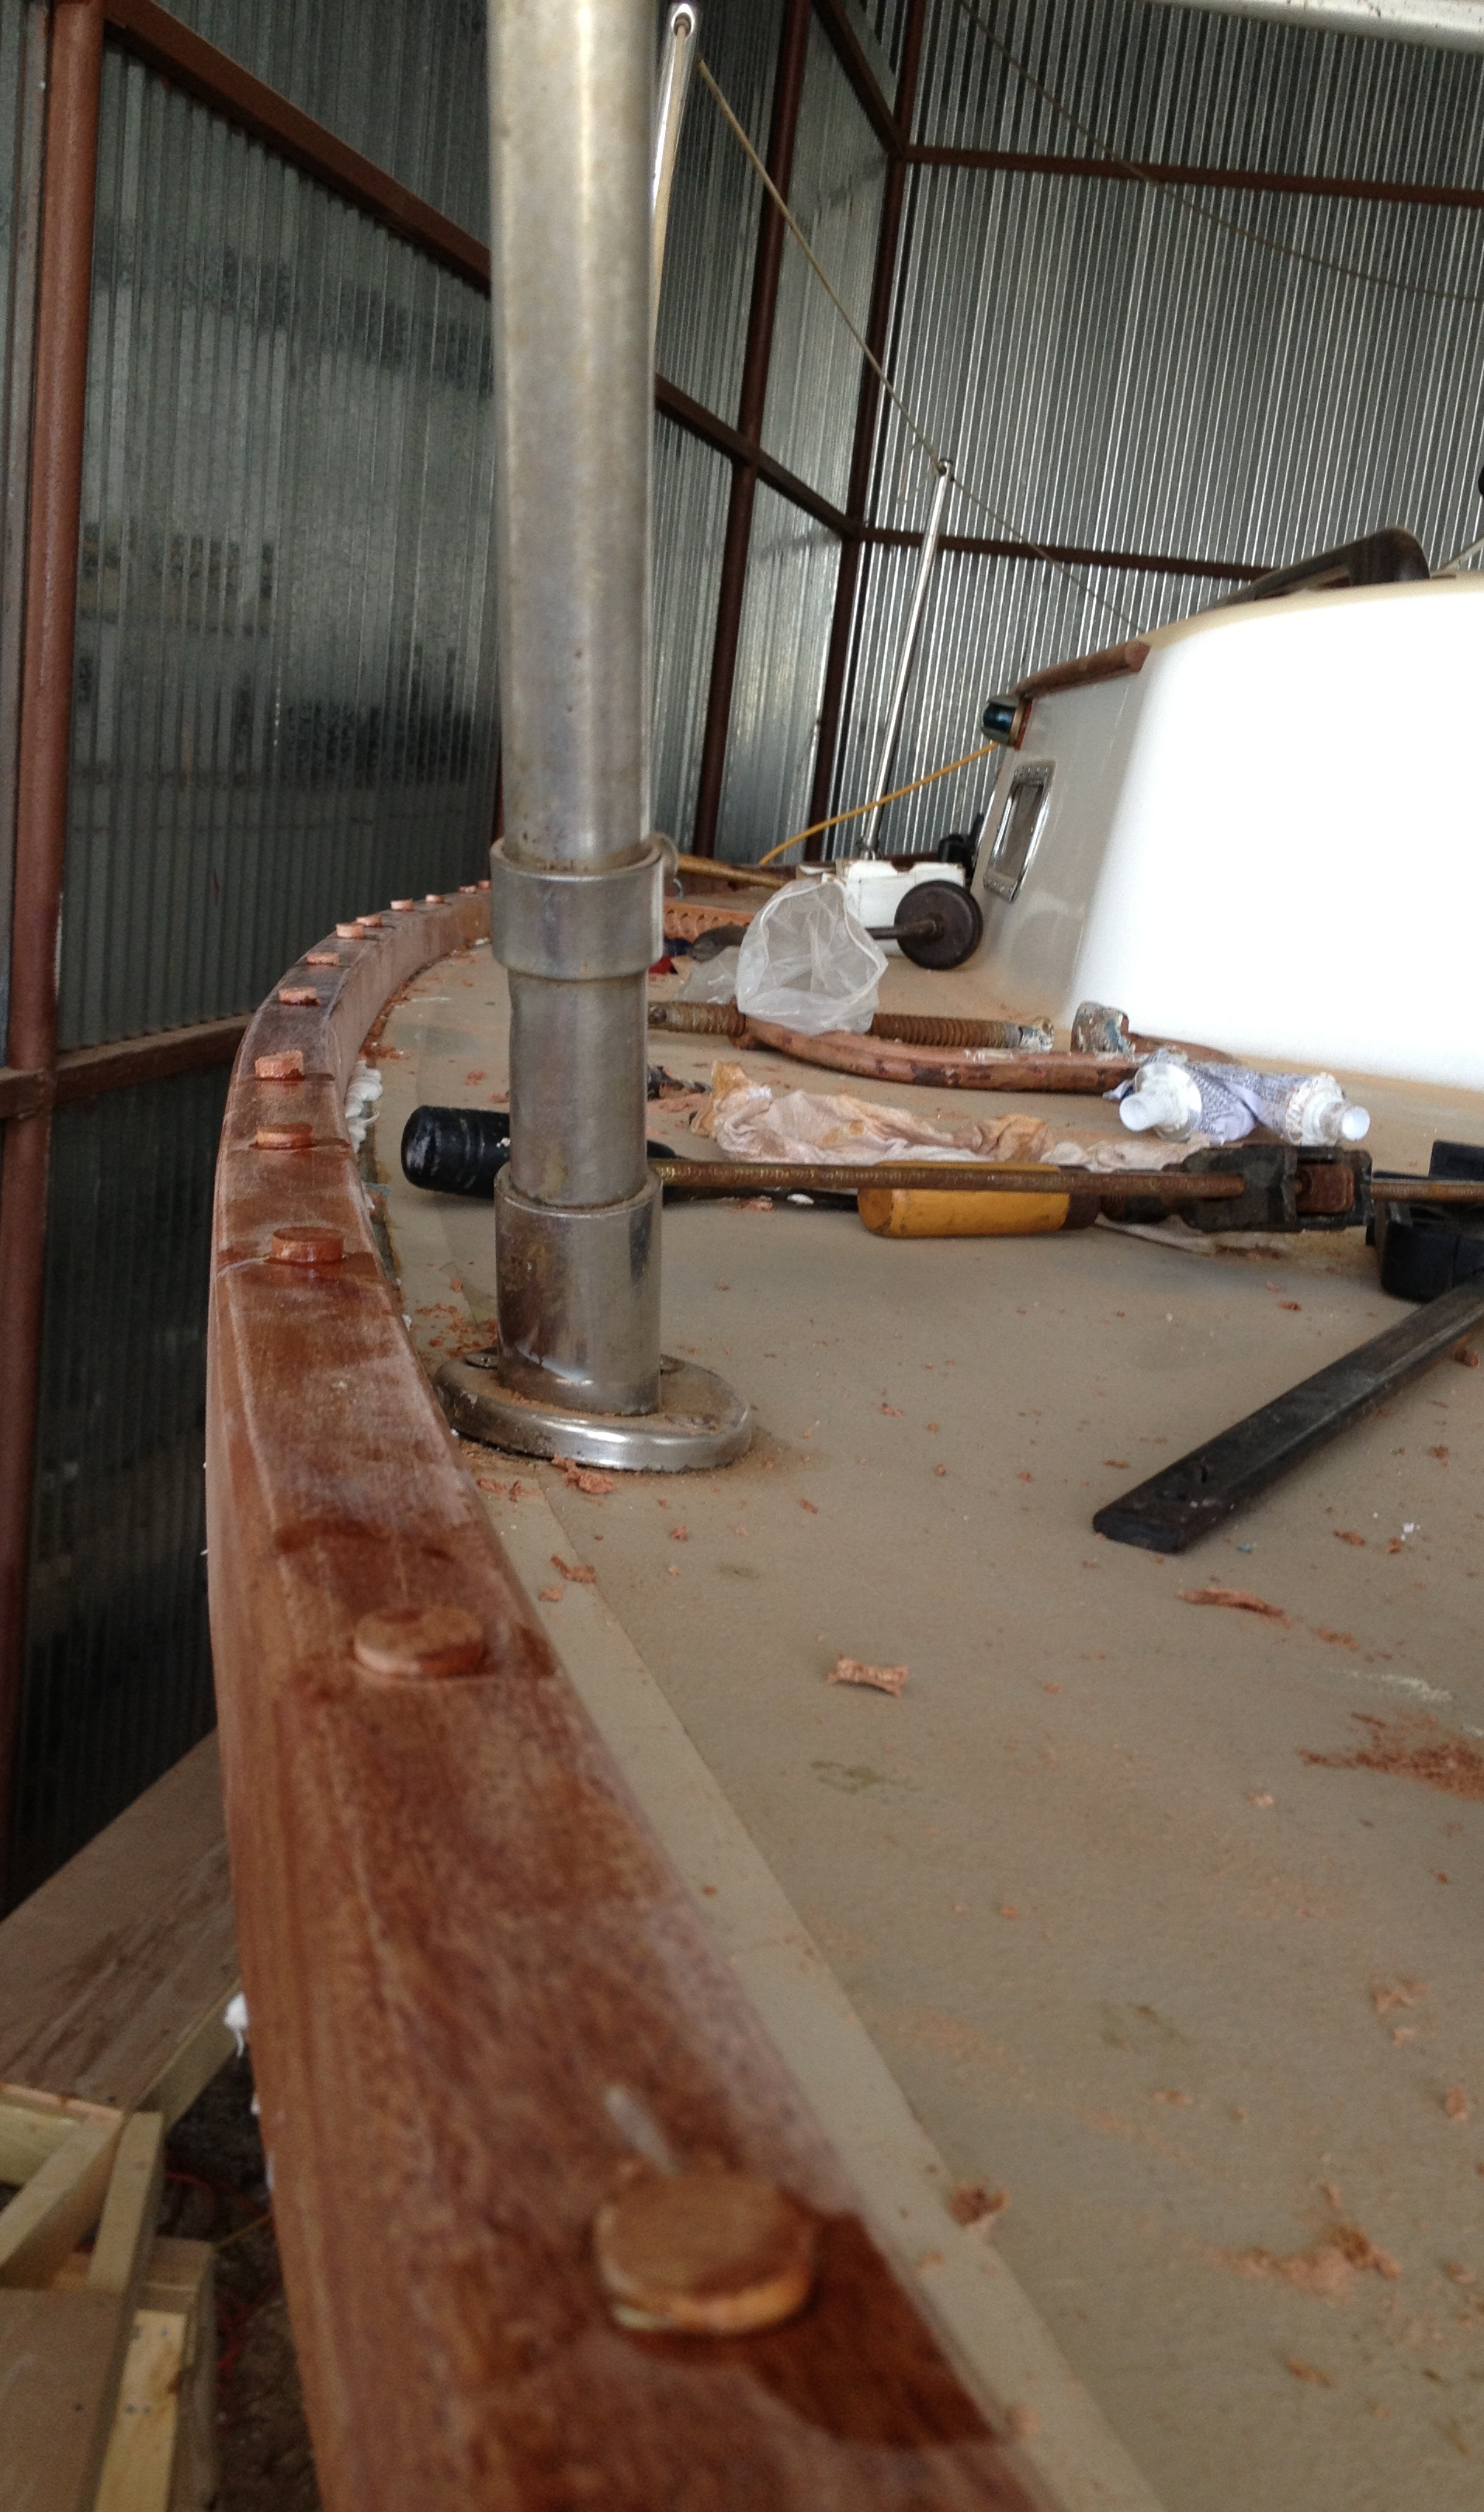
This led to a close look at, and reading of Chapter 13 of Boughton Cobb, Jr's book, Fiberglass Boats published in 1965. This chapter dealt with Greying's restoration in 1962 by her owner, Jim Caulkins. We were looking for clues that would be still visible 50 years later. While we knew of this book and had reported it on Greyling's page, small details, if confirmed by Jerry, could be strong indicators that Rowdy was Greyling. Your webmaster sent Jerry a copy of pages 126, 127 and 128 (click here to see them) that contained details of changes made during the restoration including a new bow water tank, a new lazarette hatch, a new copper tube grounding system, a new bulkhead, and a new rudder. A call to former (1967-1971) Greyling owner, Steve Romaine, was also in order.
|
|
Book Cover |
1st Page (of 15 pages), Chapter 13 |
When Jerry got these materials this was his response a few hours later.
Ron,
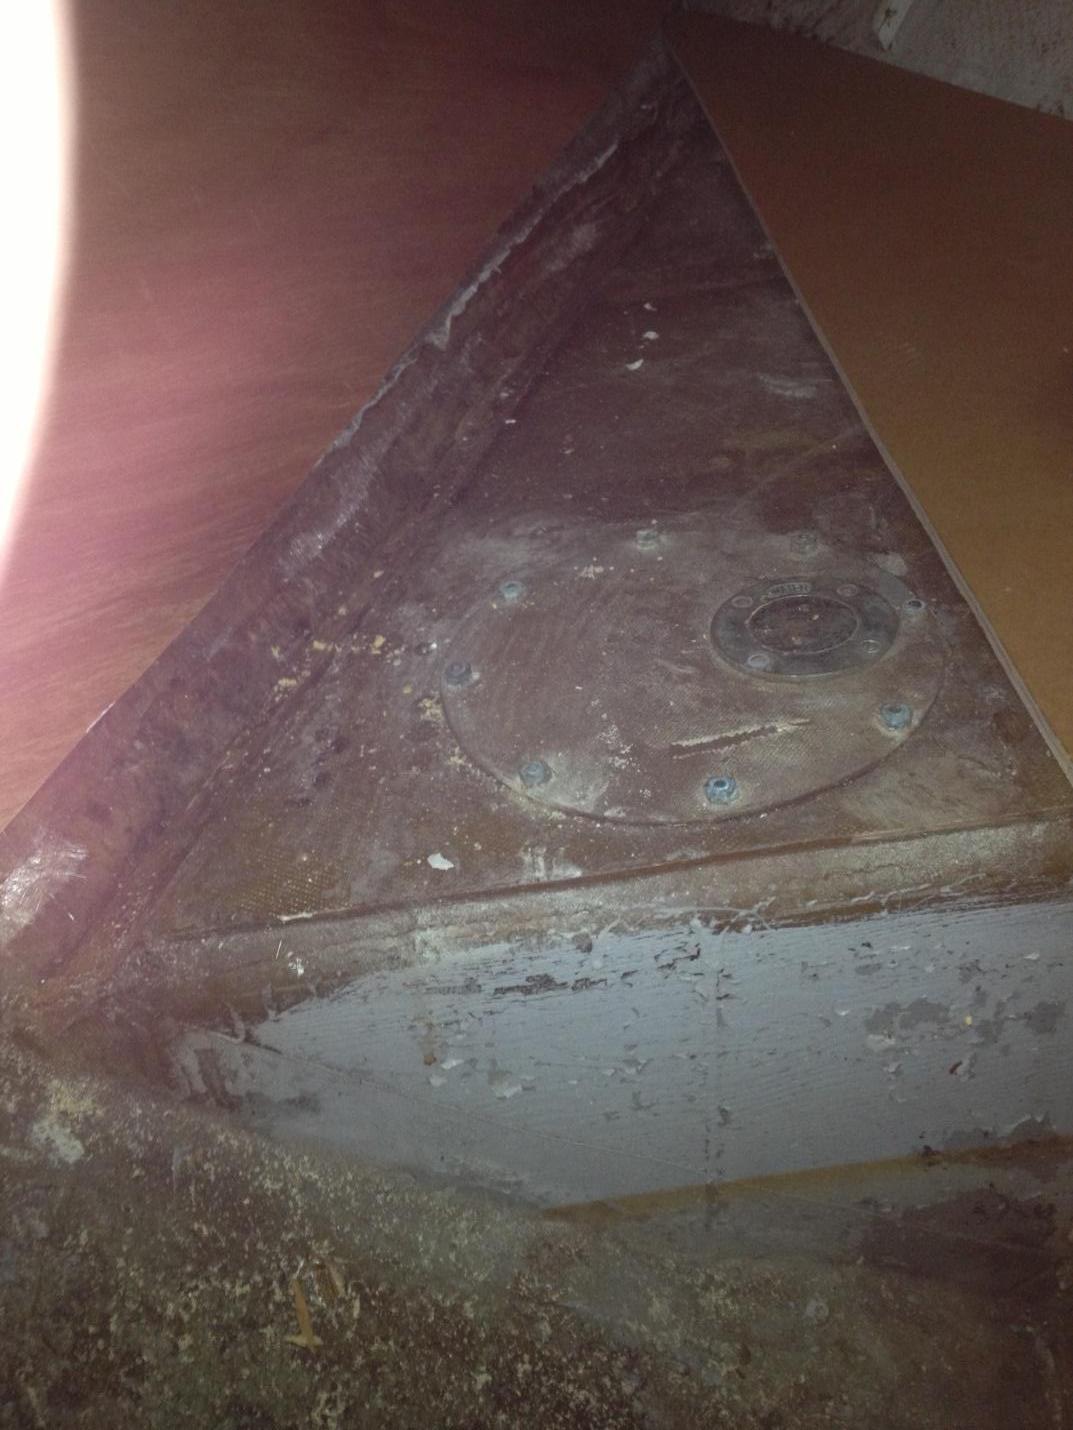
Well, well, well, it looks like ROWDY is indeed GREYLING. Everything I read in the attachments you sent point to that. The bonding system is copper pipe, the water tank is fiberglass and has a large cleanout cover bolted or screwed to the top, as shown in the diagram. The water tank vent is in the bow up against the hull and the description of the lazarrete and the blocking bulkhead aft of the quarter berths is as described. It all fits. I also remember telling my friend, when we first saw her, that the rudder looked like newer construction.
Jerry
PS I'll check to see if the water tank is tabbed to the hull, tomorrow.
Former Greyling owner Steve Romaine and your webmaster had a phone conversation and exchange of emails, among other things confirming that his sails had the #5. He also said to look for paint splothes on the spinnaker, a Van Zandt built zippered main, and evidence that the boat once had a blue deck. Steve was sent a picture of Rowdy's interior, and we are awaiting snail mail pictures of Greyling from him.
Stay tuned
May 30, 2013. Proof!! Jerry sent in a few pictures including one of a major repair done to the starboard side of ROWDY and a couple more emails (minor edits)
Hi Ron,
I am sending a few pictures I took yesterday. This one shows fiberglass repair on starboard side, one shows the (bow) water tank tabbed to the hull, and one shows blue paint on the aft cabin bulkhead at the compass cutout. The mainsail I have is a newer one, no zipper, and the spinnaker looks clean except at the head where I saw a color smudge....
Jerry
ps the spinnaker was made by Louis J Larson, Port Washington, New York.
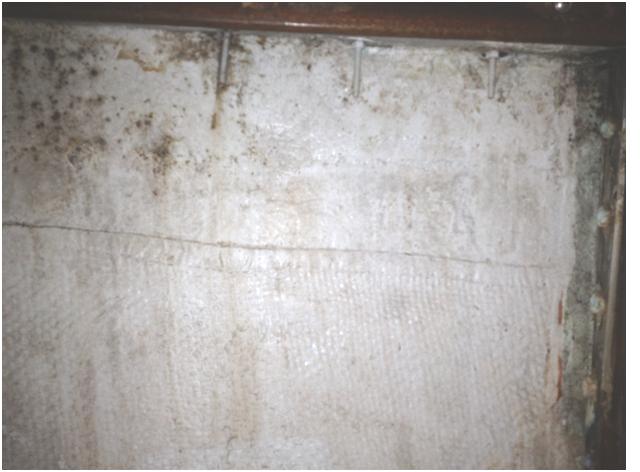
Evidence of major repair on starboard side
|
|
Compass hole cutout in aft cabin bulkhead - old blue paint |
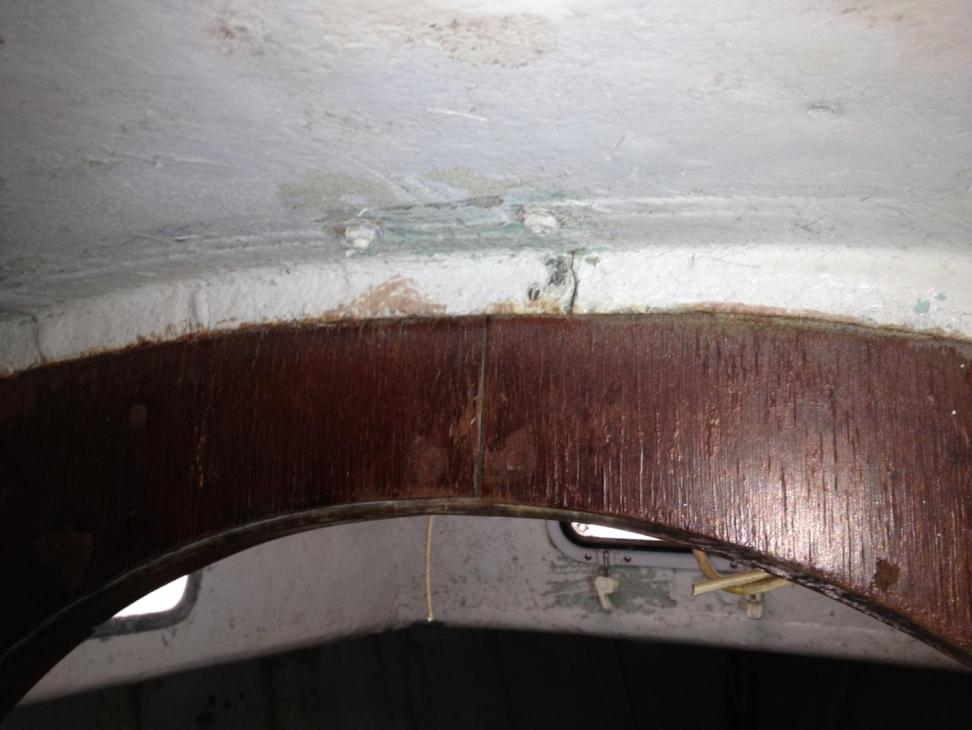
Mast arch |
|
Ron
I've ordered a copy of the (Cobb) book.
I'm on my way to the boat and will check for the metal support (for the mast arch). The boat was varnished inside and on the underside of an old v berth panel there was blue paint. The boat was awlgrip painted, I believe. It is two part paint, I just don't know which one.
I think the 24 on the paperwork is the length, not the hull number. The lazerette is a smoky grey Bomar mounted on a wood frame. The frame was probably varnished as there is still some blue painters tape masking it off. I don't know when I'll get a look at the centerboard.
Exciting, isn't it!
Jerry
The watertank at left. Click on the pictures for a larger view. Use the back arrow on your browser to get back to this page.
|
*******************************************************************
June 14, 2013. Jerry is working - here is his email and project photo (edited)
Hi Ron,
Here is the V berth of Rowdy with a couple of new structural parts installed.
Jerry
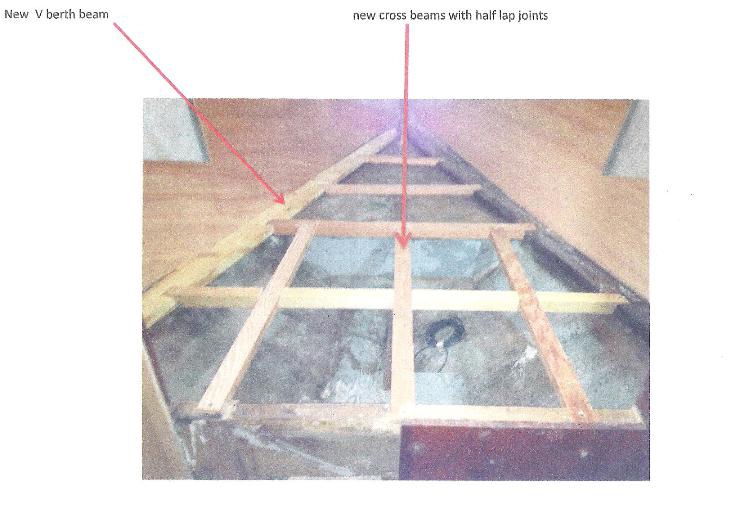
Panels resting against the hull sides have cutouts for hatches - Note water tank up forward
***********************************
June 25, 2013. Anchor Locker update
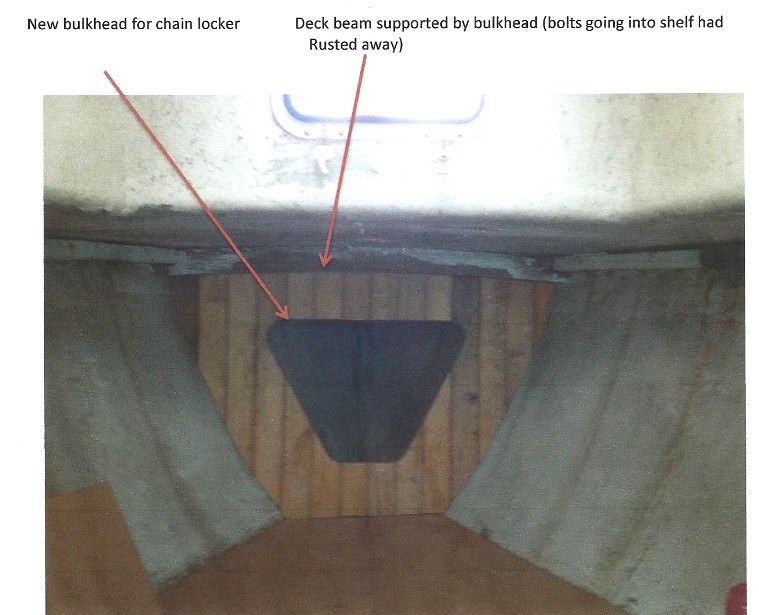
Hi Ron,
This is a bulkhead I built for the chain locker. It will also provide some support for the forward deck beam. There is a hatch door that will be fitted after some trim has been applied.
Jerry
**********************************************
July 29, 2013. Jerry sent in some photos and a status report on his V-berth project and we have decided that this project deserves to have its own page in the Technical Section/Interiors. Click here to go there. Below is Jerry's email and photos from the project
|
Hi Ron,
I have been working on Rowdy's V berth. My plan was to build a chain locker and attach ceiling to warm up the space a bit. So far the bulkhead is in and attached and I've glued in some ribs for the ceiling strips. Today I screwed in a bunch of the strips but I've got to get some more mahogany next week and mill a bunch more strips. I've still got some engineering to do on the deck beams but I think those will be finished soon. Once the V berth is finished things should move along quickly.
Jerry
|
August 12, 2013 - A better picture....
*************************
August 18, 2013. Moving aft......
Hi Ron,
I worked a little on Rowdy's galley today. I got some paint in the lockers, attached a Fawcett pump, and set up the rails for attachment when I get a long screw driver bit that can handle a small screw. I also put some fairing goo on the main bulkhead. I'll be working on that tomorrow.
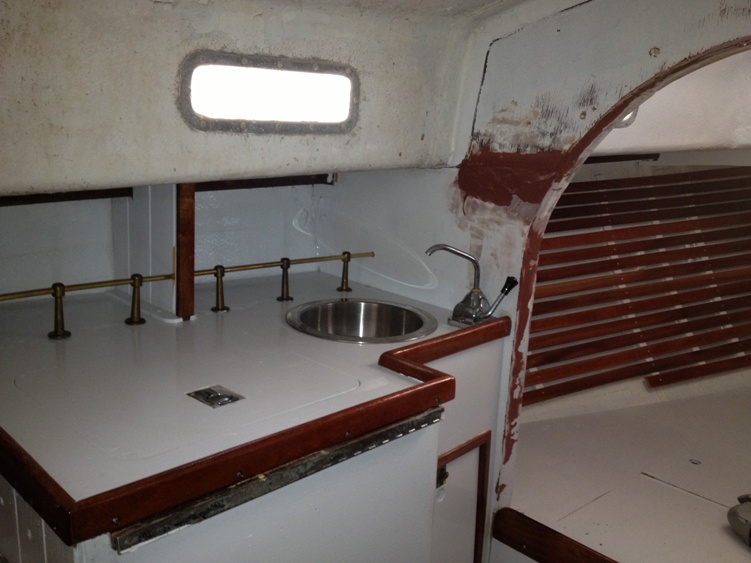
I pulled off the lazerette hatch and trim to rework at home. Tomorrow will be fairing and painting and maybe taking apart the stove platform that is partially rotten (pessimistic) or partially good (optimistic) hmmm.
Jerry
Webmaster Note October 14, 2014. The Galley Project has progressed to the point where it has its own page in the Technical Section - Click here to go there
**********************************
September 10, 2013. Jerry sent in some pictures of his centerboard winch, centerboard winch control line tube and wire and modified companionway laddar. We have included these, and his related comments, in our Technical Section dealing with these matters. Click here to go there. He closes his email with a comment that belongs here.
When I lived in Annapolis, MD in the 1990's, I had rebuilt a Hinckley Souwester 36. I was real interested in finding as many owners of wooden Hinckley's as I could. In my searching I found Doris and Donald Dunker and talked to them several times on the phone. It's interesting to note that two wooden Hinckley past owners should find happiness with Dolphins.
Webmaster Note: The Dunkers had Dolfyn. Click here to go there.
*****************************************
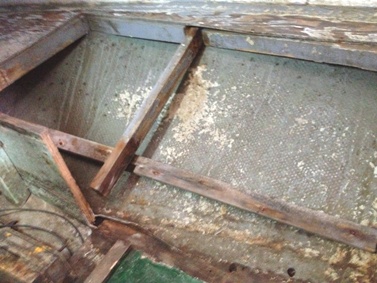
September 29, 2013. On to the quarterberths - here is Jerry's report (minor edits) and pictures
Hi Ron,
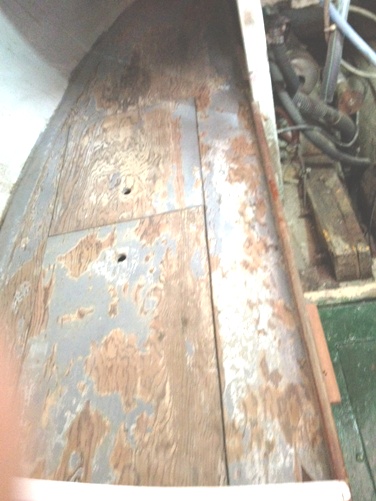
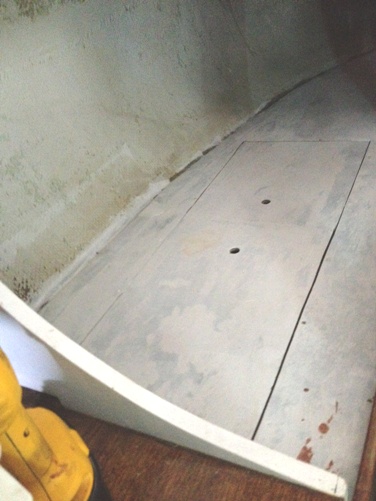
Well, I finally got into the work of rehabbing the aft berths. First I had to attack the years of mold and mildew, with some Tilex and a scrub brush. Then I sanded and painted the starboard platform with a coat of primer. It ain't pretty but it is a start.
|
|
Starboard quarterberth cleaned up |
Starboard quarterberth primed |
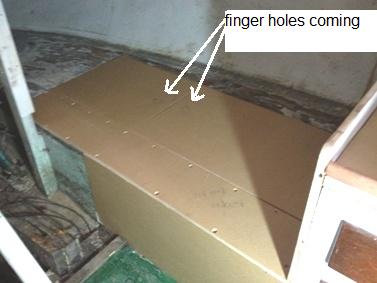
On the port side I cut out the rotten berth facing (I don't know what else to call it) and some of the platform. This let me see the support structure and what could be saved and what needed replacing. After getting the structure fixed I cut the panels I needed to form up the berth attached everything and cut the two access panels to let me get to the under-berth storage. I brought the access panels home to cut the finger holes.
|
|
Port quarterberth framing |
New port quarterberth panels |
Click on the lower two images for larger views - click the return arrow on your browser to get back here
After some fairing everything will get some primer and paint and trim, then I'll have to see about cushions and upholstery. I'm attaching some photos and I hope you can make out what they represent.
Jerry
******************************************
|
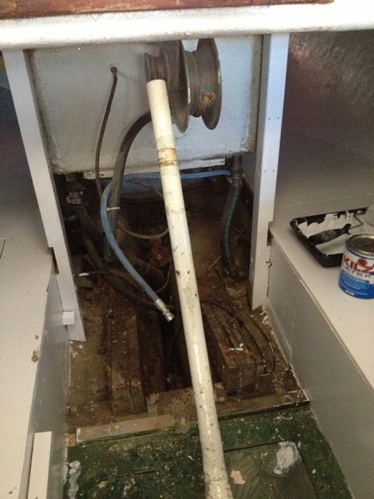
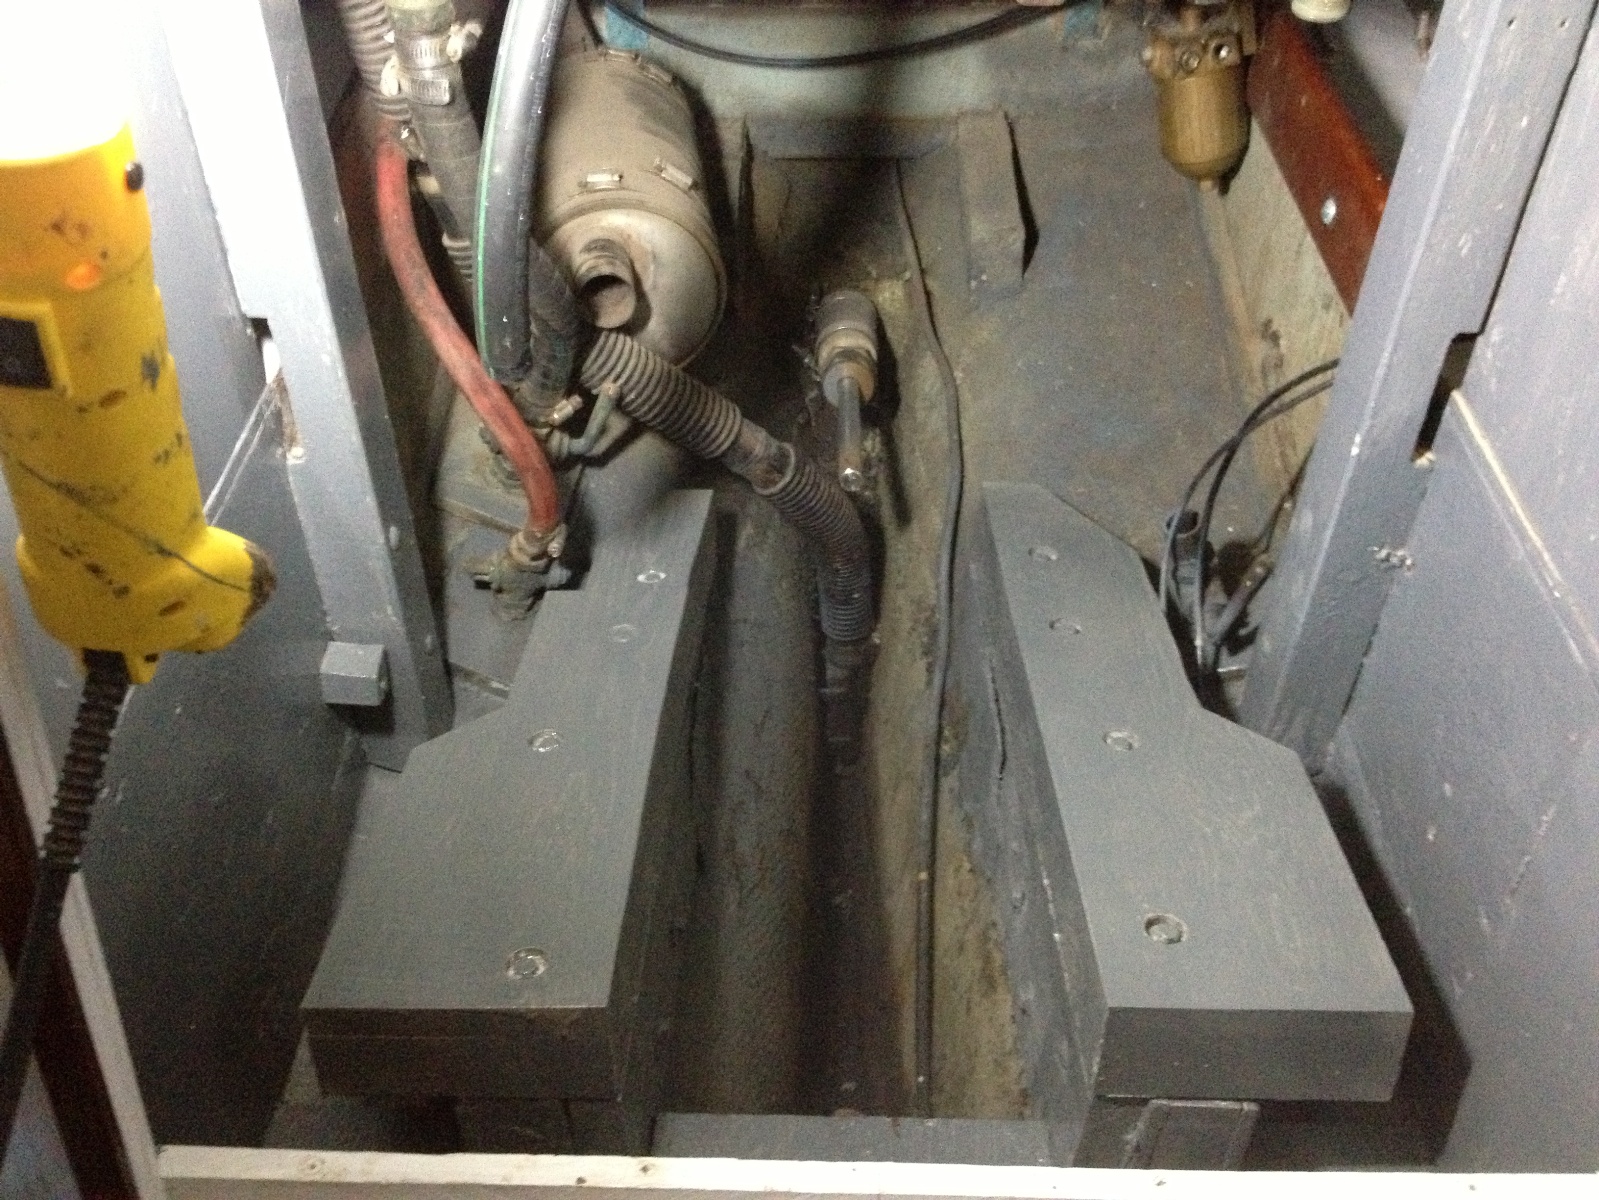
October 8, 2013. There's a small space between the the quarterberths affectionately known in naval quarters as the 'black hole of Calcutta". This space is destined to be (over)filled with ROWDY's power plant.
Hi Ron,
I decided to enclose the engine space with a box with a removable hatch. I will cut the centerboard cable tube and that should allow me to get the engine in and out if necessary. I was going to have a hinged double door for a hatch but couldn't figure a way to make that work around the tube. I would have needed a big slot cut in the doors which would have defeated some of what I was trying to accomplish which was to keep sound and heat out of the cabin.
Once I trim out and paint the box it should blend in pretty good. The engine space will be freshened up soon then I will start the detail work to finish things off.
Jerry
As this subject is of interest to all we have set up a page on this page in our Technical Section. Click here to go to it and coming updates. We'll get a finished picture here - when it is finished.
to be continued
|
****************************
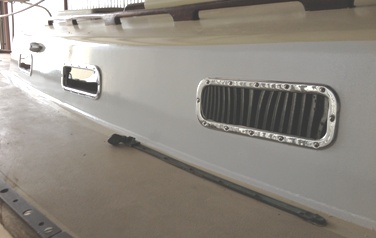
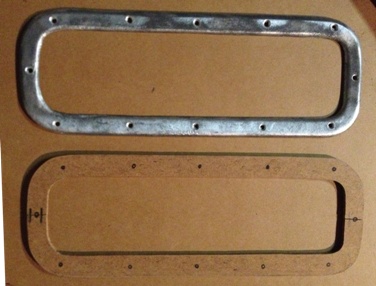
October 11, 2013. Jerry sent in an update on his engine access hatch project (click here to go to that update), and introduces us to a new ROWDY project - Portlights, ok windows.... There's a good chance this too will end up in our Technical Section (minor edits)
|
Hi Ron
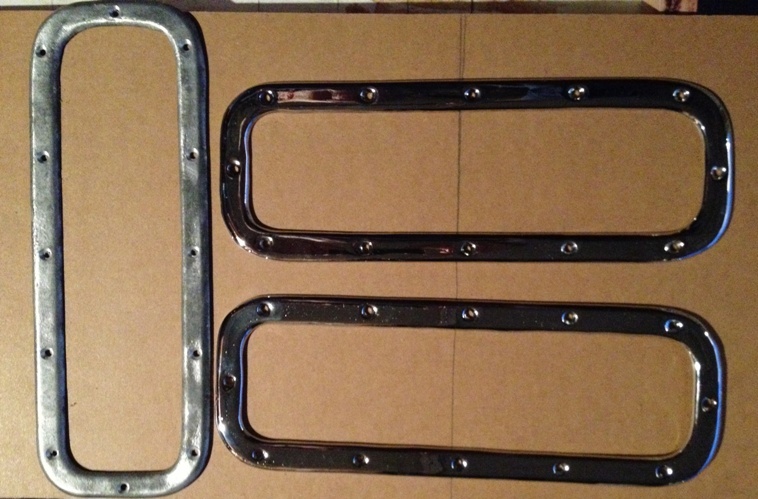
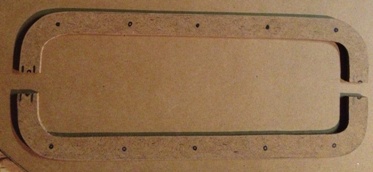
About the window frames, I pulled the windows last week and was able to save 6 of the trim rings. They are thin aluminum things that I am considering having chrome plated. I wire brushed the rings which made them look decent if you didn't stand too close.
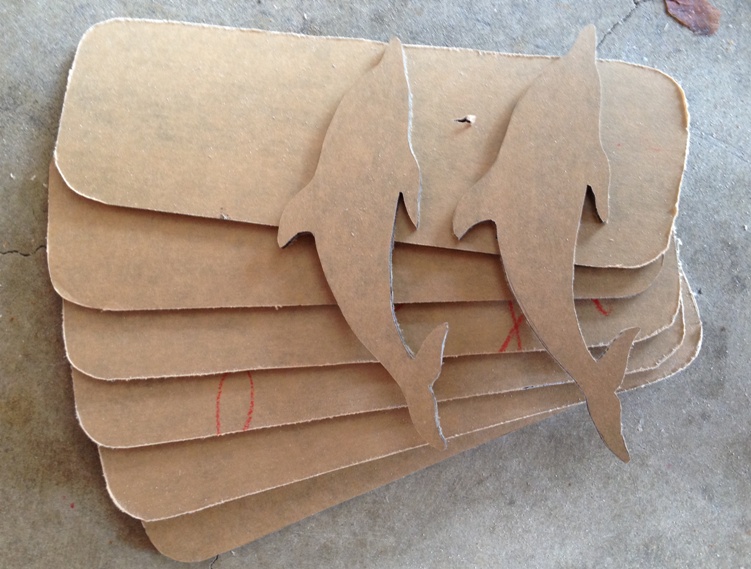
For inside trim I will probably use mahogany. I cut some pattern pieces in hardboard and will try to finish the rings with my router and a pattern cutting bit. I'm thinking they should be about 1/2 inch thick so they will not appear to obtrusive in the small cabin. We will see how that goes.
I just traced one of the metal frames onto 1/4 inch hardboard, cut the frame pattern in half and cut the patterns out with a band saw, carefully. I marked the screw holes and will pre-drill a couple of them so they can be screwed to the raw stock without creating extra holes in the wood. I plan on varnishing the inside rings.
One thing I should emphasize is the need to be extra careful removing the old rings from the boat. The are especially fragile and will break if you look at them hard. One of my 6 cracked at a screw hole but I should be able to glue it up (fingers crossed). I've included a couple of photos of the ring and pattern.
Jerry
Stay tuned
|
*****************************
October 14, 2013. Jerry sent in an update on his portlight project and, as predicted, we have set up a page in our Technical Section. Click here to go to it.
************************************
October 18, 2013. The engine box is done. Jerry update is below. Click here to go to the Engine Box page in the Technical Section for a larger picture and the full story.
|
Hi Ron,
I finished the engine box (see picture at left) and have moved on to stair varnish and window frames. Also I think I may have to make a small modification to the engine box so I can access the centerboard winches. I think that can be done without too much change to the look of the box.
As expected, I'll have to paint the cabin sole again.
I'll let you know how the windows turn out.
Jerry
|
*****************************************
October 29, 2013. Another new project report from Jerry - the removable compression post, replacement portlights are cut, and a couple of Dolphins?
Hi Ron,
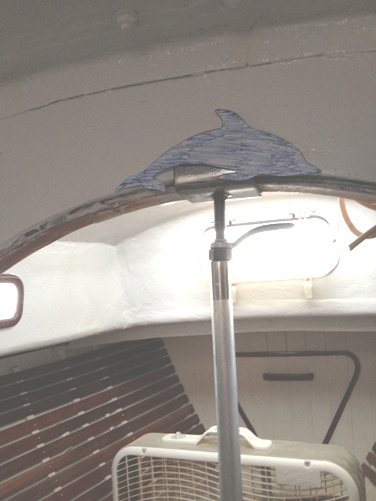
I cut out six windows and two dolphins today. You know what I'm going to do with the windows but the dolphins might need a little explaining.
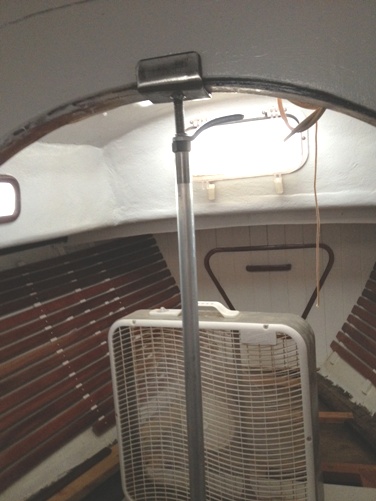
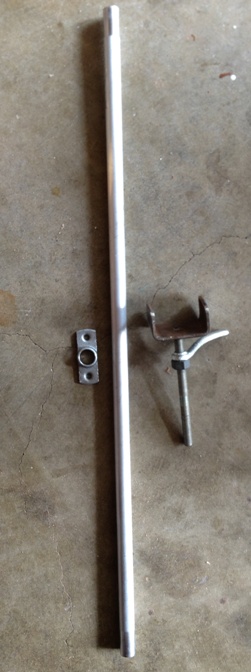
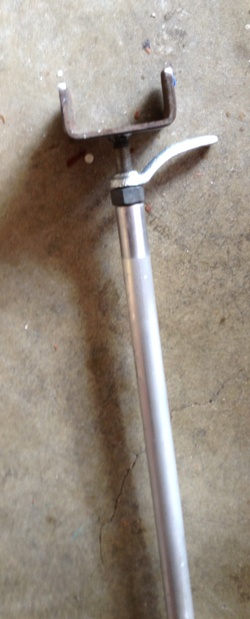
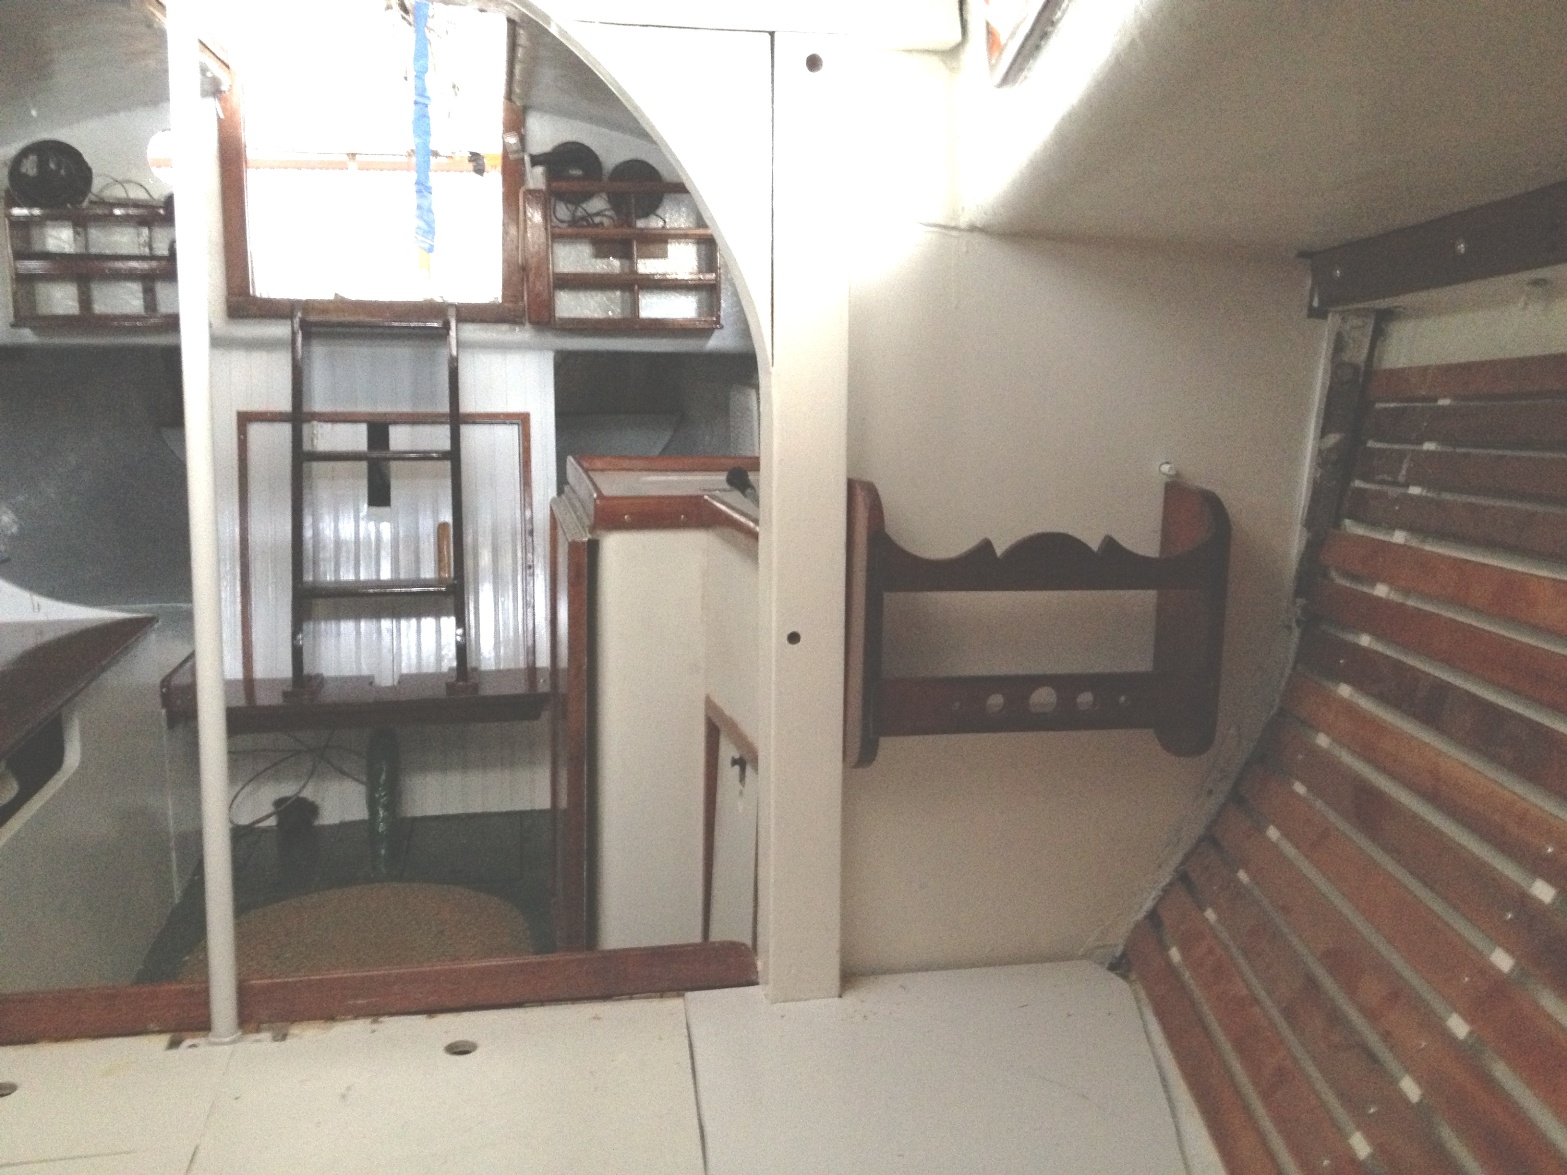
I built a compression post for Rowdy.
|
|
Click here to go to the Technical Section page on Struts and Mast Support Arches
|
I used 3/4 inch, thick walled aluminum for the post, made up a slip-fit flange for the base and made a 2 1/2 inch saddle out of flat plate with a 1/2 inch threaded rod welded in the center. I'm using an adjustment nut followed by a lock nut to hold the adjustment. I haven't decided whether to use the nut with the arm or a wing nut. I thought of dressing up the saddle with a couple of dolphins since I had some acrylic left over. It should look nice once painted. The post is easily removable if I need more room getting in and out of the v-berth.
I pulled the motor shaft and am slowly moving towards putting the iron wind into the boat. I still need to do some thinking on that big lift and the "black hole" needs to turn into a "grey hole" before I start.
By the way, I think I figured out the CB winch, which uses all the holes in the small drum, but my locking bolt for the cable is missing thereby adding one more thing to my to-do list.
Jerry
********************************
November 5, 2013 - Portlight frames plated
Hi Ron,
I got my window frames from the chrome plater today. The cost was a reasonable $20 bucks each and they will look good from 5-10 feet away. I must warn anyone who is considering this step that every blemish, in the frames, broadcasts through the platting. This is, in my humble opinion, acceptable and I look forward to mounting them on the boat.
Jerry
Looking pretty good from 1500 miles away too
**************************
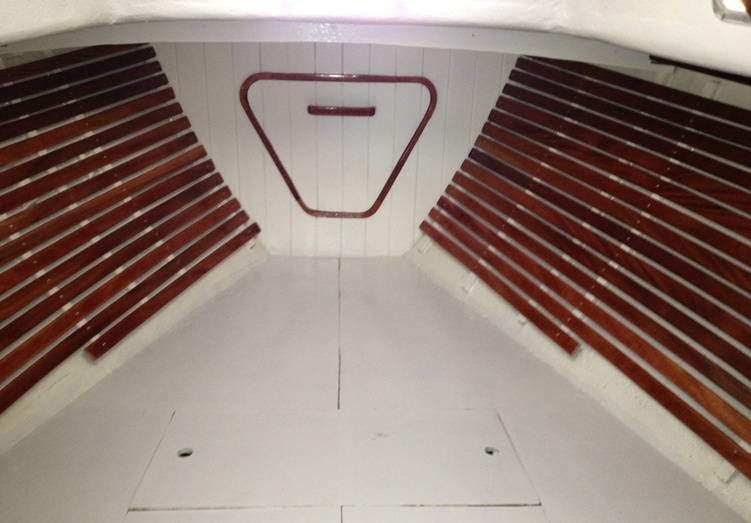
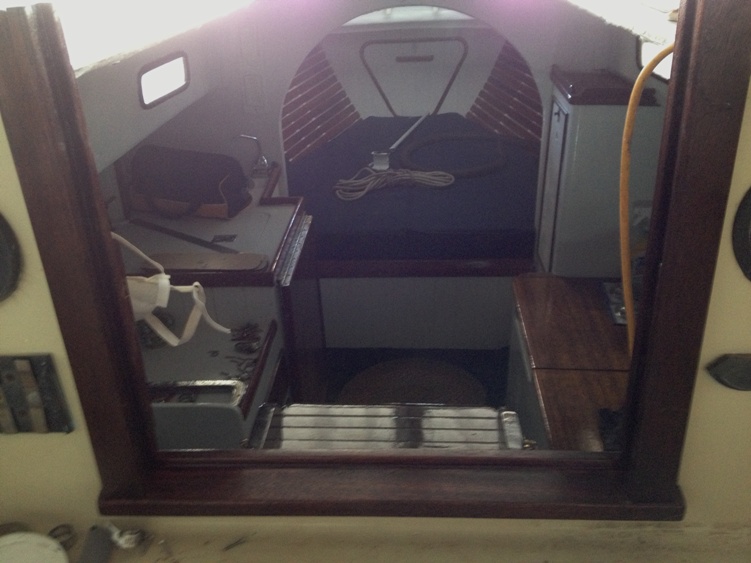
November 17, 2013. Jerry thinks he's is close to done as far as ROWDY's big projects in her interior is concerned. Or so he declares - We'll see....This first picture also deserves to finish off our Technical Section page on ROWDY's v-berth. Click here to go there. Here's Jerry's email and photos
Hi Ron,
Rowdy's interior spaces are done! Or at least I so declare.

Click above image for a larger view, then click on the new image - click the return arrow on your browser to get back here
Click on either image for larger views - click the return arrow on your browser to get back here
|
I did some plumbing today and pretty much just looked around. Electric is in the offing but I haven't decided how much to do, yet. I'm leaning towards flash lights, and two interior lights, one in the v berth and one in the main cabin, plus an oil lantern. I may put one additional light in the engine room but that is about it. I've still got to pull some cables and hoses out of the engine room and set things up for the "big lift".
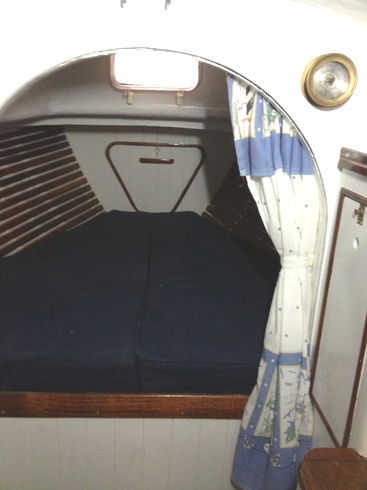
I want to put in a curtain for the v berth (see below) but haven't figured out how. Could you tell me how yours is set up? I also want to find a little stereo with a big voice, any suggestions?
Outside work will begin tomorrow with prepping the cabin for paint and porthole fitting. Putting on the "new" window frames is about a week away but I'll only take photos if they look good.
Jerry
|
Webmaster Note. Marionette has a denim curtain to close off the v-berth. This seems to work just fine among the male crew - females sometimes express reservations. There are loops sewn along the top edge of the curtain and they are threaded on to a stainless steel rod mounted on the inside edge at the top of the main bulkhead. To keep open the curtain is fastened to a simple hook screwed into the starboard edge of the bulkhead with a short cloth 'belt' with small loops on either end. You slide the curtain to starboard, gathering the curtain with the belt loops hooked on to the screw hook. More - click here - pictures coming...
Marionette's long time excellent sound system needs replacement - click here for that update
|
|
****************************************
November 27, 2013 and December 2, 2013. Updates from Jerry regarding plans for ROWDY's 'new' Vetus M2 05 diesel engine, requirements for the engine bed, some electrical and related matters. Click here to go there.
*******************************
December 16, 2013. We got the following update from Jerry
Hi Ron,
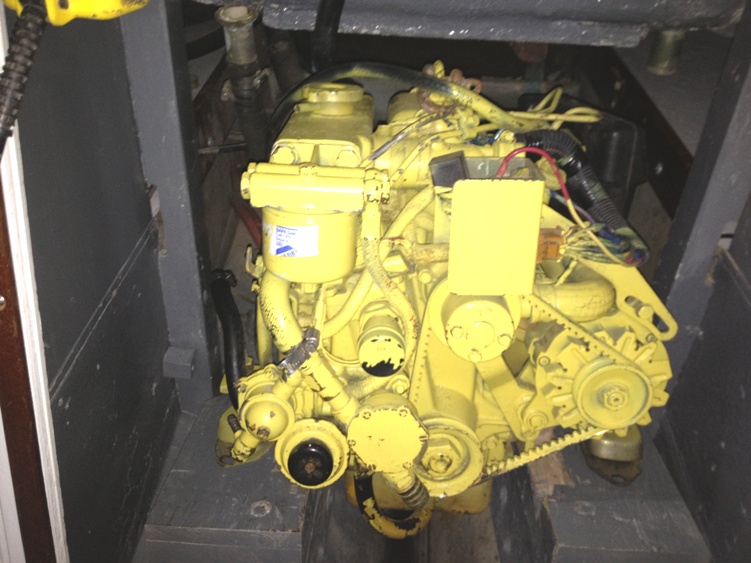
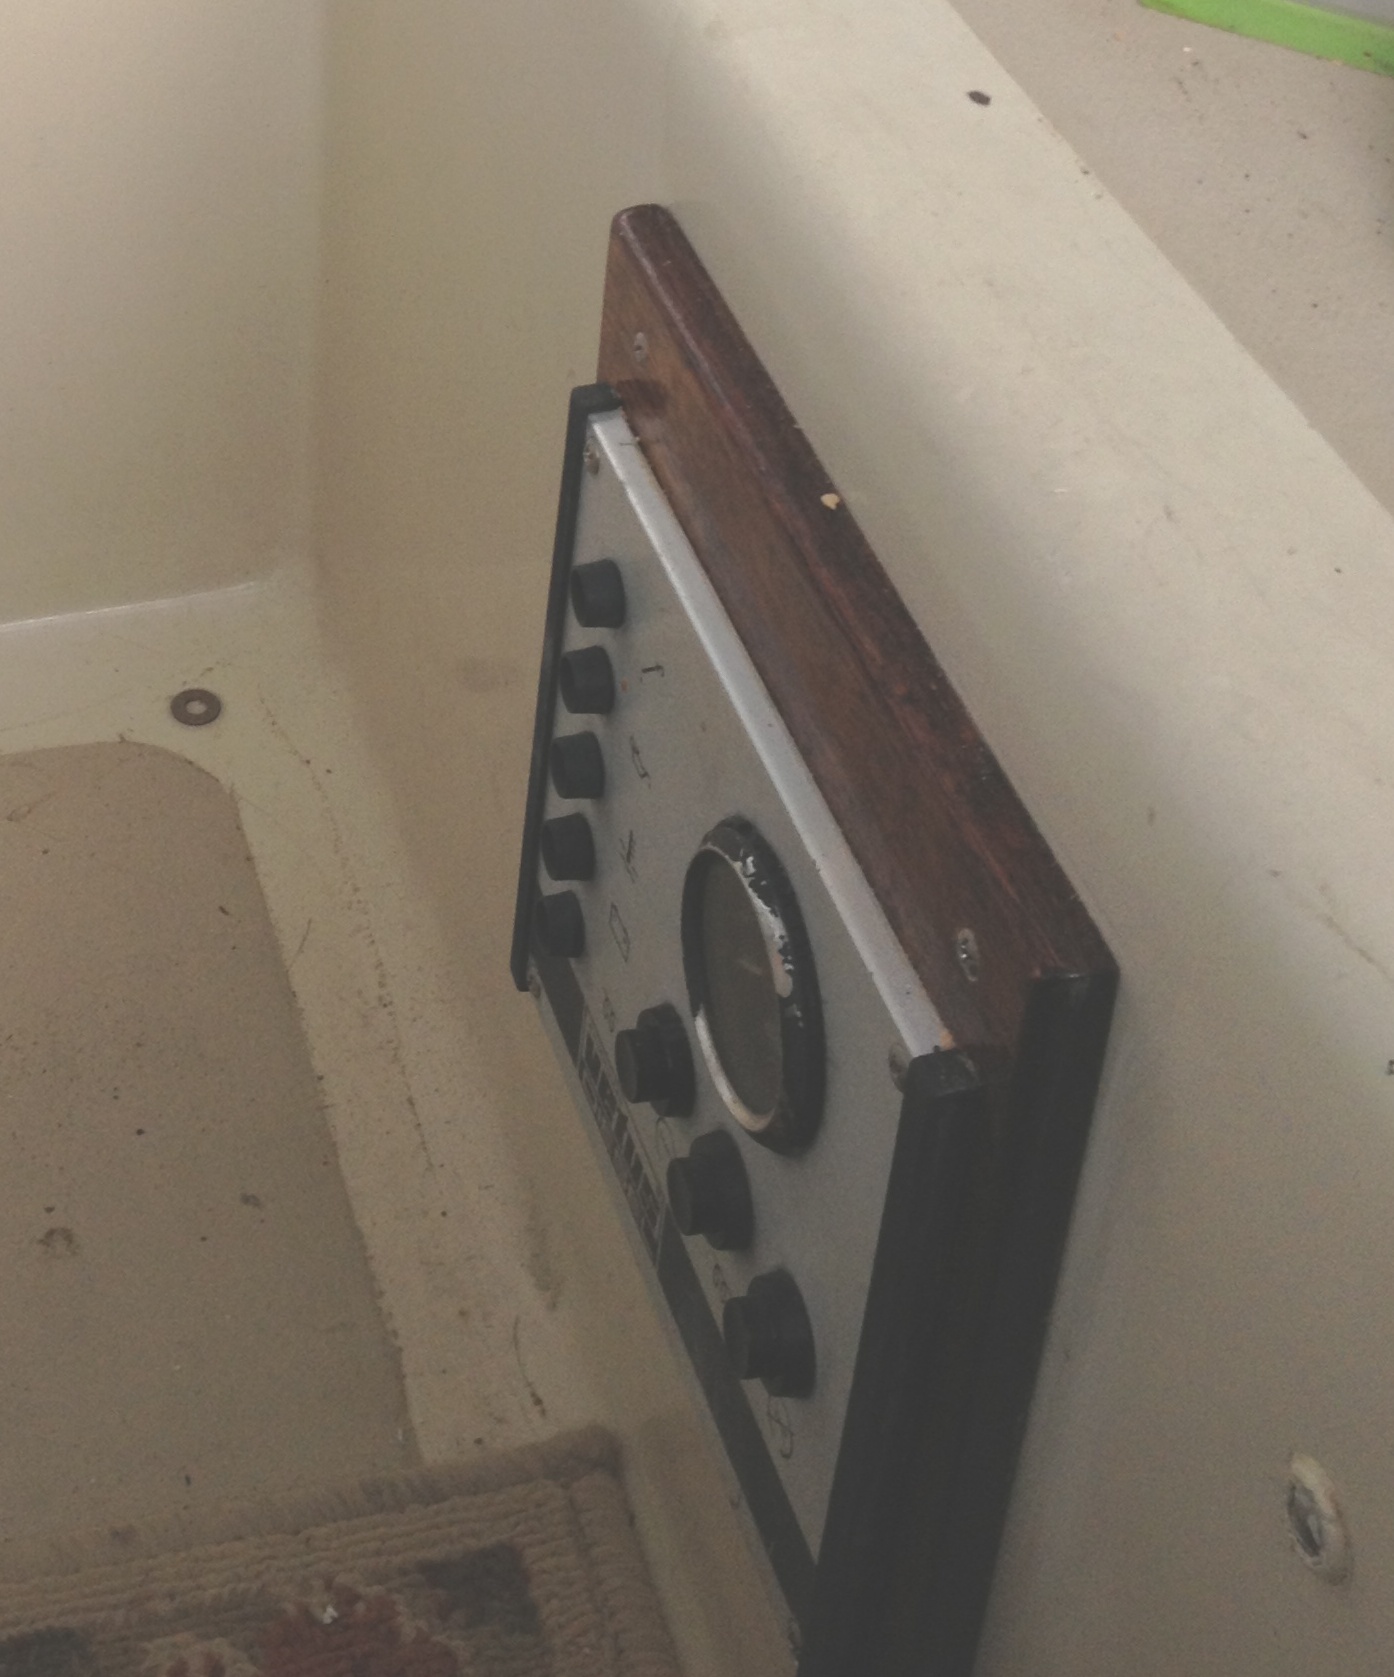
Not too much going on worth reporting. I started my Vetus engine and let it run for a bit. For some reason the start button is not working and I'm trying to run down the problem. I built my electric switch box and put a coat of paint on the frame and cover. This week I will hinge the lid and mount some switches.
|
The engine bed logs Left) are complete and glued and lag screwed to the old bed logs. Primer and paint completed that job. I may yet add two transverse braces but they may not be needed since the original bed logs were glassed in place.
I did some shaping of the acrylic window pieces so they are ready to attach. The next big stuff will be painting the engine, fixing the start switch, rough sanding the cabin sides and priming and painting the cabin. It looks like we are going to have a good weather window for painting. For some reason, the lazarette hatch still needs to be finished, I don't know why I'm dragging my feet on that chore.
Jerry
Click on picture for large view
Click here to go to the "Black (now grey!) Hole of Calcutta"
|
*************************************
December 30, 2013. Jerry sent in the following update. His comments and photos have been have included in our relevant Technical Section pages as well.
Hi Ron,
I got out to the boat for a few hours today. Not much is going on, it has been a bit chilly and of course the seasonal stuff kinda slows boat work. I decided to dry fit one of the portholes to see if there were going to be any hiccups doing that task. I'm using #8 oval head SS screws, 3/4 inch long, for the frames rather than through bolting them. I was concerned that the screw would go through or split the mahogany inner frames but that didn't happen on window #1. There are a couple of frames that are thinner so I'll have to wait to see if the project is deemed a success. Webmaster Note: Click here to go to ROWDY's portlight project page
One of the biggies today was building the saw horse for the "big lift". You know I call it a big lift but in reality its only lifting about 250 pounds of inert iron about 8 feet high, moving laterally 3-4 feet and then squeezing through the hatch and onto the engine bed. Nothing to it, in my minds eye. We will see in a day or two. I've attached a couple of photos.
Click on the pictures for larger view, click the new picture to move around; click the return arrow on your browser to get back here
The saw horse has 10 foot legs on one side and 4 foot legs on the other, the deck mounted side. The cross beam is a standard 8' stud supported by plywood gussets. The only add on I will probably use is a piece of pvc along the beam so the hoist can slide easily. Webmaster Note: Click here to go to ROWDY's page in the Technical Section dealing with her engine box and related matters
Happy New Year and keep up the outstanding work on the web site. I can't tell you how much other owners' experiences and views of their yachts have helped me shape ROWDY. Thank You!
Jerry
Webmaster Note: Jerry - Thanks for the nice words about the website, and your contributions. And Happy New Year as well
*************************************
January 6, 2014. "The BIg Lift" - the engine is now in place.
Click here to read Jerry's report and more photos
****************************************
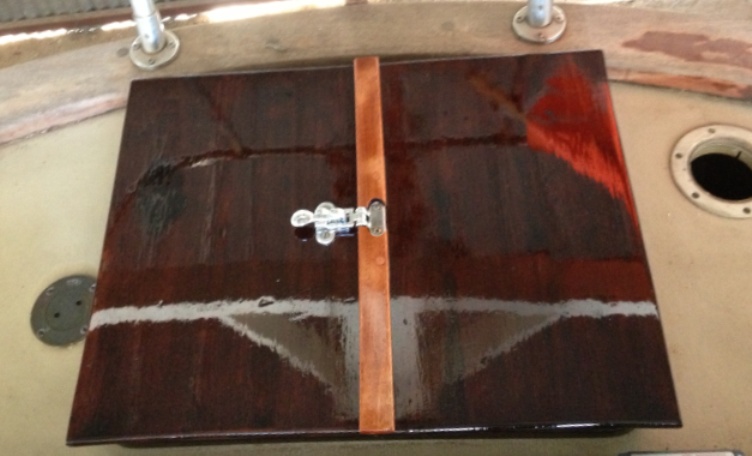
January 8, 2014. Jerry did some work on his lazarette hatch, details of which we have included in our Technical Section. Here is is email and a photo of the finished hatch (minor edits)
Hi Ron,
Well today was slow due to the cold temps. I needed to check on something at the boat and took the opportunity to dry fit the lazarette hatch. I used the hatch frame from the Bomar hatch that was on the boat when I got her. The Bomar plastic was broken in a couple of places and I just didn't like its looks but the frame was in good shape. I also had an old wood hatch I had built for another boat but had replaced for some reason. I added a rim to the old frame, cut the old hatch in two and stained ( I couldn't get rid of the big stain) and varnished the whole affair. It should do to keep some of the weather out of that aft locker. (see photo below)
I think the next order of business will be to make some main hatch boards, screens, and to remove the hand rails and main hatch slides for inspection and varnish.
Jerry
Click here to go to the Technical Section/Hatches and related
**********************************************
January 20, 2014. Here's an update from Jerry (minor edit)
Hi Ron,
I thought it was time for a progress report although there isn't much to show in pictures yet. Let's see, I pulled off the main hatch trim, the hatch slides, and the handrails. All that stuff looked pretty rough but only one piece, the main hatch, still needed to be replaced. The rest just needed some heat gun attention, sanding, staining, and varnishing. I dry fitted the hatch trim and took a photo of that.The process is currently on going.
Main hatch trim dry fitted, and a nice peek inside
 |
I attached the fuel filter and raw water strainer in place and have the water plumbed. The water comes in through the seacock, to the strainer, up to a vent, and then down to the engine. That's almost 9 feet of hose in such a small space. I'm currently using the fuel hose, from the tank to the filter, that was in the boat. It's a little long but I'll use some exotic routing to take up the slack. I just need a 90 degree hose barb out of the filter to complete the fuel system.
Here's a shot of the strainer and fuel filter. You may notice that that stuff is just inside the port side engine box hatch, very convenient for servicing and I still have a little room for servicing the oil filter and coolant.
Click on the picture at left for a larger view. Click on the larger view to move around inside the Grey Hole of Calcutta. Click the return arrow on your browser to get back here.
|
January 22, 2014 postscript - FYI, I primed and painted the first coat of finish on ROWDY's cabin sides. One or two more coats and then the cabin top will be painted. The trim is just about ready but several more coats of varnish are needed. It will not be too much longer till a bottom job will be needed.
For Christmas I got a set of plans for a Shellback tender, from the WoodenBoat store. I'll have to make a trip to Houston to get some marine ply and a few more boatie things
Jerry
***************************************************
February 5, 2014. Update - emails consolidated and minor edits
Hi Ron,
I finally finished staining and varnishing the handrails and hatch slides for ROWDY. I took the parts over to the boat and dry fitted them. I think they will do, with the usual caveat, "don't look too closely". The hatches are at home for repair and paint, and I want to mount a solar vent in the fore hatch so a hole needs to be cut. The attached photos are a bit premature considering nothing is fastened yet but they do give an indication of how things will look soon.
Click on the images for a larger view, click the return arow on your browser to get back here
For stain I'm using Minwax's red mahogany and for varnish Helmsman's spar urethane also by Minwax, all from Home Depot. Over the years I've tried just about everything on brightwork and have decided to let cost play a role. A quart of Helmsman is about $16, and you know what the other "marine" varnishes cost. Time will tell if I was just being a "foolish old man" or "wise beyond my years"
|
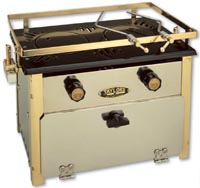
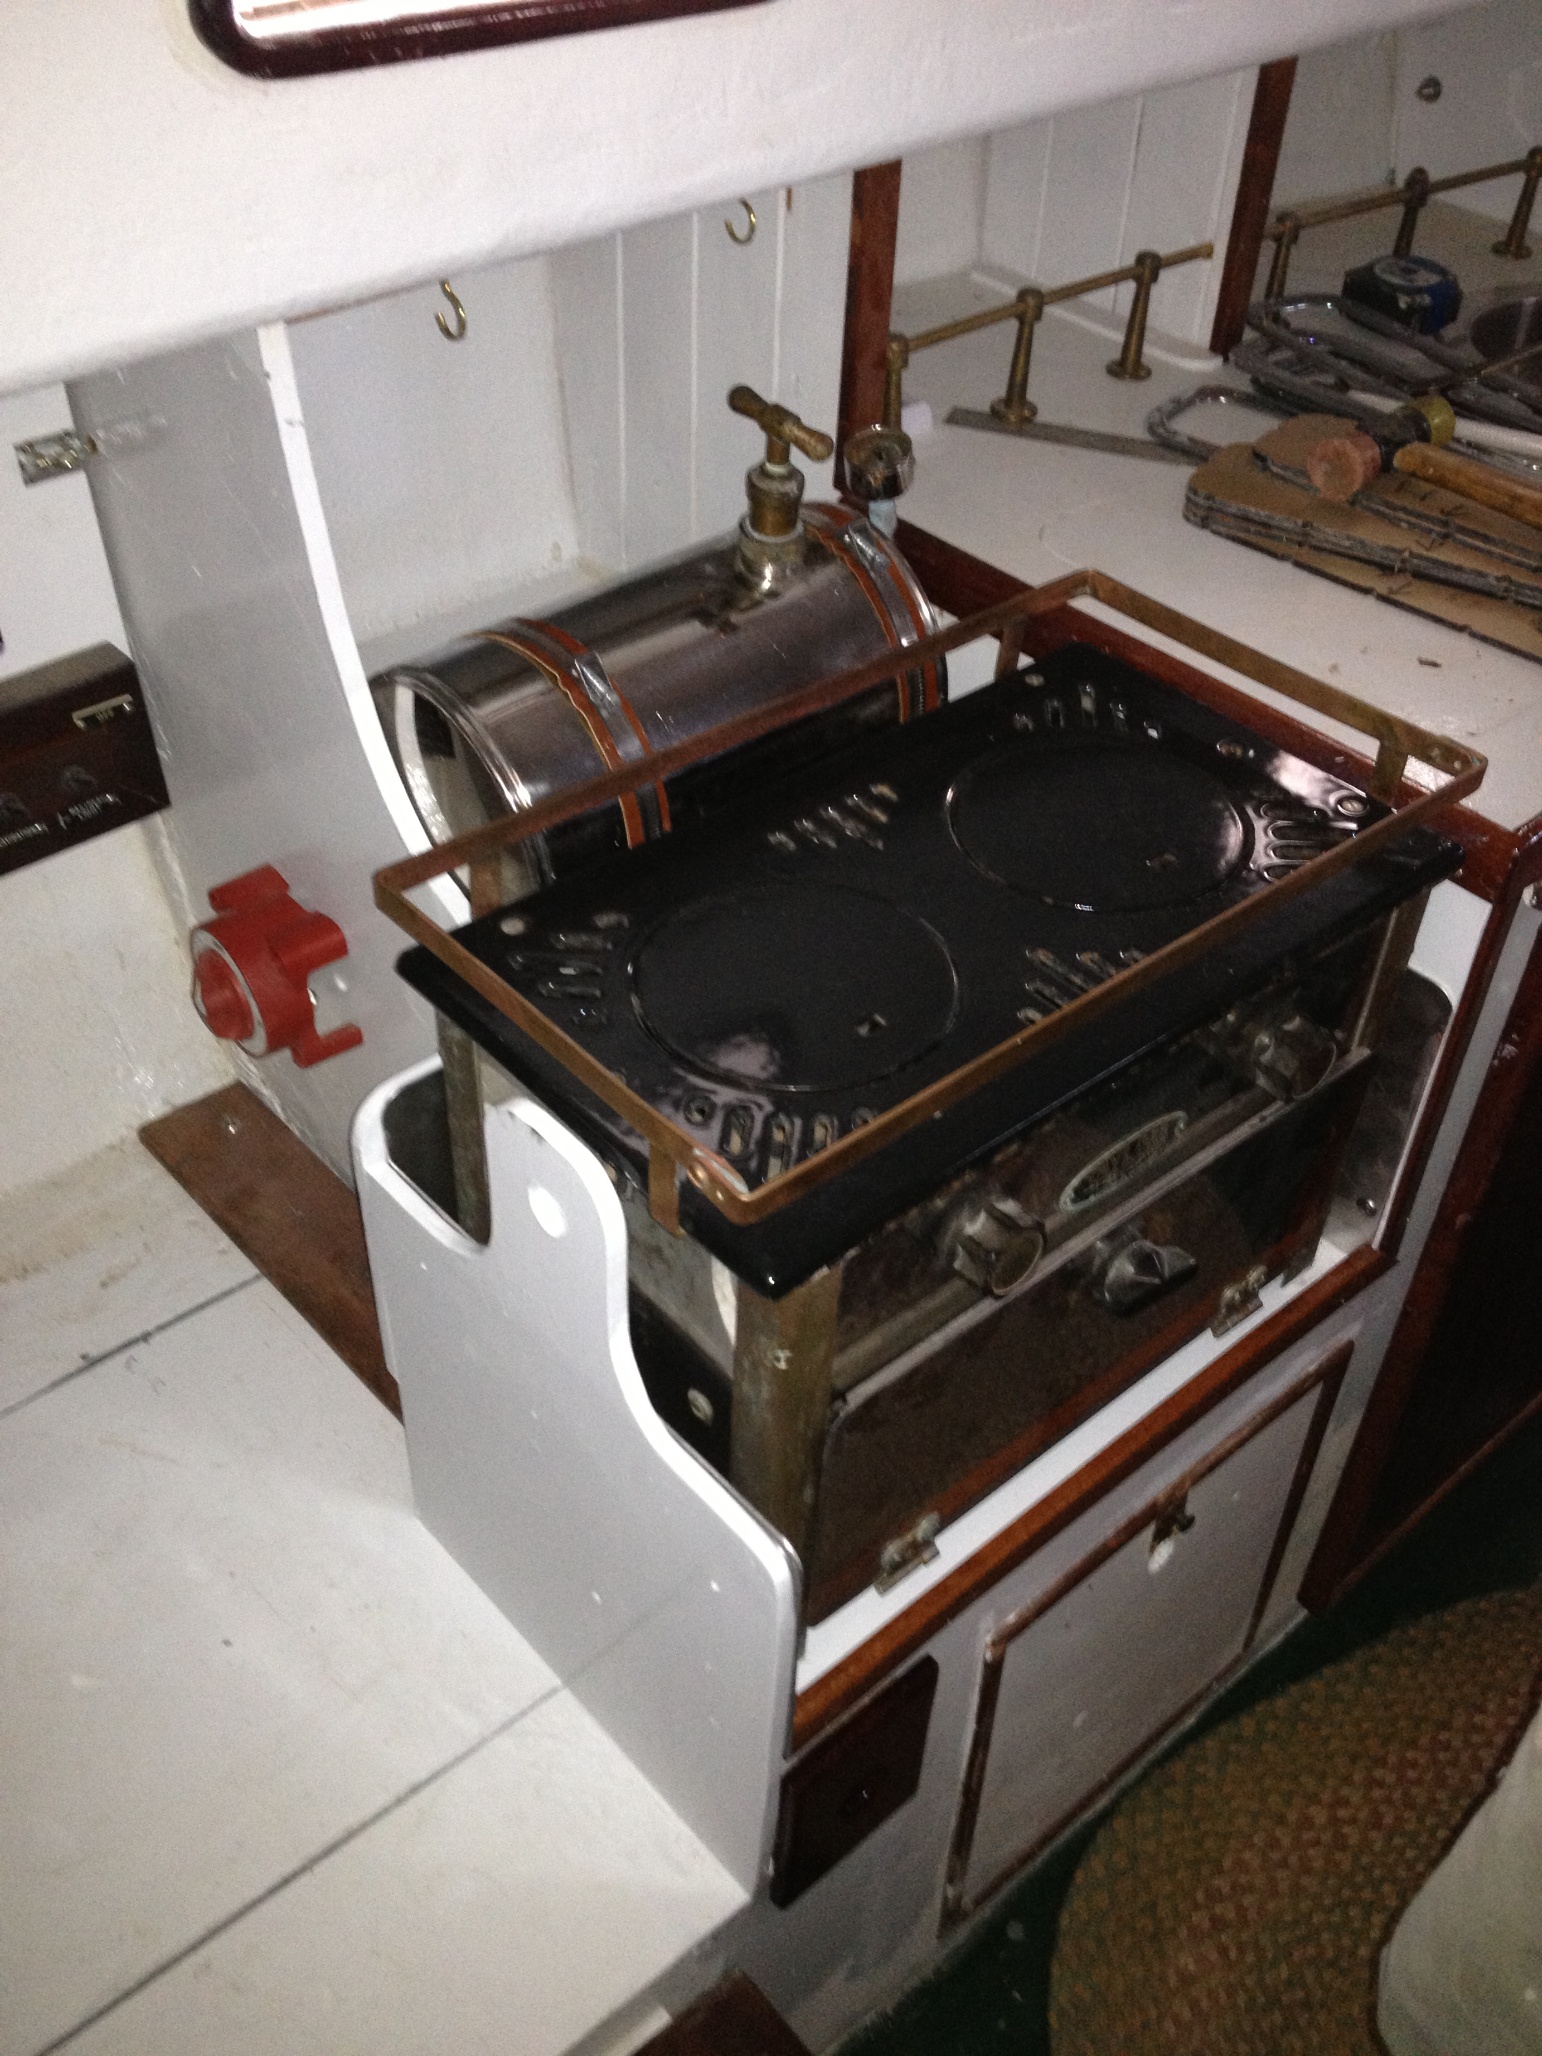
I've decided to make a major change to the stove platform. I've had a Taylor 029 stove sitting in my garage for years and I think it would do well in ROWDY. The thing I like about it is the small oven so you can make cookies or biscuits on a frosty foggy day at anchor.
Unfortunately it is 18" wide and the stove platform is 13". I'll build a cubby hole for it that will extend 5" +/- into the port side bunk space. My plans now are to use that bunk area for storage and the starboard side for sleeping, when necessary.
I'll let you know when I start chopping up the galley.
Jerry
Photo at left from http://www.blakes-lavac-taylors.co.uk/taylors_029.htm
|
************************************
February 14, 2014. We got the following update from Jerry (minor edits)
Hi Ron,
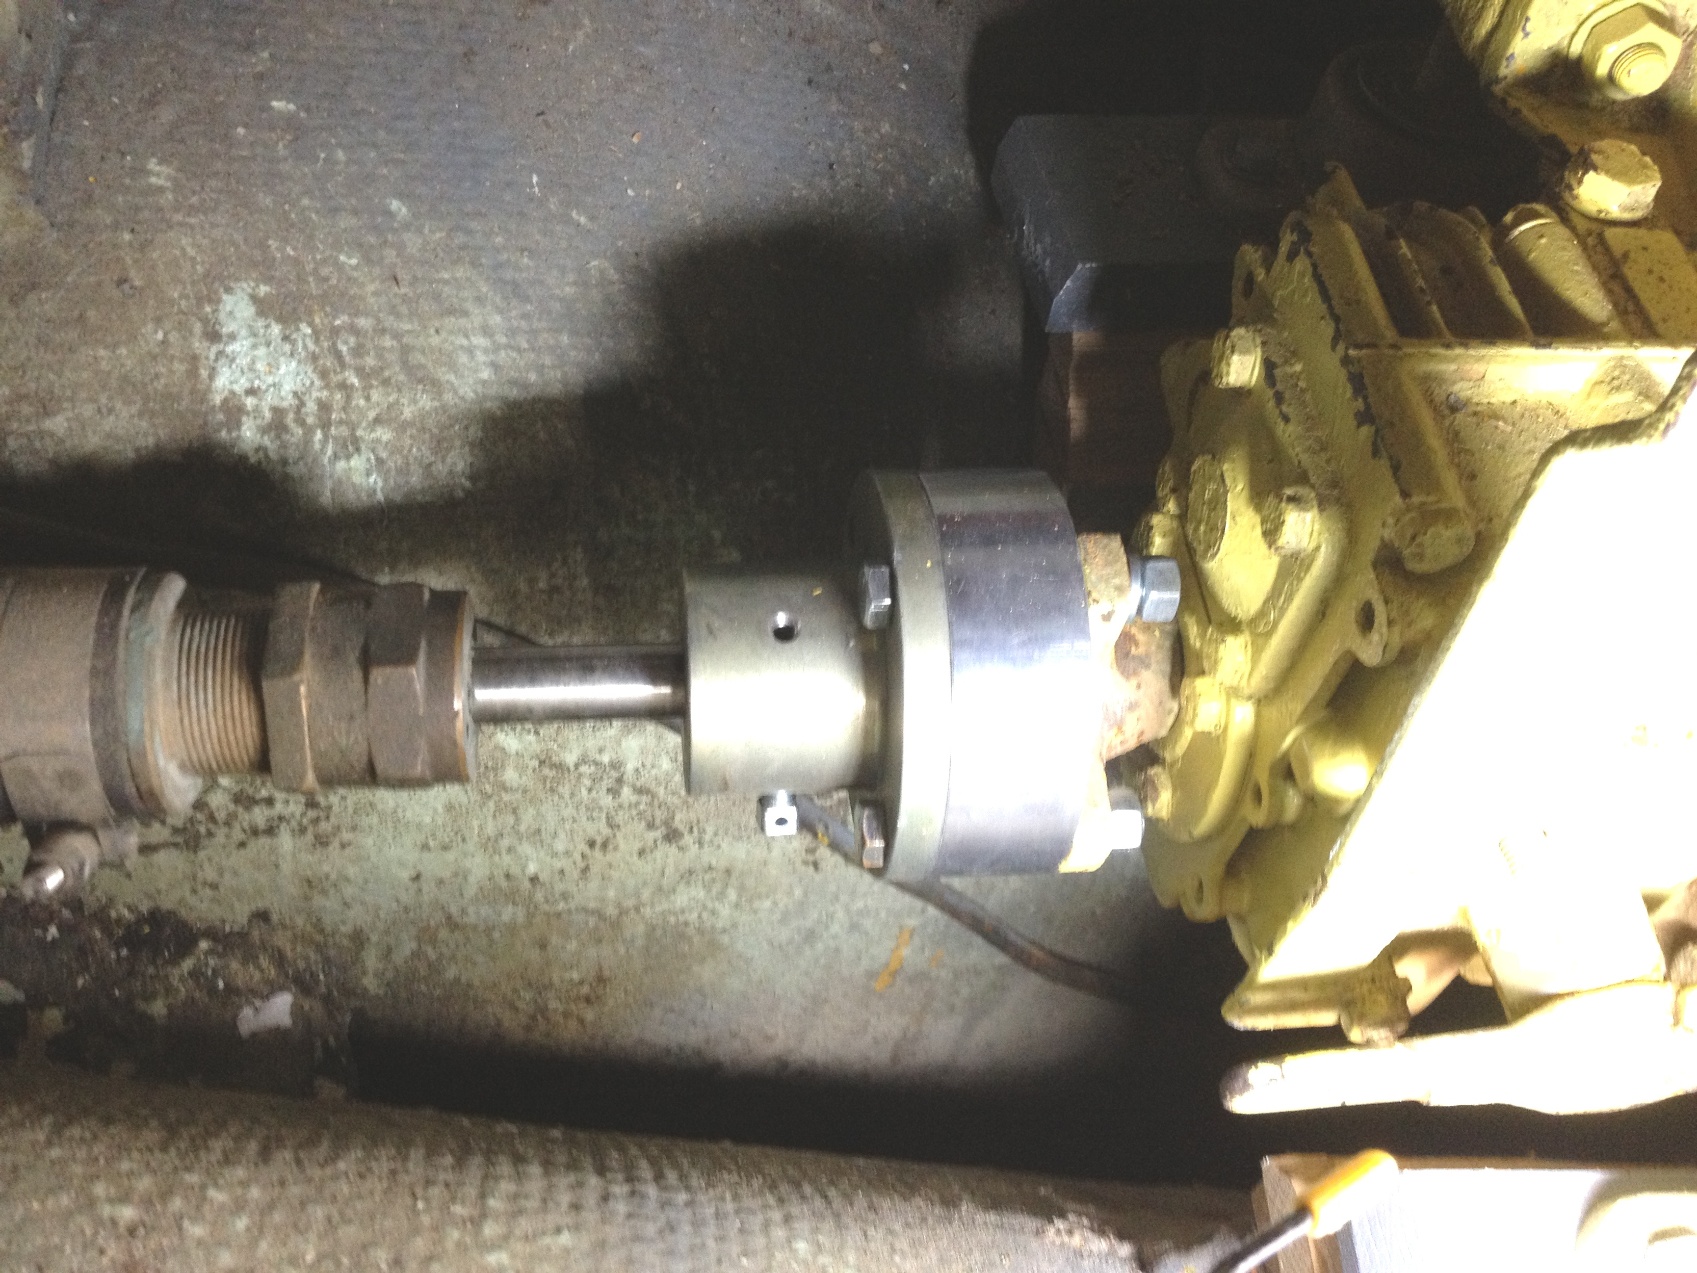
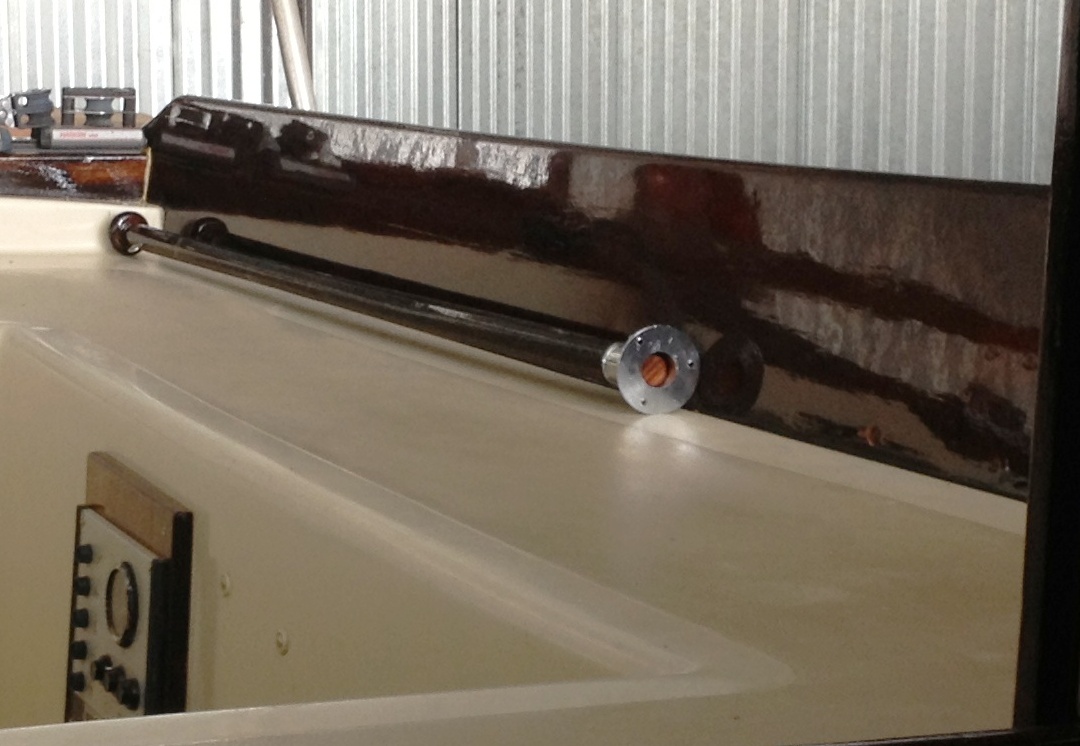
It has been a busy couple of days. When I put the engine into ROWDY, I placed it where it would fit around seacocks and the muffler. This made the existing prop shaft 1 1/4 inches too short. Rather than replace the shaft , which was in good condition, I decided to make a flange spacer to make up the difference. My machine shop turned out a beautiful spacer made out of aircraft aluminum. I'll get a photo when I do the linkup.
|
|
I finished the main hatch boards and bedded the main hatch slides. So far things are fitting the way they should, no hiccups yet.
By the way, my main and fore hatch are fiberglass, not wood, so I'm just fairing and painting them. The companionway boards are wood.
|
I took the saw to the stove platform and got the new platform roughed in. I still need some insulation to keep the heat under control and I think Bed Bath and Beyond may have what I need. Since the stove took over the space previously holding a drawer, the drawer will have to be relocated, probably to the other side of the cabin.
|
To follow ROWDY's galley project in detail and see more photos, click here. Click the return arrow on your browser to get back here
The machine shop is finishing up my hinged mast step so I should have that this week. Hand rail bedding is next and I'll be finishing the hatches. . My cowl vents are ready for mounting so a bit of hole drilling is in my future. Finally, I made the cut out for the engine instrument panel. I'll mount the panel when the frame varnish is dry.
Jerry
***********************************************
February 24, 2014. We got the following update from Jerry (minor edits)
|
Hi Ron,
I finally got the new stove platform finished. I found some cookie sheets at Bed Bath and Beyond and cut them up to insulate the stove area. I also decided to put the fuel tank right behind the stove rather in the v berth or behind the stove in the coffee pot locker.
You may notice a small drawer just under the stove, the varnished square at the upper left corner is the new small stuff drawer.. That was a hole I needed to fill, not part of some grand scheme. The drawer will hold a lighter and other stovie stuff. The drawer that was there has been relocated across the cabin and placed next to the head. The locker that was there still is, you just have to pull the drawer open to access it.
Finally I made a small cutting board/serving board that fits on top of the stove. We will see how that holds up when some serious lime cutting takes place.
|
|

Click on the photos for a larger view
These photos and text also included in the Technical Section article dealing with Rowdy's galley. Click here to go there
|
I cut the hole for the starboard cowl vent and fastened the two cowls in place. The trained eye may notice that the starboard cowl is one (1) inch taller than the port one, but I had to go with what I had at hand.
Click on the pictures for a large view
The lazarette is now bedded and attached. I still have the spring lifts to attach when I figure out where to put them. The instrument panel is attached and a new starter button has been installed, but not yet tested.
I mentioned that the prop shaft spacer is ready to attach and I will go ahead and show a few pictures of it (shiny metal is sure pretty!).
Click the photos for larger images
Next on the agenda is to get the port holes bedded and attached and search for paint for the topsides. I'm still debating whether I want to stain the coamings and toe rail or just varnish them.
Jerry
******************************************
March 3, 2014. No rest for the weary. Here Jerry's update.
For more photos click here to go to the portlights page
|
Hi Ron,
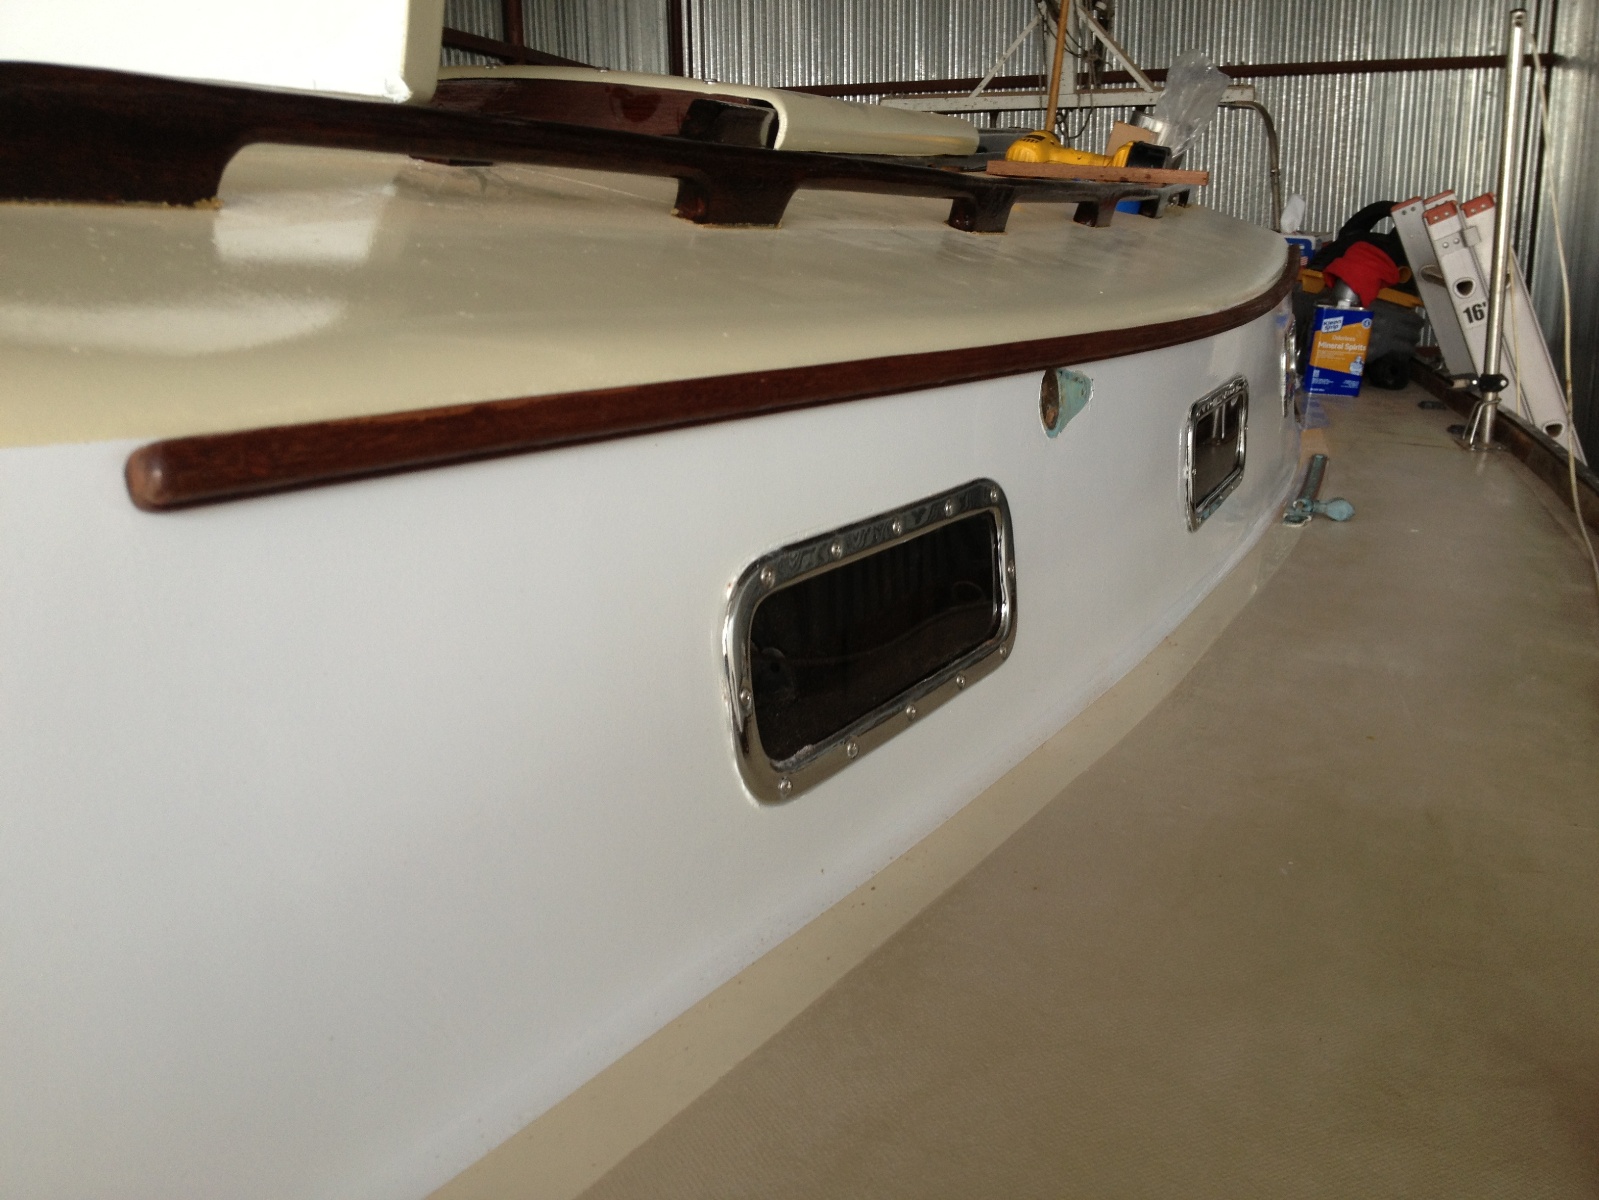
Well I finally got around to putting the glass and porthole frames back on ROWDY. I also got the prop shaft back in the boat and would have gotten it hooked up but a cold front blew through around midday and the temp dropped like a rock and I, as hardy as I am, scampered home where it was warm.
I took some photos of the portholes but realized that ROWDY is in a corrugated metal shed and the corrugations reflect in the chrome plating, making the photos look a little strange.
After hooking up the prop shaft, I will be working on the toe rails and topside prep, and I am still waiting for my mast step. I did check in with the machine shop and got to see the mast step in process. The guy is creating a fine piece of jewelry so I will not push him.
Jerry
|
************************************************
March 4, 2014. Jerry has been in a discussion with Bill Thomas (Ruby #4) about eyebrows. We have it in our Technical Section. Click here to go to it.
******************************
March 11, 2014. Jerry sent in the following update (minor edits). The updates have been included in the applicable Technical Section pages.
Hi Ron,
For the last couple of days I have been spending a lot of time fishing things out of my bilge. For one, a much needed socket wrench, a crescent wrench, a couple of critical (short supply) nuts, and a lock washer or two. Aside from that, I did get a couple of jobs done.
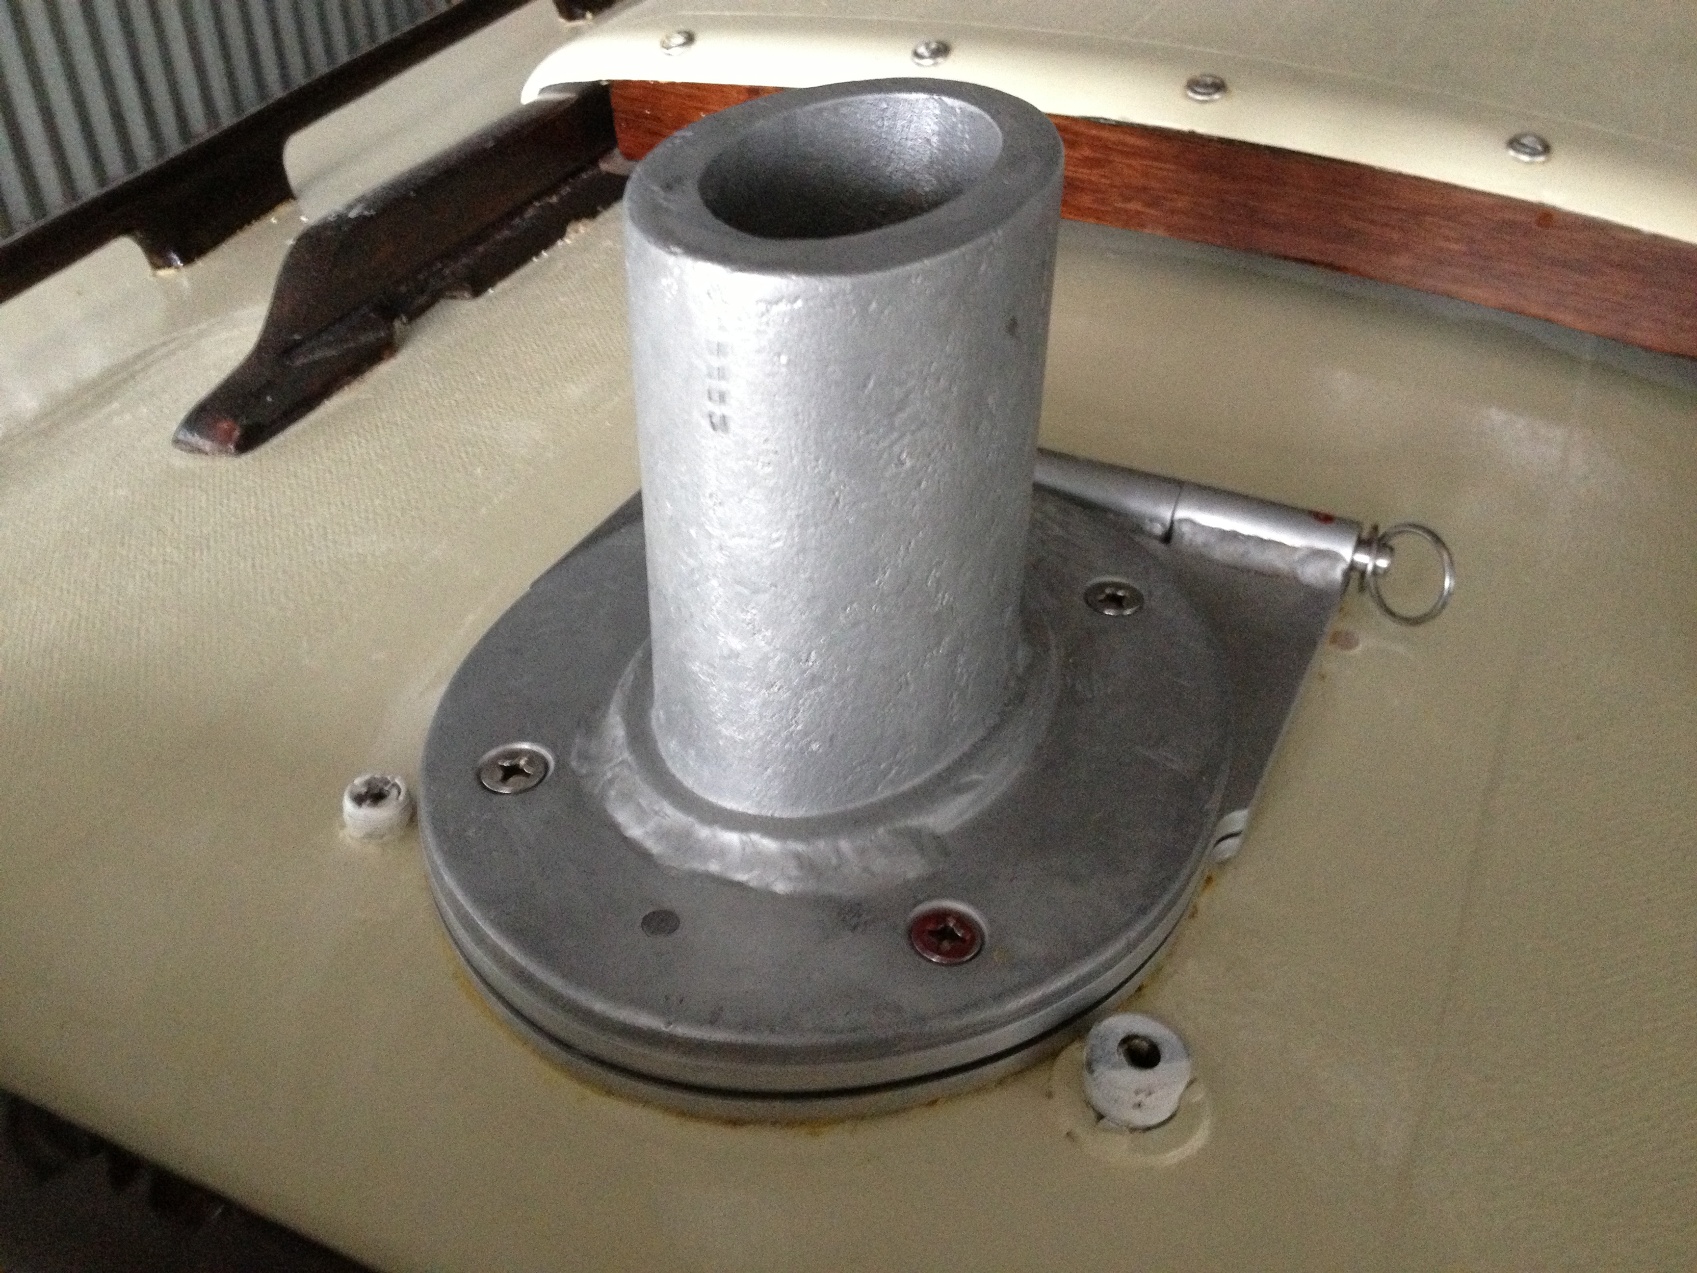
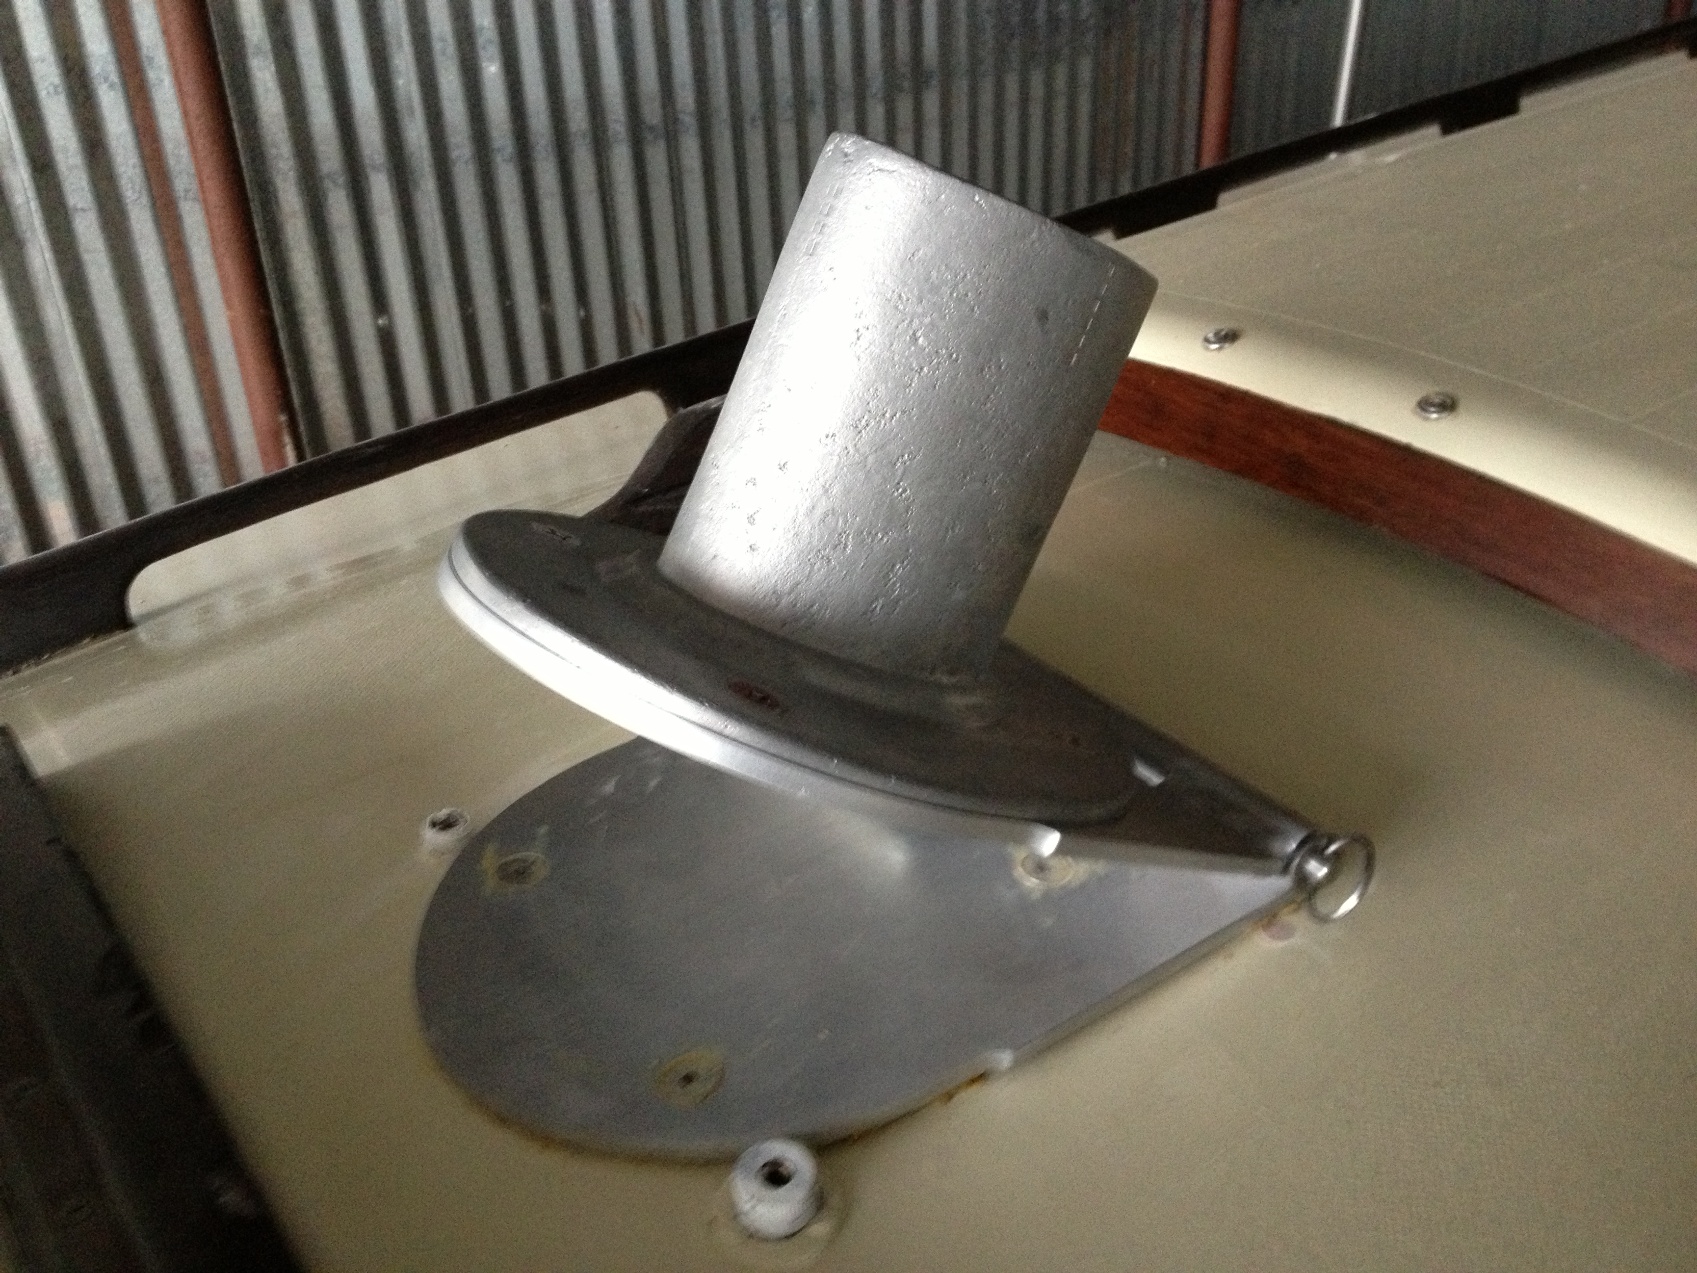
The mast hinge plate/step is attached. I've included a couple of photos.
Click on the photos above for a large view (click here to go to Mast Tabernacles/Hinges in the Technical Section)
The bottom plate, 1/4 inch aluminum, is bolted to the cabin top and pinned to the top plate which is screw attached to the old mast fitting. This set up is very similar to that of Yankee #81, AEYLA MAKAIRA. The mast fitting was pretty beat up by the boat yard when they were trying to de-rig her in New York. Also, the casting was fairly rough. The machine shop did some welding and then built up and faired the base so it would sit flat on the hinge plate.
I finished plumbing the stove fuel system. I'll probably do a test run this week. I've had to order a fuel gauge and a couple of pump spare parts from the manufacturer in England. They should be here in a couple of weeks.
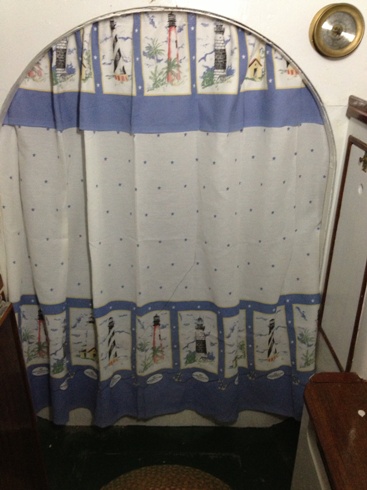
The curtain is in.
I used an aluminum rod (3/8") and made a couple of wood end blocks to hold it up. The tie back has a couple of braided marline(nautical) loops to hook onto a brass cup hook that keeps the curtain out of the way during the day. (click here to go to ROWDY's V-Verth)
|
Let's see, oh yea, the prop shaft is attached.
You wouldn't believe the contortions required to get that thing hooked up, including bilge diving. Every part of me, except the soles of my feet, is sore.
Jerry
Click on the photo at left for a larger view |
***************************
March 19, 2014. Update
Hi Ron,
Seems that I worked hard over the weekend, but I don't have much to show for it. That's probably due to all the conceptualizing that went on for future projects.
|
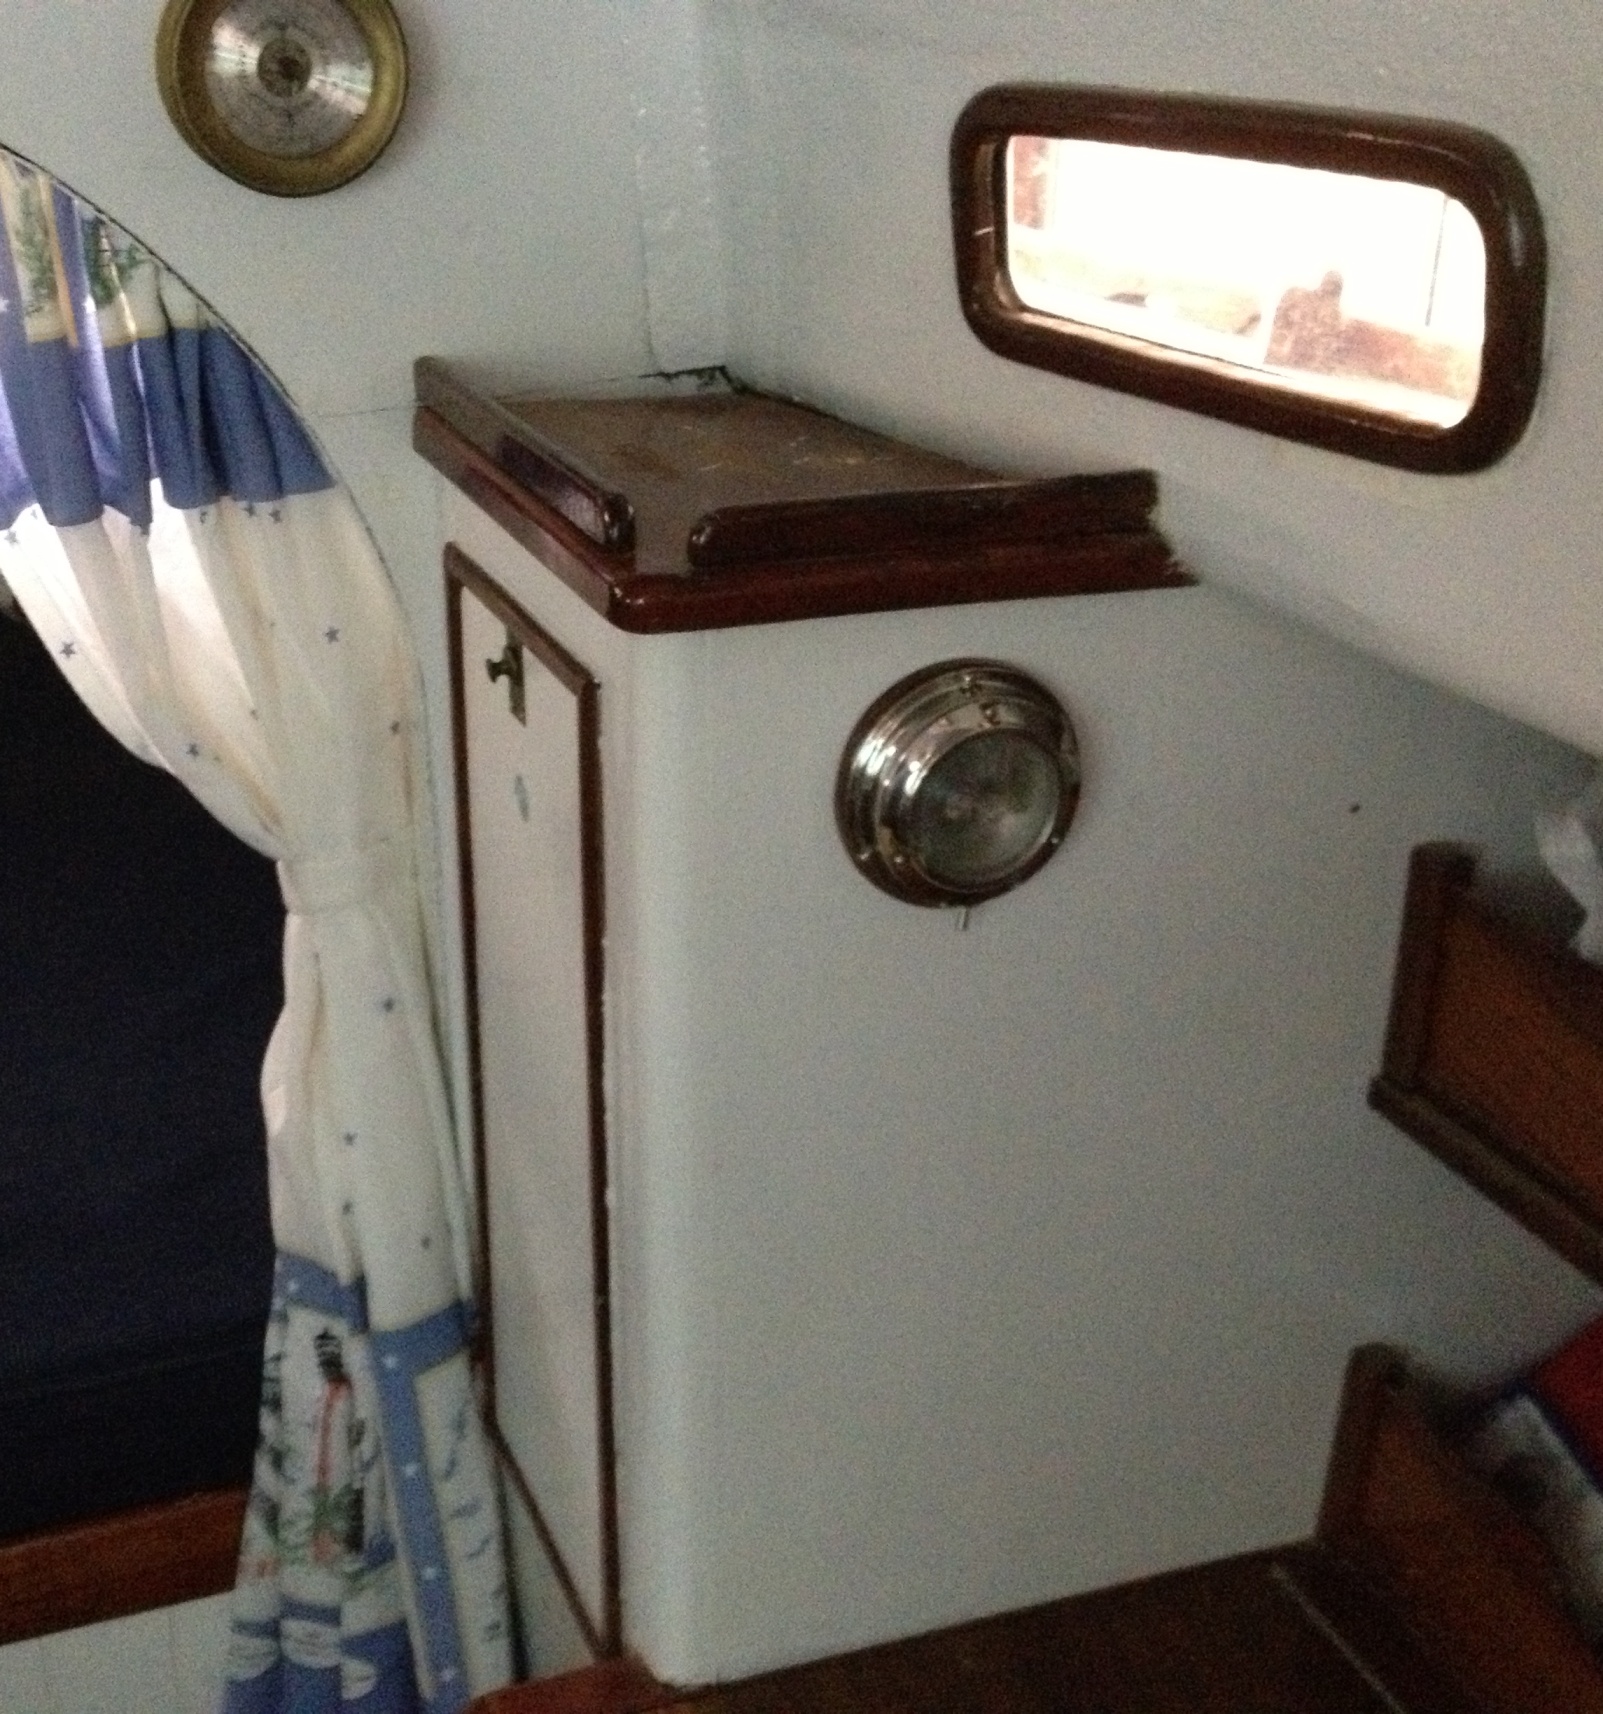
I had three light fixtures I wanted to mount so I cut some mahogany pads, put on a little varnish and placed the lights, one in the v-berth, one in the main cabin (at left), and one in the quarter berth, all on the starboard side of the boat.
I'll put at least one more in the electric panel area that is located in the port side quarter berth. Other than rough wiring, nothing is hooked up yet.
One day soon I'll do nothing but electric hook ups and beer drinking.
Click on picture for a larger view - click the retrn arrow on your browser to get back here
|
|
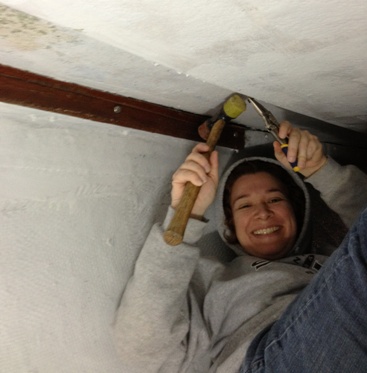
I talked my daughter into helping me with one of my dismantling projects. I had been thinking about rehabbing my cockpit coamings, which are a mess. It looks like some oil or gas got on and stained the wood along the cockpit seat, plus the old stain and varnish was looking terrible.
|
I remember seeing the trim wood that Bill Thomas had pulled off RUBY and his coamings looked like they had come off pretty clean (non destructive) so I looked around and saw just a row of bolts and six screws holding the coamings in place. Now this is where the daughter comes in, of coarse if one doesn't have an agreeable daughter (photo above left of same with appropriate tools attached), a son, friend, or hired hand will also do nicely. We removed the nuts and bolts and off popped the coamings. Bringing those things back from the edge will take some doing, but what else do I have to occupy my time?
Lastly, I fired up my stove and both burners work! I don't know why the stove looks so rough in close up photos, I guess it's one more of those things you just don't want to stand too close too.
Jerry
**********************************
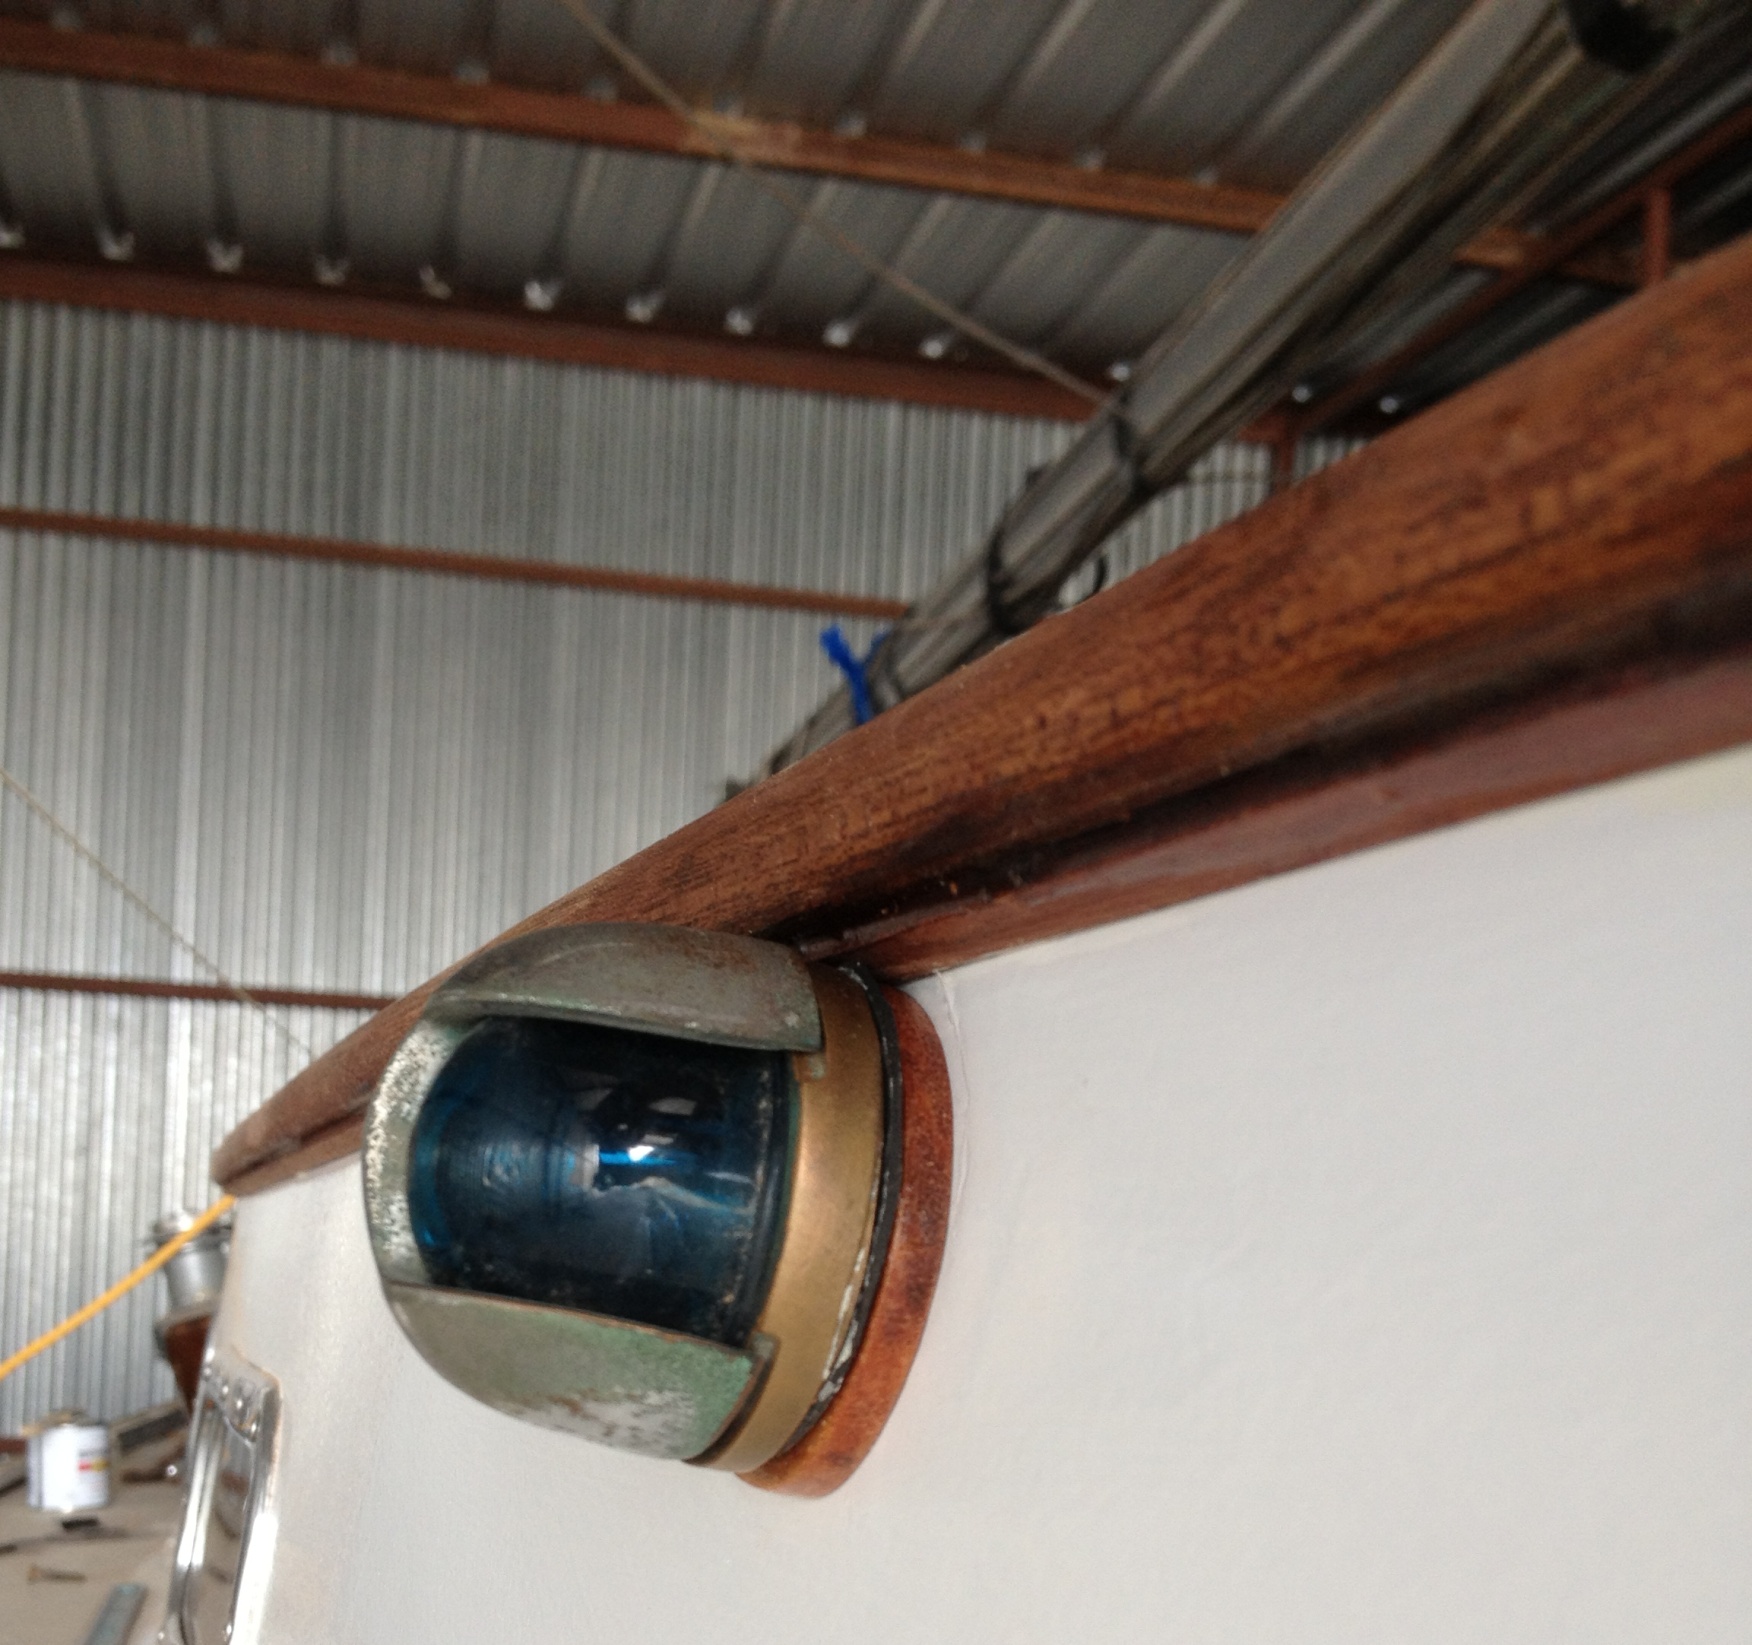
April 7, 2014. We got the following update from Jerry (minor edit). The applicable part about eyebrows is also included in the Technical Section page on eyebrows. Click here to go there.
Hi Ron,
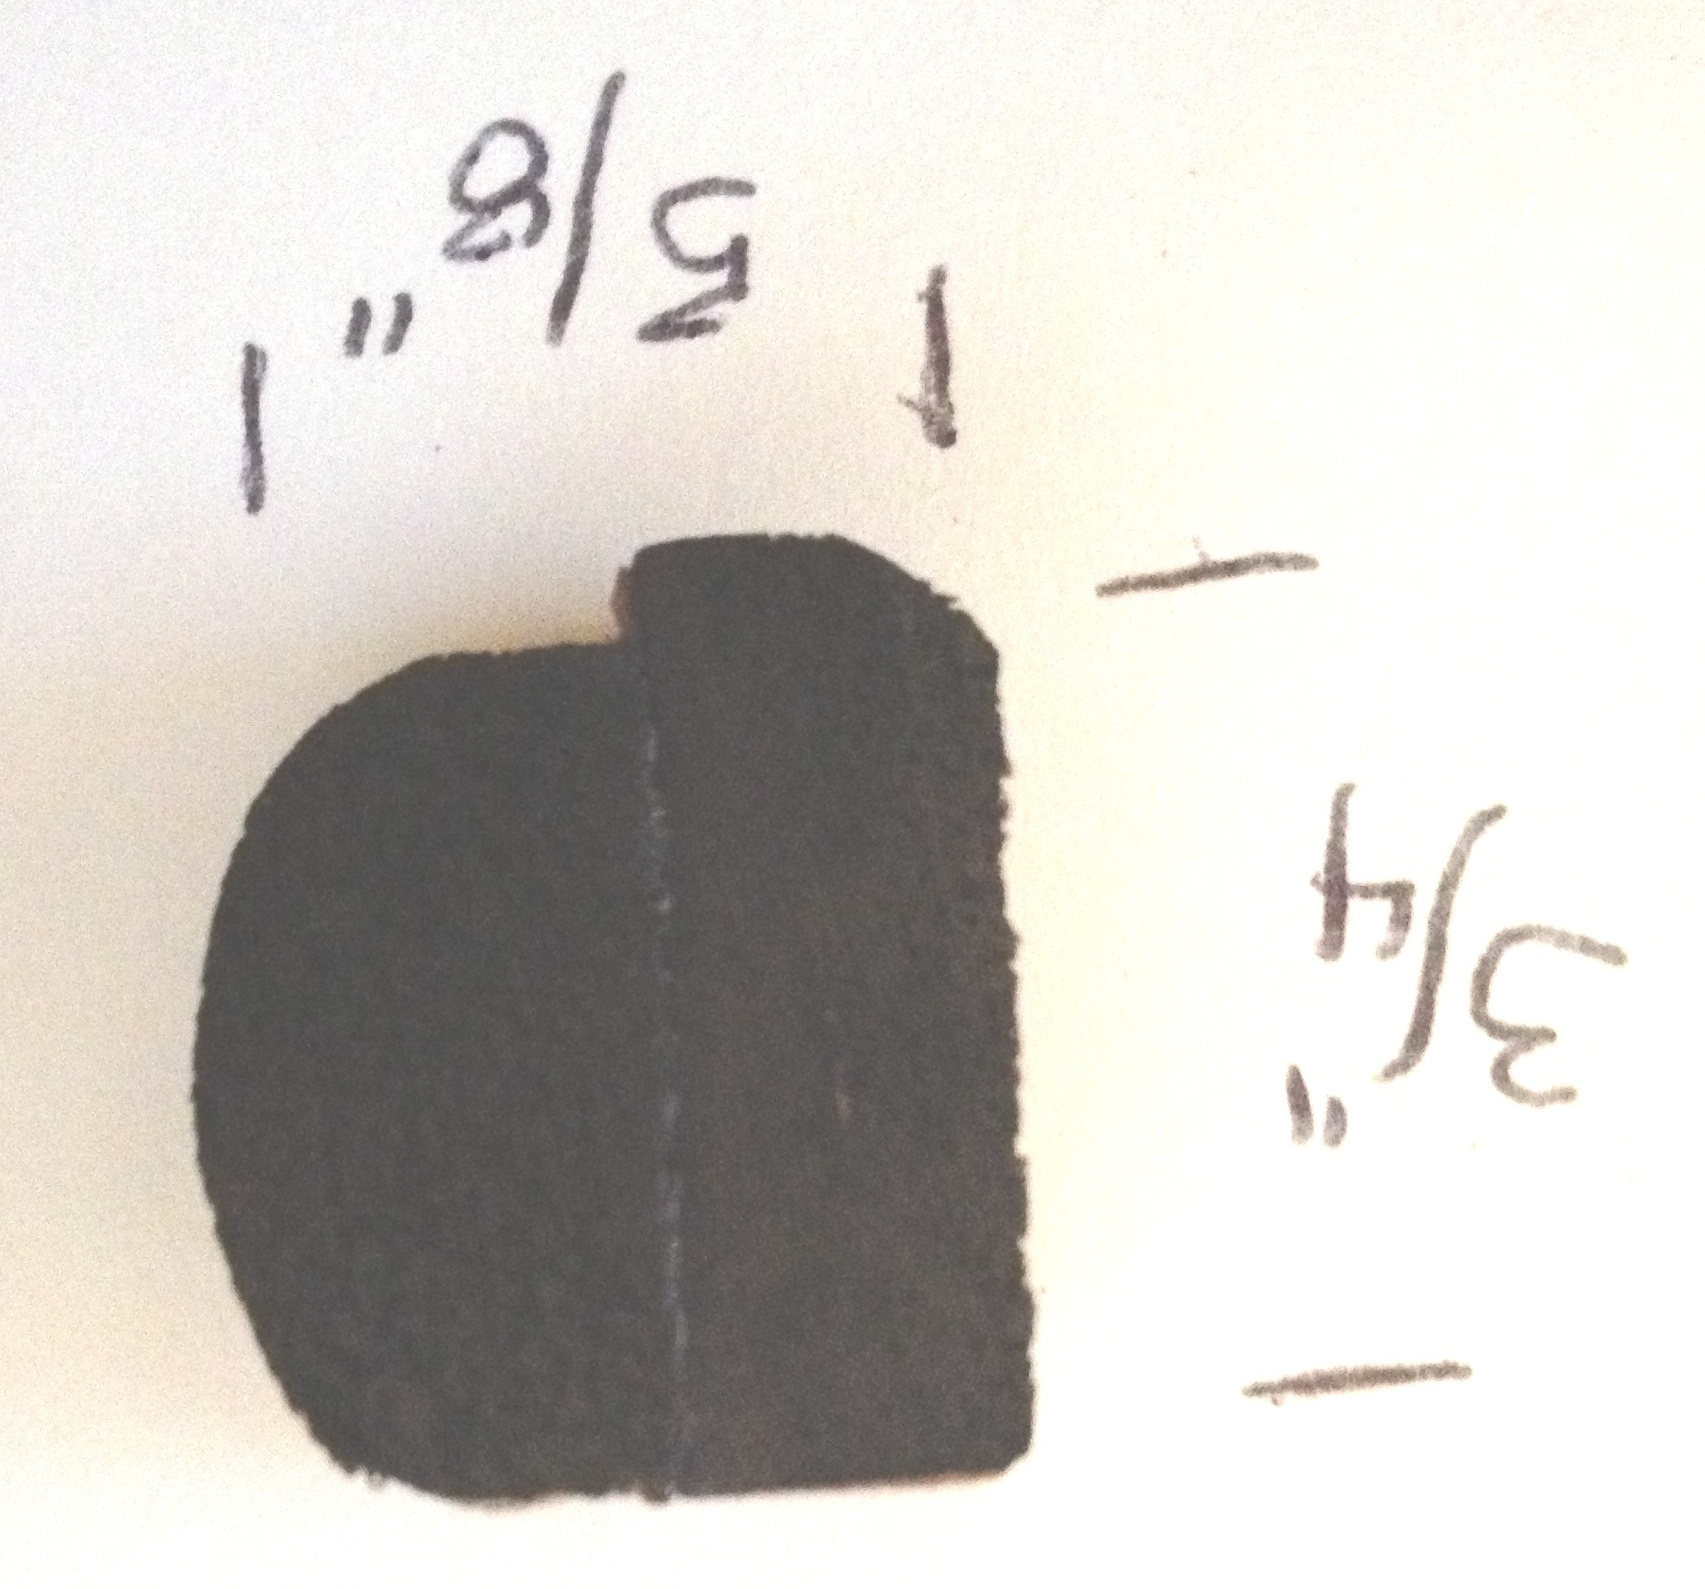
Well ROWDY now has a new set of eyebrows, only lacking a little mascara.
Click on the images above for a larger view
I decided to go with a 3/4 inch design which should be easier to trim out for the side lights. The profile consists of a piece of 3/4" X 1/4" flat stock and a 3/4" half round, with both edges knocked off with a plane, glued to it (see attached photo). I wanted to get a small drip edge on the molding to keep some water from wicking up behind it. I only bedded the fastener locations, located every 12 inches, rather than the whole 103" of eyebrow. I always make a mess when working with bedding and long pieces of trim.
The cockpit coamings have been getting a bunch of varnish and should be ready to re-attach this week. I'm still working on the traveler track base and it should be ready in 5-6 days.My paint arrived this week and I have sanded the transom in anticipation of applying the primer. I ordered ROWDY's name and hailing port. It should be ready this week and I'll take a photo when the name is attached.I've decided to pull the lifeline stanchions for rebidding and perhaps redesigning the backing blocks. I'm a little confused over the way the stanchions are attached so we will see what they (the prior owner) had in mind when I dismantle their work.I've attached a few photos but we will not be able to get a good shot of the eyebrows till I move the boat to the coast.. As always, I appreciate the good work you do on this web site, please keep it up.
Jerry
***************************************
April 14, 2014. We got the following update from Jerry. His comments re ROWDY's coamings both above and below are consolidated in our Technical Section (click here to go there), and his comments re her trailer are also included in the Technical Section/Trailers (click here to go there)
Hi Ron,
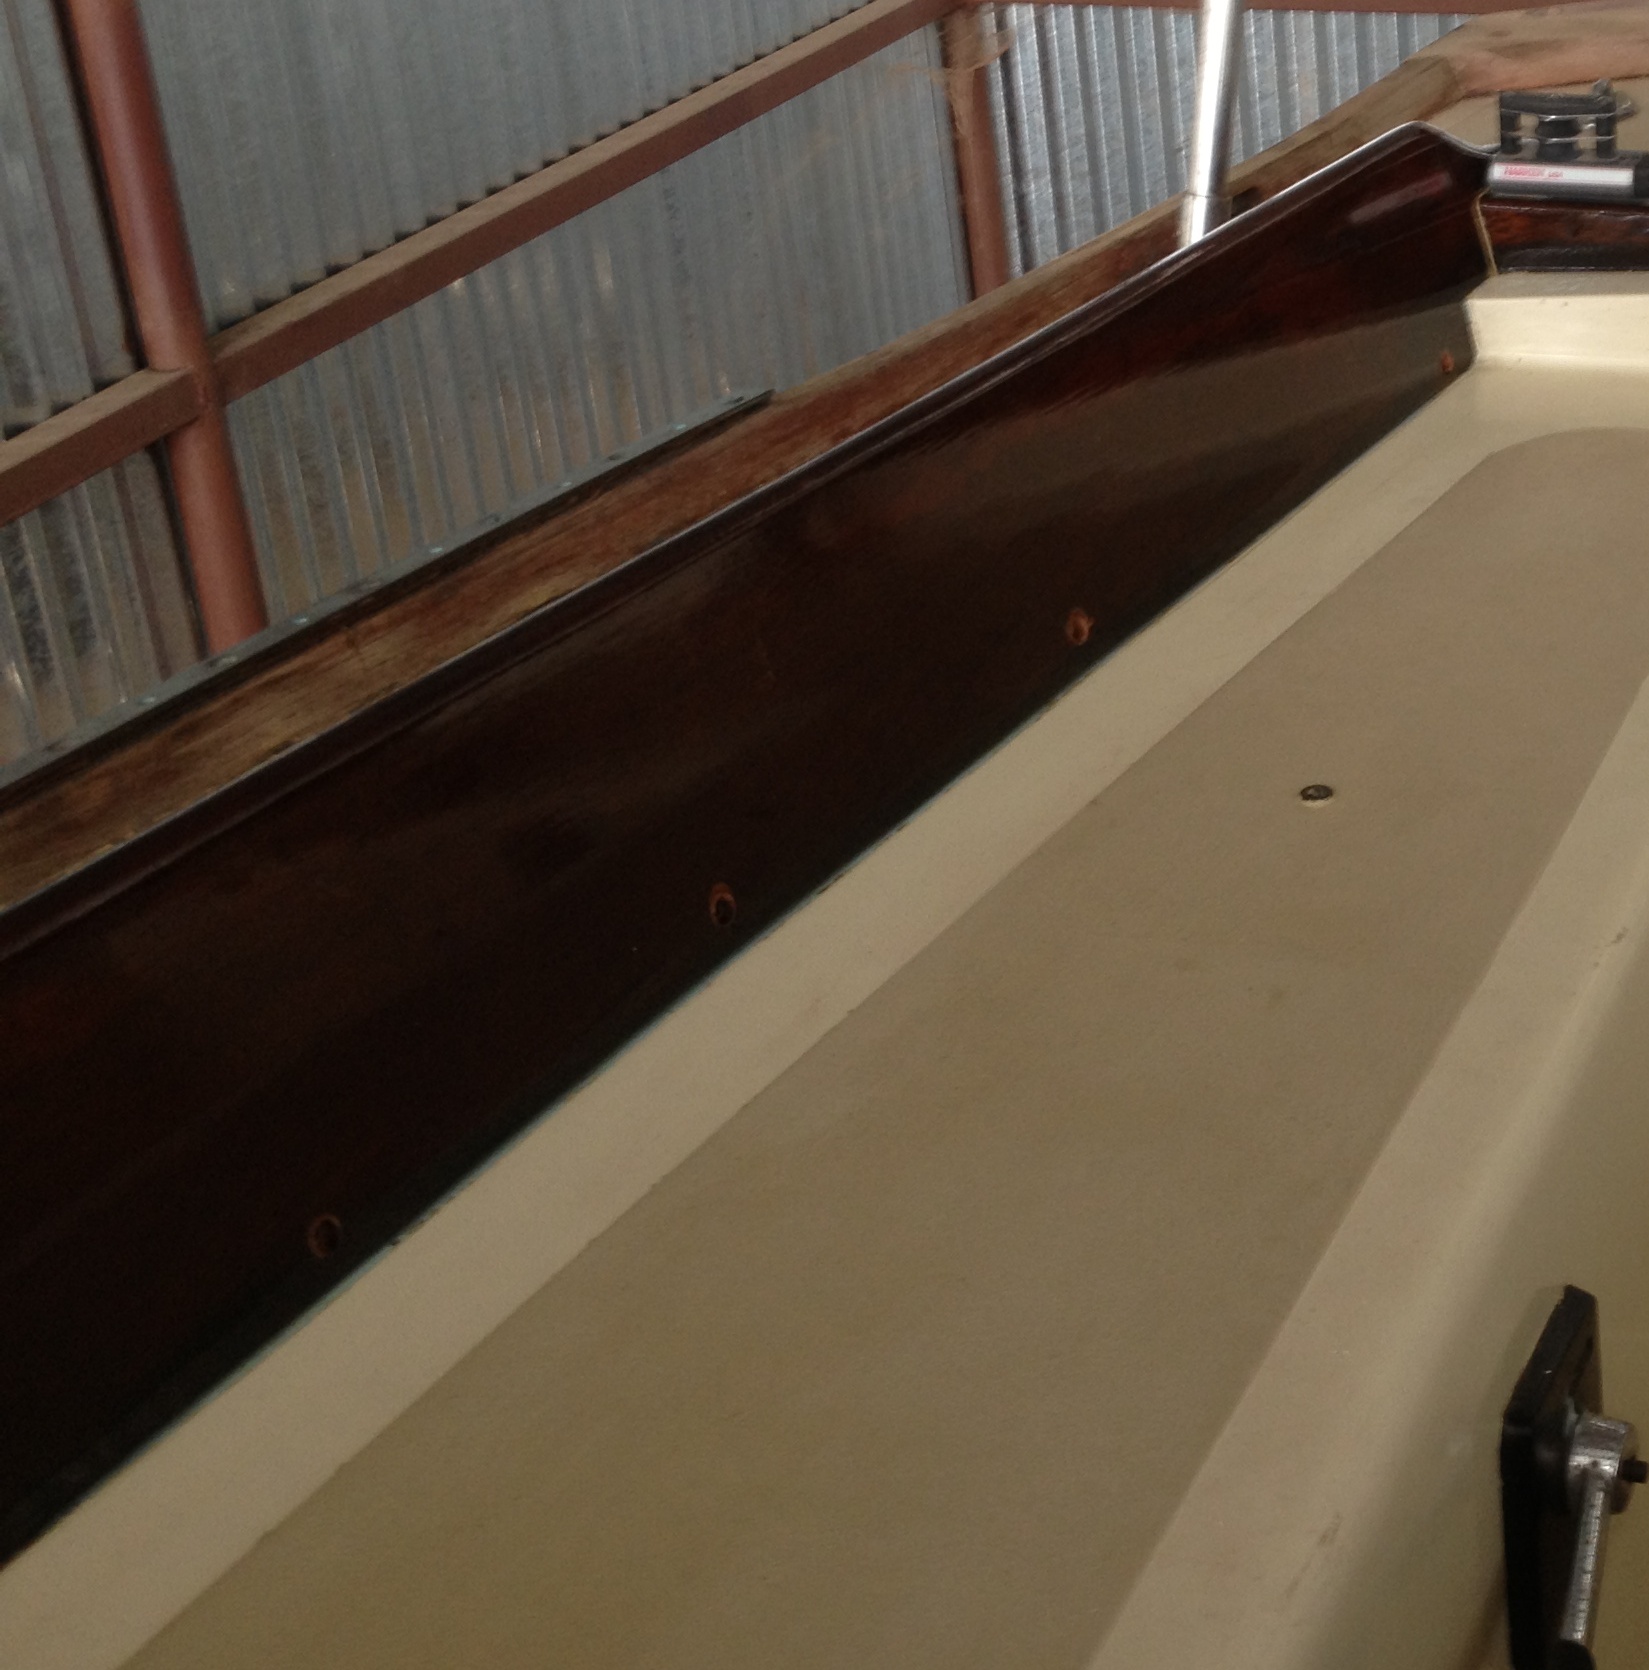
I finally got the cockpit coamings and traveler base varnished and mounted on the boat. The whole process went much smoother than I anticipated.
|

Click on the photos for a larger view -
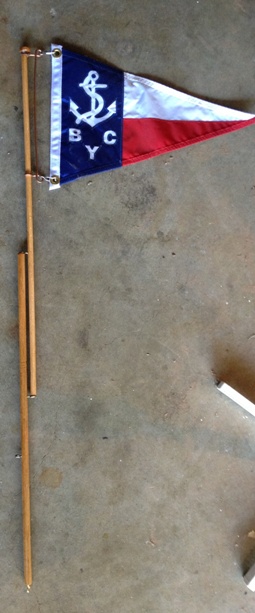
and note the flag staff laying on the cockpit seat above |
I made a few modifications to my trailer, specifically the bow roller was attached and my winch roller was lowered so a strap could be attached to the bow cleat for those times when I will trailer launch and recover.I tried to jack the boat back straight onto the trailer but wasn't too successful. I mentioned that during my road trip, from New York, the boat moved on the keel skid. I wanted everything lined up before the next road trip. I think one more jack and a pry bar will do the trick.
I've about decided to replace the toe rails on ROWDY. Since she will be spending time in the weather and she leaked like a sieve around her rail fasteners I think I'll just cut off the old rail and mount some new ones and bed the hull deck joint real well. This will also be the time to eliminate any scarfs in the rail. My plan is to glue up a solid rail, bow to stern, thereby cutting down on the number of fasteners and possible leak sources. I'll let you know how that process goes.
Jerry
**********************************
 |
April 28, 2014. We've got 2 related reports from Jerry - one an interchange/discussion with Bill Thomas (Ruby, #4) on bedding materials (click here to go there).
The other reports is on ROWDY's new Toe Rail project (click here to go there).

These photos, above and at left, will get the interest of early Marscot/O'Day boat owners
****************************
|
May 27, 2014. ROWDY continued....(minor edits)
Hi Ron,
I have been progressing, slowly, on Rowdy. Nothing much to be shown in photos yet but we are closing in on the final show-off. After pulling off the starboard toe rail, I stopped being destructive and went inside to hook up the electrics. I grabbed a Zagen Bock, a bag of Fretos and went to work.
Most of the wires are run down the starboard side of the boat because of the ease of getting to bulkheads and low areas where the wires could be run without being obtrusive.
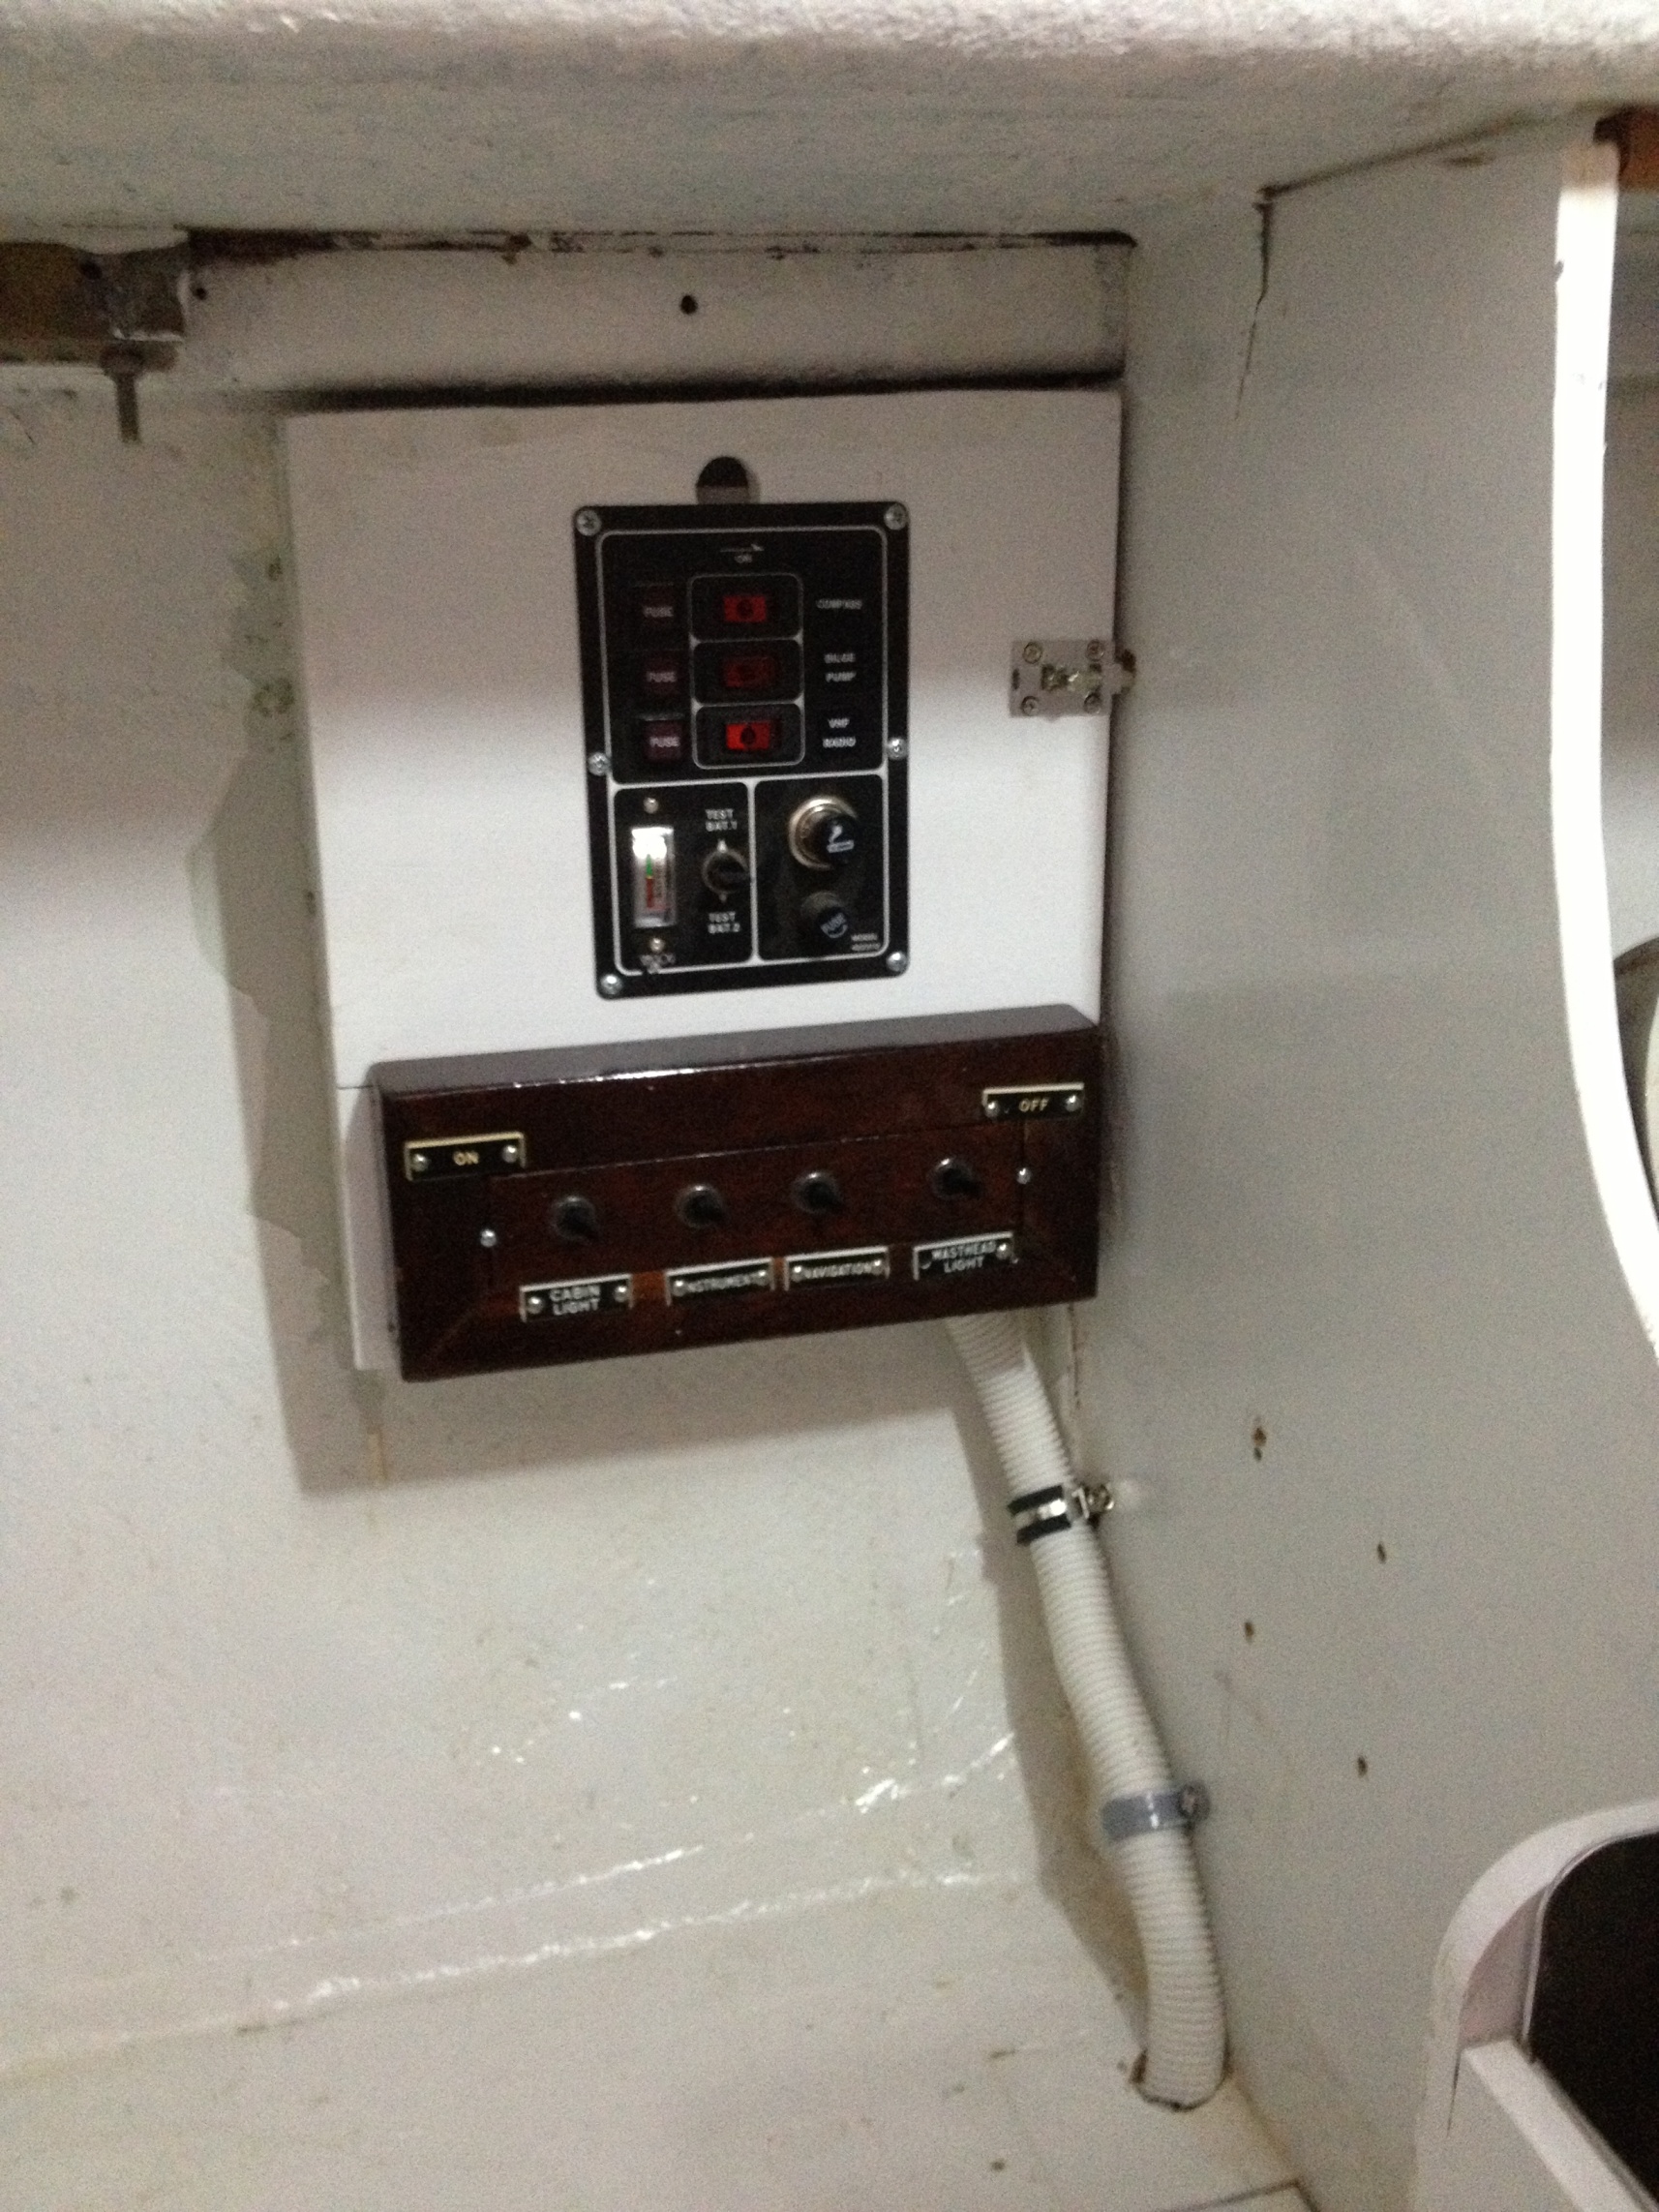
The interior lights(3) wires were all terminated at a buss block and a single wire run was made from the buss to the switch panel, which is on the port side of the boat.
I'll have two batteries, one under each of the quarter berths. All the wire runs were made through the engine box, and although not ideal it was convenient. The main selector switch was moved from the area of the switch panel to the engine enclosure just beside the stairway.
|
|
|

Click on these photos for large views |
The stern light will be finally wired when some varnish has been laid on the trim, back there.The switch box looks rather forlorn right now but should look better when the shelf trim has been added. I might add some additional lights on the port side of the boat but I haven't decided what, if anything, is needed yet.
|
I got the saw working again on the port toe rail and removed it from the stern to the bow. The port and starboard running lights were attached with wood pads that kept me from having to trim the eyebrows. Webmaster Note: Photo and comment added to Technical Section page dealing with EYEBROWS
Tomorrow I'll probably attack the breasthook and then it will be time to start laying down 5200. I've identified about 20 port side screws that will have to be replaced and the areas beefed up. I think I have all the materials to do the toe rail job except the wood for the toe rails. I think 5/4 by 6/4 mahogany will work for the rails.That's about it for now.
I've attached a few pictures. Feel free to weed through them and toss out whatever you don't need.
Jerry
Click on photo at left for a larger view
|
**************************************
June 17, 2014. Jerry's toe rail project continues - a couple of teaser photos here and more in the Technical Section dealing with this project. Click here to go there.
Hi Ron,
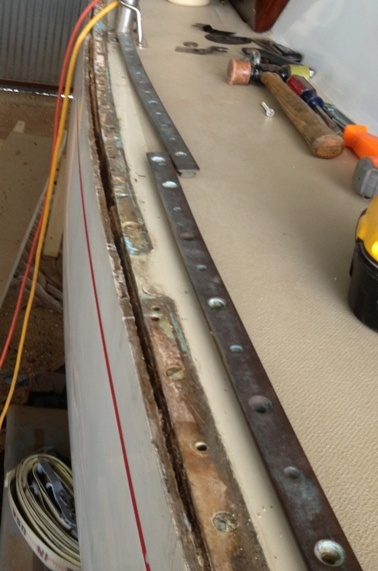
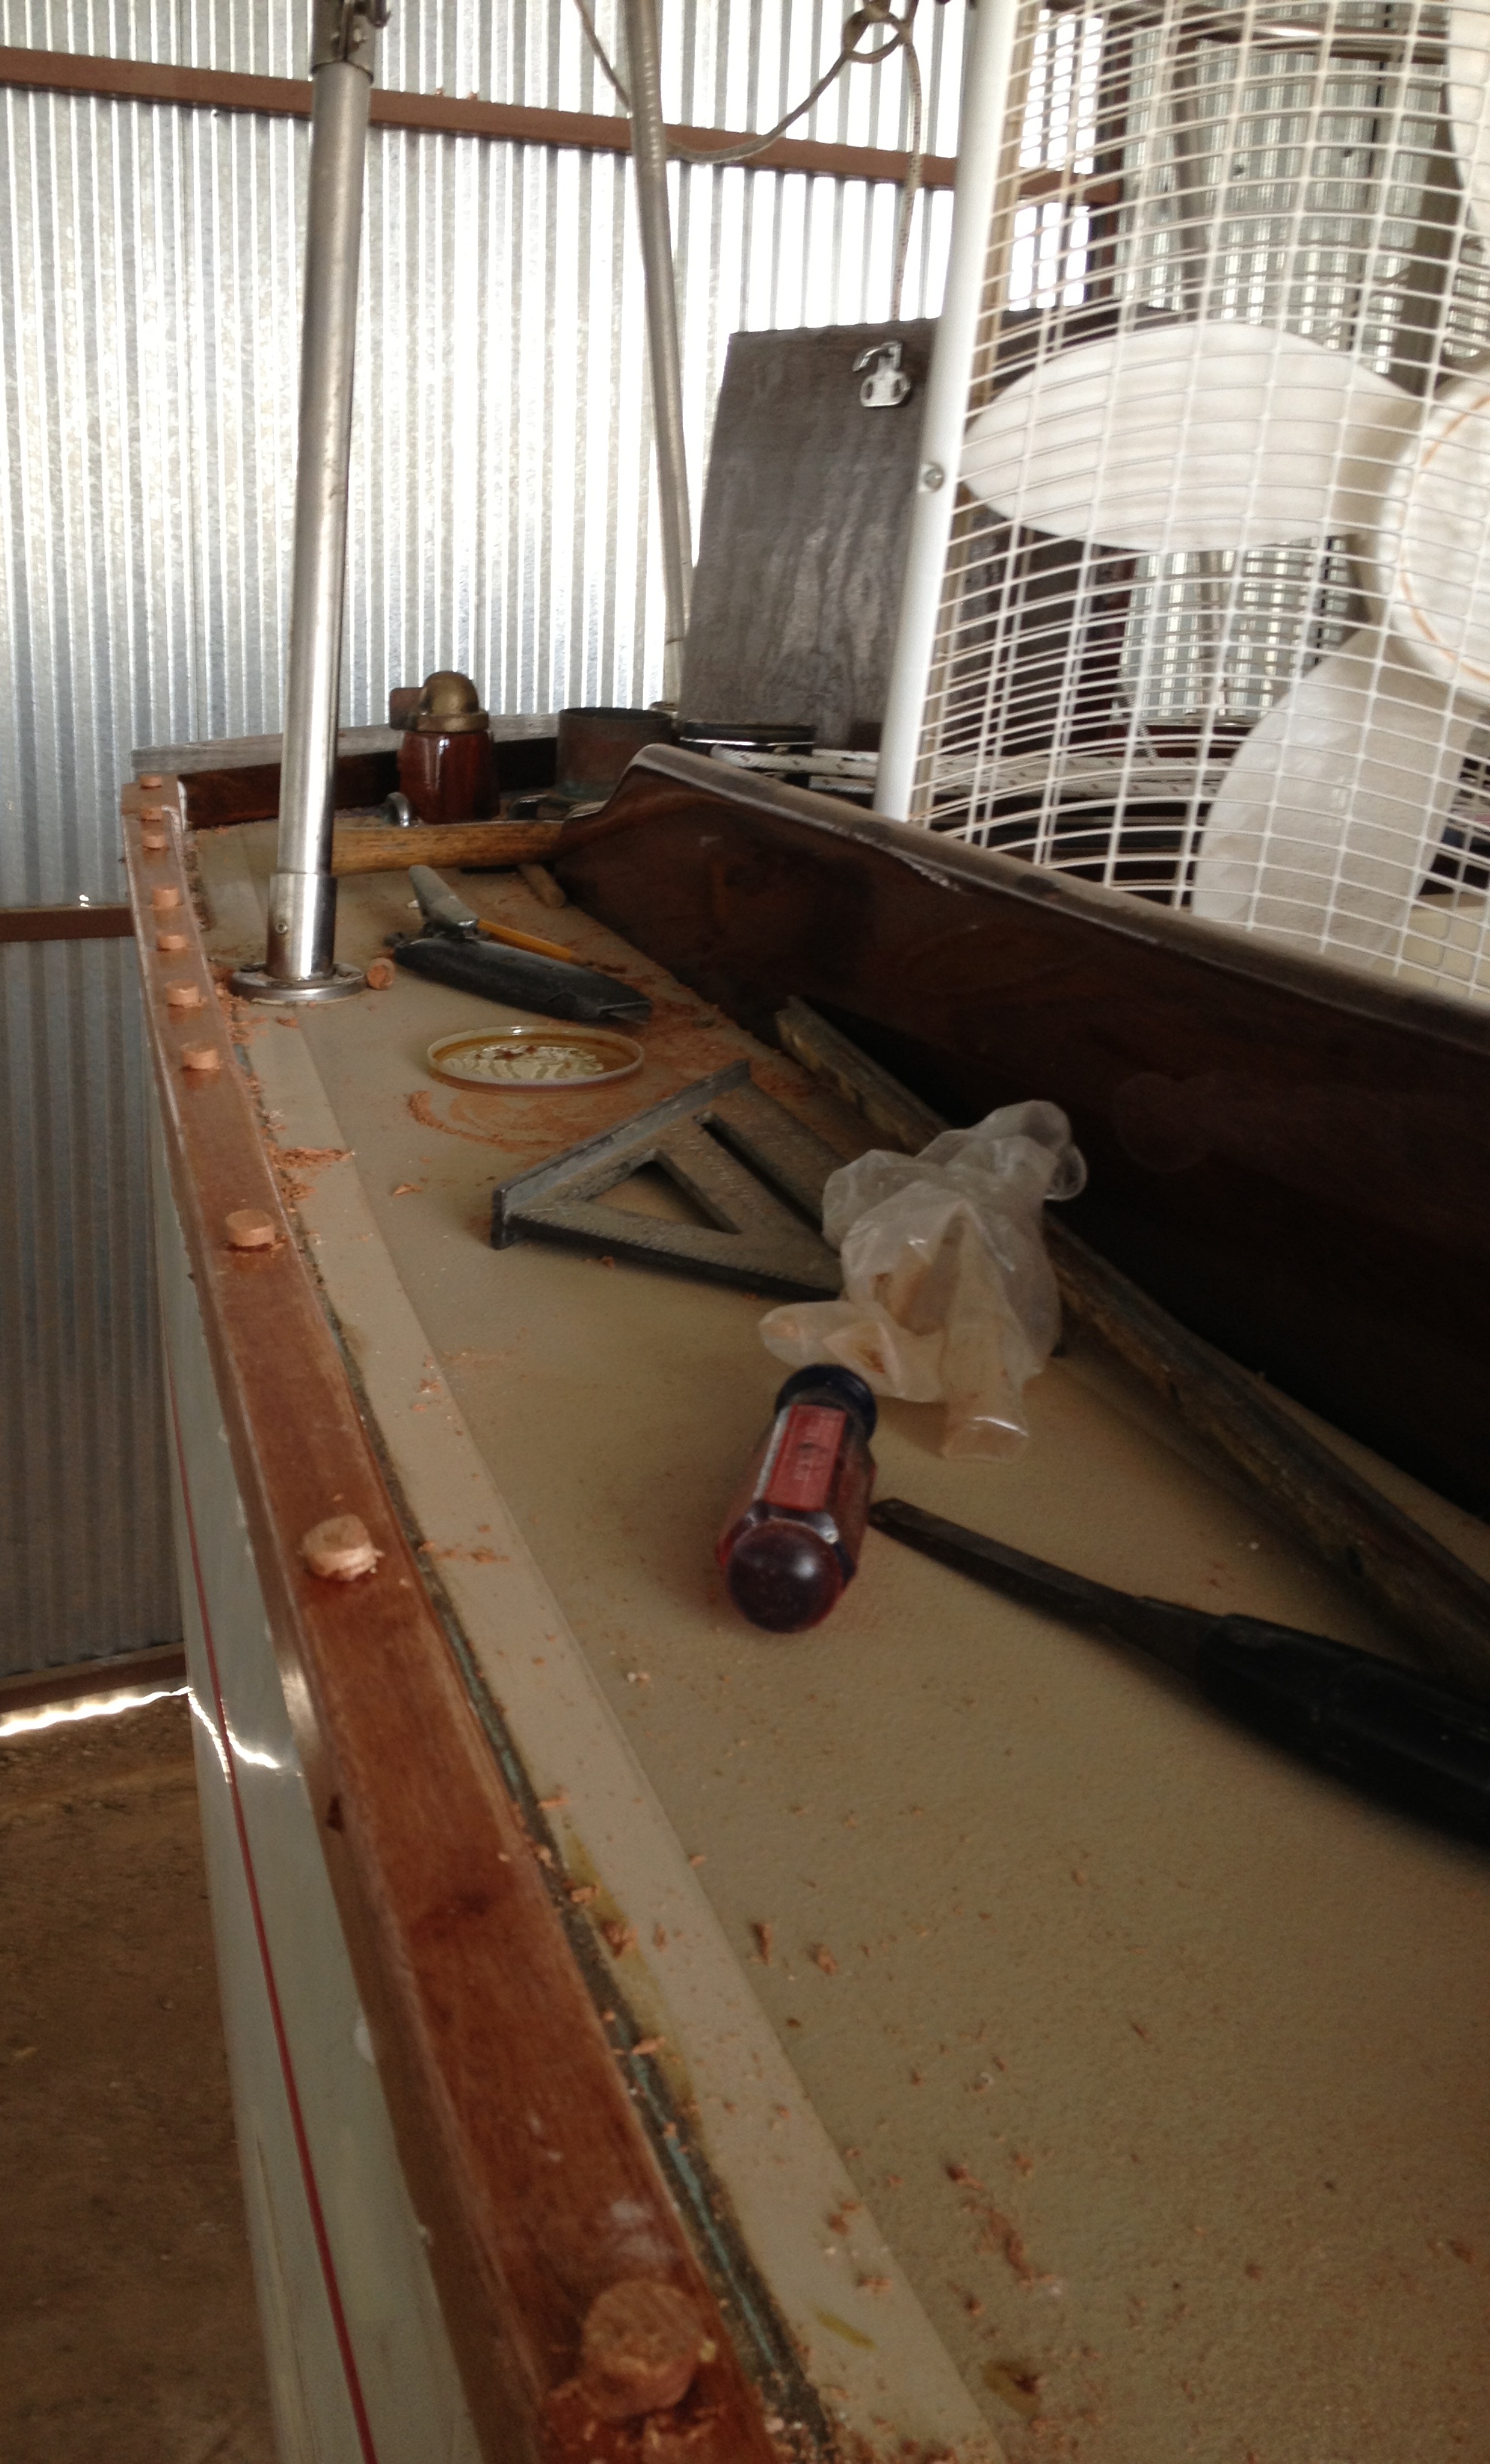
I've been working on the toe rails for Rowdy. The process seems to go on forever but I think I am sneaking up on the end. The starboard rail has been glued up, sealed, fitted, caulked, drilled, screwed, and plugged. Some final shaping mid ship and then varnish will finish that side off. The genny track will be added last, after both the rails are mounted.This week I will glue up the port rail. It is in three pieces and will have 11:1 scarf joints.
My initial rail stock was nine(9) feet long which will give me a 25' 4" long rail. I only cut 4 scuppers in each rail. The old rail had 5 but one was way up forward and wouldn't do much for removing water from the deck. After the sanding and sealing I will spring in the rail for a dry fit and then the drilling caulking and plugging will commence.I've thrown in a few photos. Feel free to toss out any or all.
Jerry
Click on the pictures for a larger view
June 27, 2014.
Jerry sent in the following update (minor edit) and info regarding
his pigstick, which we have also included with additional photos in our Technical Section on this subject. Click here to go there.
|
Hi Ron,
I have been meaning to send you a few pictures of my pig stick but hard boat labor kept getting in the way.
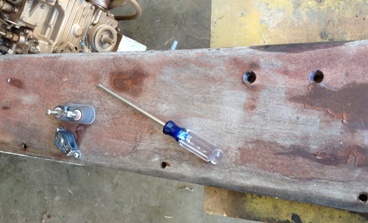
The pig stick is made up of a couple of dowels, off hand I can't remember the sizes but the top one was a little smaller diameter than the bottom. I got some copper ground wire and bent it into the shape shown in the photo and mounted the wire on the upper dowel so it could freely rotate around the dowel. Then connected the upper and lower dowels with screw eyes, added a couple screw eyes for the flag halyard and there you have it.
I may make a taller upper dowel if this set up fouls on the vhf antenna.
We will see.
Jerry
PS I've decided that next month will be the last one in the rented shed. All the big jobs will be completed and we will head to the coast for Rowdy's bottom job. There, I said it so it will have to happen!
By the way, I hammered in the bungs for the port toe rail today and I will be sanding them this weekend.
************************************
|
July 8, 2014. Jerry's update. Also check out http://www.dolphin24.org/rowdys_toe_rails.html for the genoa track
|
Hi Ron,
Today was a bit of a red letter day for Rowdy.
My daughter and I refastened the genny track which pretty much finishes off the toe rail project. I still need to shape the breasthook and run a bead of caulking down the inside face of the toe rail.
Next in line will be sanding and priming the topsides and transom, it will not be long now.
Just in time for the hurricane season.
Jerry
|
******************************************
July 14, 2014. Getting close - here Jerry's latest update
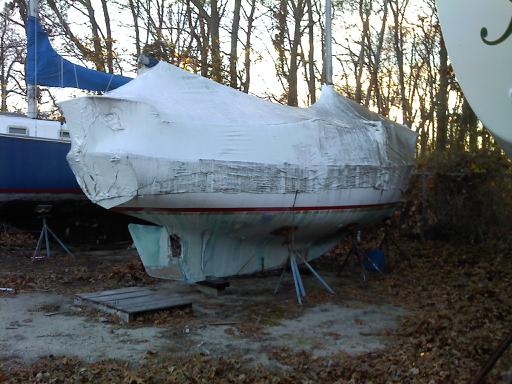
Hi Ron
,Rowdy is getting closer to being done enough to go to the coast. When I picked up the boat in New York, we removed the shrink wrap cover she had been sitting under for years. Up forward at the bow water had apparently been sitting, captured by the cover and as a result Rowdy had a bunch of paint blisters port and starboard. They burst with sanding but I had to fair the areas prior to painting with primer. I still have a little fine tuning to do with some putty but we are almost there. This weekend was all taping, sanding and priming but now most of that is done. My next move will be final fairing and topcoat paint. Maybe four (4) more days. Hip, Hip, Hooray!!!!
I'll have to make a to-do list of all the little things that will need to be done while I still have electricity available. I've got three weeks left in covered storage.
Jerry
Click on the picture for a larger view
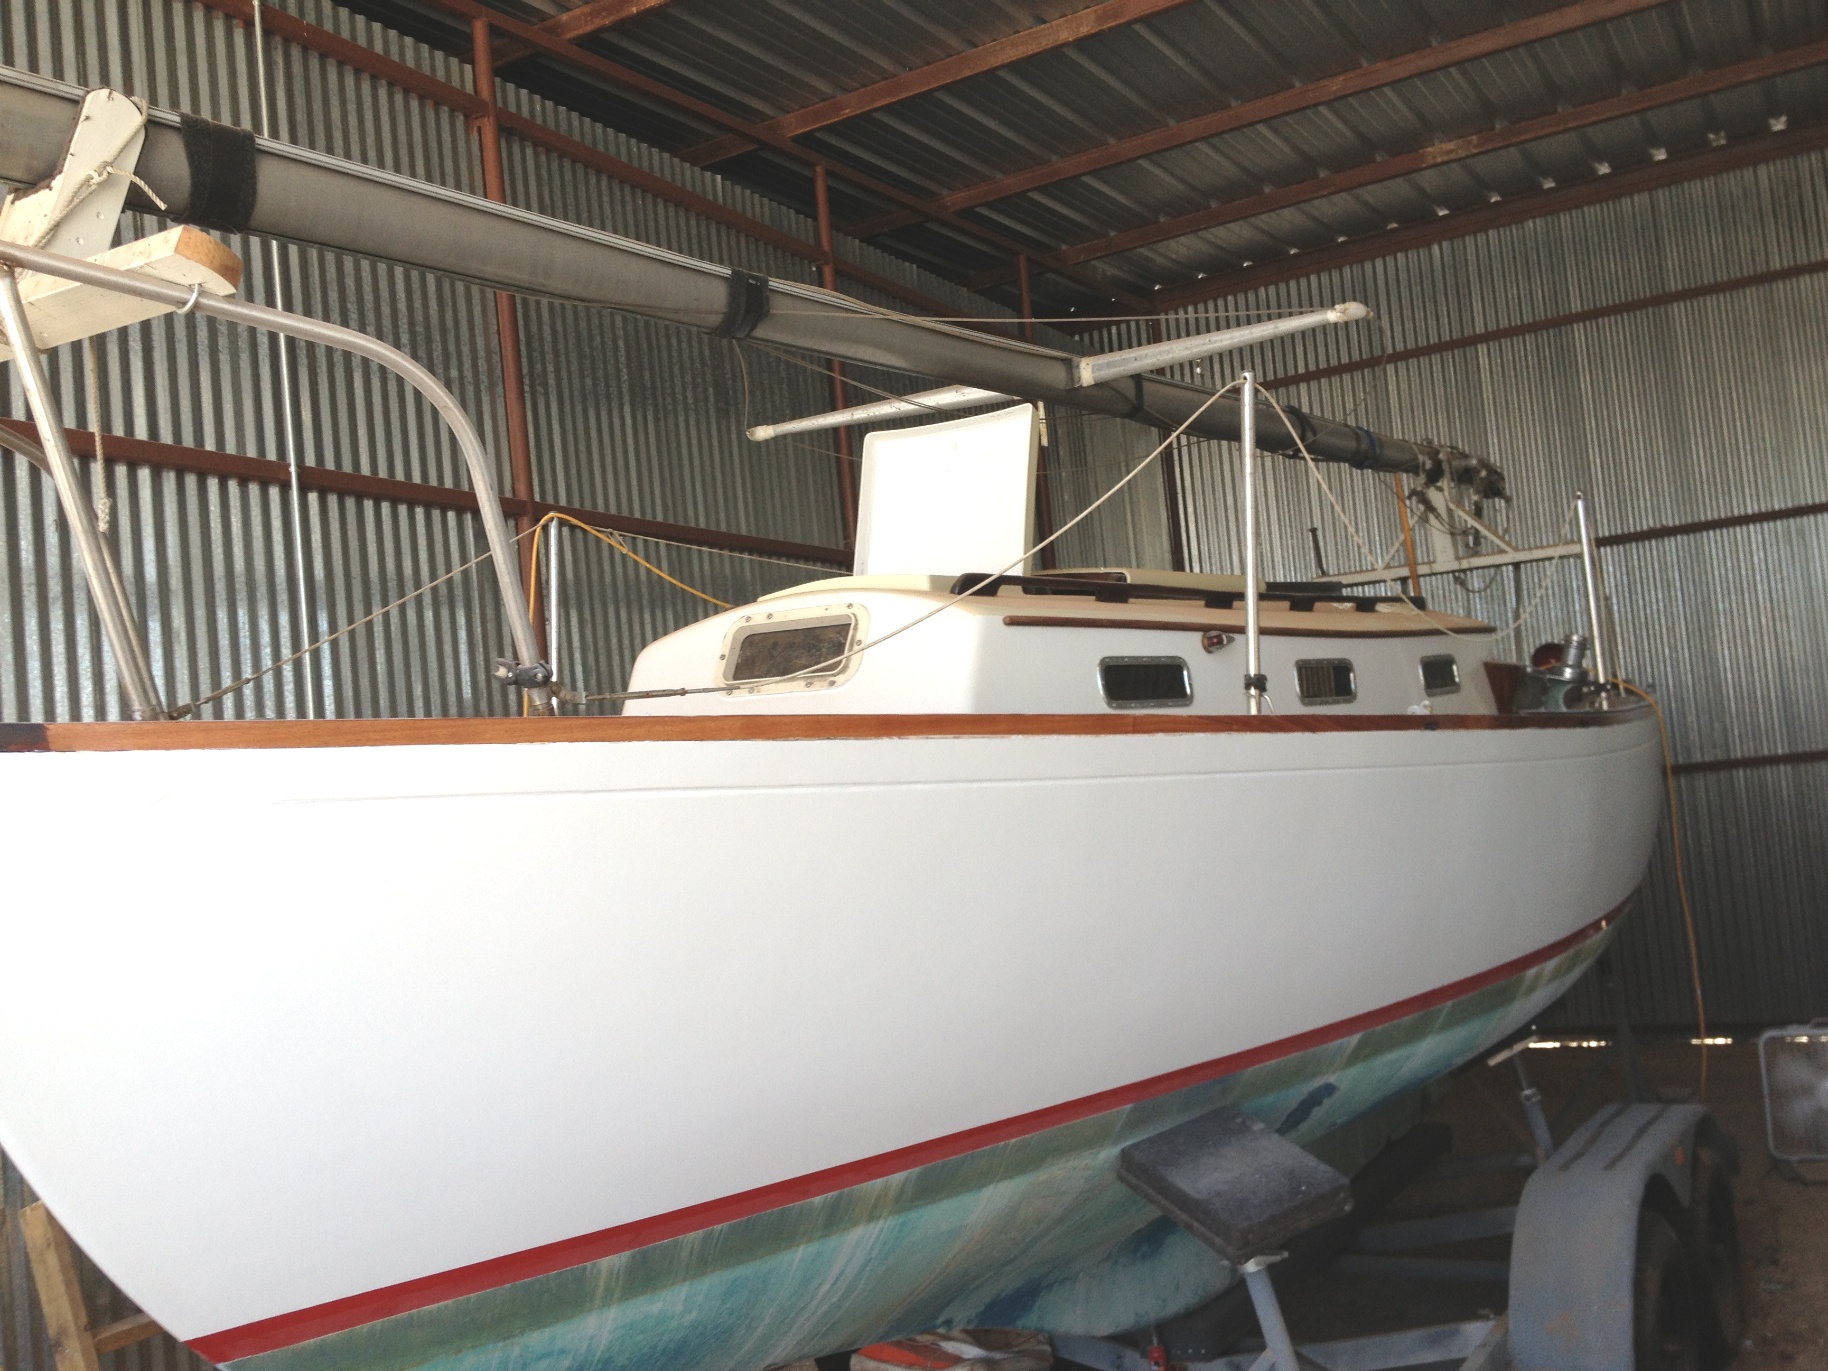
July 18, 2014. Getting closer....
Hi Ron,
Rowdy has been painted with two coats of primer and two finish coats. That should hold her for a year. I'll be touching up the toerail this weekend and caulking the deck seam. If the paint is dry enough I'll also get after the cove stripe. Paint leaking under the tape is sure making a lot more work than I need right now. (Webmaster Note - I just had the same problem painting Marionette's topsides, cove and boot stripes!!! Made no difference whether I was using the cheap paper tape or the expensive green painter's clean edge tape)
Jerry
Click on photos for a larger view
************************************
July 20, 2014. And closer......
Hi Ron,
I got some paint on the cove and stuck her name on her transom. Tomorrow will be clean up of the cove and toerail caulk. The list is getting shorter.
Jerry
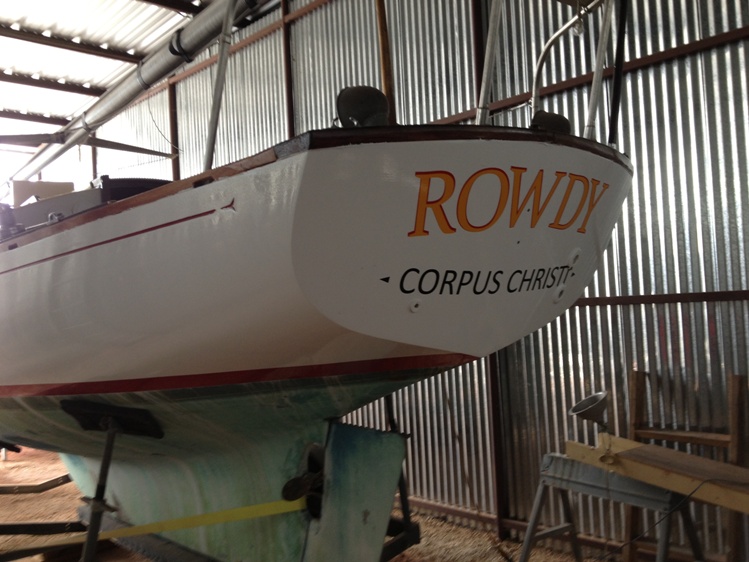
Postscript These will be the final photos from the confines of the shed. The big "coming out" is still a week and a half away but there will not be anything going on news worthy till then. My dolphins look a little skinny, don't you think?
They need water...
***************************************
July 31, 2014
- Closer....
Hi Ron,
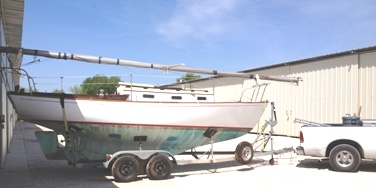
I pulled Rowdy out of the work shed and put her into a outdoor storage slot. Before the roll out I added two keel guides to the keel skid, a la Ruby. I also attached the port lifeline, put 6 hose clamps on the poppets (also a la Ruby), hung the spare tire and picked up the last of my work trash. Three last orders of business will be to replace the rear trailer axle, get a bottom job and contract for a welder to do a few fixit jobs.
I'll probably be going to the coast later this next month, then we will get the mast up and the sails bent on. It has been quite a trip getting Rowdy water ready and presentable. I picked her up about a year ago and when I look over some of the posts on the web site, a shiver (I can't believe I took that on) goes up my spine. I think this will be the last orphan I get involved with, mainly because I think the Dolphin 24 will do everything I want and will provide a certain degree of comfort in the doing.
The web site has been very helpful over the year and now I look forward to getting some stories posted. I'll be available to you or any of the Dolphin owners who might want to chit chat about a project and maybe we will be able to meet on some future cruise.
Best wishes to you and the web site,
Jerry
****************************
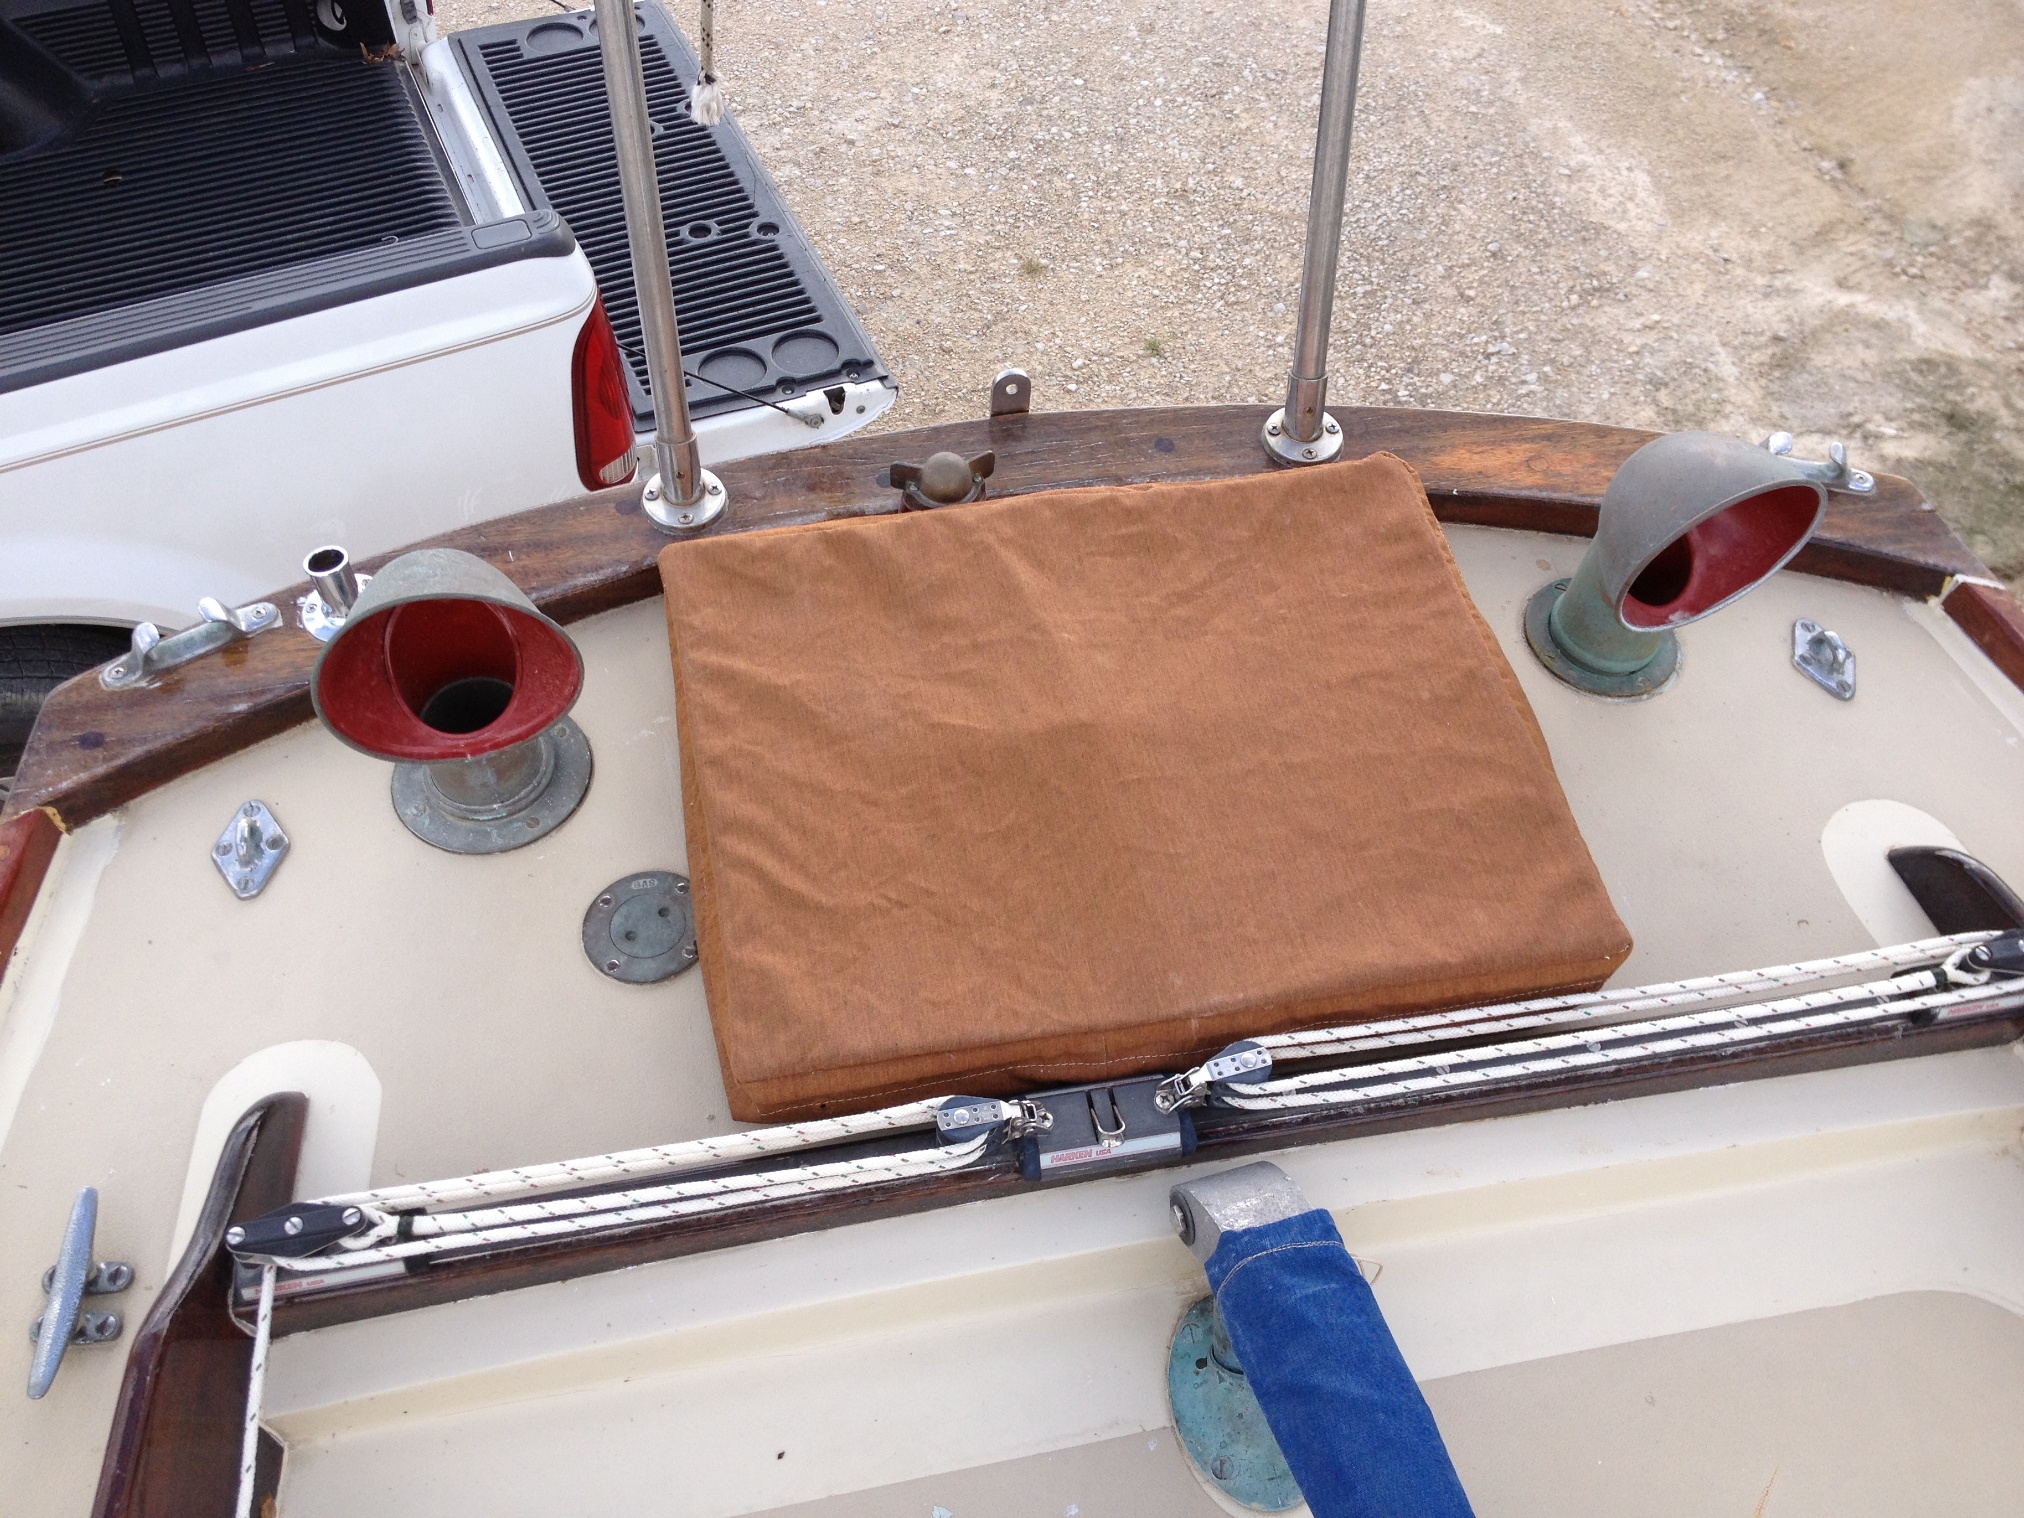
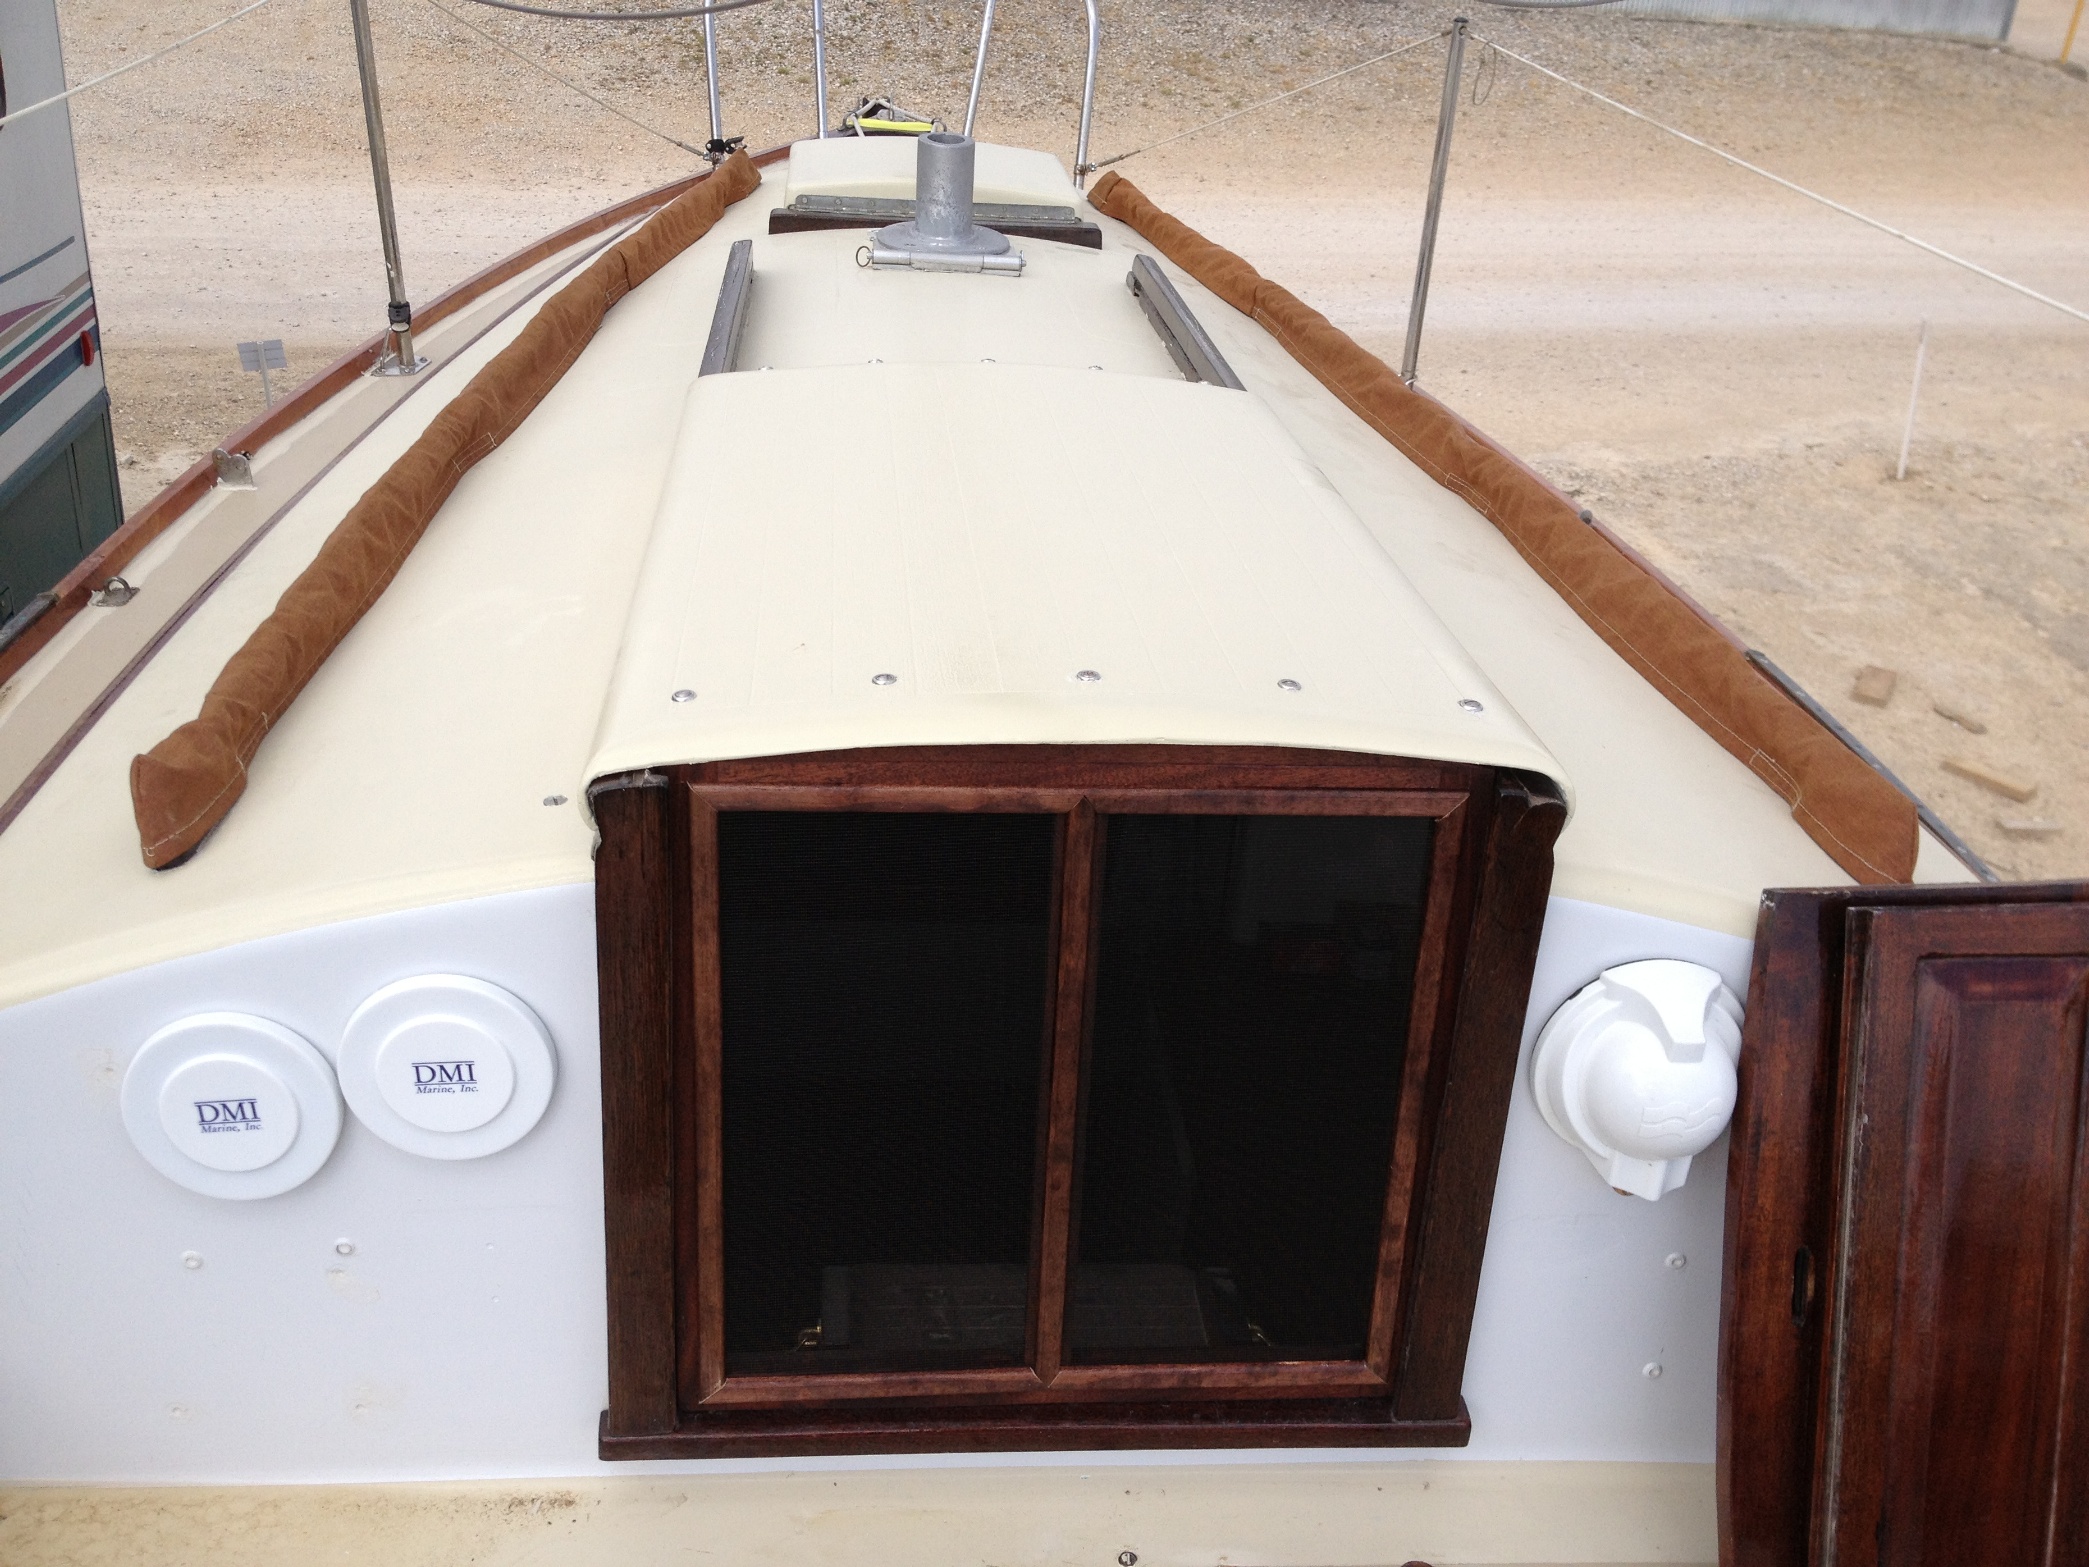
September 7, 2014. closer... (edited, and also included in the Technical Section/Covers)
Hi Ron
I have enjoyed reading the continuing adventures of Marionette in Maine. I've sailed in those waters and your tales bring back many good memories, thanks.
Since I've moved Rowdy outside, I've worried about the sun beating down on my brightwork. I had some old hatch and handrail covers from my prior boat and decided to have them modified for Rowdy. I'll probably just bite the bullet on the toe rails and coamings, we will see. The theory here is we lose about one coat of varnish every 6 months due to the intense Texas sun, so two coats per year, that should keep me busy.
I've built a screen for Rowdy's main hatch. In the past I have used bronze screen material but decided on the grey fiberglass screen for this project. The forward hatch is presenting some design challenges with all the curved surfaces so that screen is still in the future.I'll attach a few pictures for your review.
Jerry
Click on above pictures for larger views
*****************************************
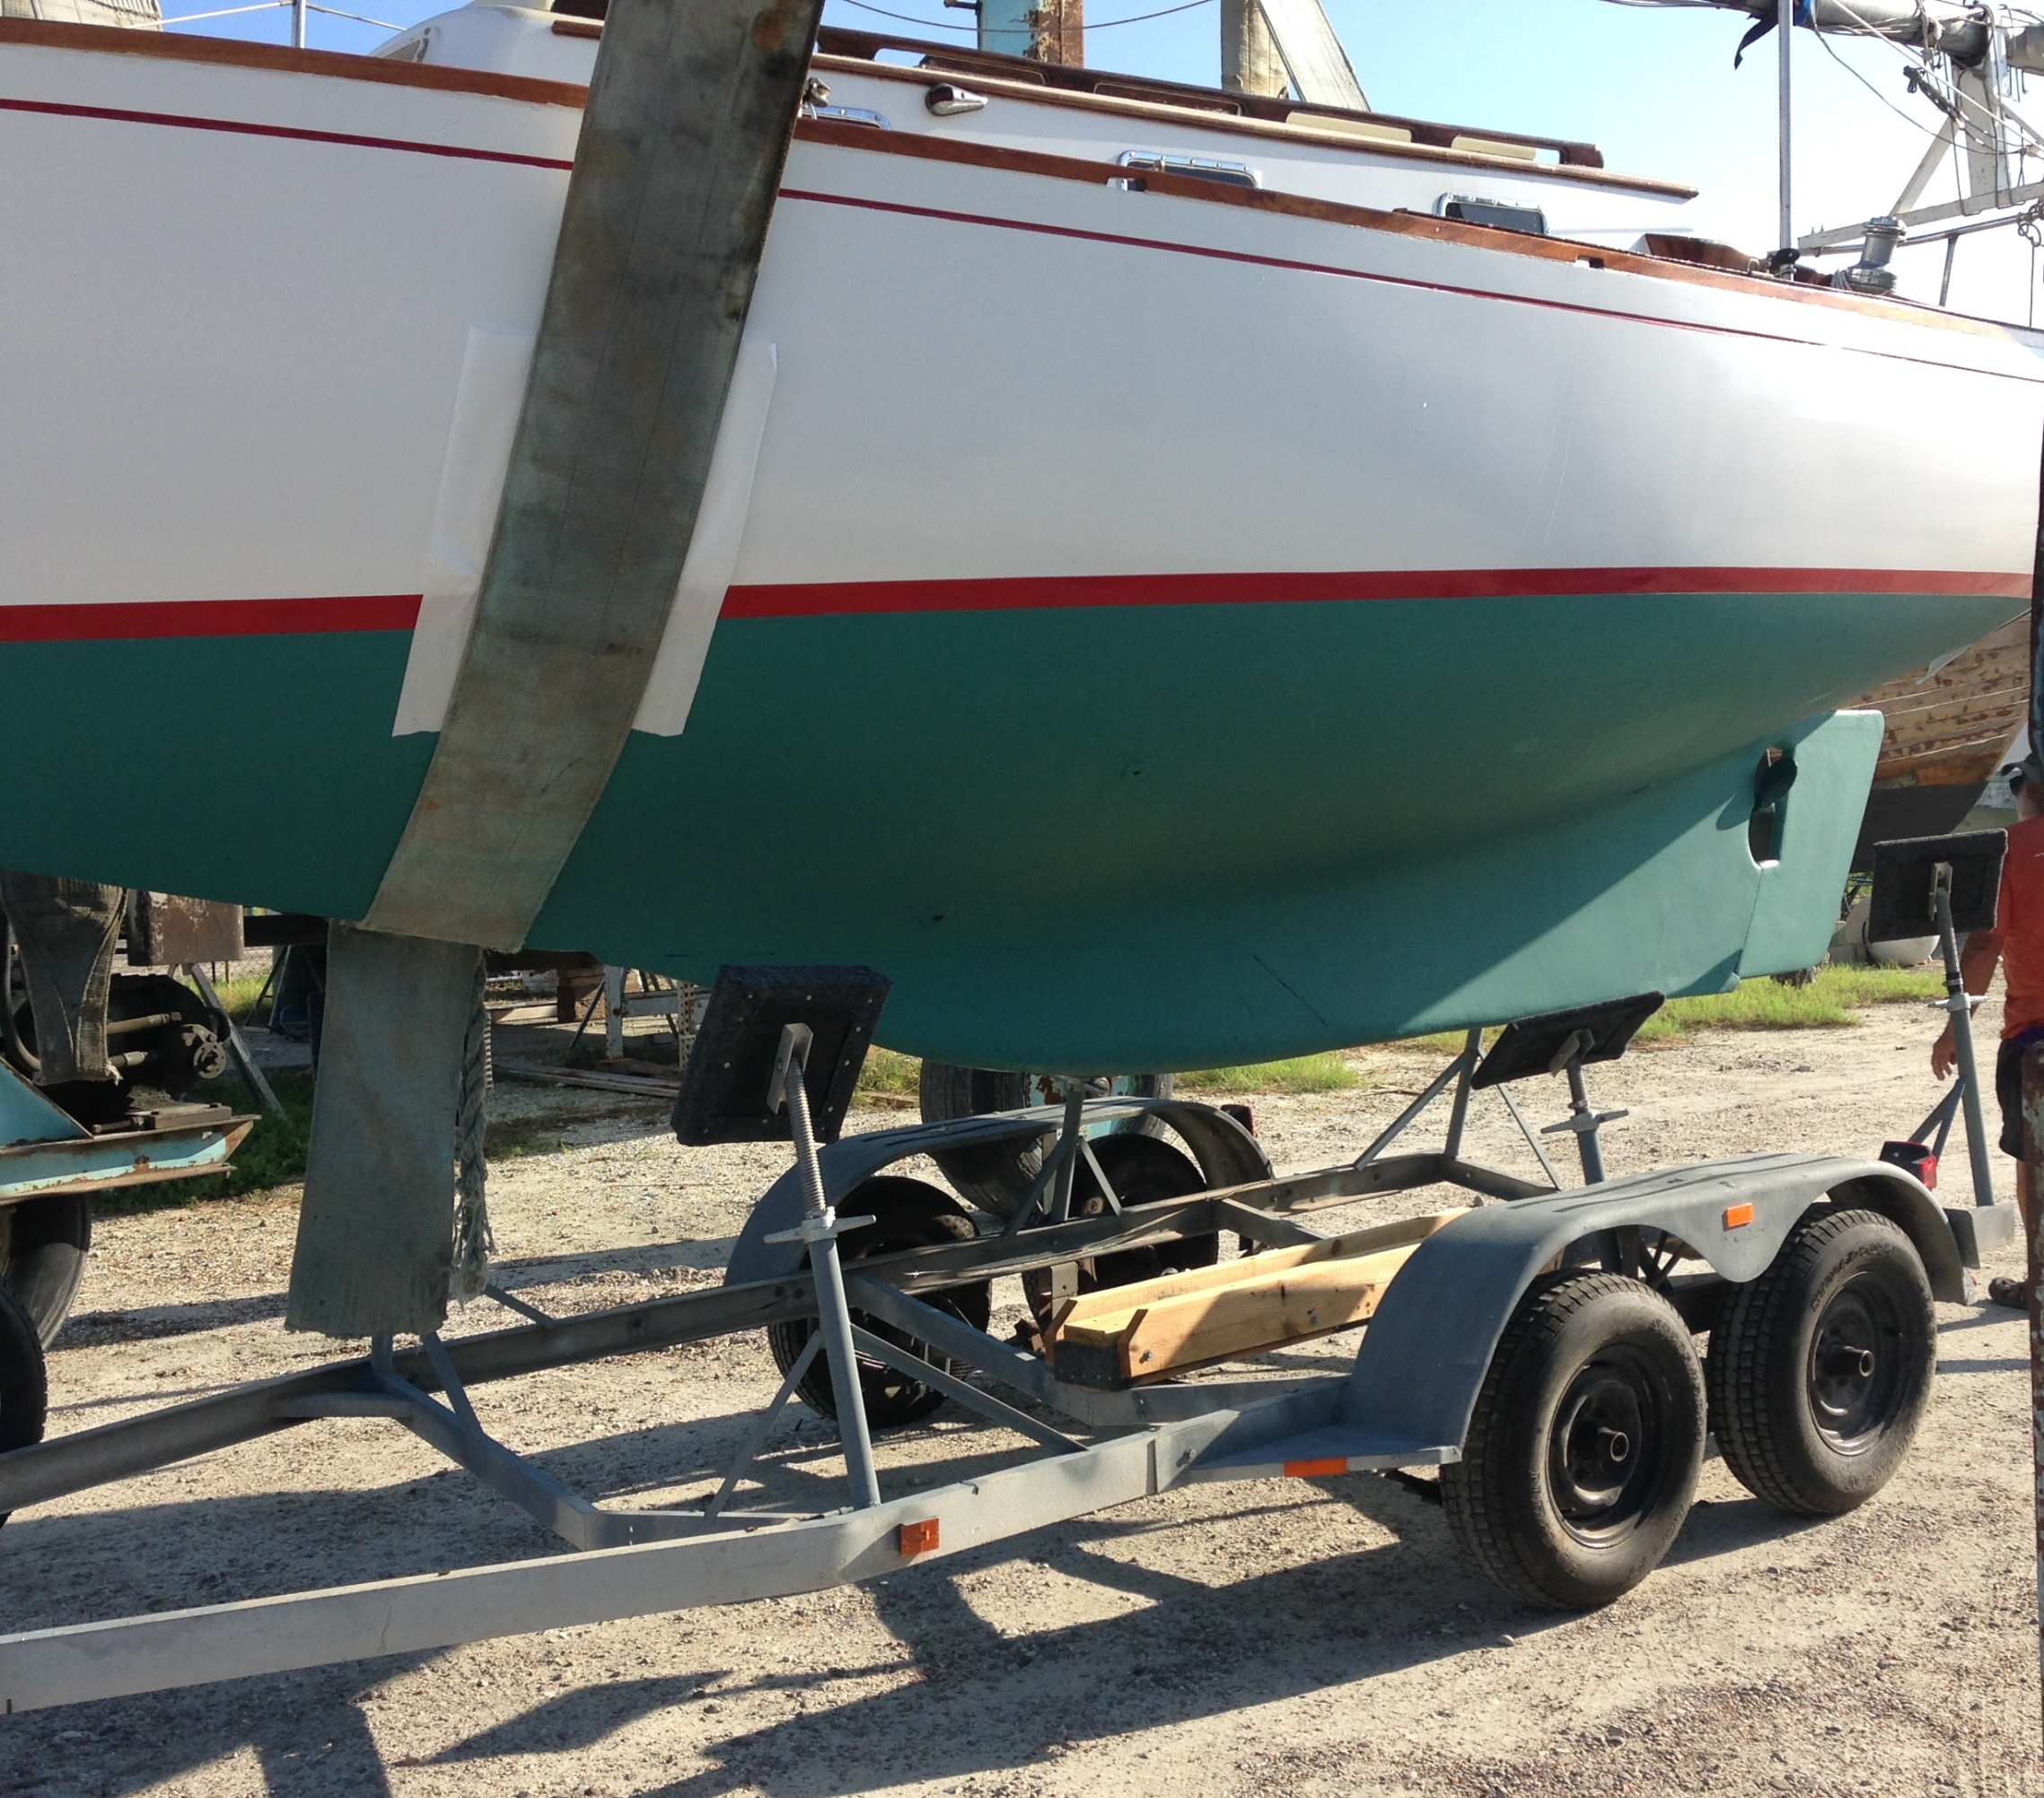
October 13, 2014. Closer still...(edited) Click on pictures for a larger view.
Hi Ron,
Finally got the bottom job finished and the trailer fixed so hoist straps will fit under the keel. After the boat was mounted on the trailer I drove thirty five miles to Corpus Christi and set up the mast. I'll take a picture or two when I take the sails down.
Jerry
********************************
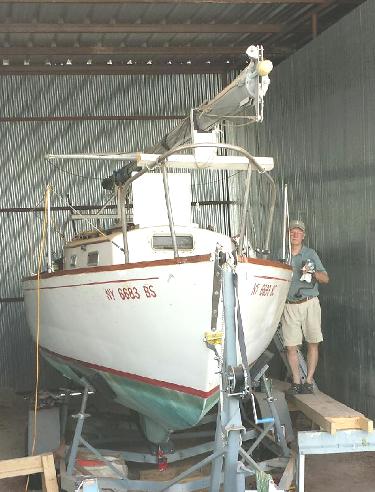
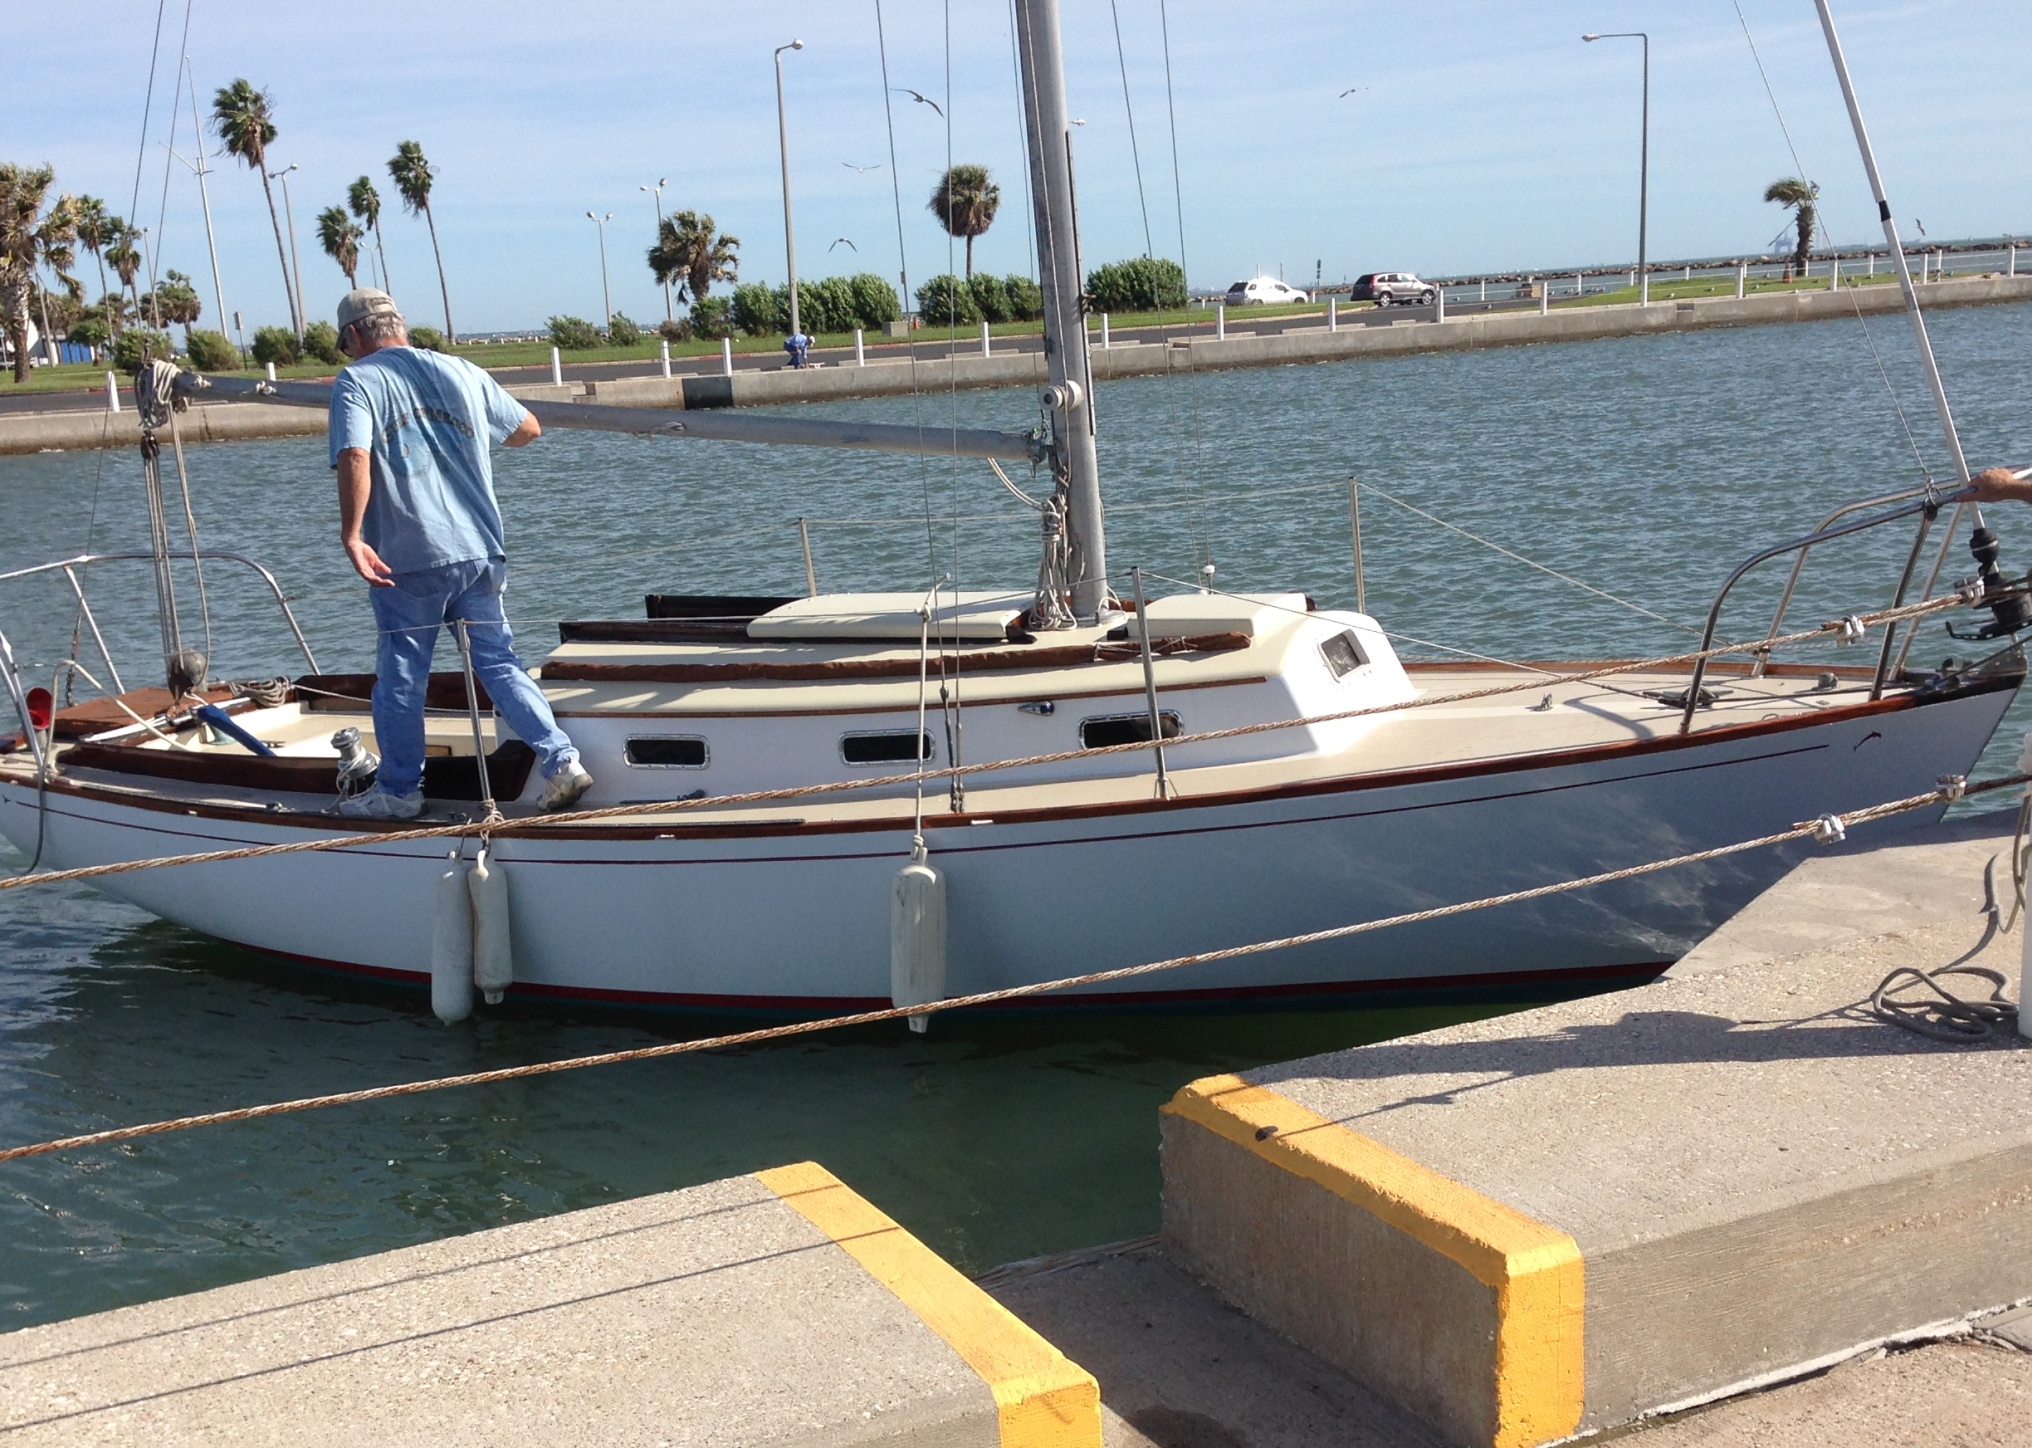
November 13, 2014. Well, ROWDY finally got wet. Just under 2 fun filled years to get her there. Congratulations to Jerry, and ROWDY! But there's more to this story. Click here to go there
Click here for a larger view
******************************************************
December 24, 2014. Jerry describes ROWDY's mast raising/lowering system in the Technical Section - click here to go there
**********************************
January 29, 2015 - Jerry updates ROWDY's mast raising/lowering system in the Technical Section - click here to go there
*********************
February 24, 2015 - Update - current plan (edited)
Hi Ron,
Those photos of you northerners playing in the snow in Whats New (Feb 16) are something else. We get excited, in south Texas, if the temp gets down into the 30's for a day or two. I remember reading about the yacht America being crushed under a blanket of snow and all I can really relate to is that pretty fluffy stuff making the landscape turn beautiful.
Next Sunday I will be hitching up Rowdy for a road trip to Houston (Clear Lake area) to have some thru hulls moved. I also plan to raise the mast and launch for a shake-down sail and, of course, a motor run up. Other little jobs include mounting the hardware and lanyard for the pig stick, mounting the windex, checking the depth and speedo, checking the autopilot and finishing the electric hook ups. All-in-all a busy few days. I also want to find a replacement head and a couple of cushions for the quarter berths.
And, I almost forgot. I purchased a Garmin 535 chart plotter I need to hang and wire. We are suppose to be in the 70's Sunday through about Wednesday, fingers crossed, which will be a fine weather window for all of the above.
Stay warm, I'll be thinking of you guys up north as I float across Clear Lake and Galveston Bay (Webmaster note: It was -5F this morning in Old Lyme, CT!)
Jerry
***********************
August 27, 2015. Through a webmaster staff oversight we failed to update ROWDY's page last month with an important piece of news about the hull number. We had received some info about another boat with #5 on her mainsail - she is Marango, and was sailing on Narragansett Bay in Rhode Island- click here to go to that story.
***********************************
August 29, 2015 We got the following update from Jerry - minor edits
Hi Ron,
It has been awhile. Unfortunately nothing has been going on with Rowdy. I was last down to the coast about two months ago to design easier access to the batteries, and to hook up the new thru hull raw water seacock. Every time I go to the garage I trip over the hatches for the batteries so she is always on my mind. (Webmaster Note: Reminds me of that Willie Nelson song....)
But, with so many days of extreme heat I think it will be another couple of weeks to a month before I get back to her. Also, I recently acquired a canned ham vintage trailer that I have been rebuilding and that has kept me busy. I saw the posts on Marango and don't know what to think. At the least we are pretty sure Rowdy and Greyling share a link. Is there any significance to sails with the logo and those without? My sail is bare except for the number but I'm thinking this must be her second or third mainsail. Oh well, the mystery deepens.
Have a great Fall season.
Jerry
************************
October 5, 2015. Jerry and your webmaster had an exchange of emails about trailers and being lucky. Click here to go there.
*******************************
February 20, 2016. We got the following update from Jerry
Hi Ron,
I had a great two days at the boat. My battery boxes are complete except for paint. My Whale hand pump is pumping. The addition of a strum box with check valve was just the thing. I made an access door for my potty. I needed that because I couldn't get to the screws holding the base I took out for the old Wilcox head and put in a Groco unit. Now I need to work on the plumbing and decide whether to put in a holding tank or not. After I paint up the locker and make it spiffy I'll send some photos.
My quarter berth cushion fit and feels like a feather bed. I finally wired the gps and routed the mass of wires in the battery box area so they look neat. I still need to wire the stern light and over time I've forgotten what some of my electric switches control so one day I'll need to run that down. I need to find some labels for the electric panel.
I finally bit the bullet and changed my fuel filter. Sure enough it was a stinky job but now it's done. It will have to be bled at some point in time but I've got a system that should eliminate some of the mess.
|
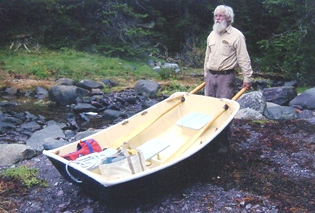
My tender is almost done. It is a wheel barrow boat by Harry Bryan called the Ladybug. I have started the oar search.
I WILL BE SAILING SOON!!
Jerry
Webmaster note: Picture at left is of a Ladybug taken from Harry Bryan's website. We'll get Jerry's boat when he send us a picture. Click here to the website for more pictures and plans |
***************************************
March 28, 2016. The Dolphin24.org Board has met and is pleased to announce that Jerry has exceeded minimum requirements necessary to receive the DFI badge. Congratulations Jerry!
*******************************************
May 9, 2016. Jerry had just 2 more projects to complete - battery boxes and head locker. Here is his report and highlight pictures. They are also included in our Technical Section with more photos.
Hi Ron,
I popped down to the coast to check on Rowdy and to do a couple of jobs that had been held in abeyance since my last medical issues.
I wanted to make a couple of access hatches for the batteries and a hatch for the head that would let me get to the head mounting screws. I took a couple of pictures that might show what I did but they also show the need for some touch up paint.
The battery storage areas are under the quarter berths, port and starboard. The hull is angular there so I made a couple of platforms to flatten out the area. I also wanted to be able to lift the batteries straight up and not fight with sliding the beasts around and busting my knuckles trying to wire them. I still have to attach the tie down straps but that's it.

Battery lockers on both sides - click here for a larger image
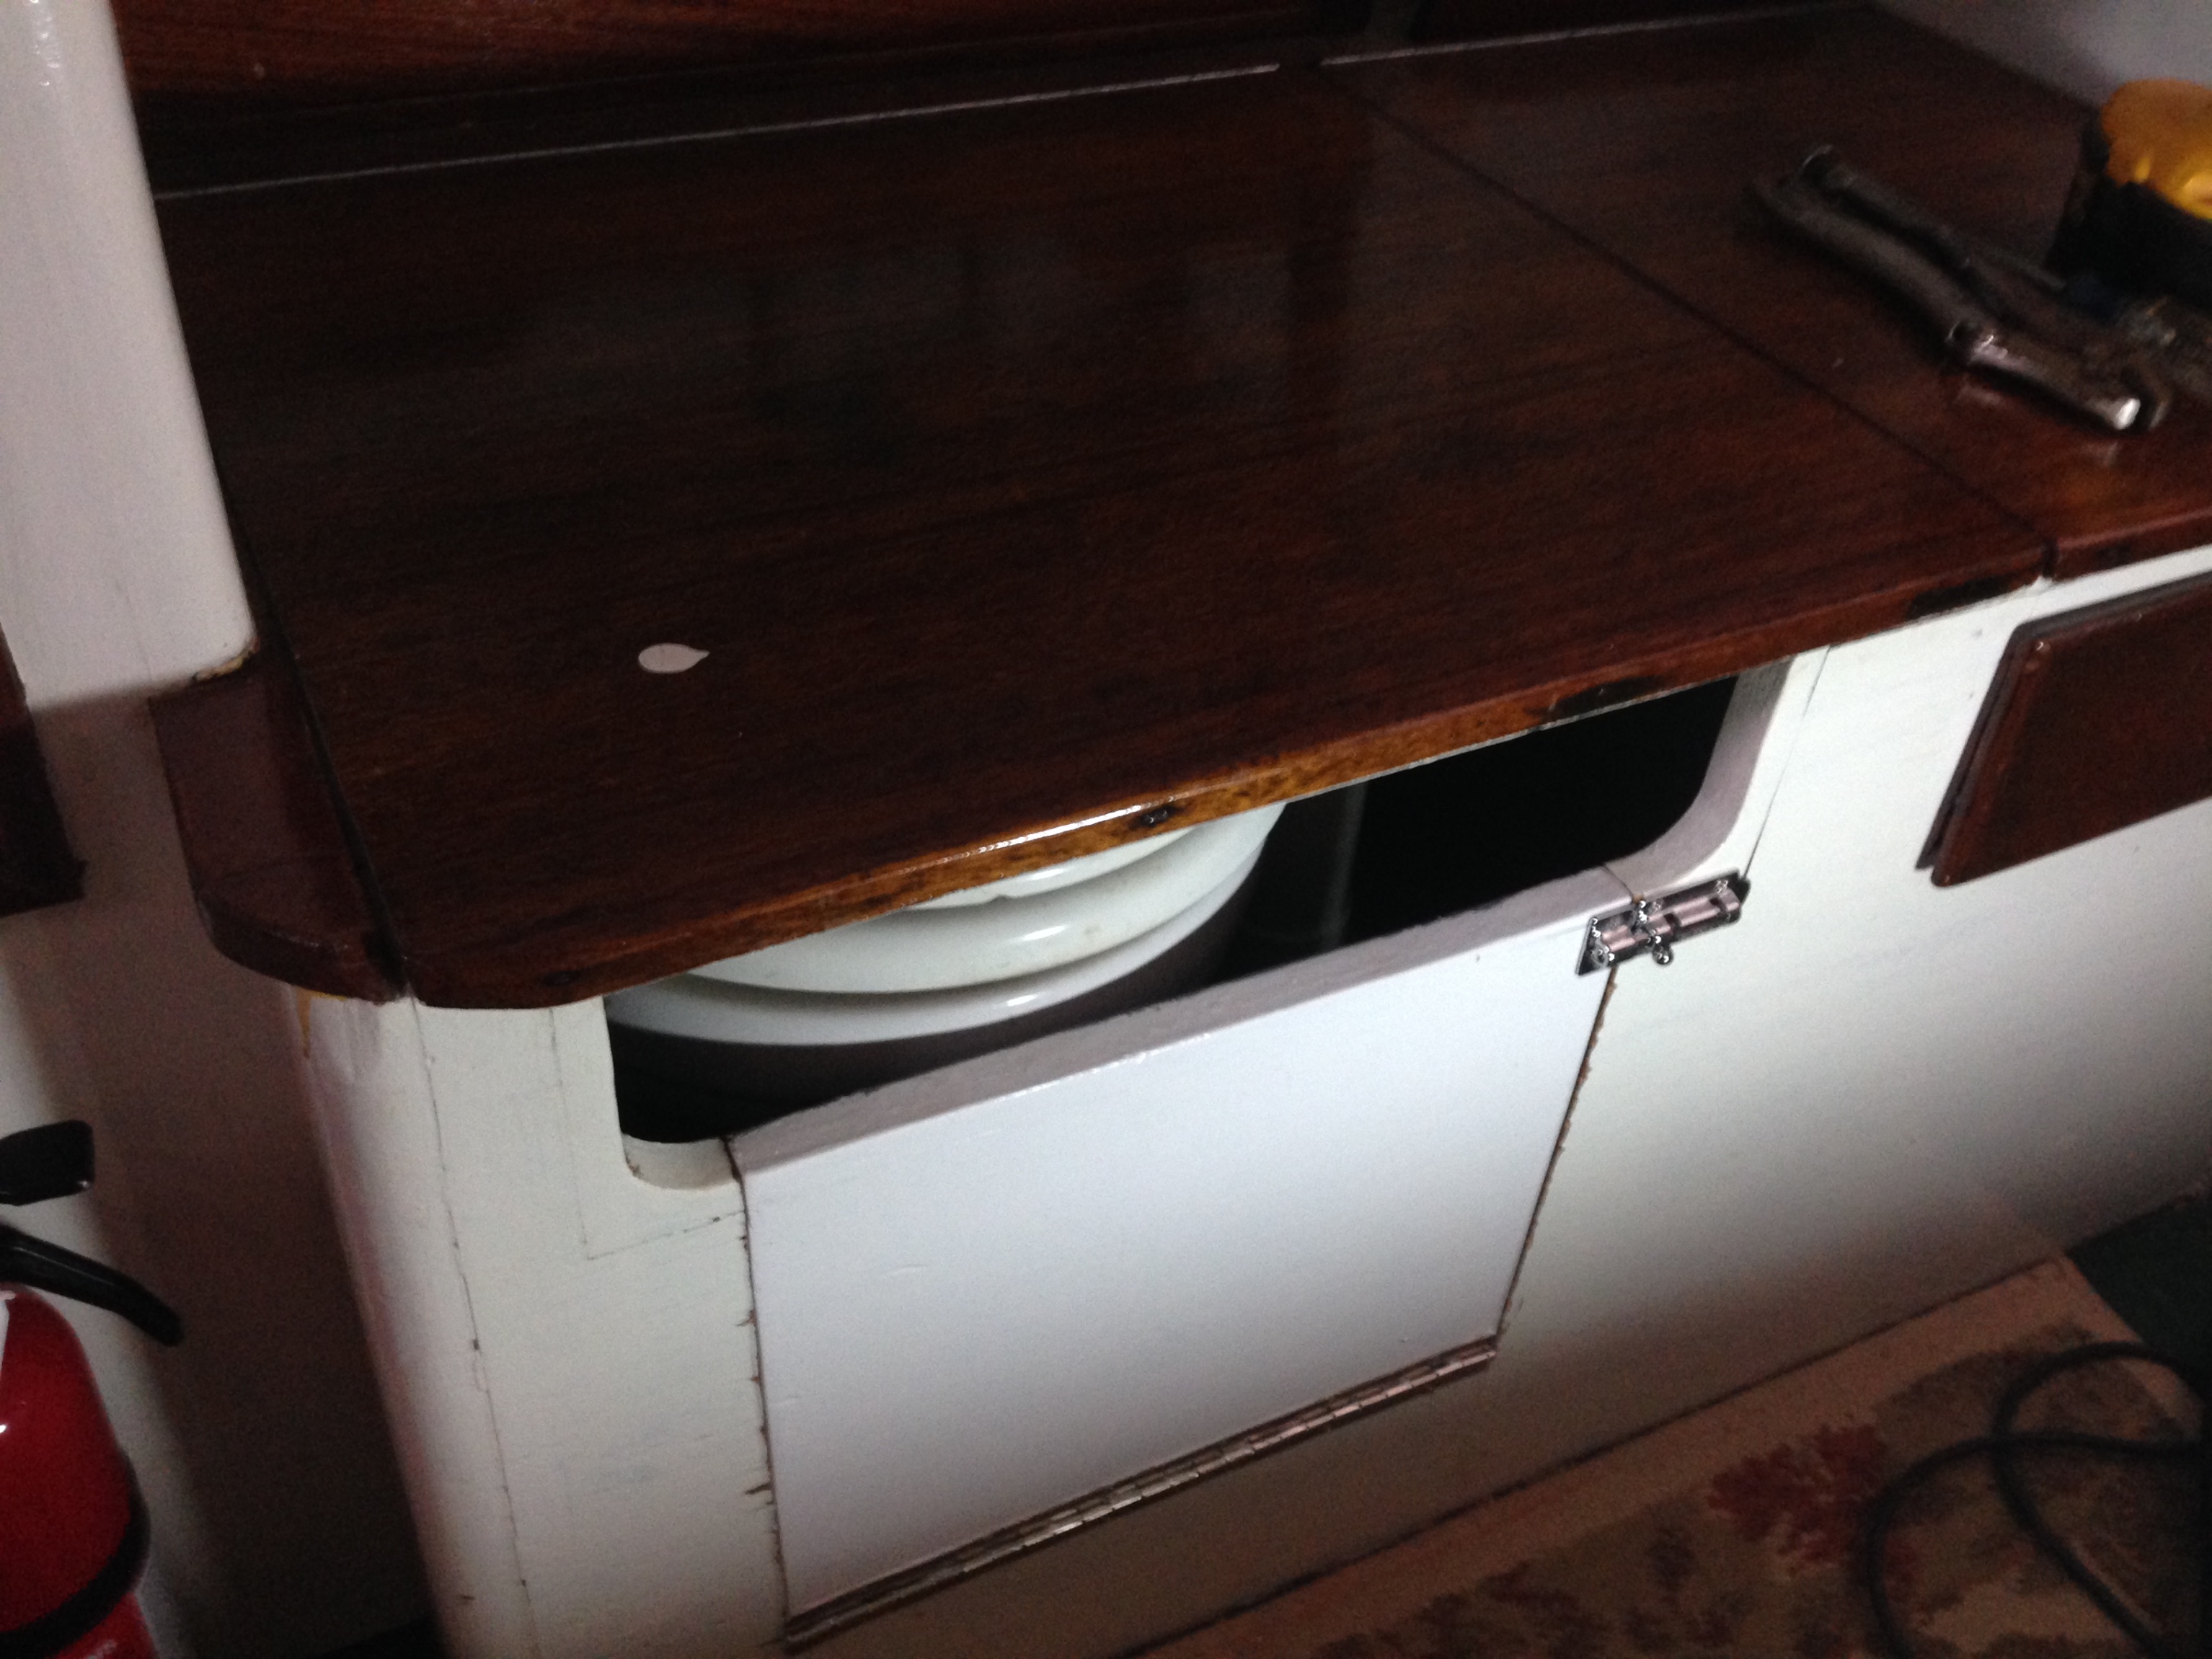
For the head, I needed access to the mounting screws. The head was in a tight area under the starboard settee. I decided to make an access door in the bulkhead under the settee and use a barrel bolt to hold it in position. I might add one more barrel bolt to keep the door from rattleing around.
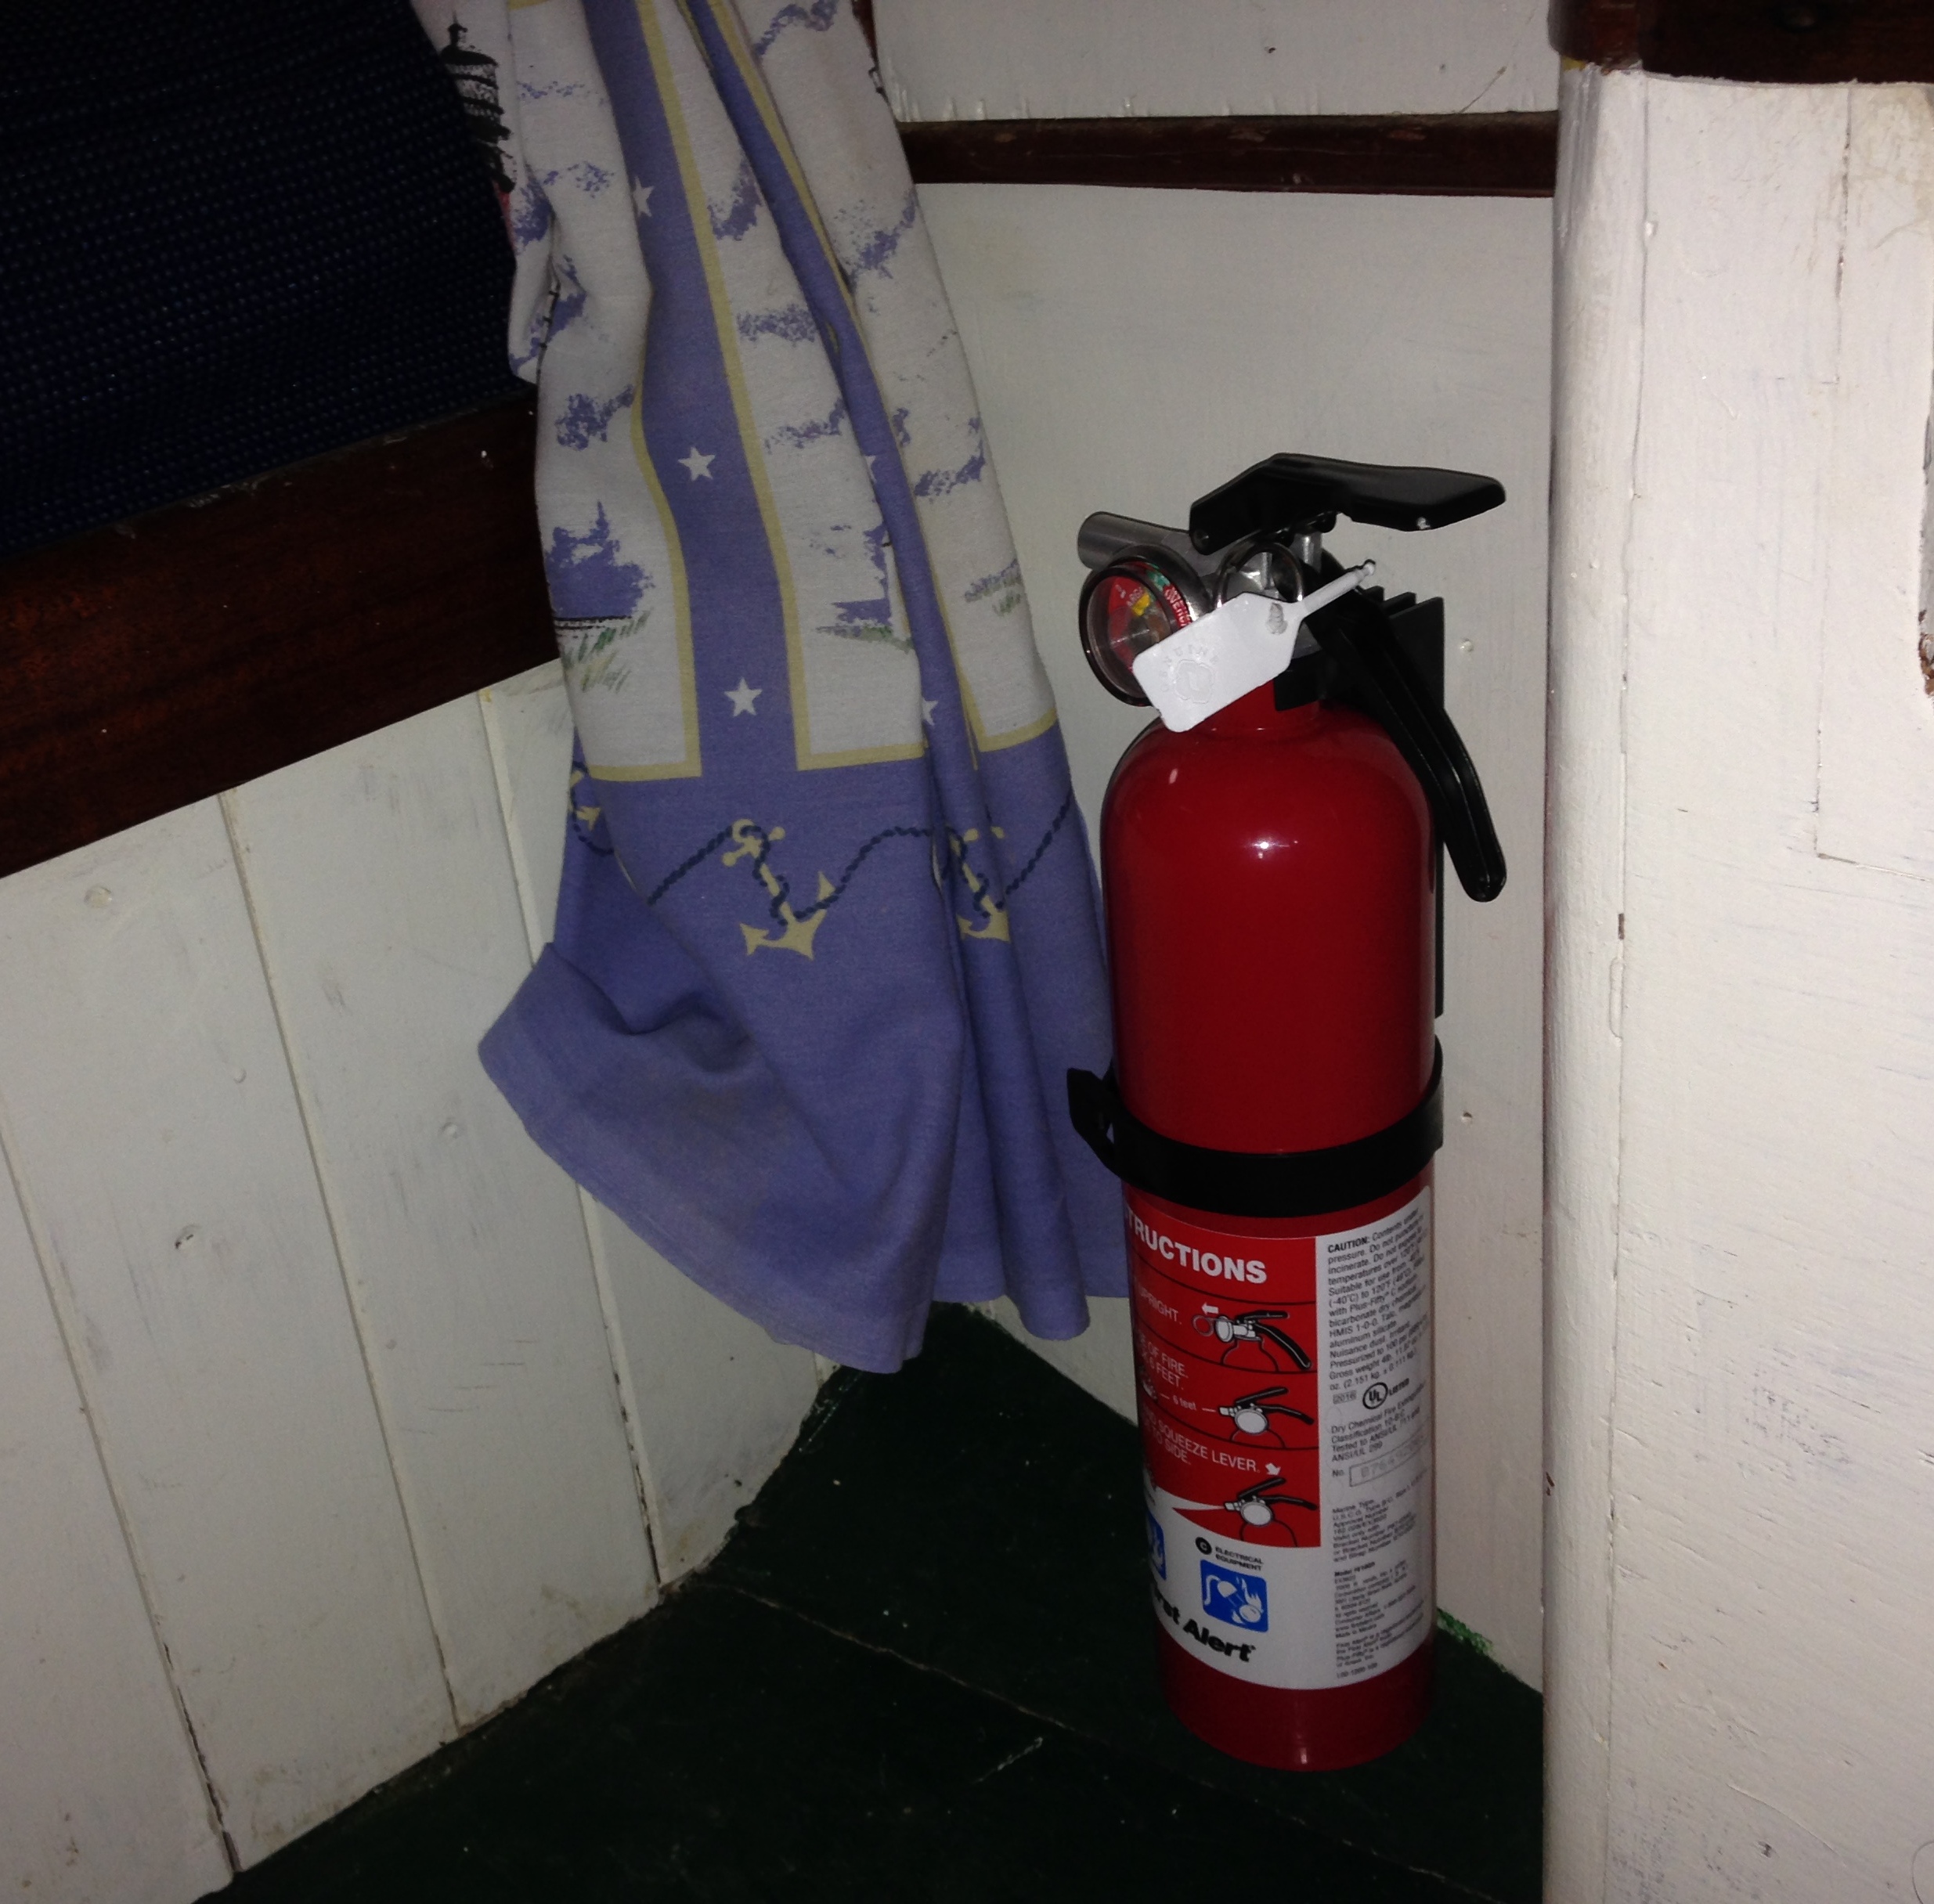
Finally I found a place for the fire extinguisher under the hanging locker.

Click on these pictures for larger images
|
|
Well, everything now has a place so I'm going to call it quits on reshaping Rowdy - it's time now for the routine maintenance these old gals demand, and some trailer work.
Jerry
Webmaster Note: Click here to go to the Technical Section - Battery boxes, and Click here to go the the Technical Section - Heads
***********************************
September 7, 2016. Responding to a routine followup we got the following update from Jerry (I'm almost sorry I asked!!!).
Hi Ron,
Nothing much going on. My truck was stolen right out of my driveway about three weeks ago. The police recovered it Sunday. All the boat stuff was stolen along with the tool box.
I'll have to replace most of the stuff and fumigate and repair the vehicle but as my optimistic spouse says, "all's well that ends well".
Jerry
Webmaster Note: A pretty good argument for keeping capital punishment!!
*********************************
January 14, 2017 - We got the following from Jerry responding to a webmaster's call for an update
Happy New Year!
Did you mean "how is Rowdy" or "how is Rowdy's dad"?
No problems here, thank goodness. We have a four year plan. Year one, this spring, trailer the boat to the Chesapeake and cruise there for two seasons. Year three, trailer up to Maine and cruise for two years. The schedule after that is open.
Jerry
Webmaster Note: For Dolphinites cruising the Chesapeake this is required reading http://dolphin24.org/robert_de_gast.html. Robert, a writer and photographer, and past owner of Timesweep, Yankee #241, passed away a year ago. He wrote several books about this area, including one about his solo circumnavigation of the Delmar Penninsula. Marionette and I look forward to seeing ROWDY and Jerry in Maine - I know Marionette will want a new dress as she gets nervous up in Maine around her beautifully restored sisters. http://dolphin24.org/Avellar2.html
*********************************
October 16, 2018 We got the following update from Jerry
Hi Ron,
I don't know if you remember that I told you I was going to take Rowdy to the Chesapeake last year. (I do!) Well life got in the way of that plan. Now for the new plan.
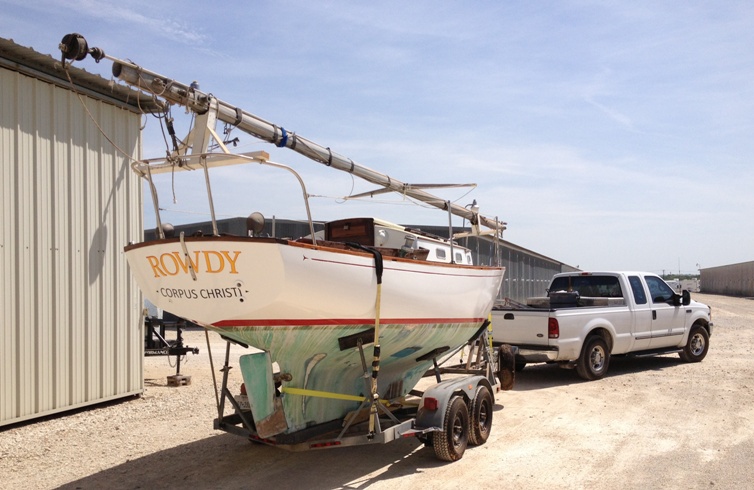
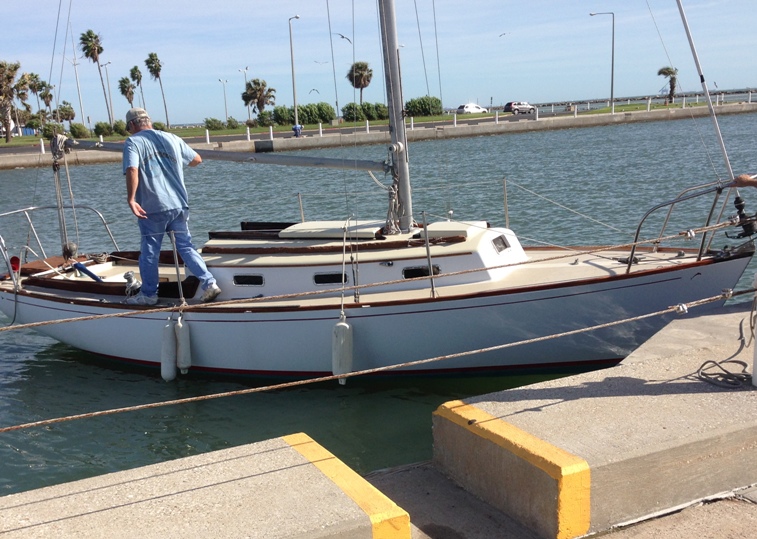
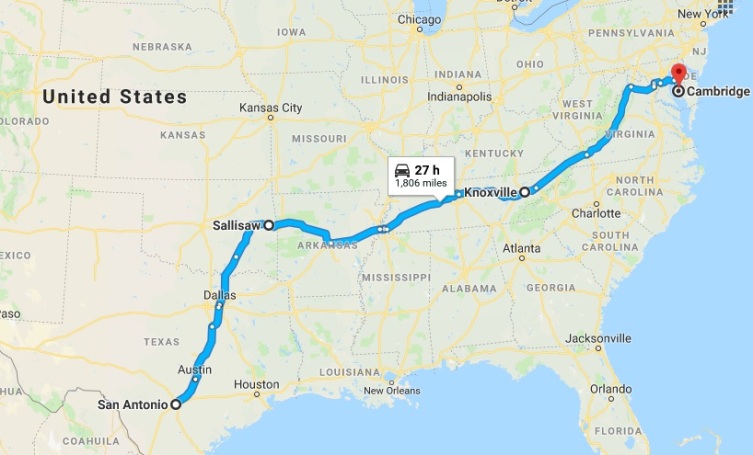
I depart San Antonio either tonight or tomorrow morning headed for Sallisaw, Oklahoma to pick up a friend and then off to Cambridge, Maryland. I am going to launch for a 2 week cruise, weather permitting, and then hauling and covering her up for the winter.
Sounds like you had a good summer. I might see you up north in a season or two. (Looking forward to it!!)
Jerry
Webmaster Note: In keeping with our past efforts to familiarize readers with the sailing areas of our Dolphins the following is a Google assisted start for Cambridge, Maryland. We'll let Jerry provide close up details.
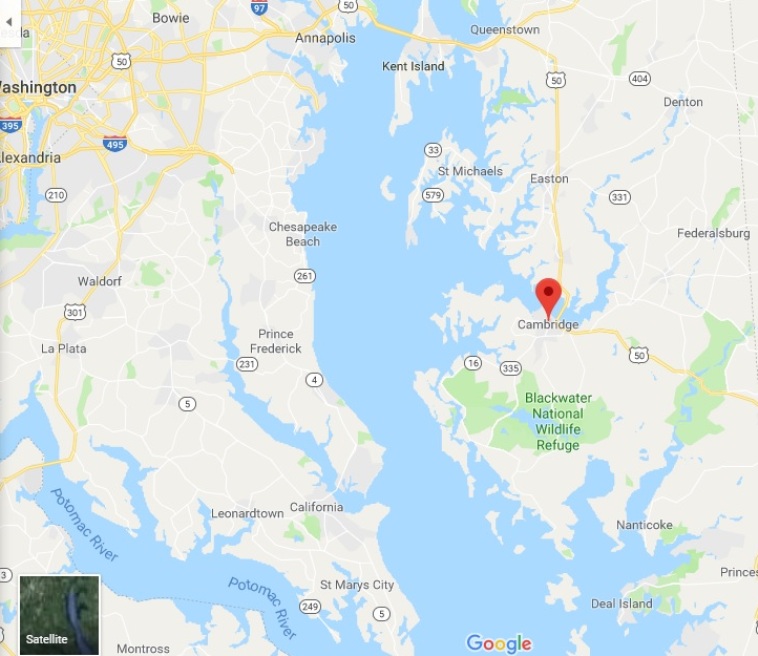
Stay Tuned
October 18, 2018 - We're tracking ROWDY......
(emails over past 24 hrs)
Hi Jerry
Ahhh life, plans....what would we do without them. Another 'Road Trip" for ROWDY. Bring your camera! and, Good Luck!!!
Here's her updated page. http://dolphin24.org/rowdy.html.
Please let me know if you see anything amiss
Safe trip
Ron
|
Hi Ron,
My travel pal has decided he needs a dolphin fixer upper, preferably of the free varity. Do you know of anything out there?
Jerry
PS we are approaching Knoxville.
Webmaster Reply Re Dolphin Freebees - Check out
http://dolphin24.org/enough.html (Right outside of Washington, DC!)
http://dolphin24.org/shroonlake.html (upstate NY)
Ron
|
Stay Tuned
|


