|
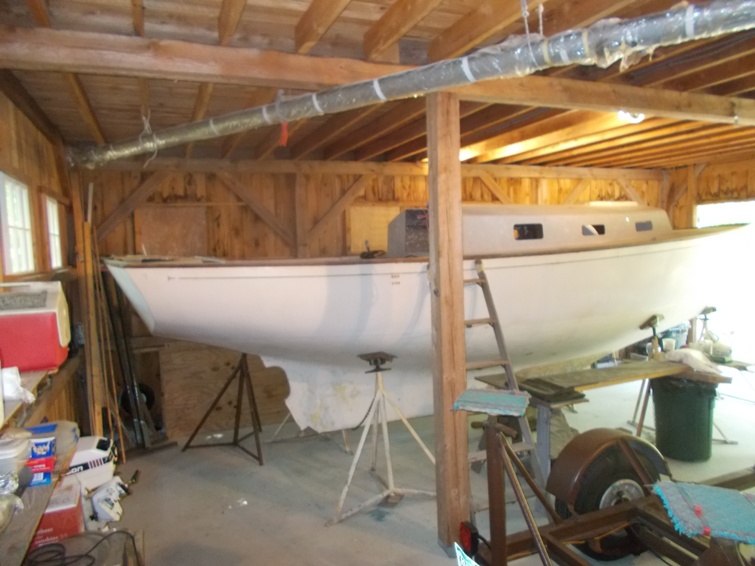
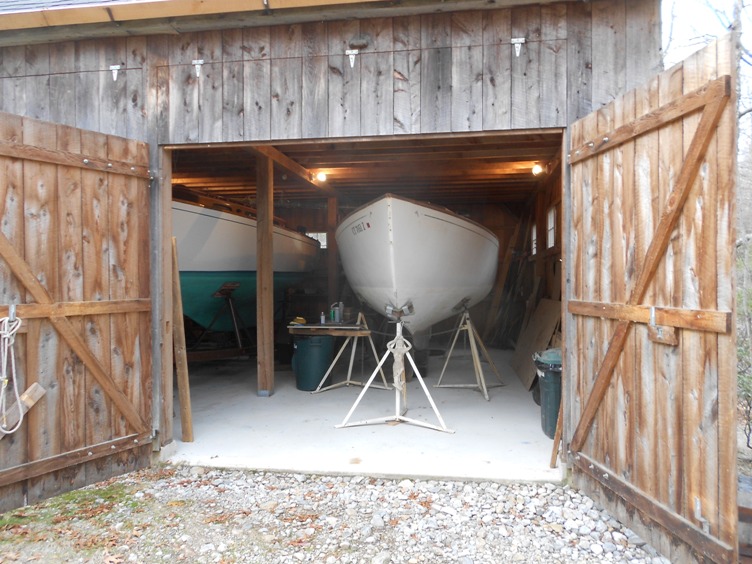
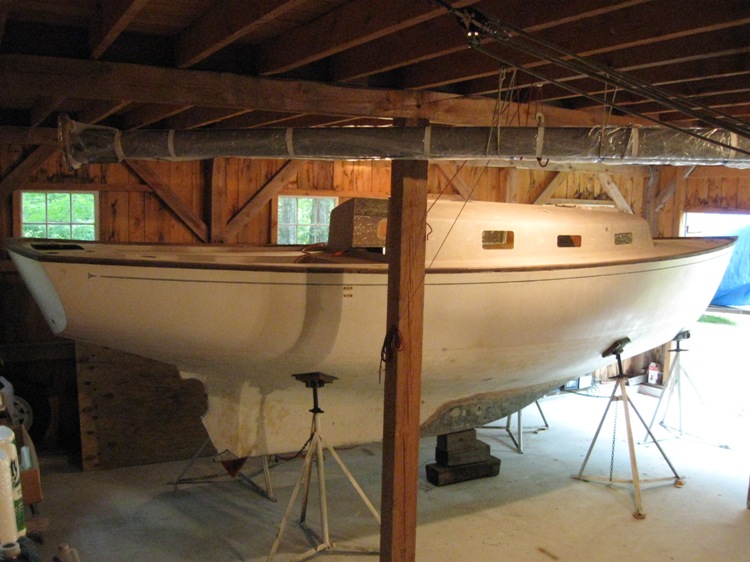
June 16, 2021 - Passage has a new owner, Walt Vongher. Here she is leaving her barn in Old Lyme on June 14 for Walt's home in North Branford, Connecticut. Stay tuned for Walt's restoration reports.

Bon Voyage Passage, Fair Winds Mike, and Welcome Aboard Walt!!
*****************************************
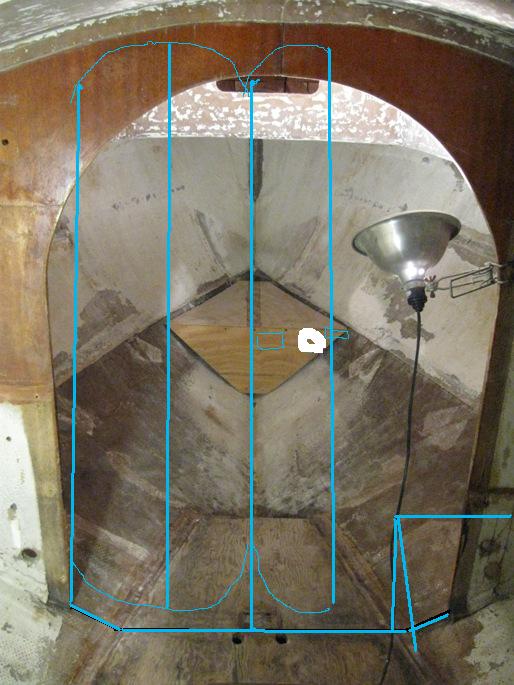
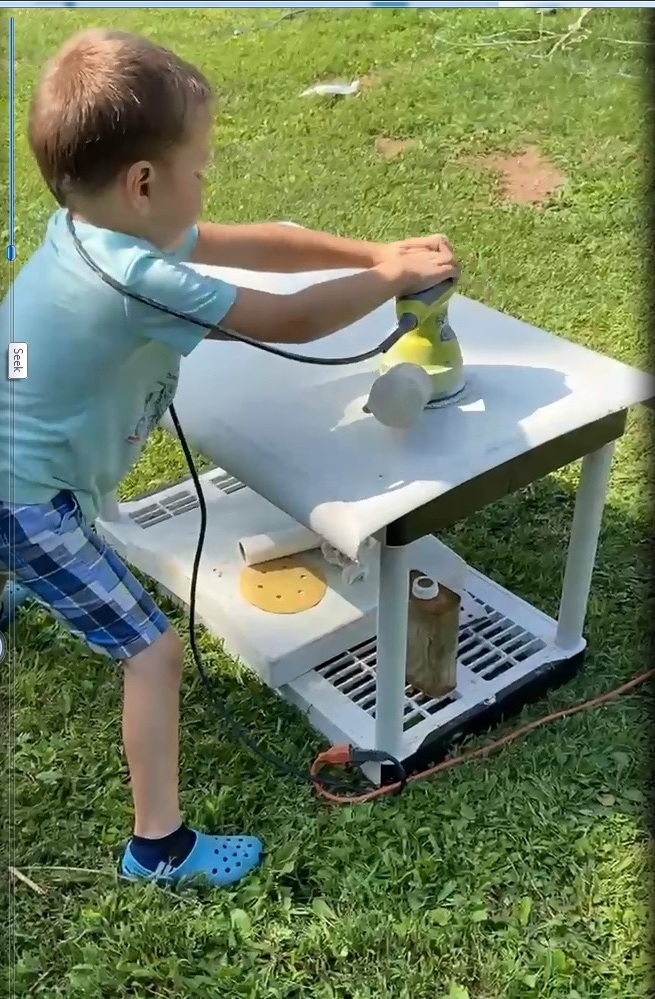
August 15, 2021 - Work on Passage progresses. We have the following 2 photo updates - below right Walt’s son working on Passage’s companionway hatch, and a cabin top paint job in progress
***********************
********************************
********************************************
******************************
This is the history we have on Passage up to this point in time
May 27, 2021.
Well - its been a tough year and a half - moving my family up to Vermont, the Pandemic's effect on life, and my dad's recent decision to sell his house and barn in Old Lyme made a restoration project no longer feasible. So, Passage is available for free to someone who wants to finish her up.
There's lots of pictures down the page that we've taken over the years, plus here's a few just taken. We have Marionette's trailer available to take Passage to her new home provided its not too far away from Old Lyme, CT. Anyone interested can contact me by email and I can answer questions and set up a visit. We are planning to move Passage out of the barn by July 15
Mike
micgoobre@gmail.com


That's Passage's mast neatly wrapped above
All the deck hardware, stanchions, pulpits, etc. are stored in the workshop above
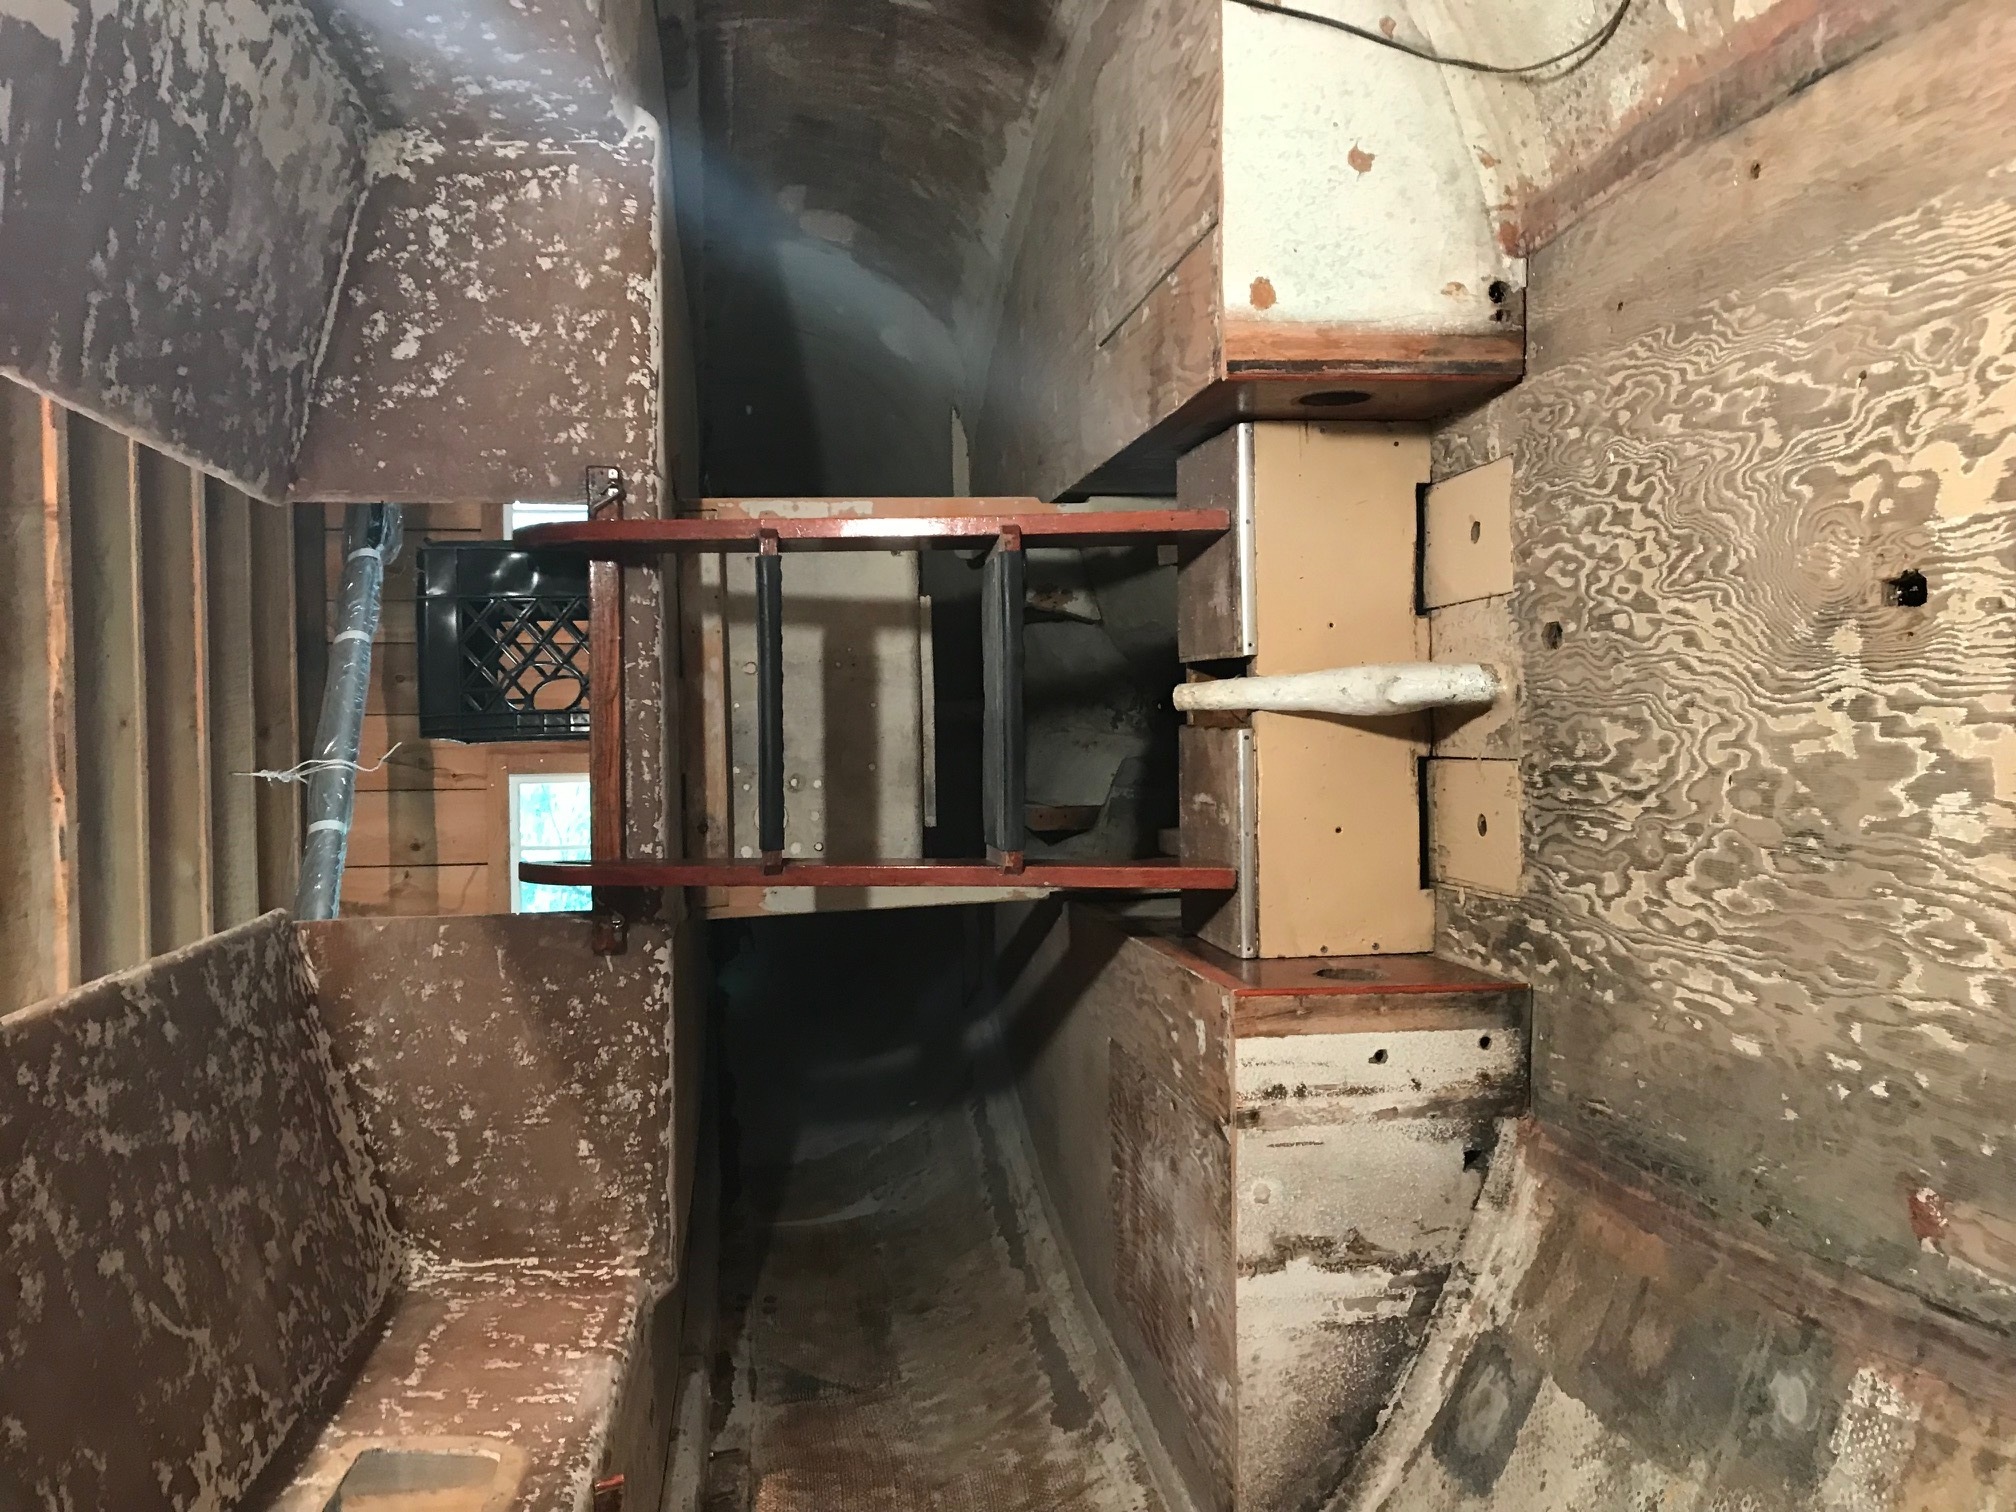
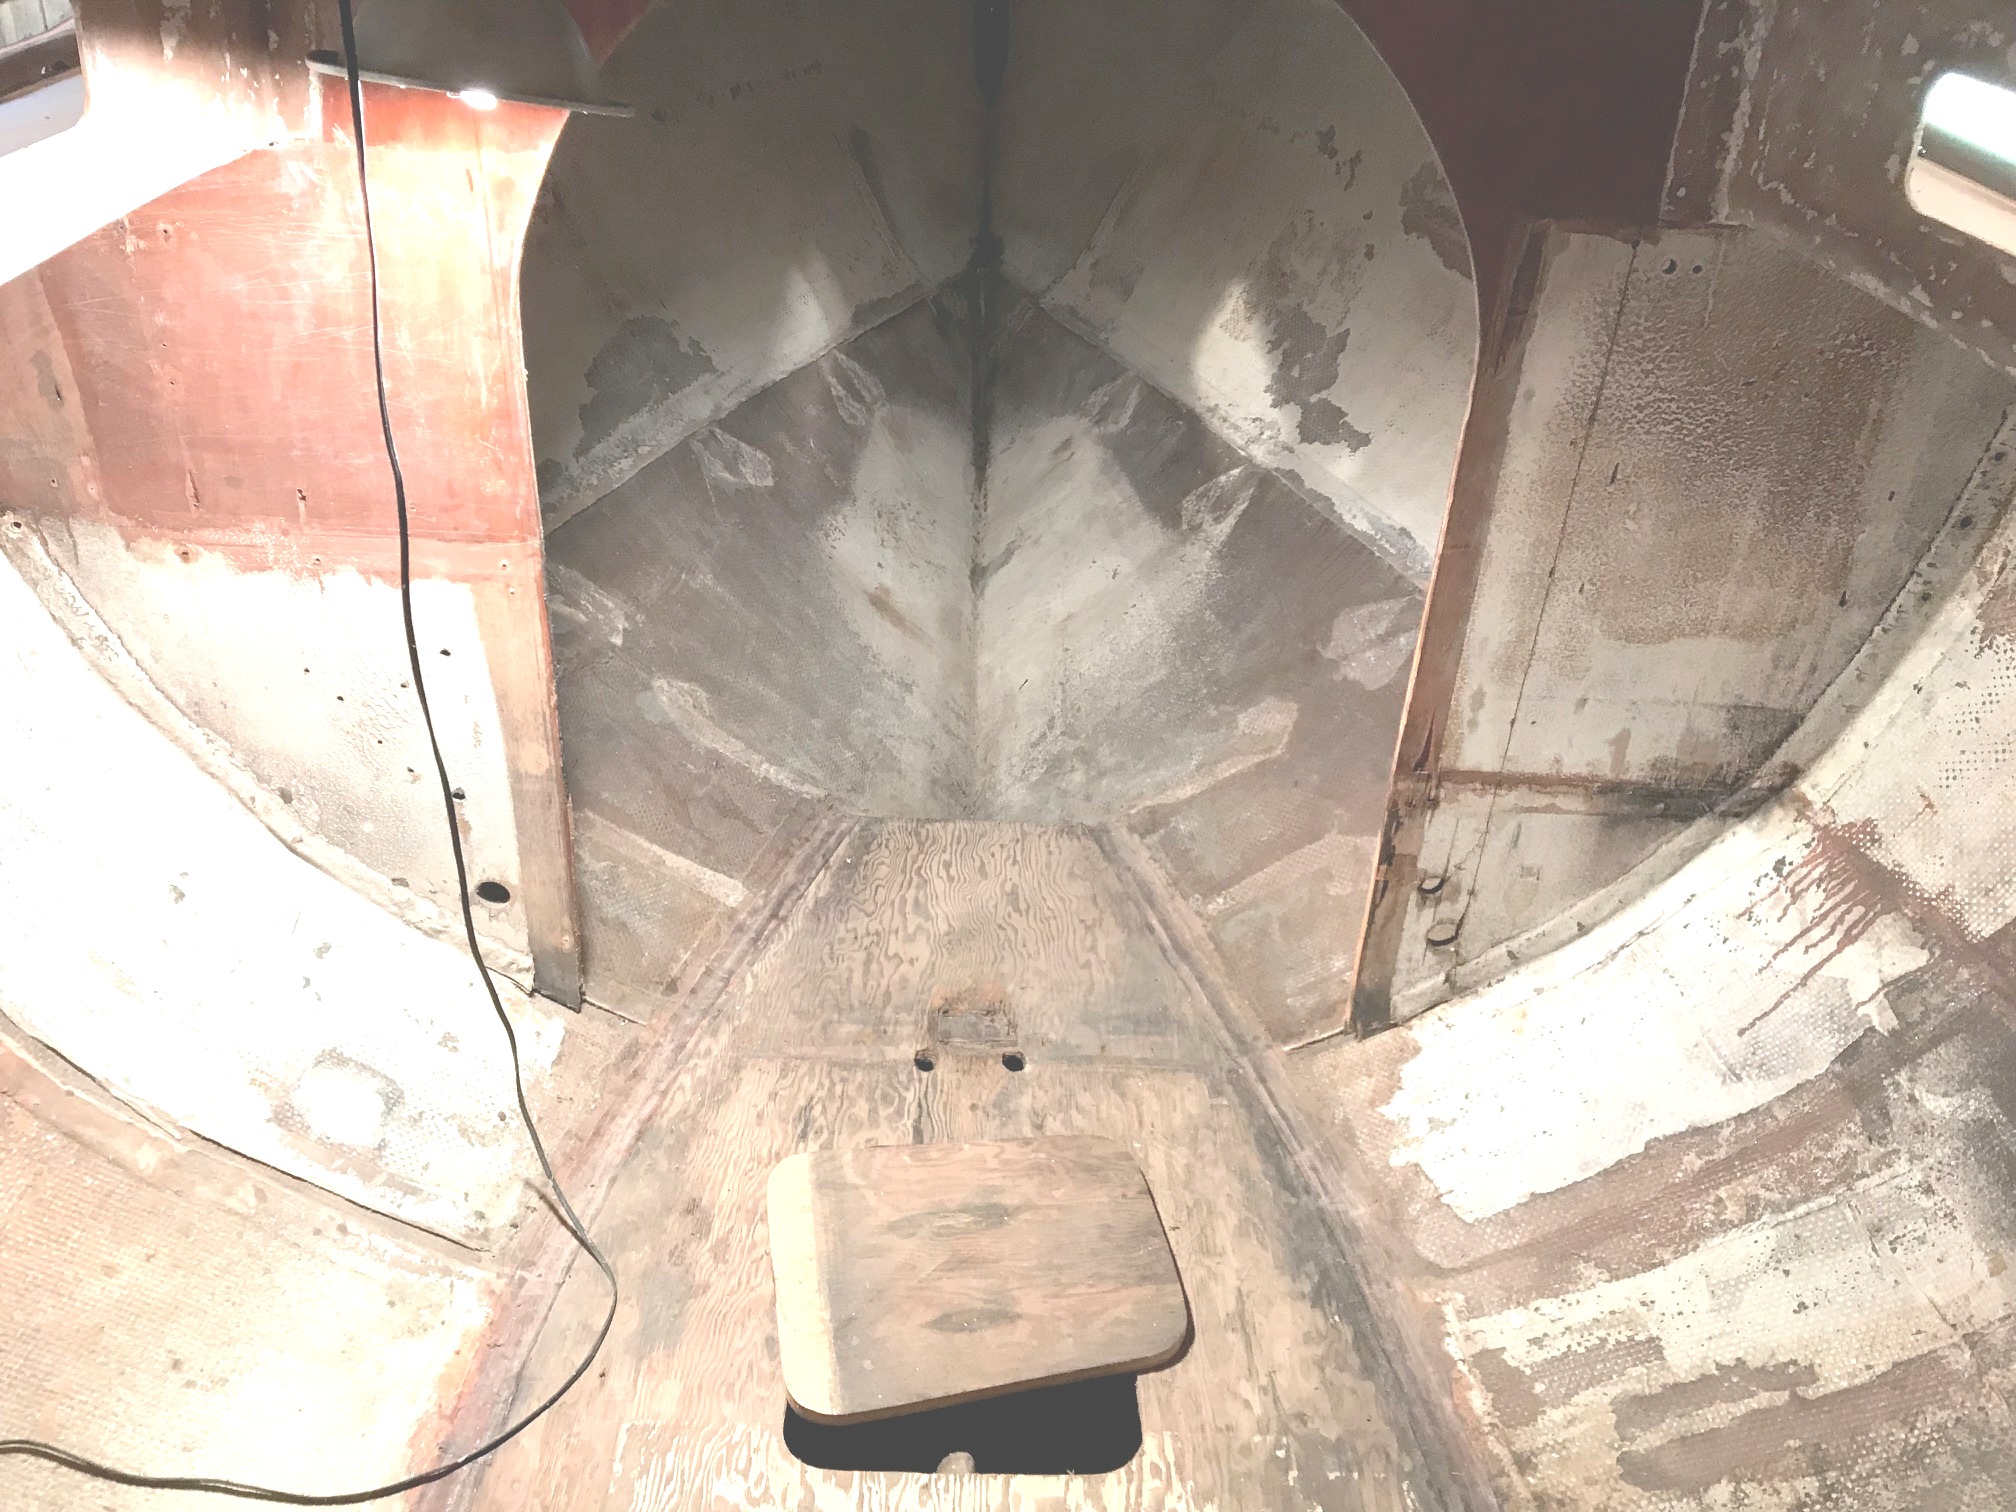
Down below pretty much stripped clean - early stages of development above....
****************************************
*********************************************************
**************************************
Ok, this is where we were, and how we got where we are
September 23, 2018. Big Day - Mike has taken down the For Sale ad and has restarted Passage's restoration! Here is his email and work photos.
Thanks for all the great stories and updates on Marionette. I’m writing to request that Passage’s “For Sale” listing be taken down. After several years of inactivity, restoration work has resumed with the goal of launching sometime in the 2019 season at a location near near New York City. As for progress, so far it mostly involves assessing and planning the project.
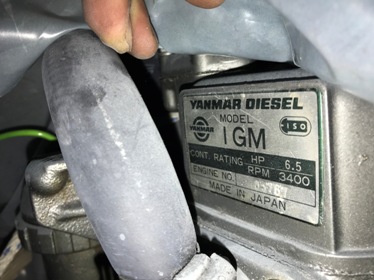
While the Palmer gas engine is probably functioning, thoughts around replacing it have consumed a great deal of time because of the trade offs of various power options. Currently I’m looking for a used Yanmar 1GM10 as the most likely best option.
Other plans and choices this fall include installing a mast strut, or a reinforced main bulkhead to support the mast. The interior is stripped out and ready for some kind of midship berths and lockers.
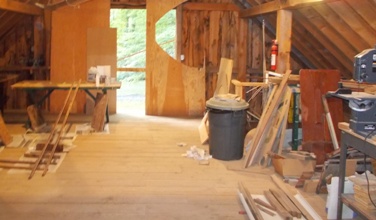
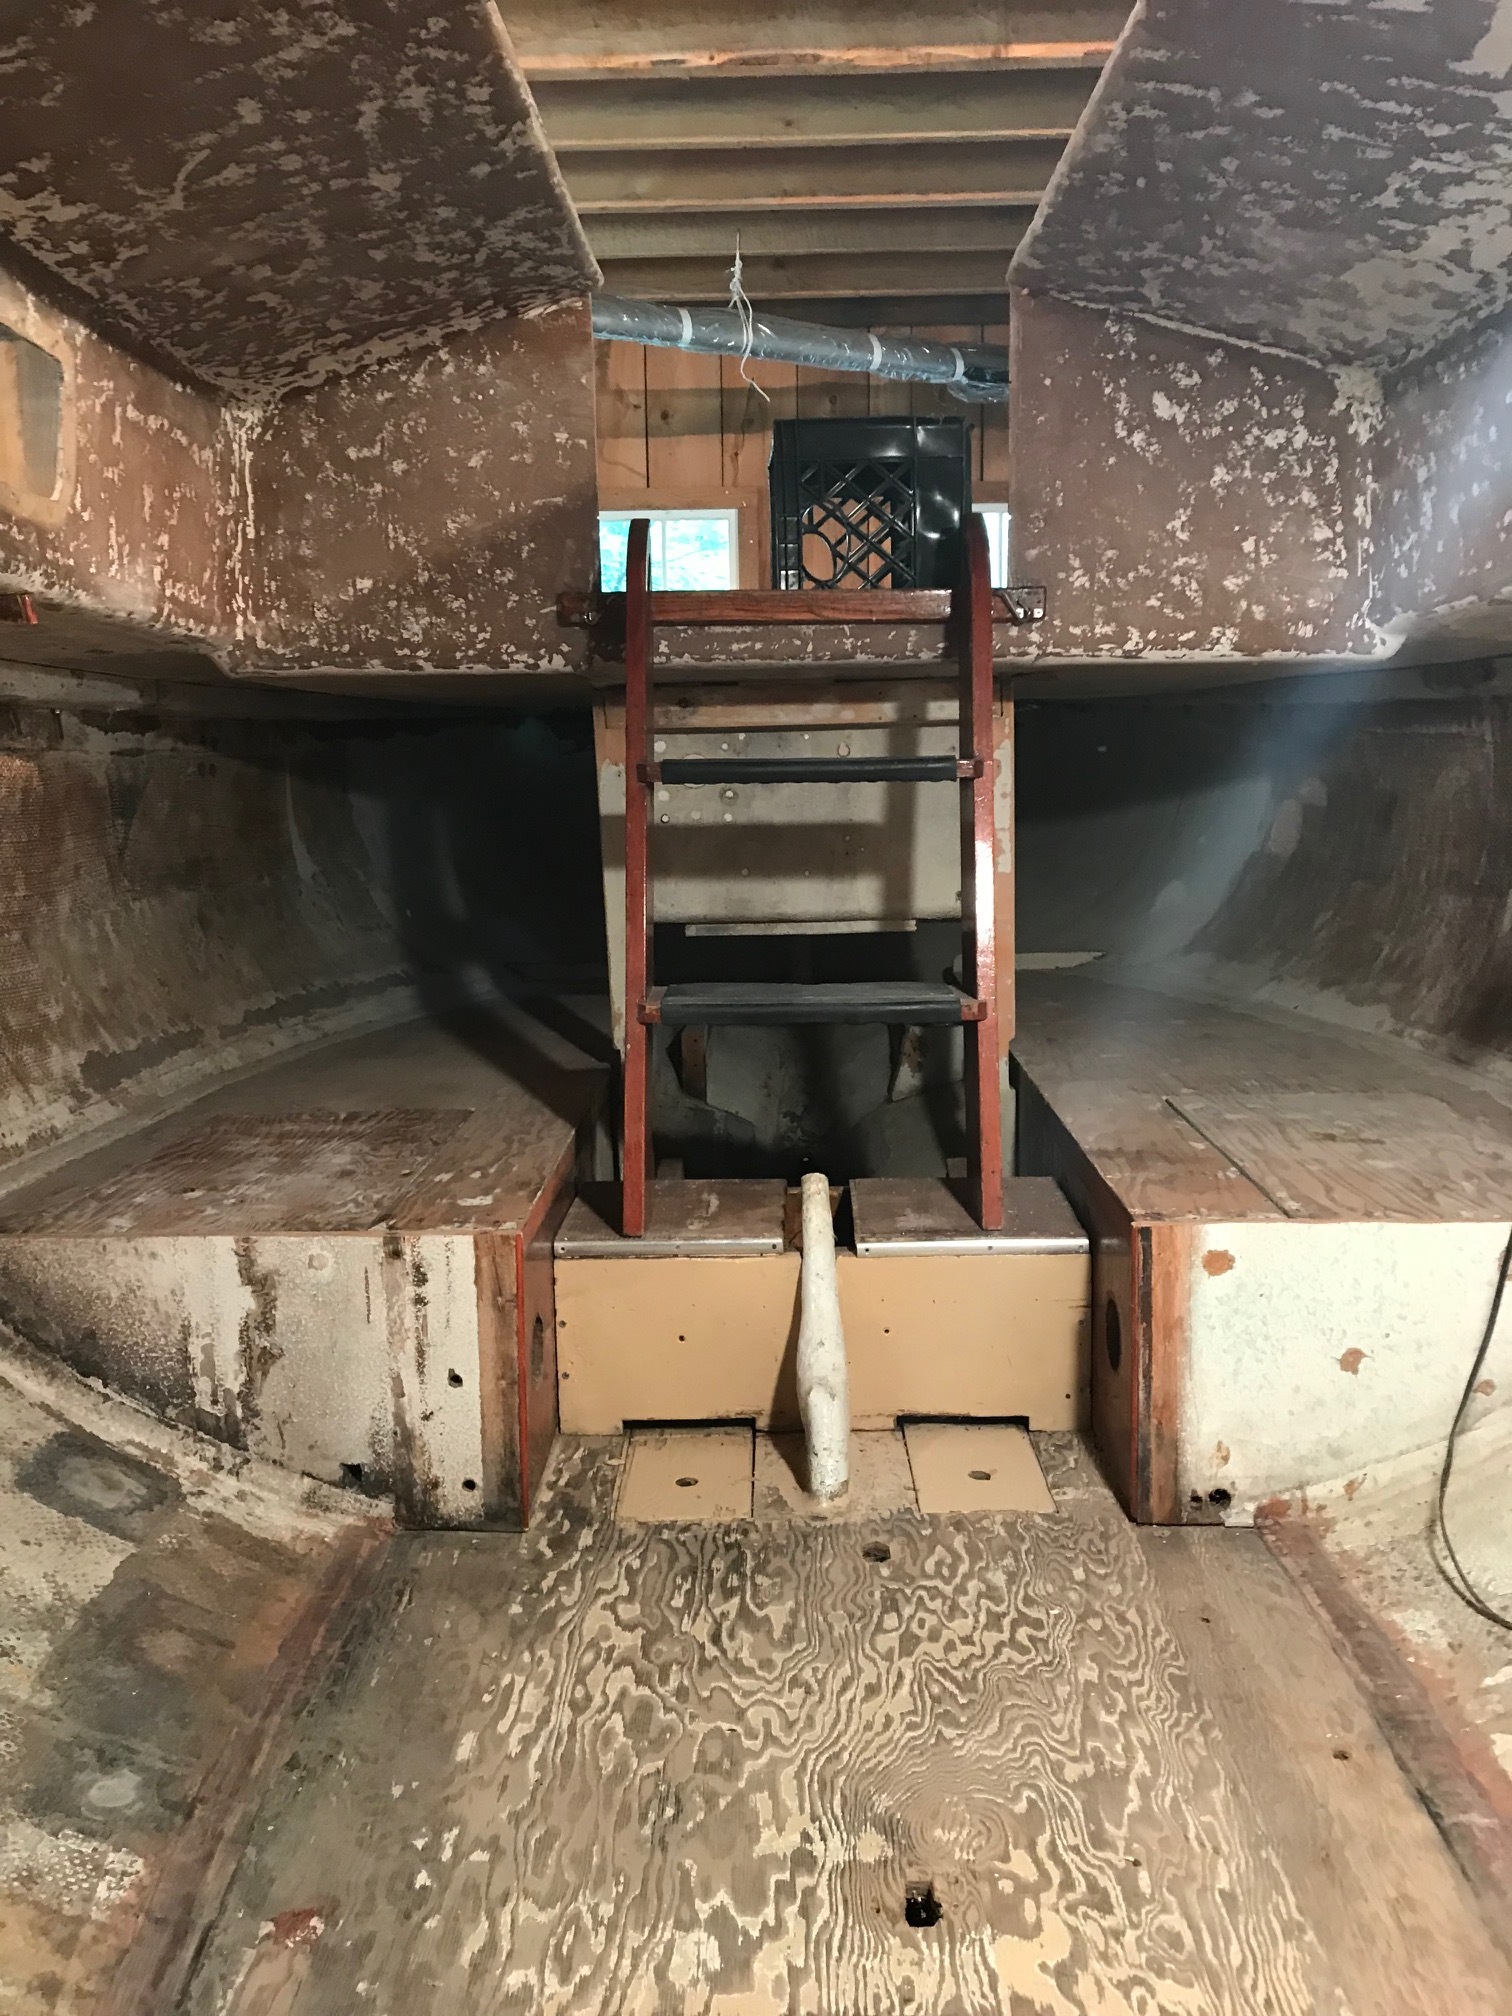
I am attaching a few photos to document the one “work day” spent with the boat. Dust and mice/squirrel droppings have been swept up and a temporary floor/ companionway stair have been set up. Significant parts re-installation/varnishing and deck/interior/bottom painting lie ahead while the weather is warm. More updates to come.
-Mike

original companionway stairs temporarily reinstalled
|
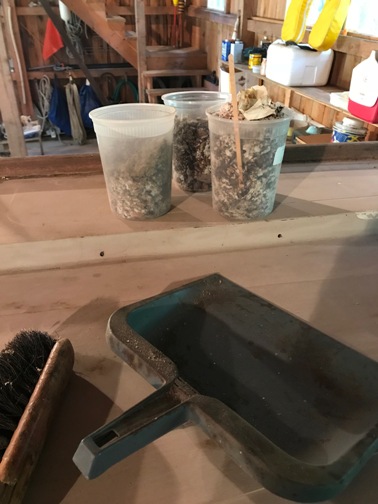
mouse/squirrel droppings swept up.....
|
Port Q-berth under study....
|

looking forward
|
Click on the above photos for a larger image
Webmaster Note: We have set up a page to store the ad - it being painful to be constantly reminded - but it is part on Passage's history.....Click here to go there. Below are keeper photos and text contained in the ad that we need to keep on her main page.
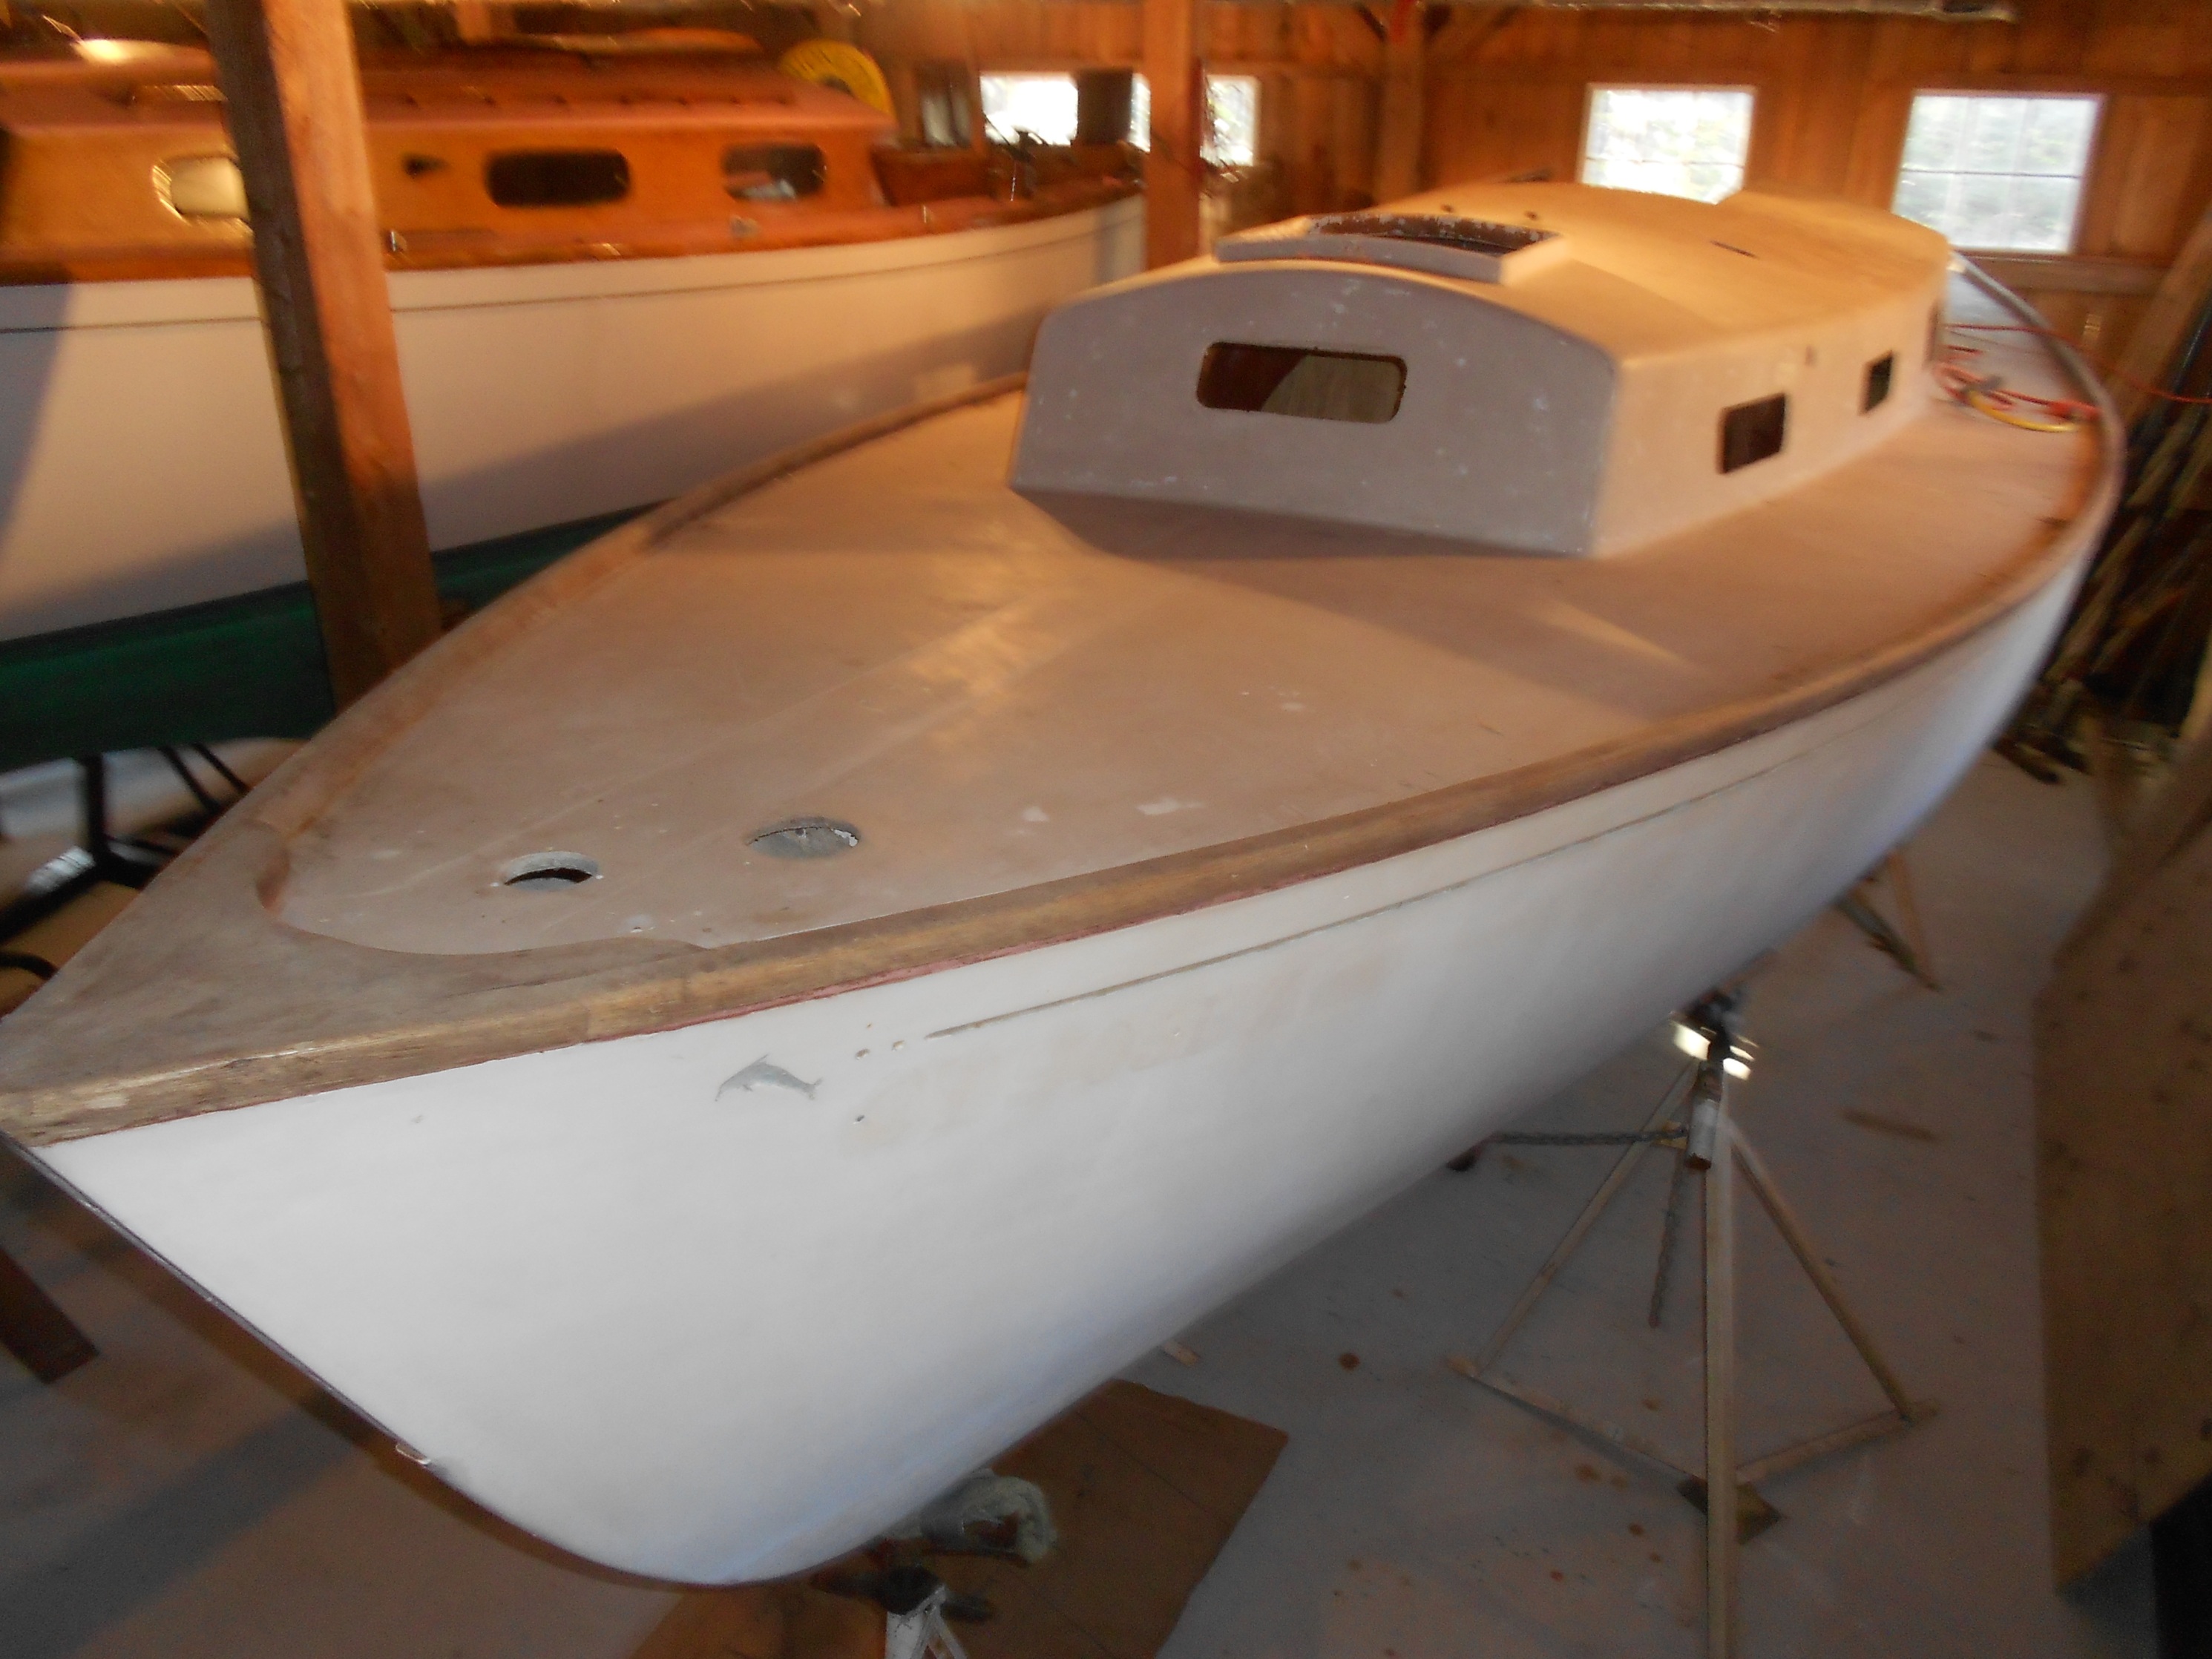
Passage has been in this barn for the past 8 years - she shares it with Marionette
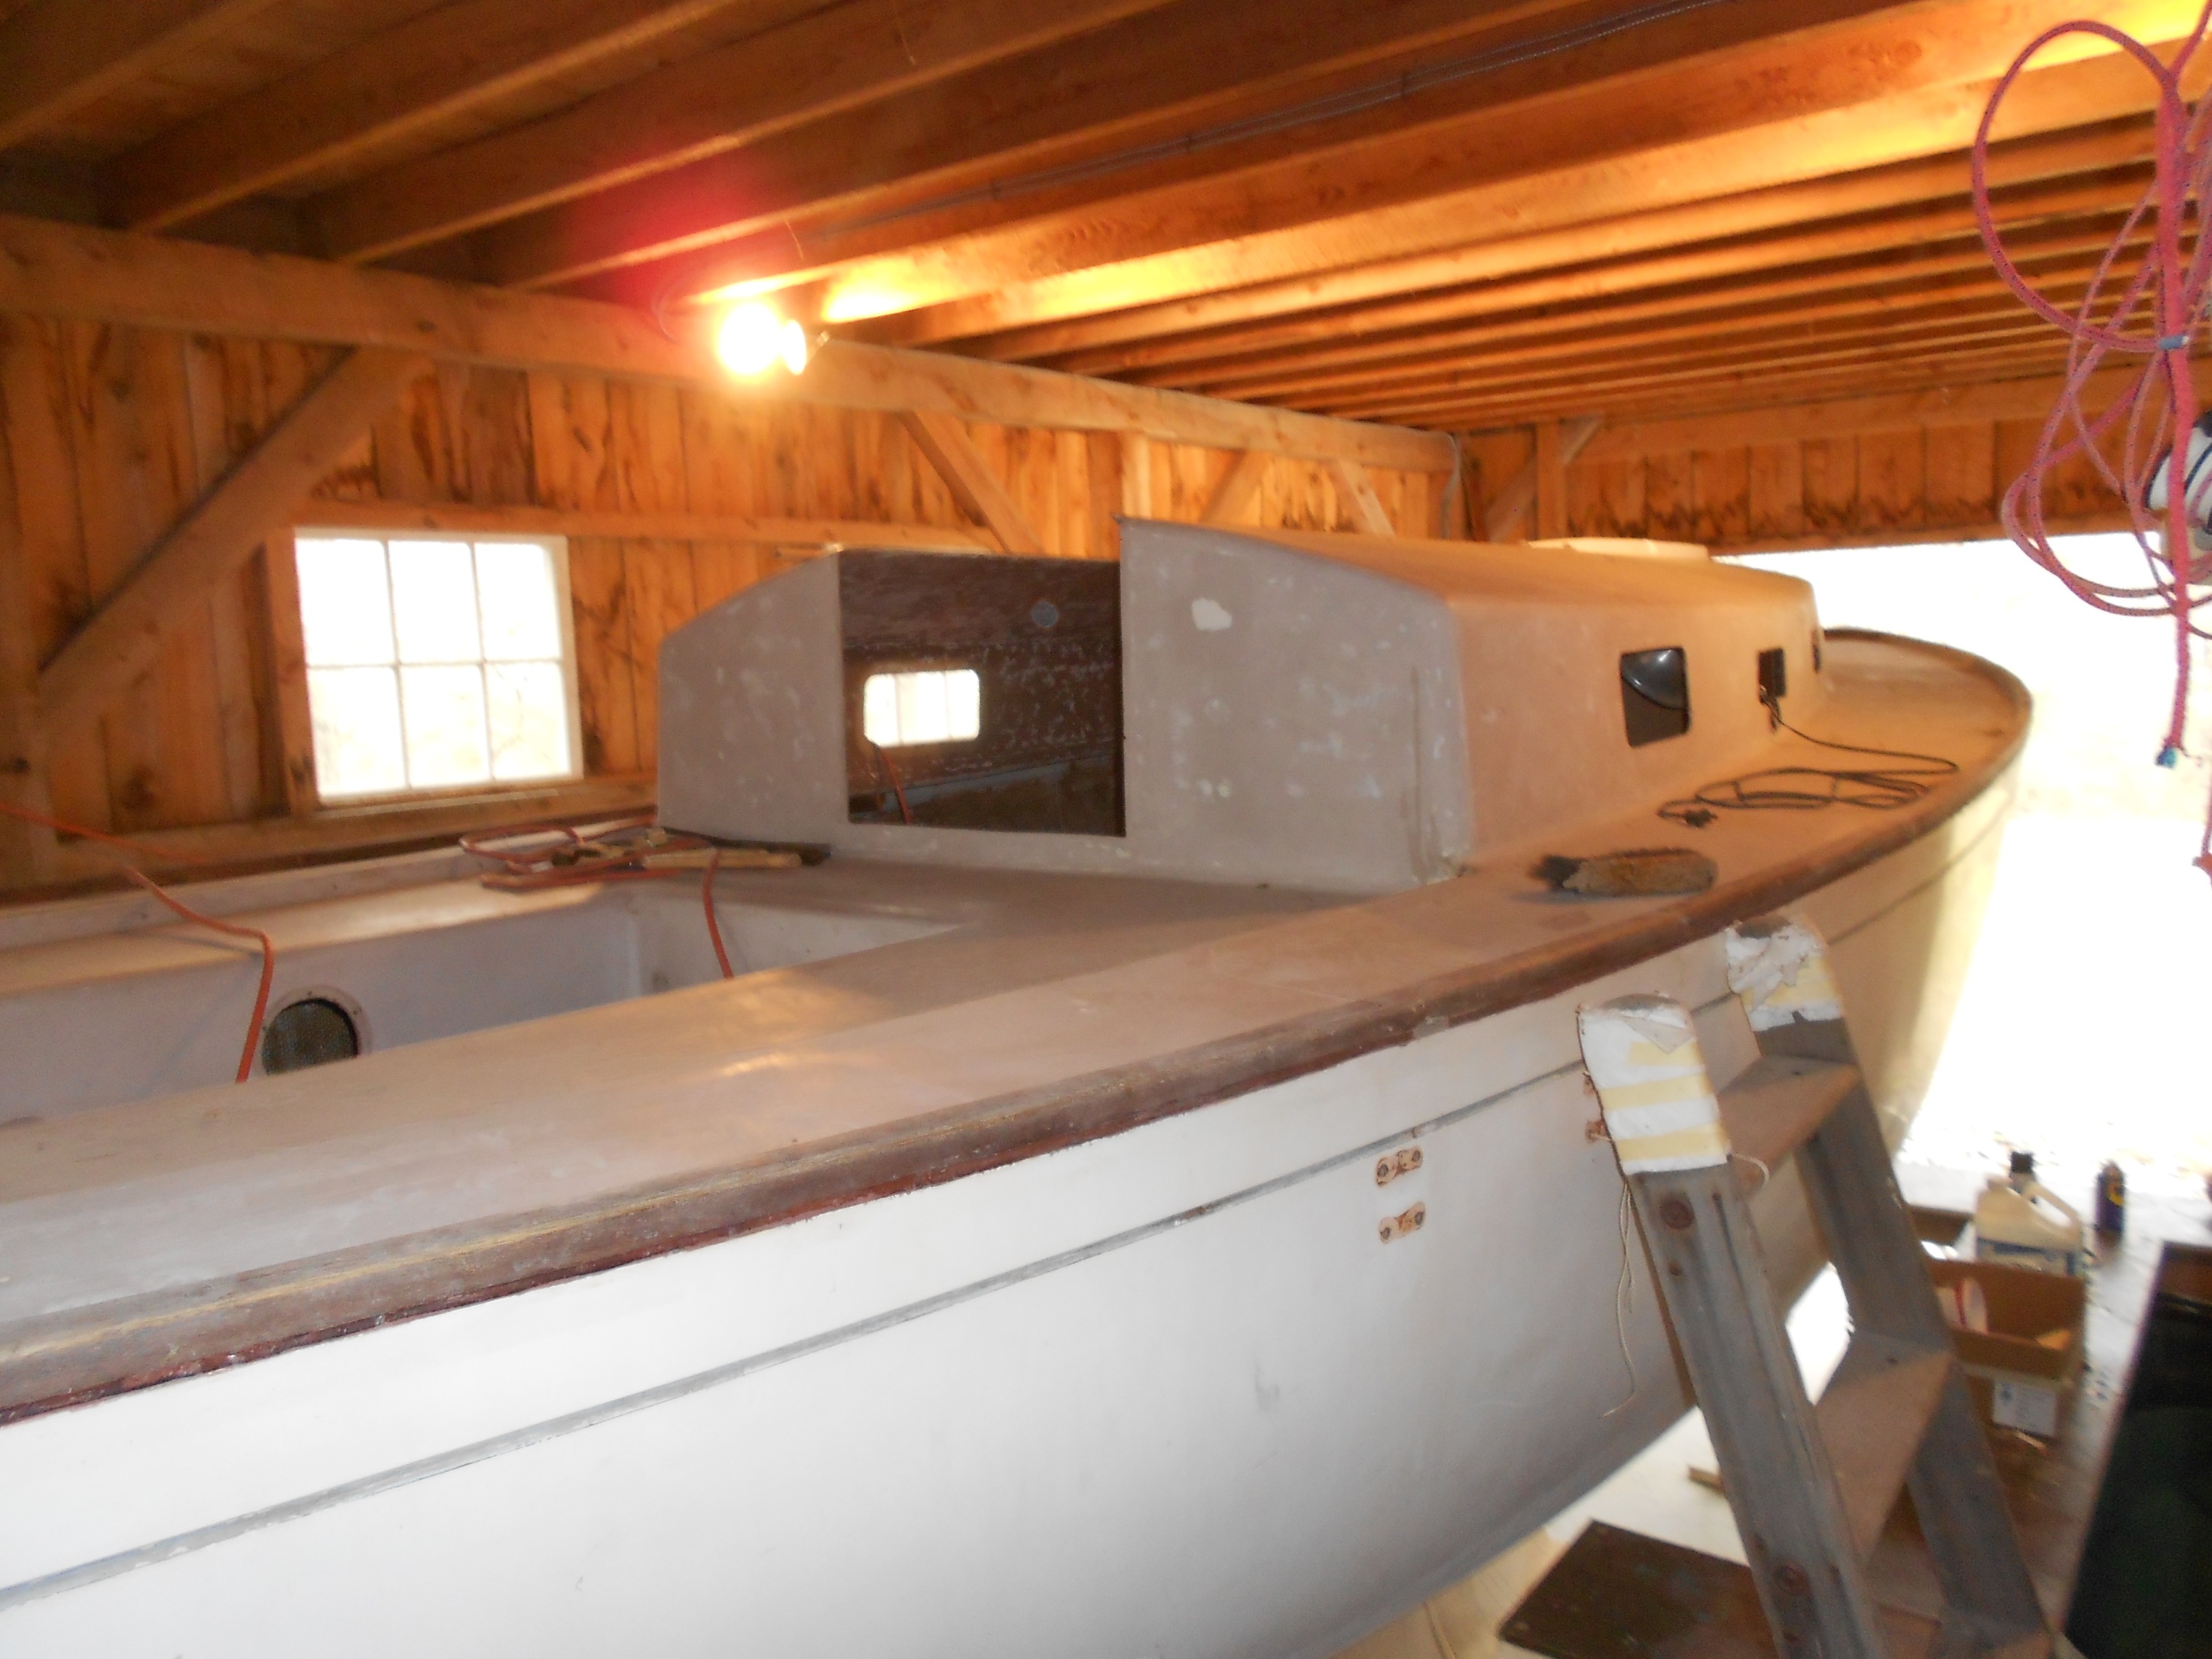
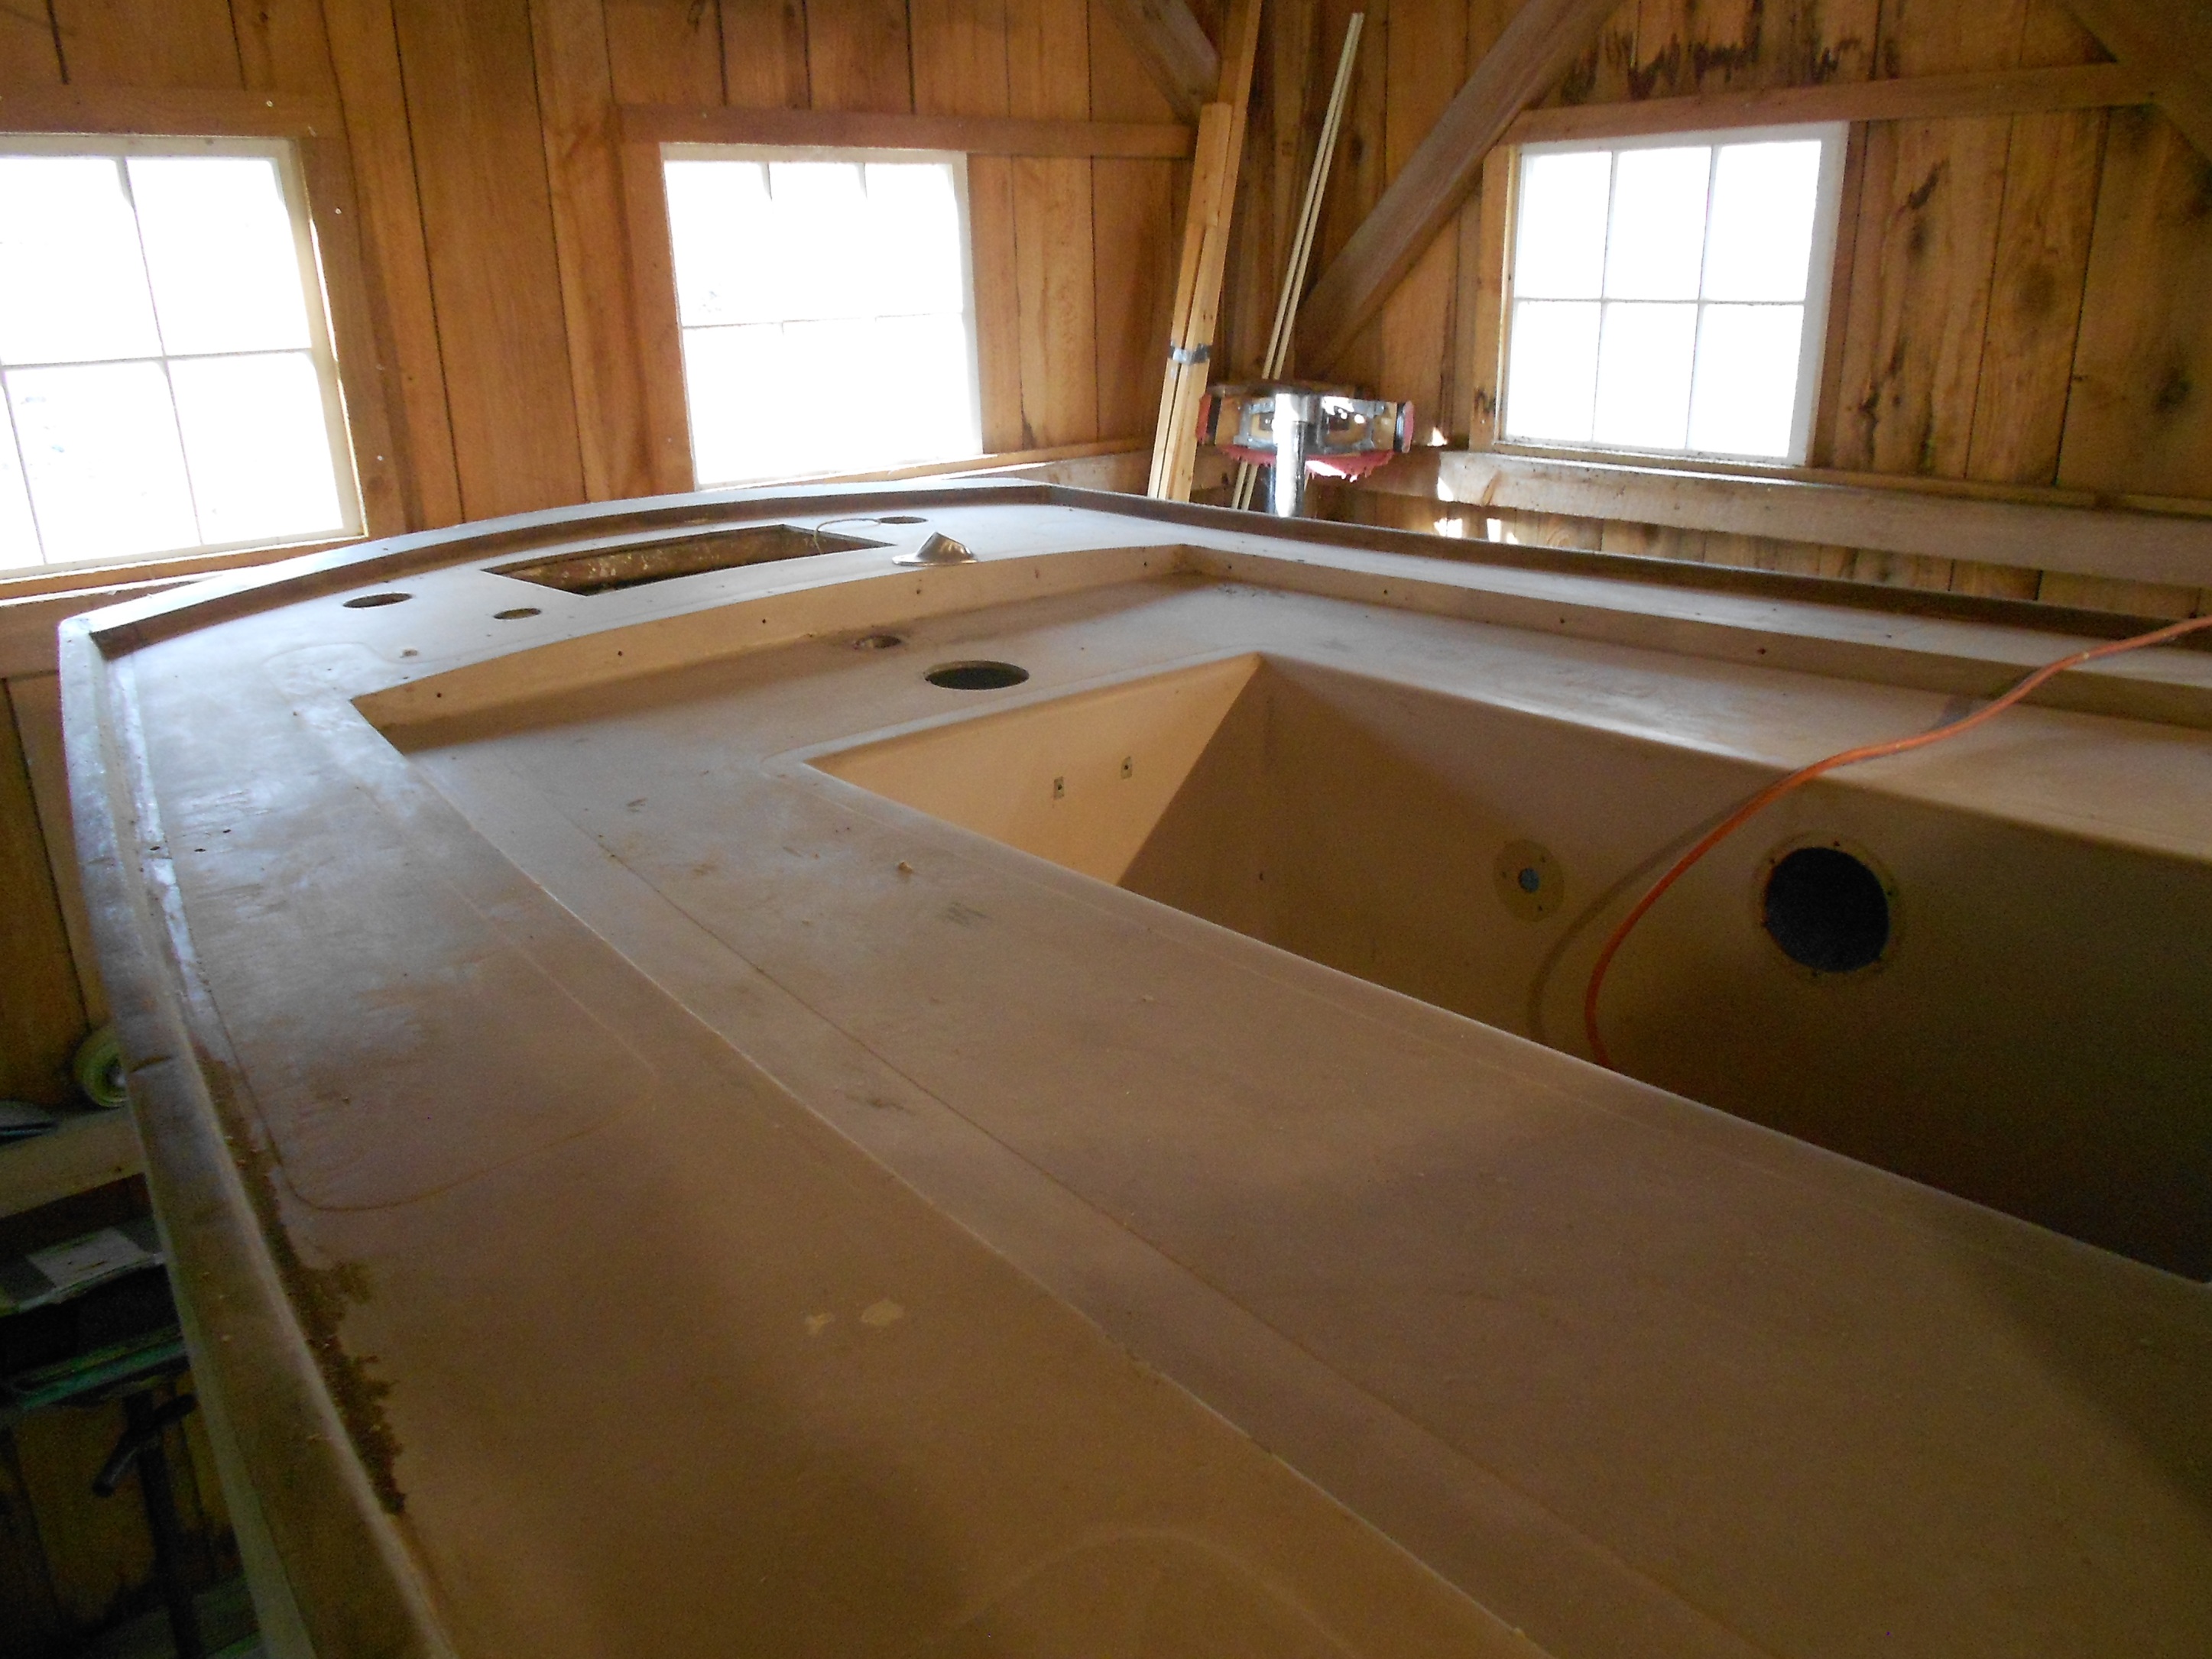
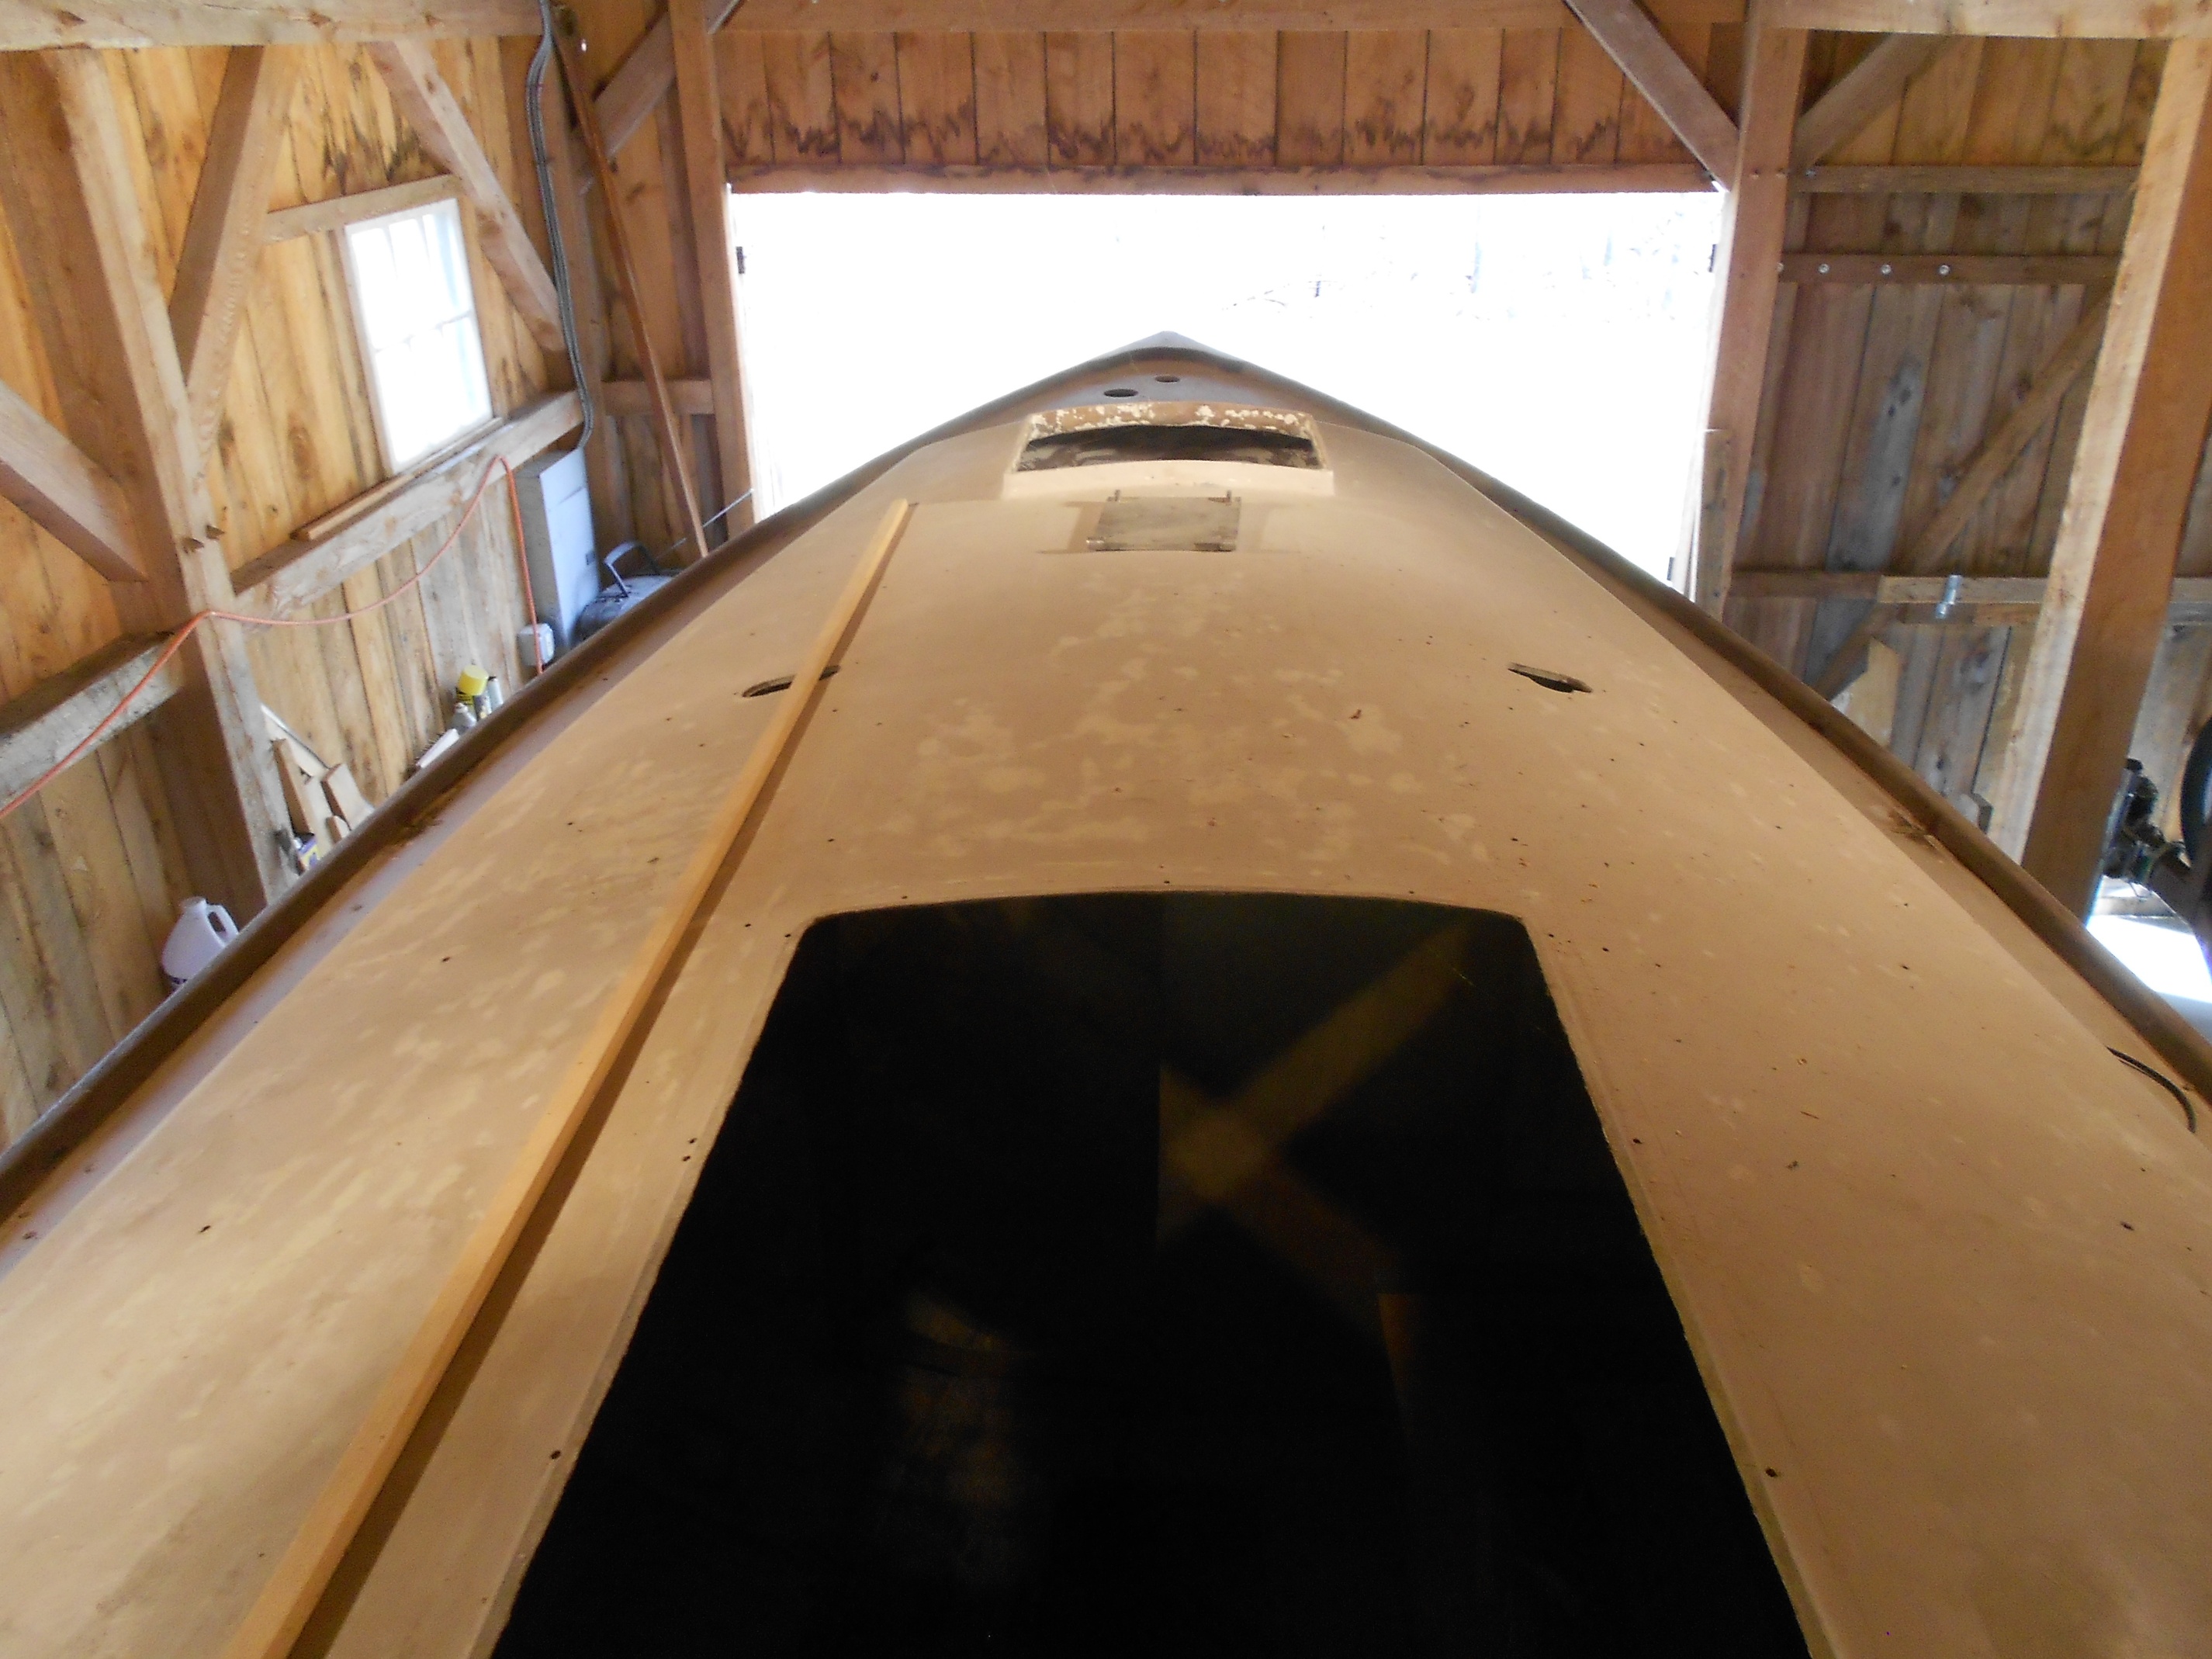
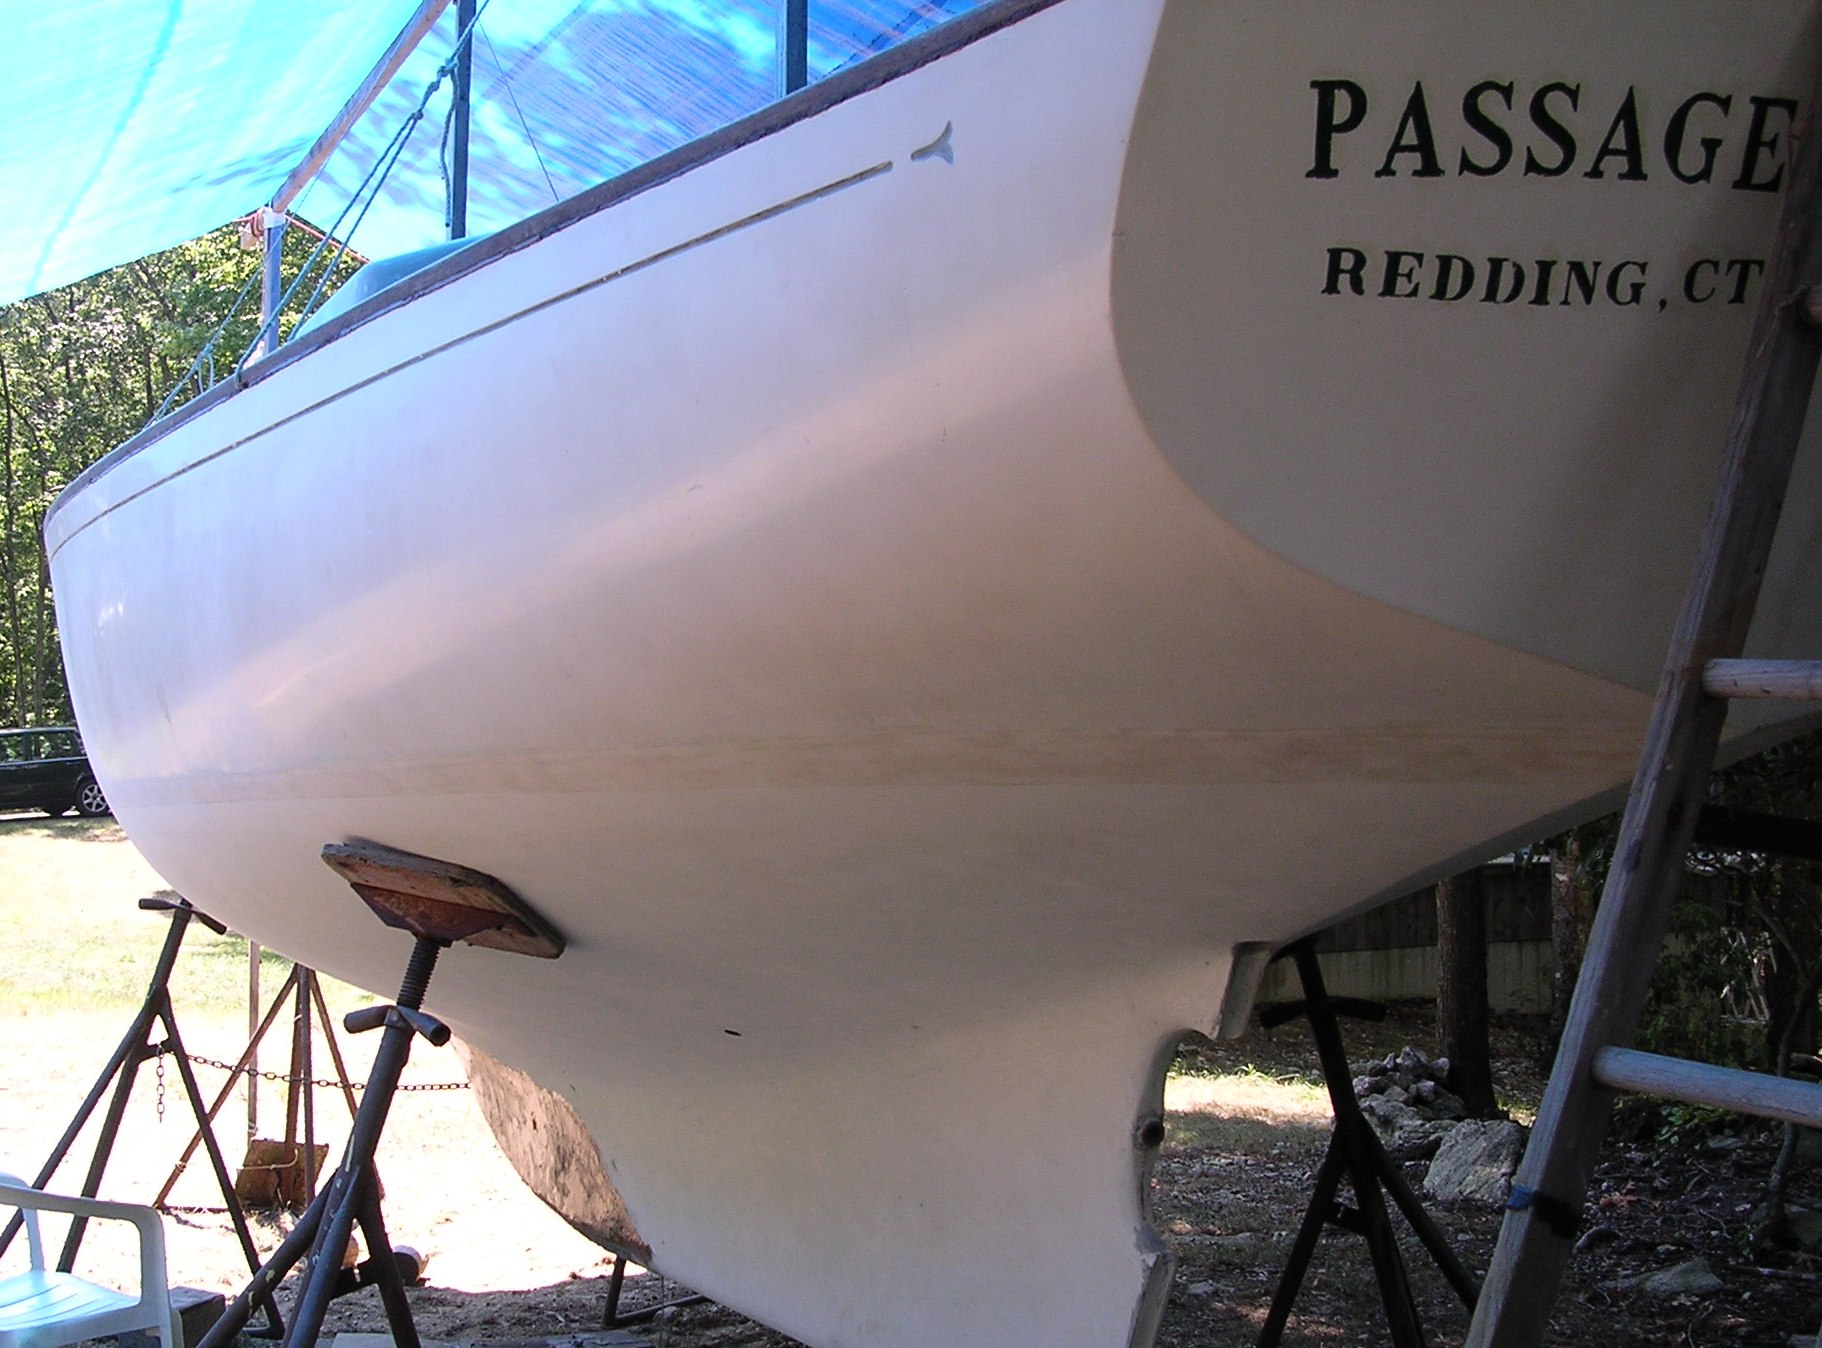
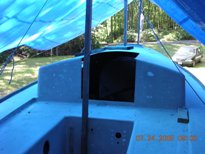
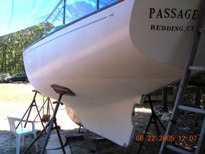
This is Passage when we found her in 1999 on the Mystic River off Noank, Connecticut. We sailed her to Niantic and hauled her there. She has not been in the water since. We had big restoration plans for her, but we ran out of time. We have completely stripped her of all exterior wood, except toe rails which have been filled and sanded. We removed all hardware, wood trim and portlights, and gutted the interior. Below is what she looks like in the barn. Click on most of the photos for larger images - click the return arrow on your browser to get back here. There's more detail on the work we did on her hull further down on the page. The bottom is sanded and faired, and ready for barrier coating - which we have (maybe the 'use by date' has passed?). The topsides look pretty good as you can see. The deck, house and cockpit are nearly ready for painting.

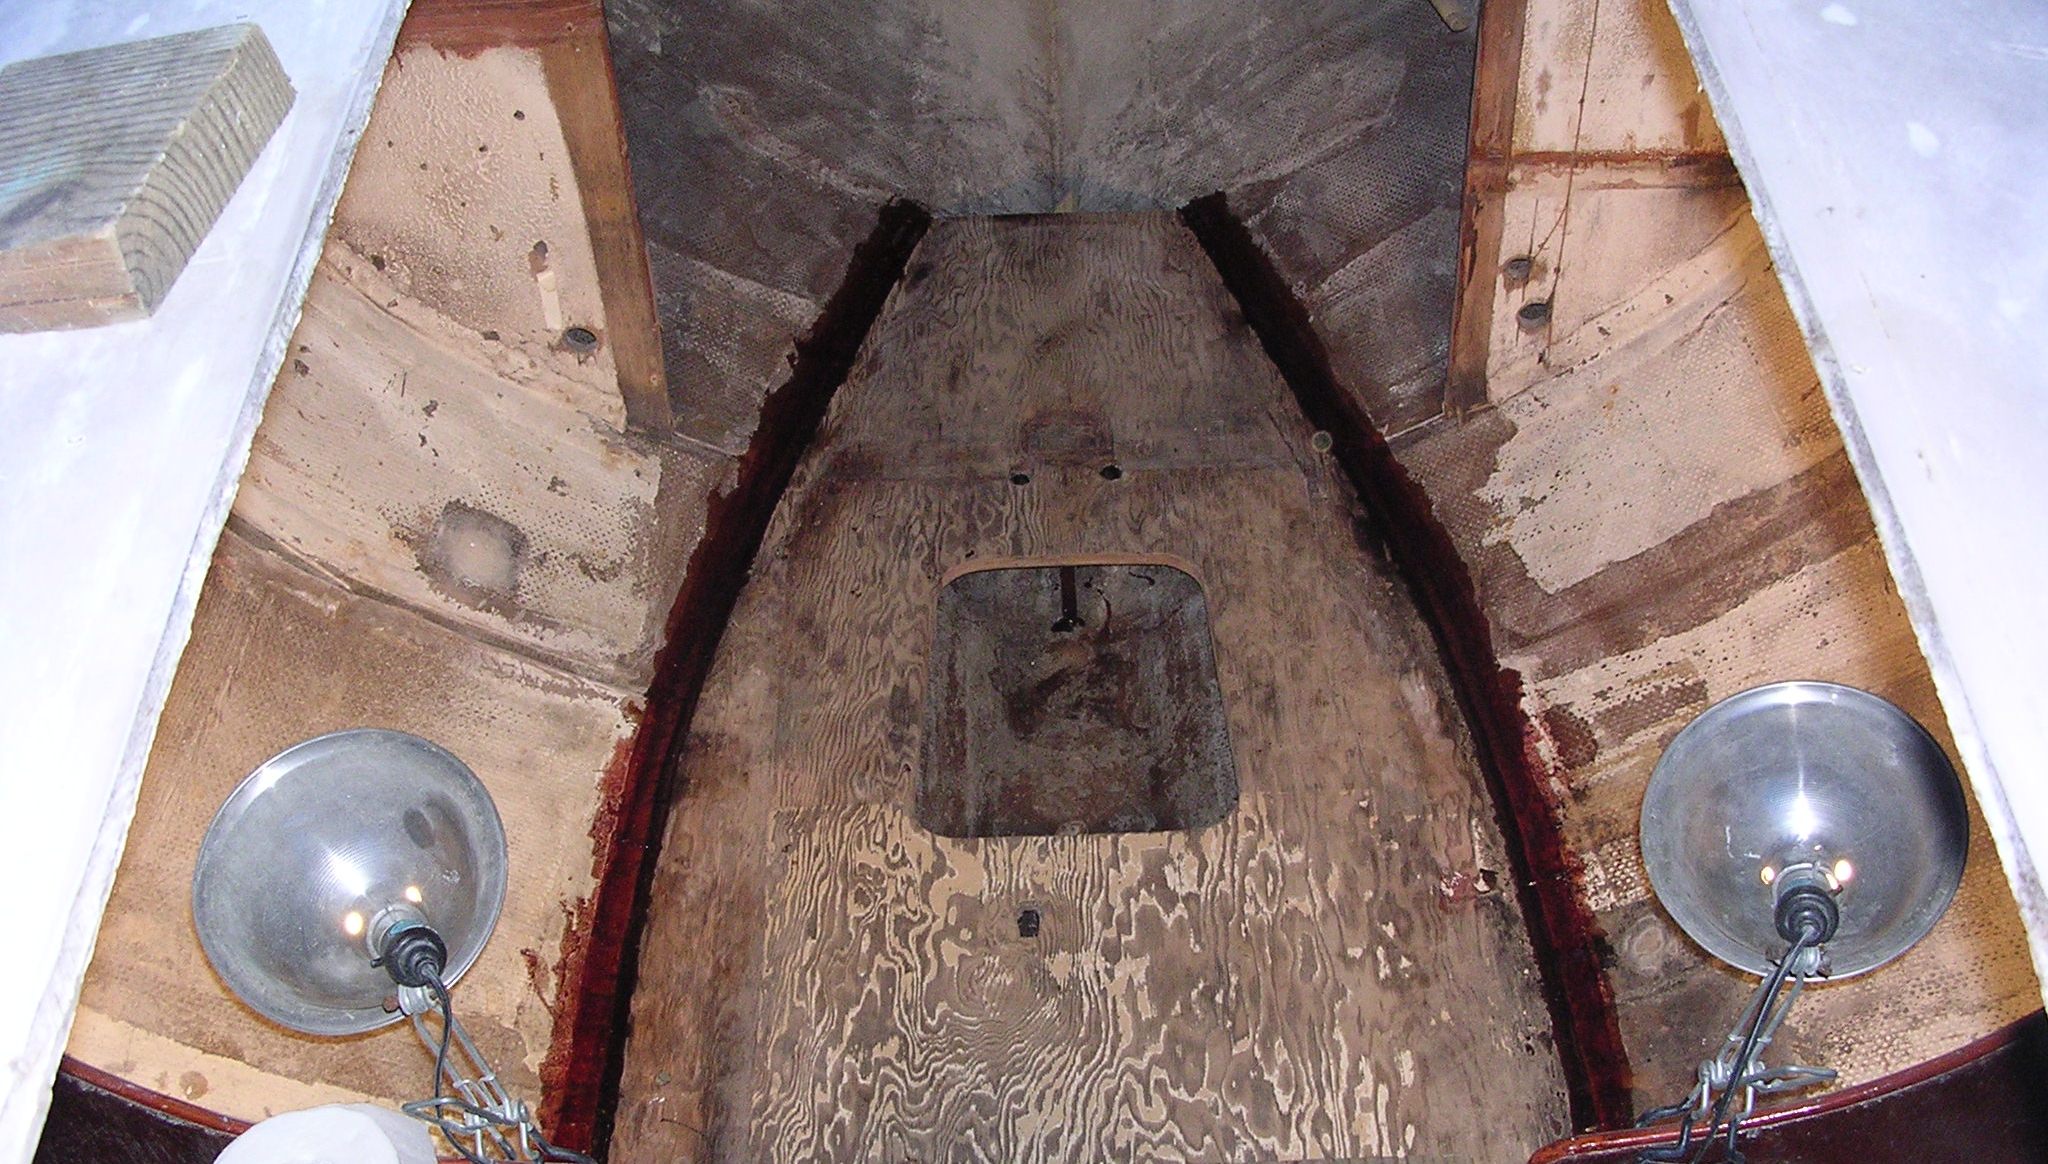
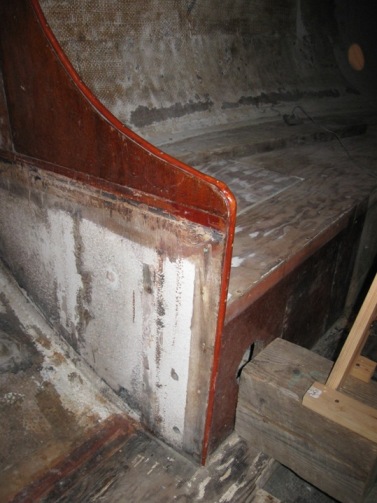
Down below Passage has been largely gutted - except for her quarterberths, engine bed and main bulkhead. This was done to remove weak, rotted wood, and in preperation for a revised layout.
|
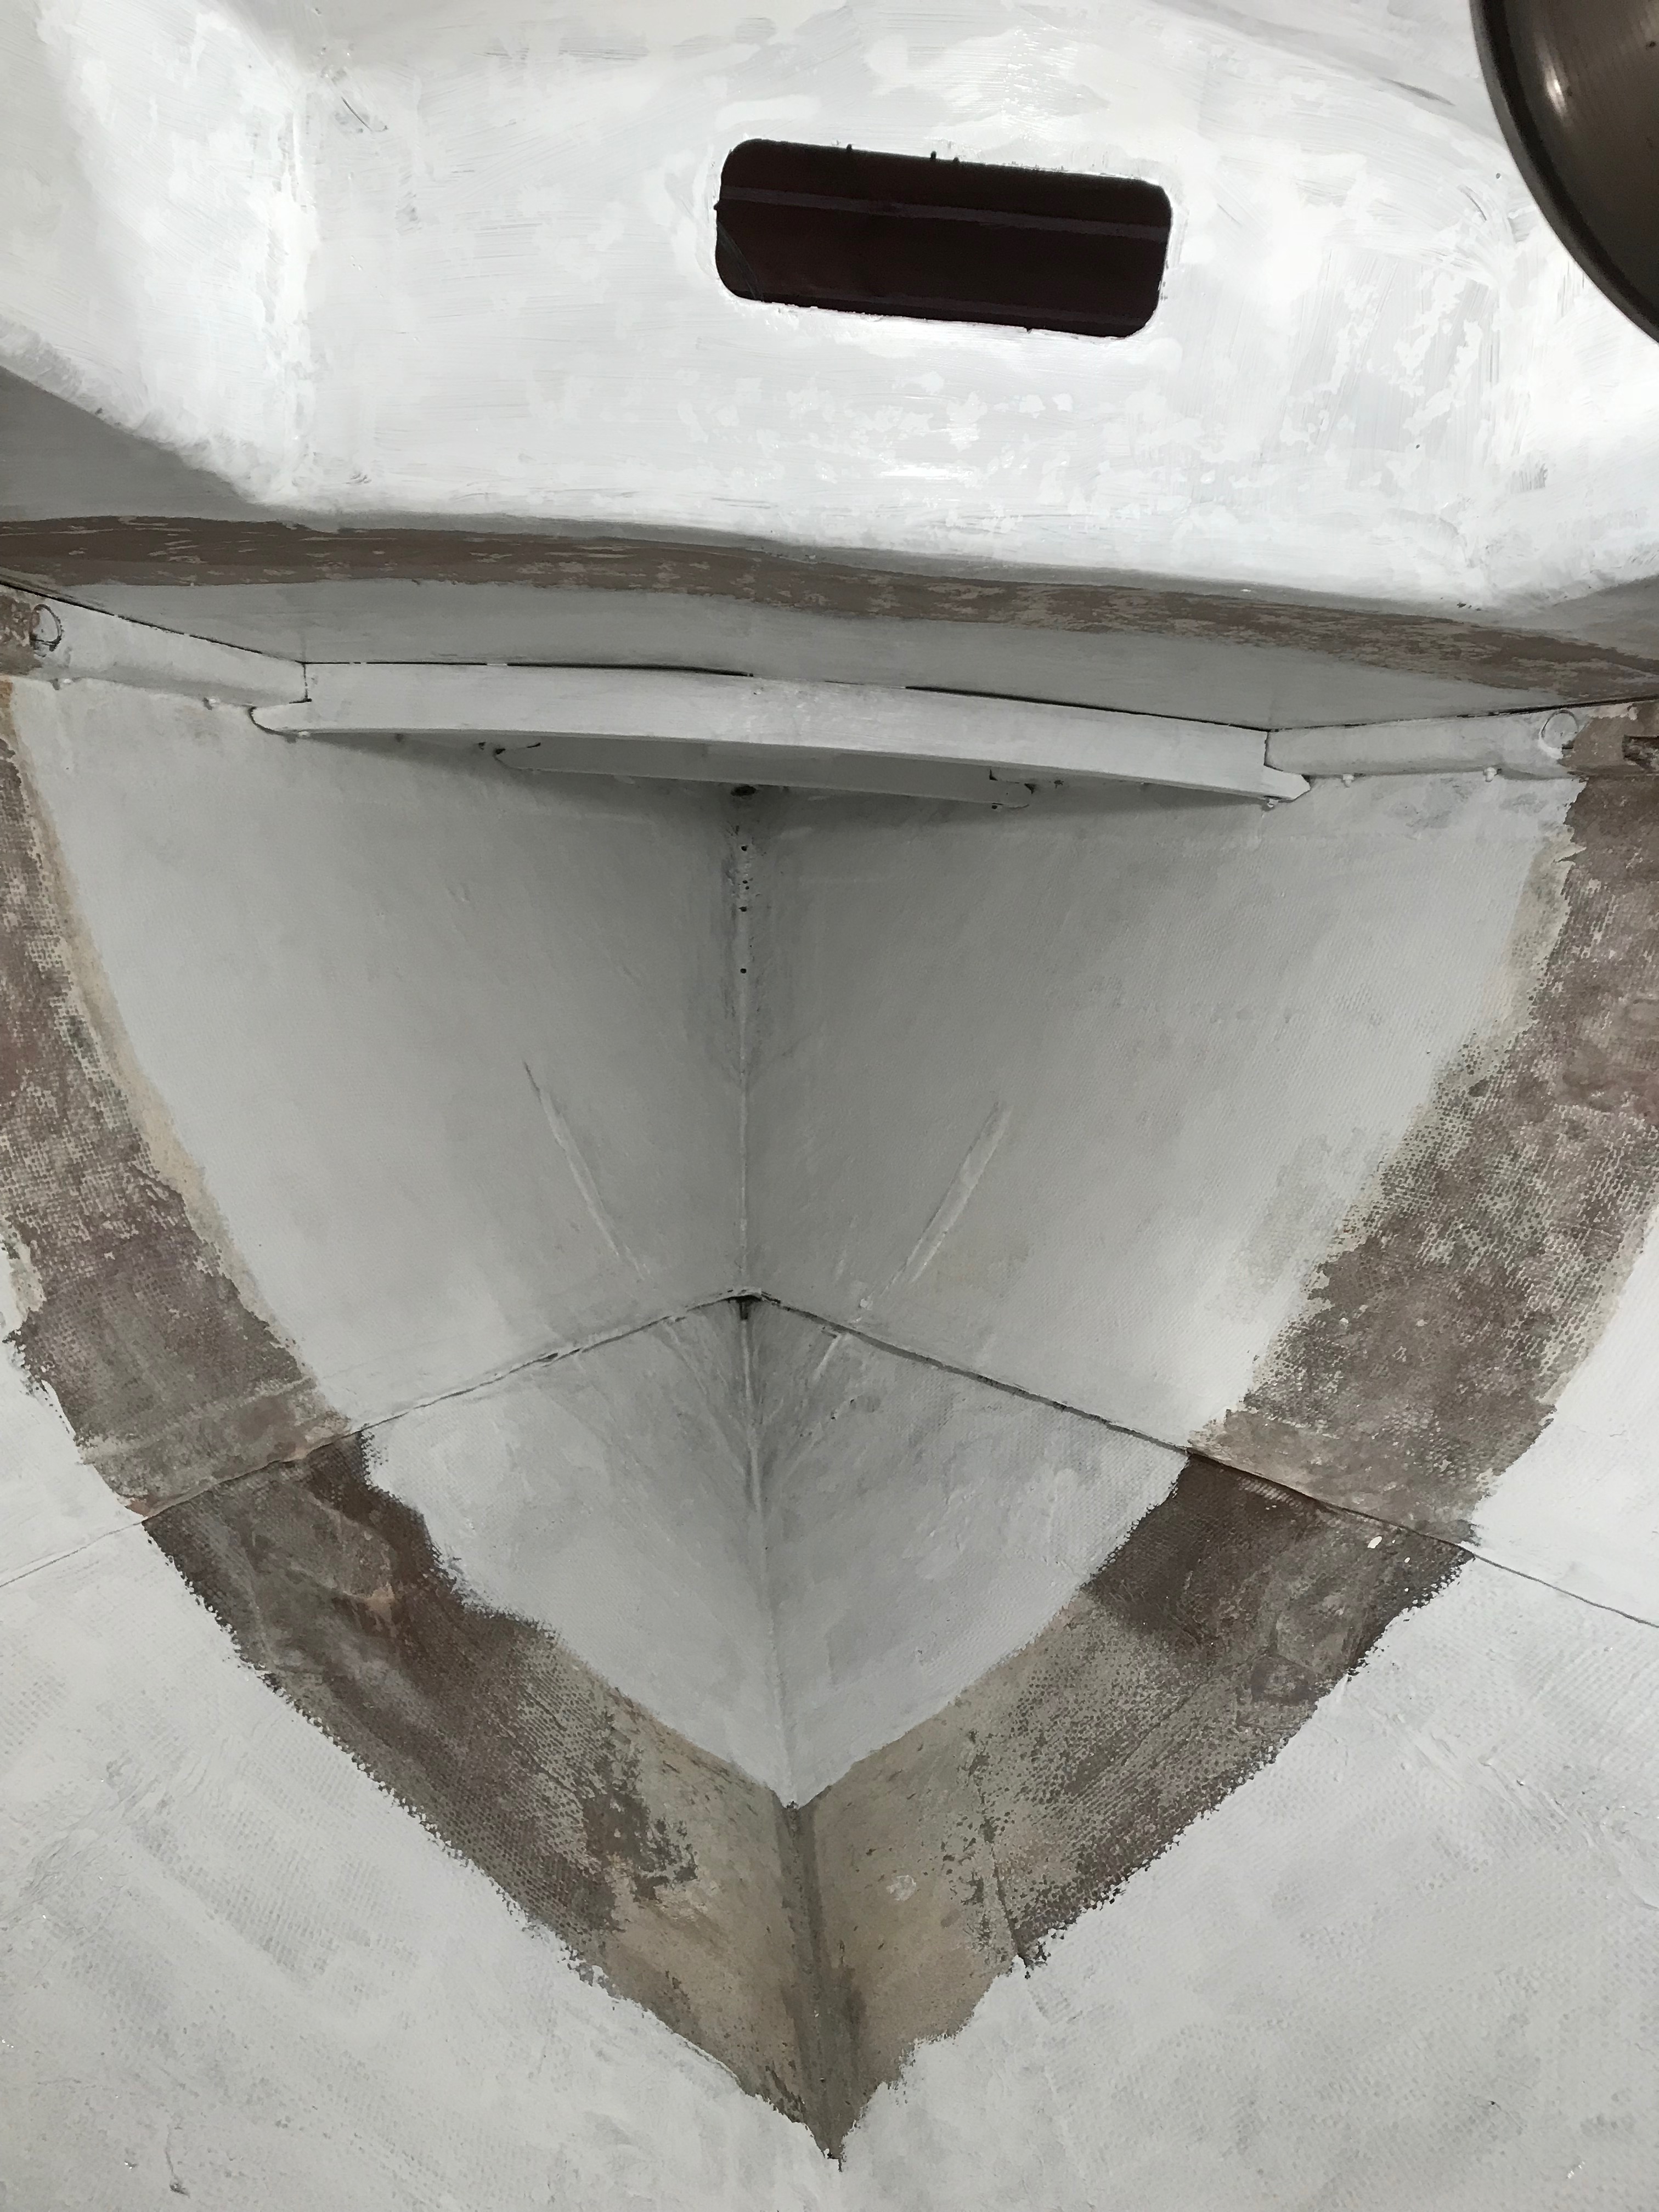
The forward cabin (left) is stripped and rough sanded and the wood sole repaired, fiberglass tabbed, and faired. This was done back into the main cabin.
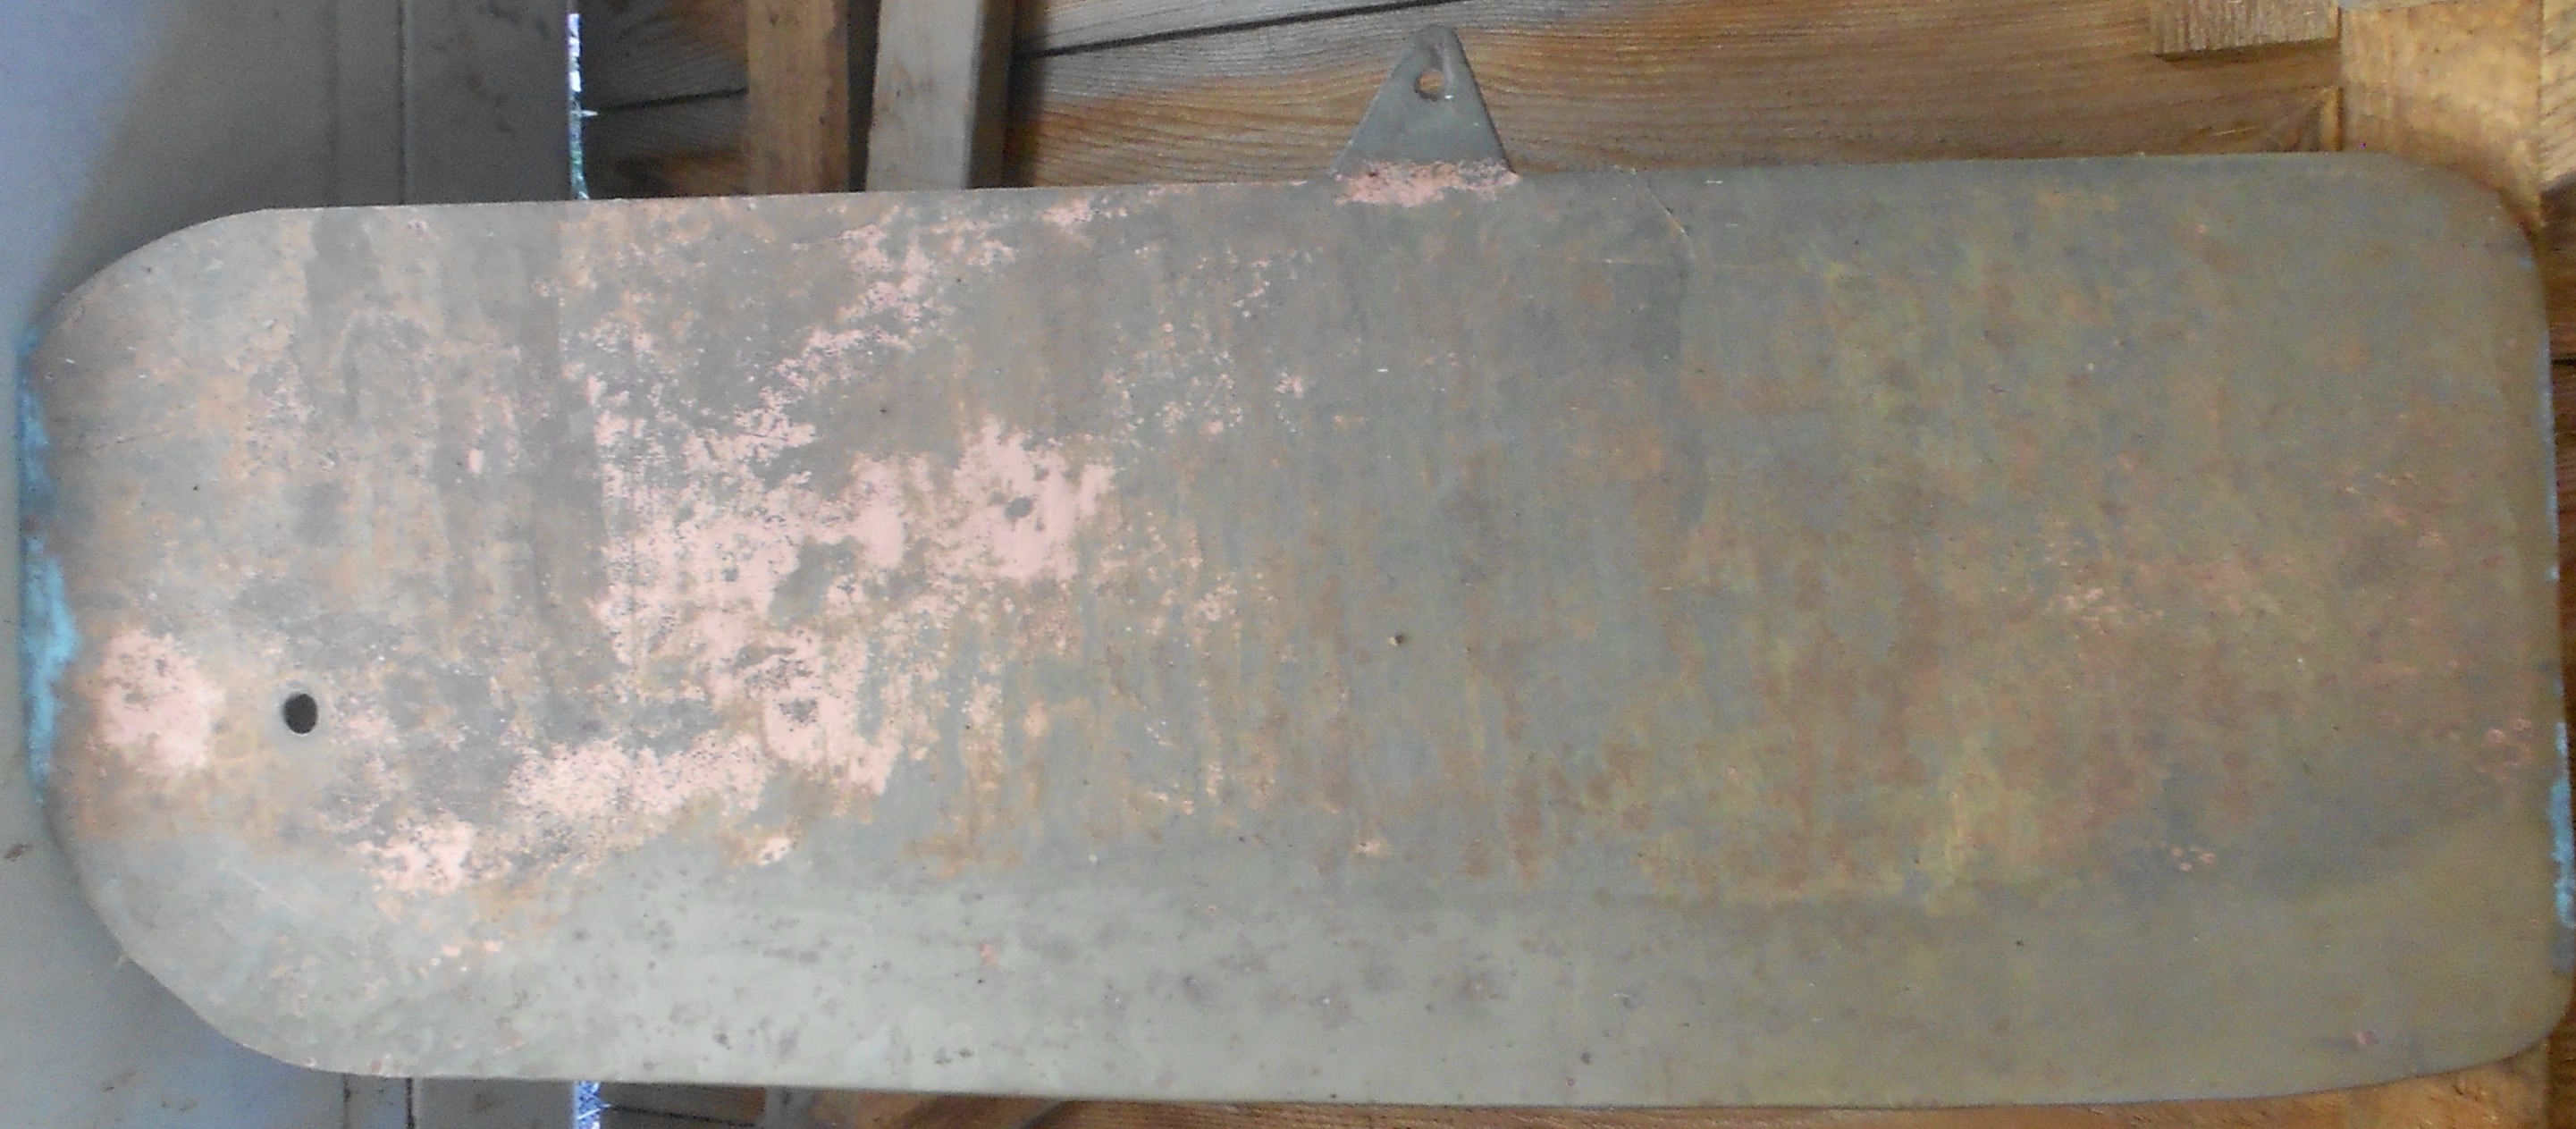
The picture at left shows a wood mock up of a holding tank similar to the one we put in Marionette. Passage had a corroded aluminum tube mast step which we planned to replace with a Purple Heart wood base and strut incorporated into a reinforced bulkhead. The base step below the sole has been reinforced and reglassed.
This subject is covered in some detail in a related Technical Section article that you can see by clicking here.
The main cabin redesign plan was to get rid of the portapotty and install a normal head in the forward cabin, along with a stowaway galley/sink. The main cabin would have settee seats/berths port and starboard hopefully making the boat more suitable for day sailing, but still ok for overnight cruising. The following pictures show the current state along with mock ups. Wood for much of this has been purchased. |
|
Variations included a siding door, and a folding door. Some of these options are shown further down on this page.
Later versions of this plan envisioned a book shelf and 'park bench' type backrests (on left ala Casandra Rose #56)
|
|
|
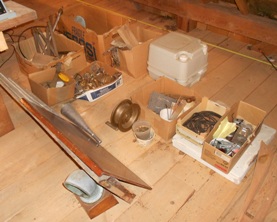
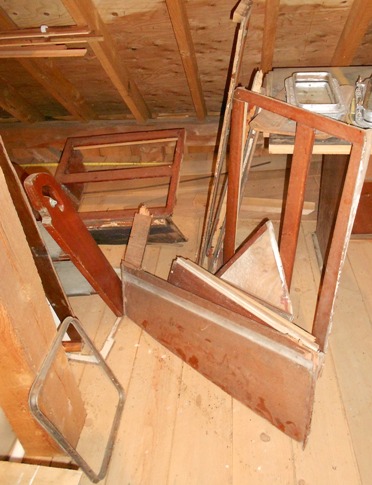
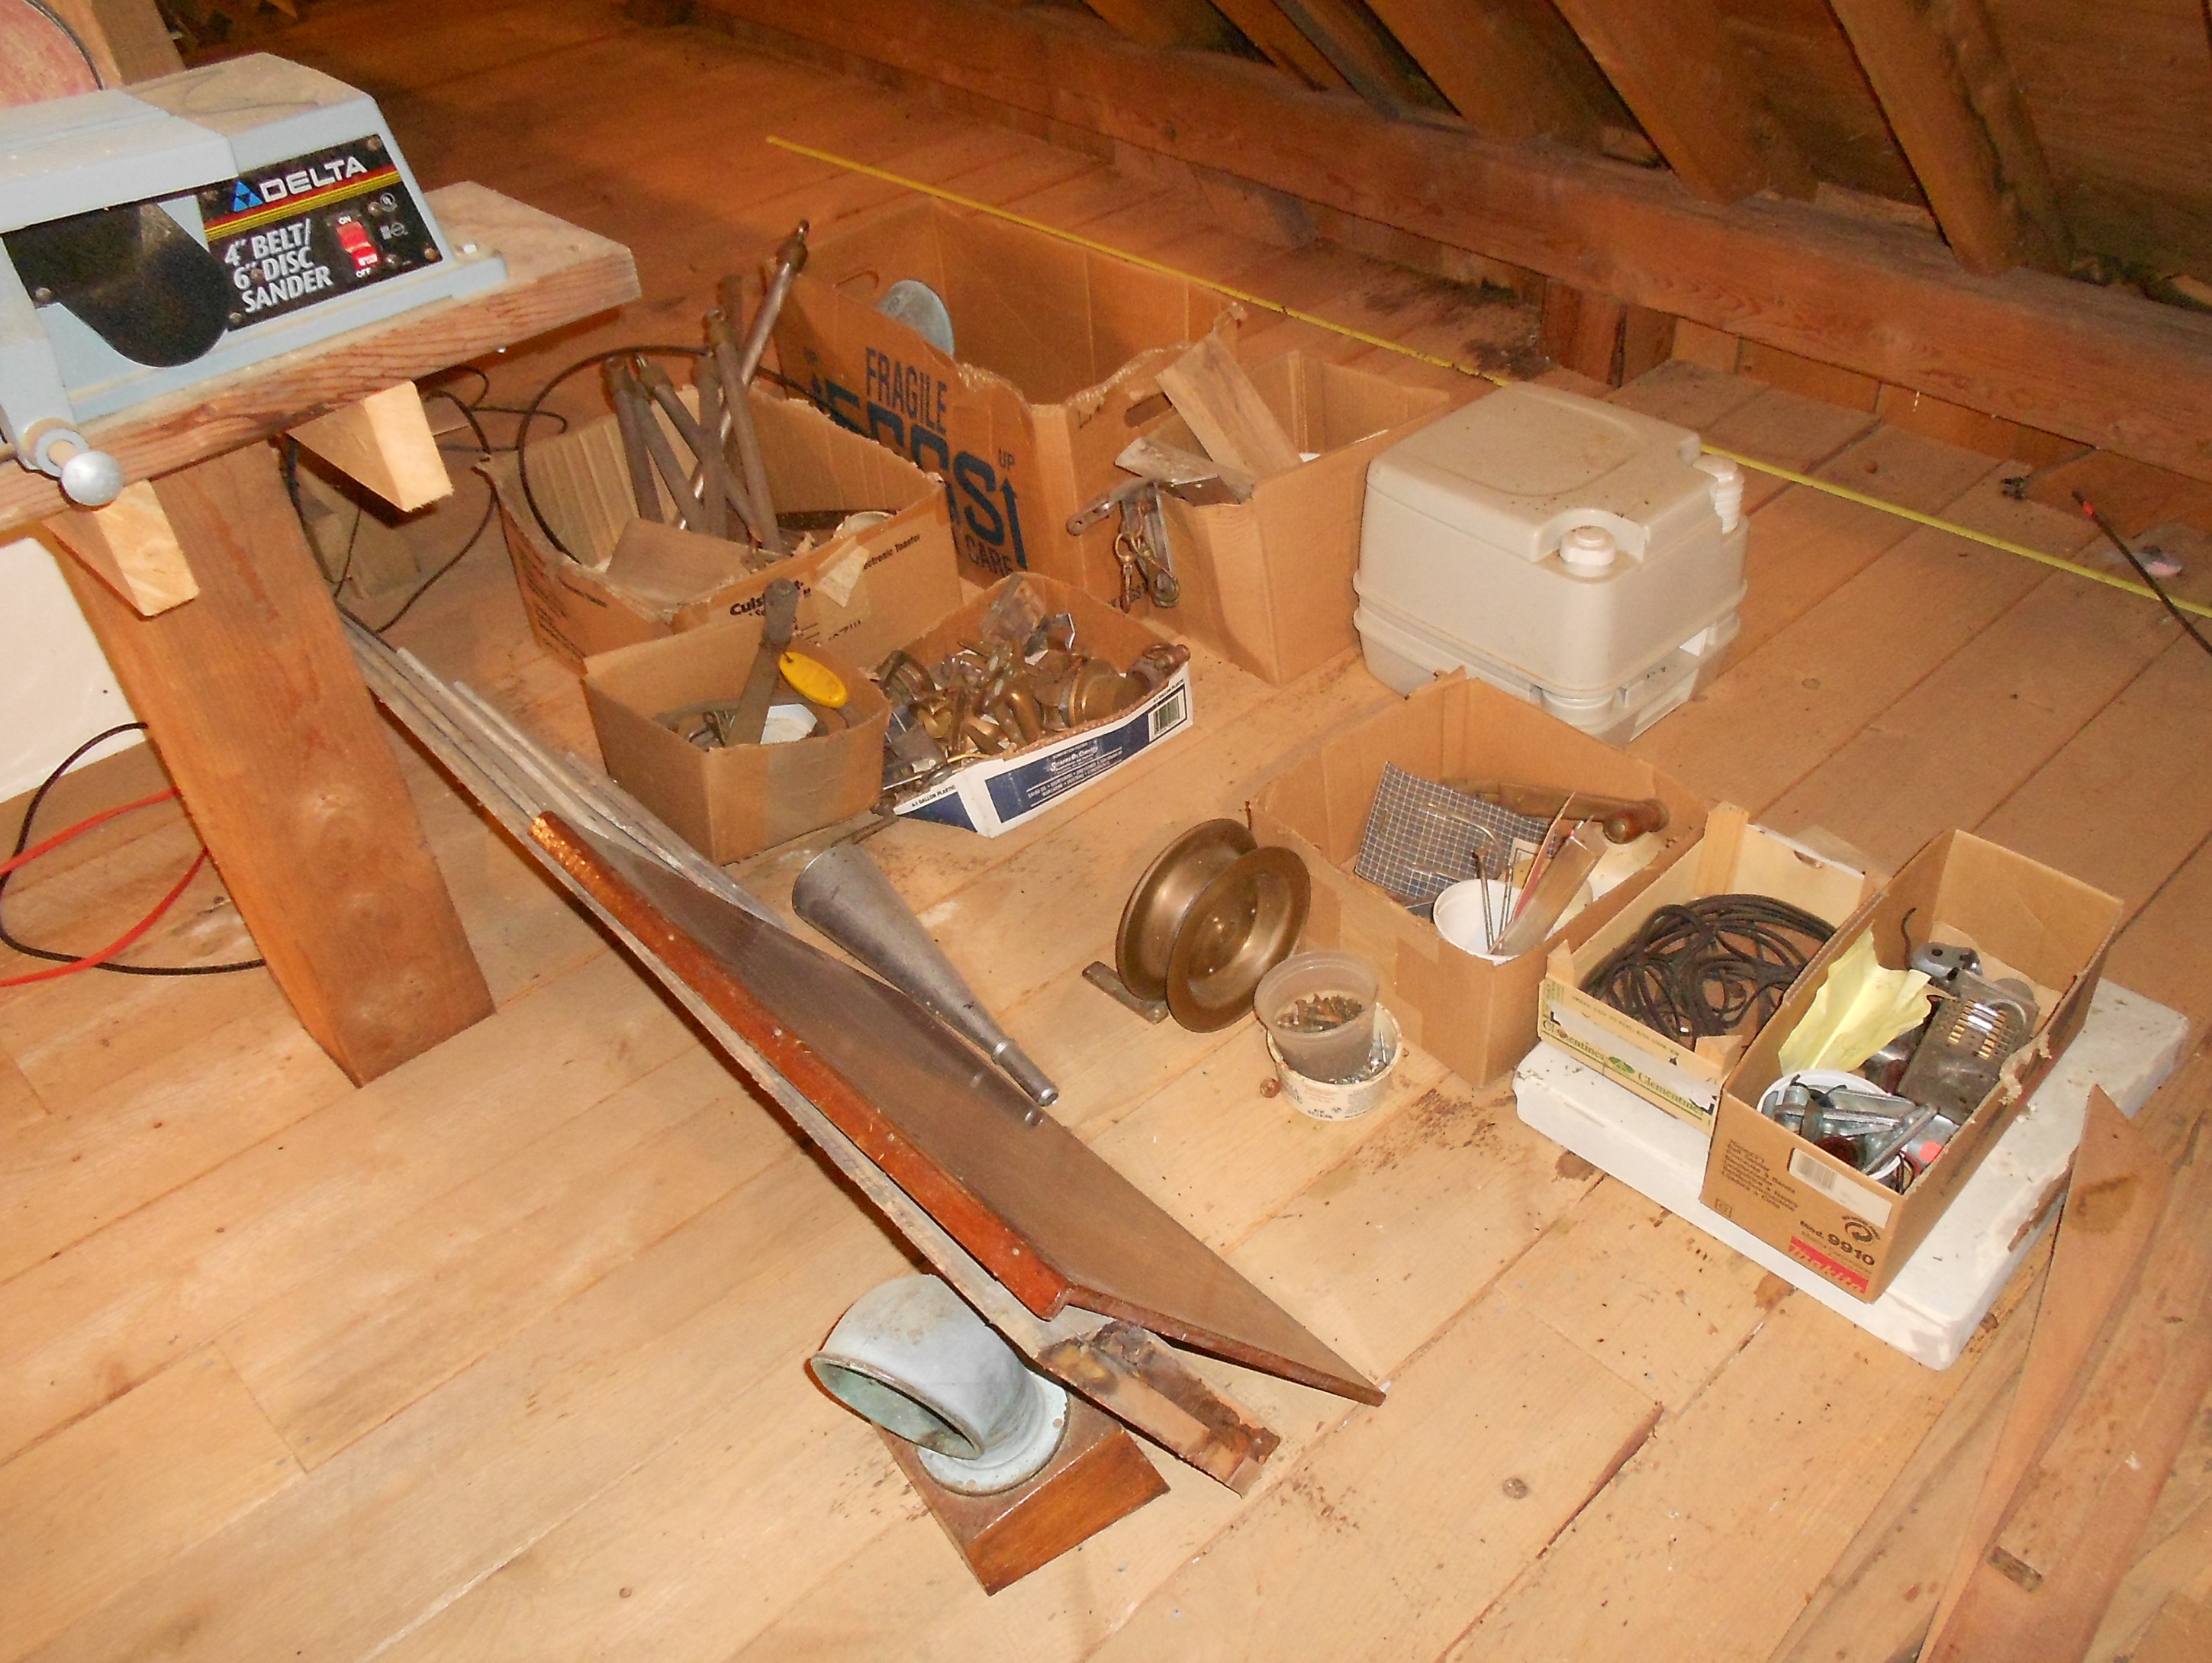
The following pictures deal with Passage's 'parts'. They are scattered helter skelter around the barn waiting their turn....We also have log books, manuals, drawings and literature accumulated to support this project. Remember, clicking on the photos will (usually) bring up a larger image.
That's her mast above, soaked in WD40 and wrapped in Saran Wrap
|

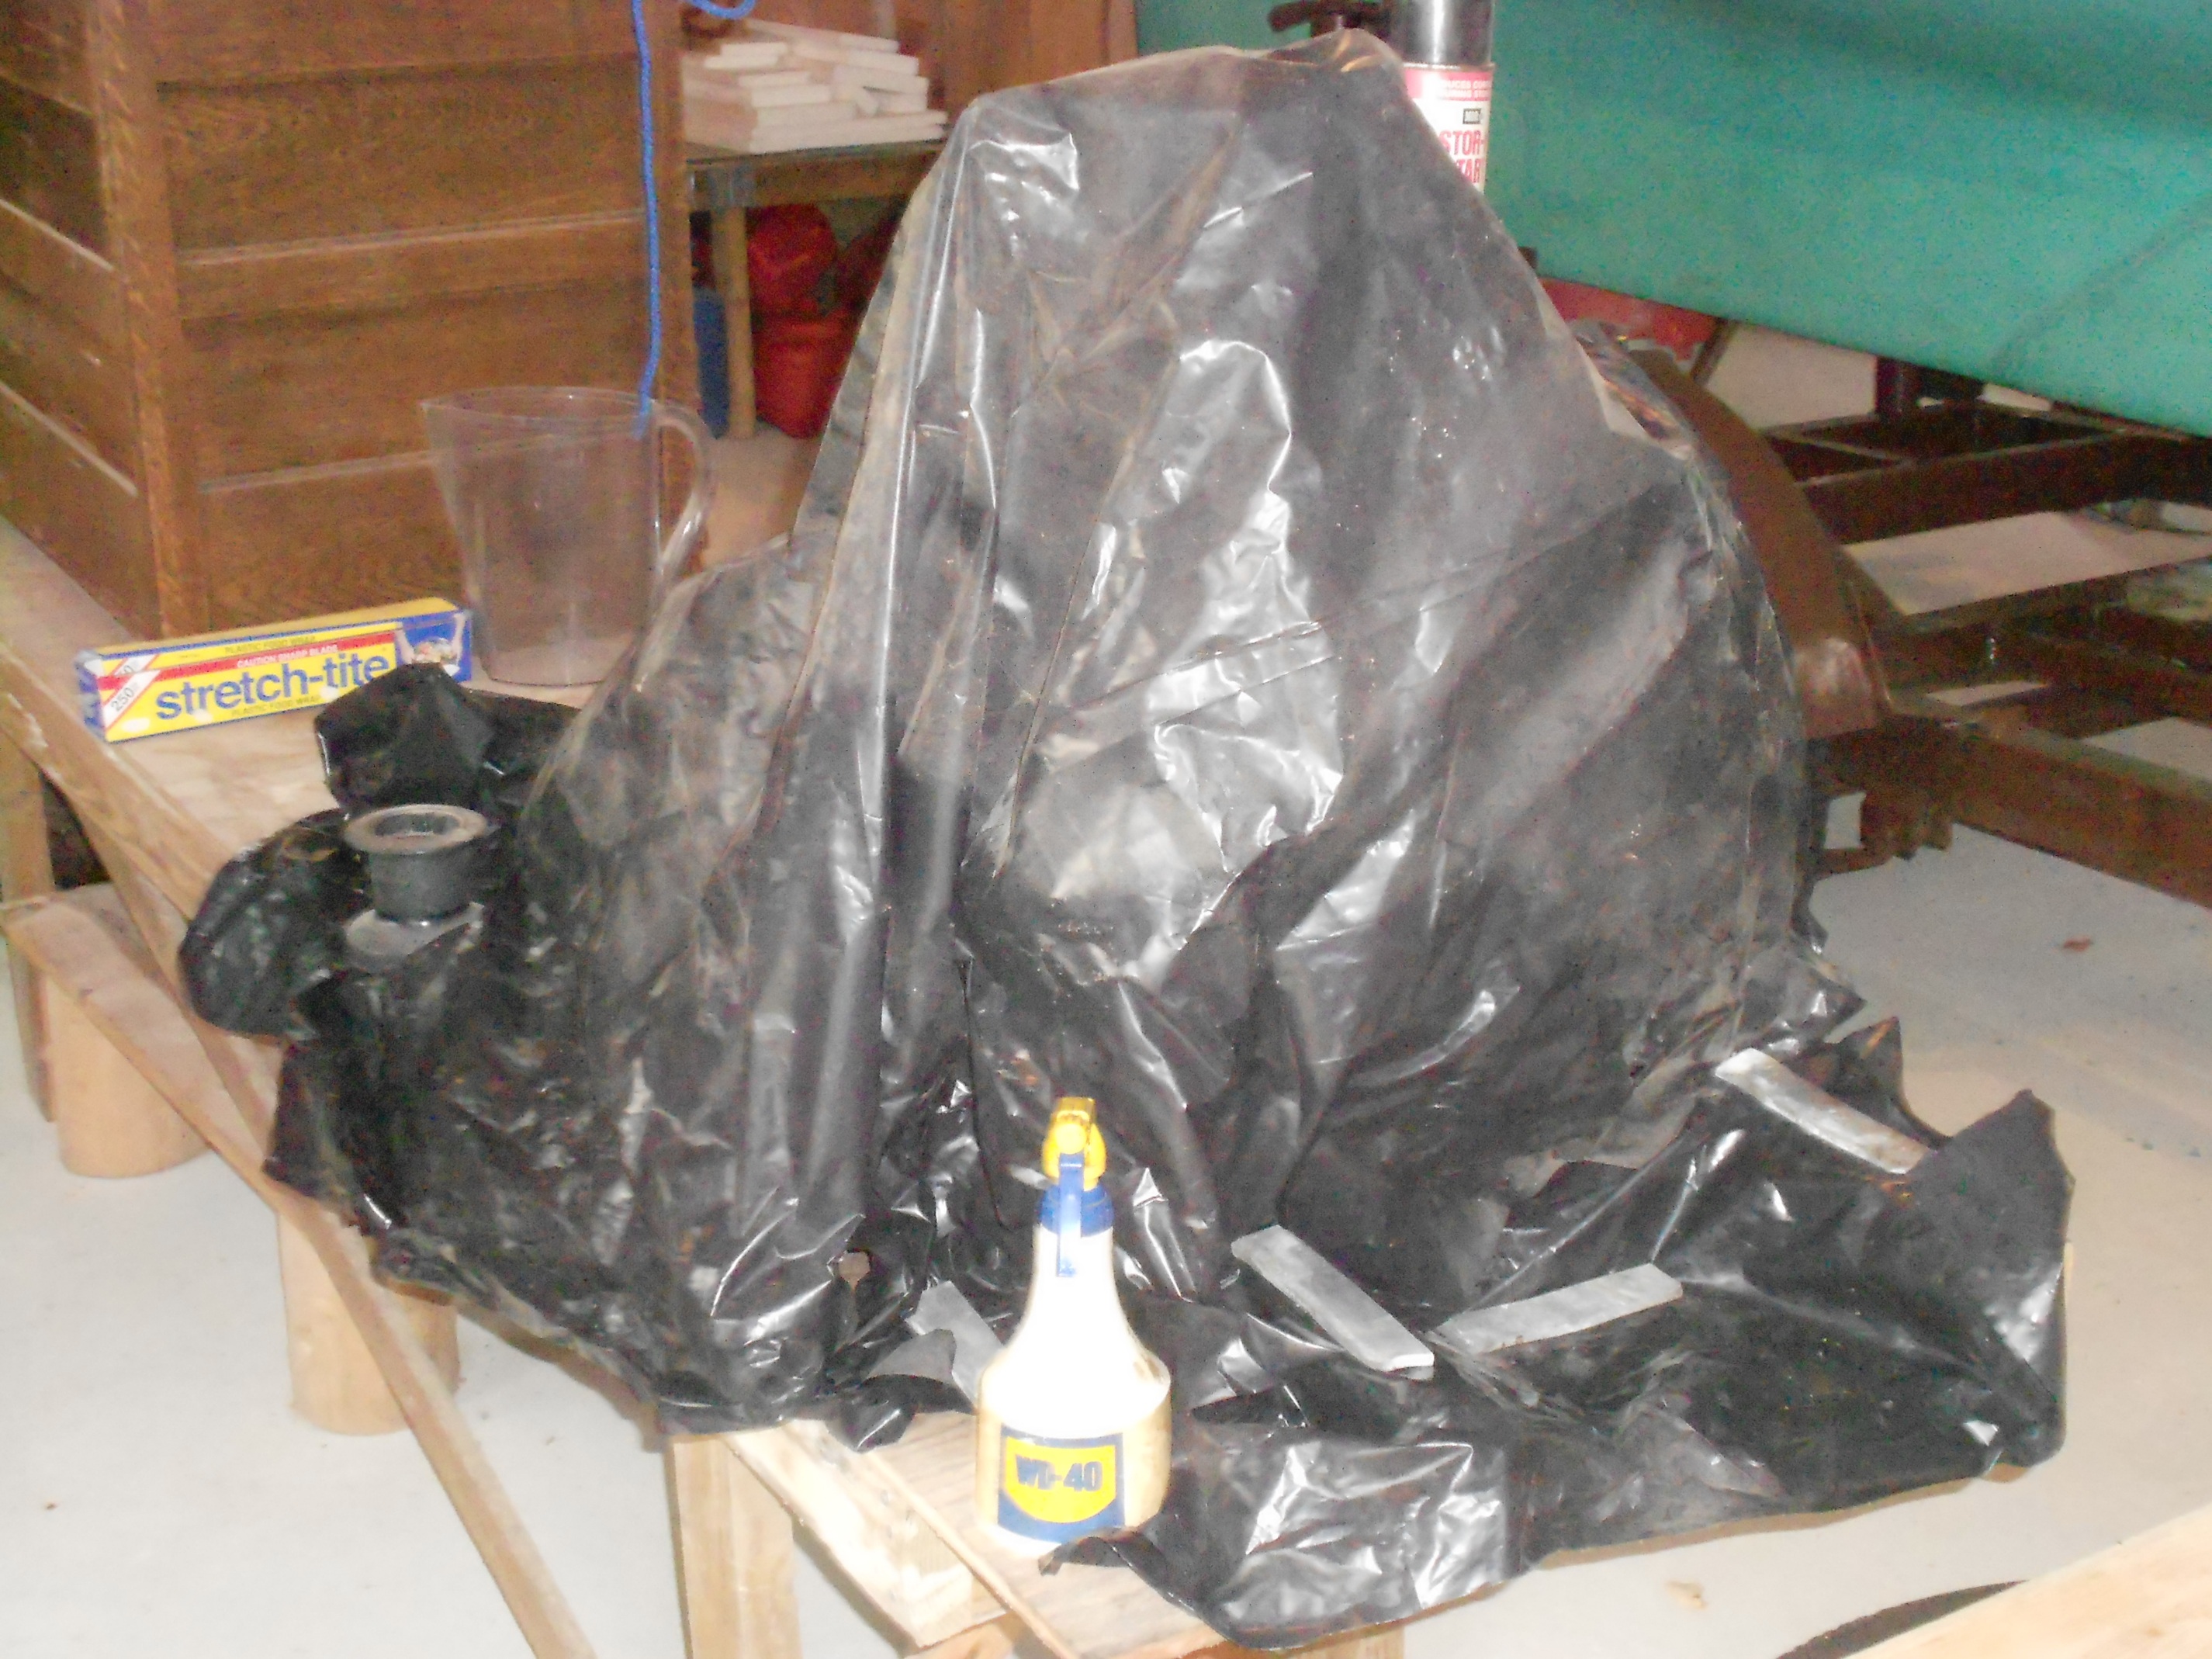
The original Palmer 27 at left is another WD40 soaked part, normally covered (above), and periodically turned over with her pull cord on the fly wheel to keep the inside parts covered in oil. When we pulled her in 2000 we had her completely overhauled - click here to get the detail.
She has been on this bench inside the barn ever since.
|
|
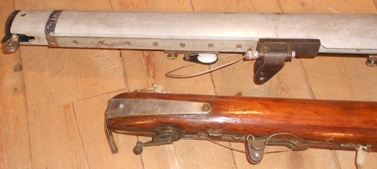
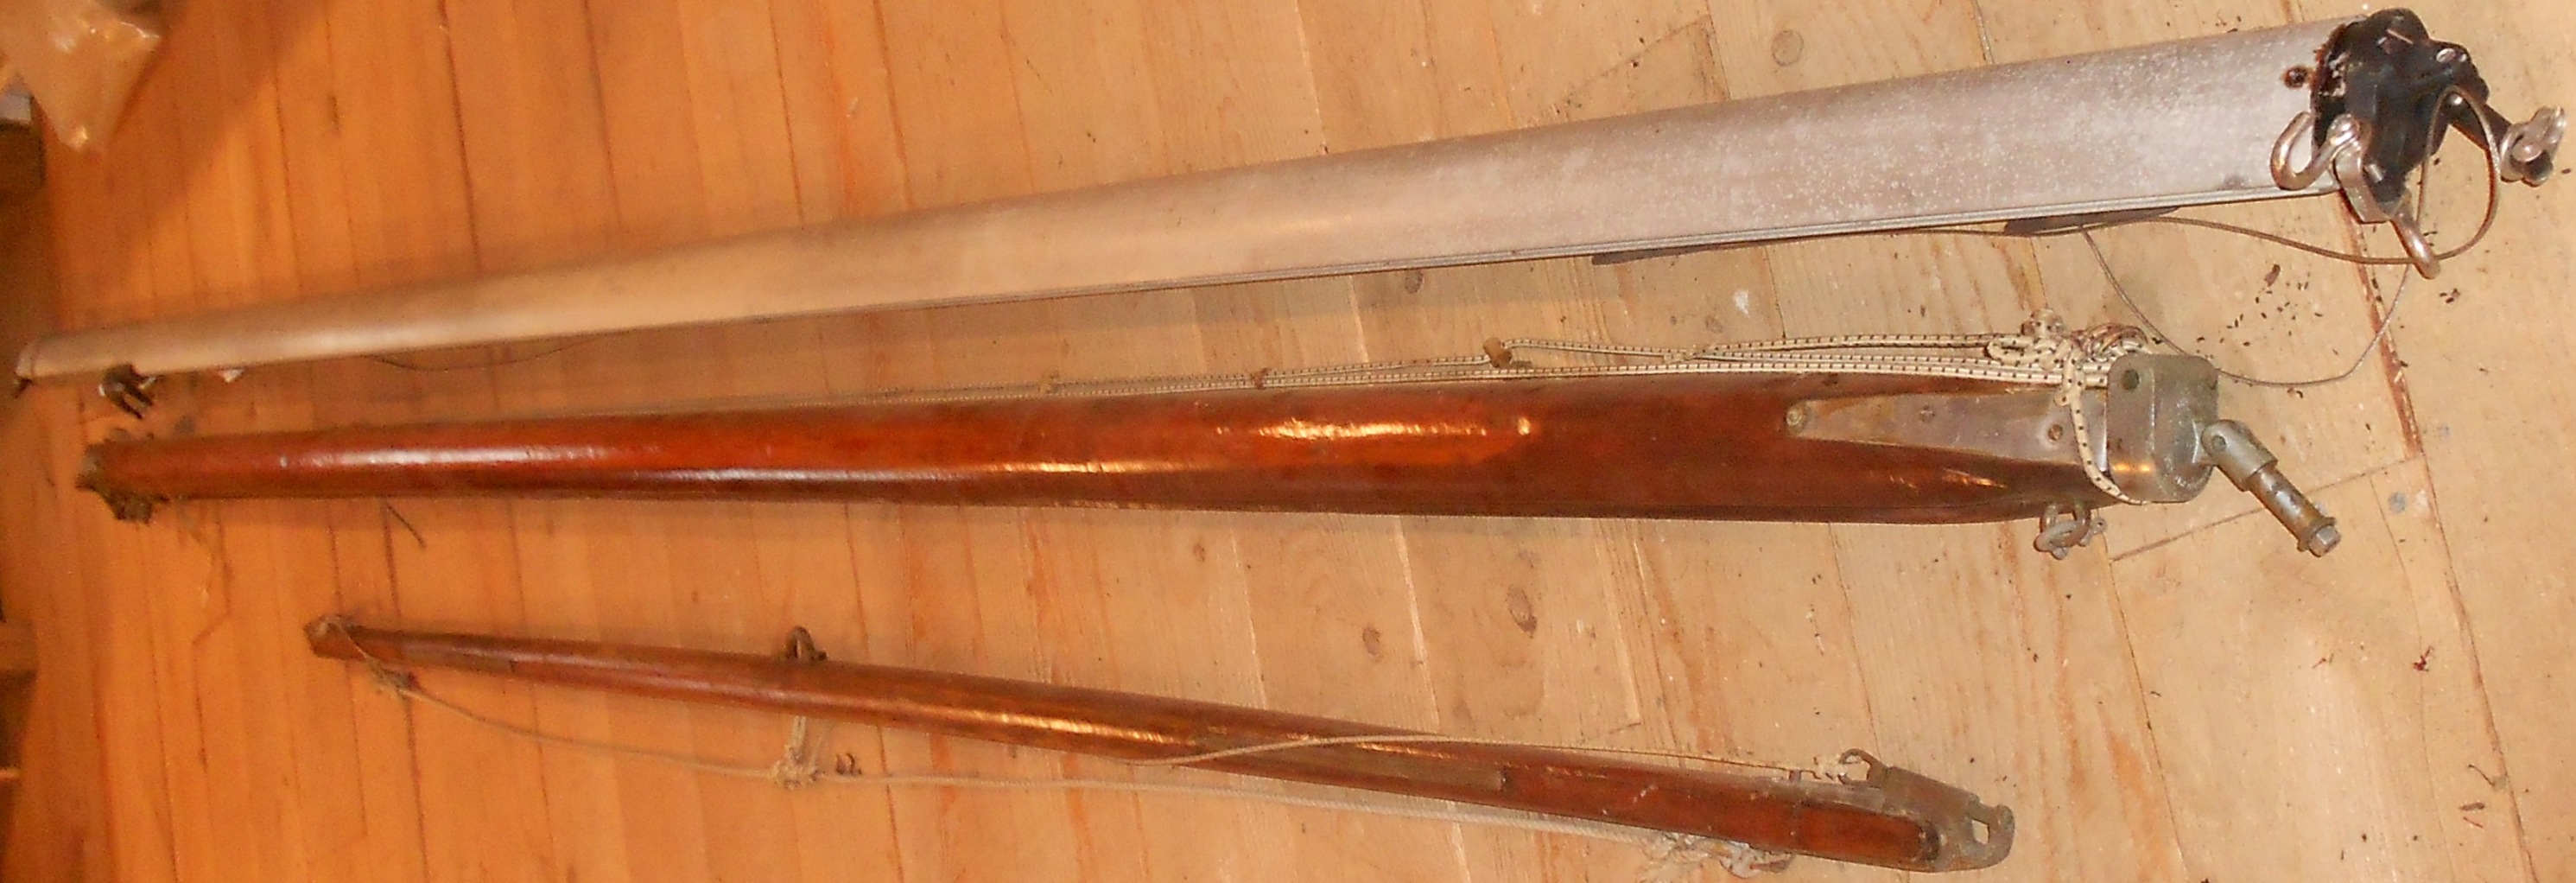
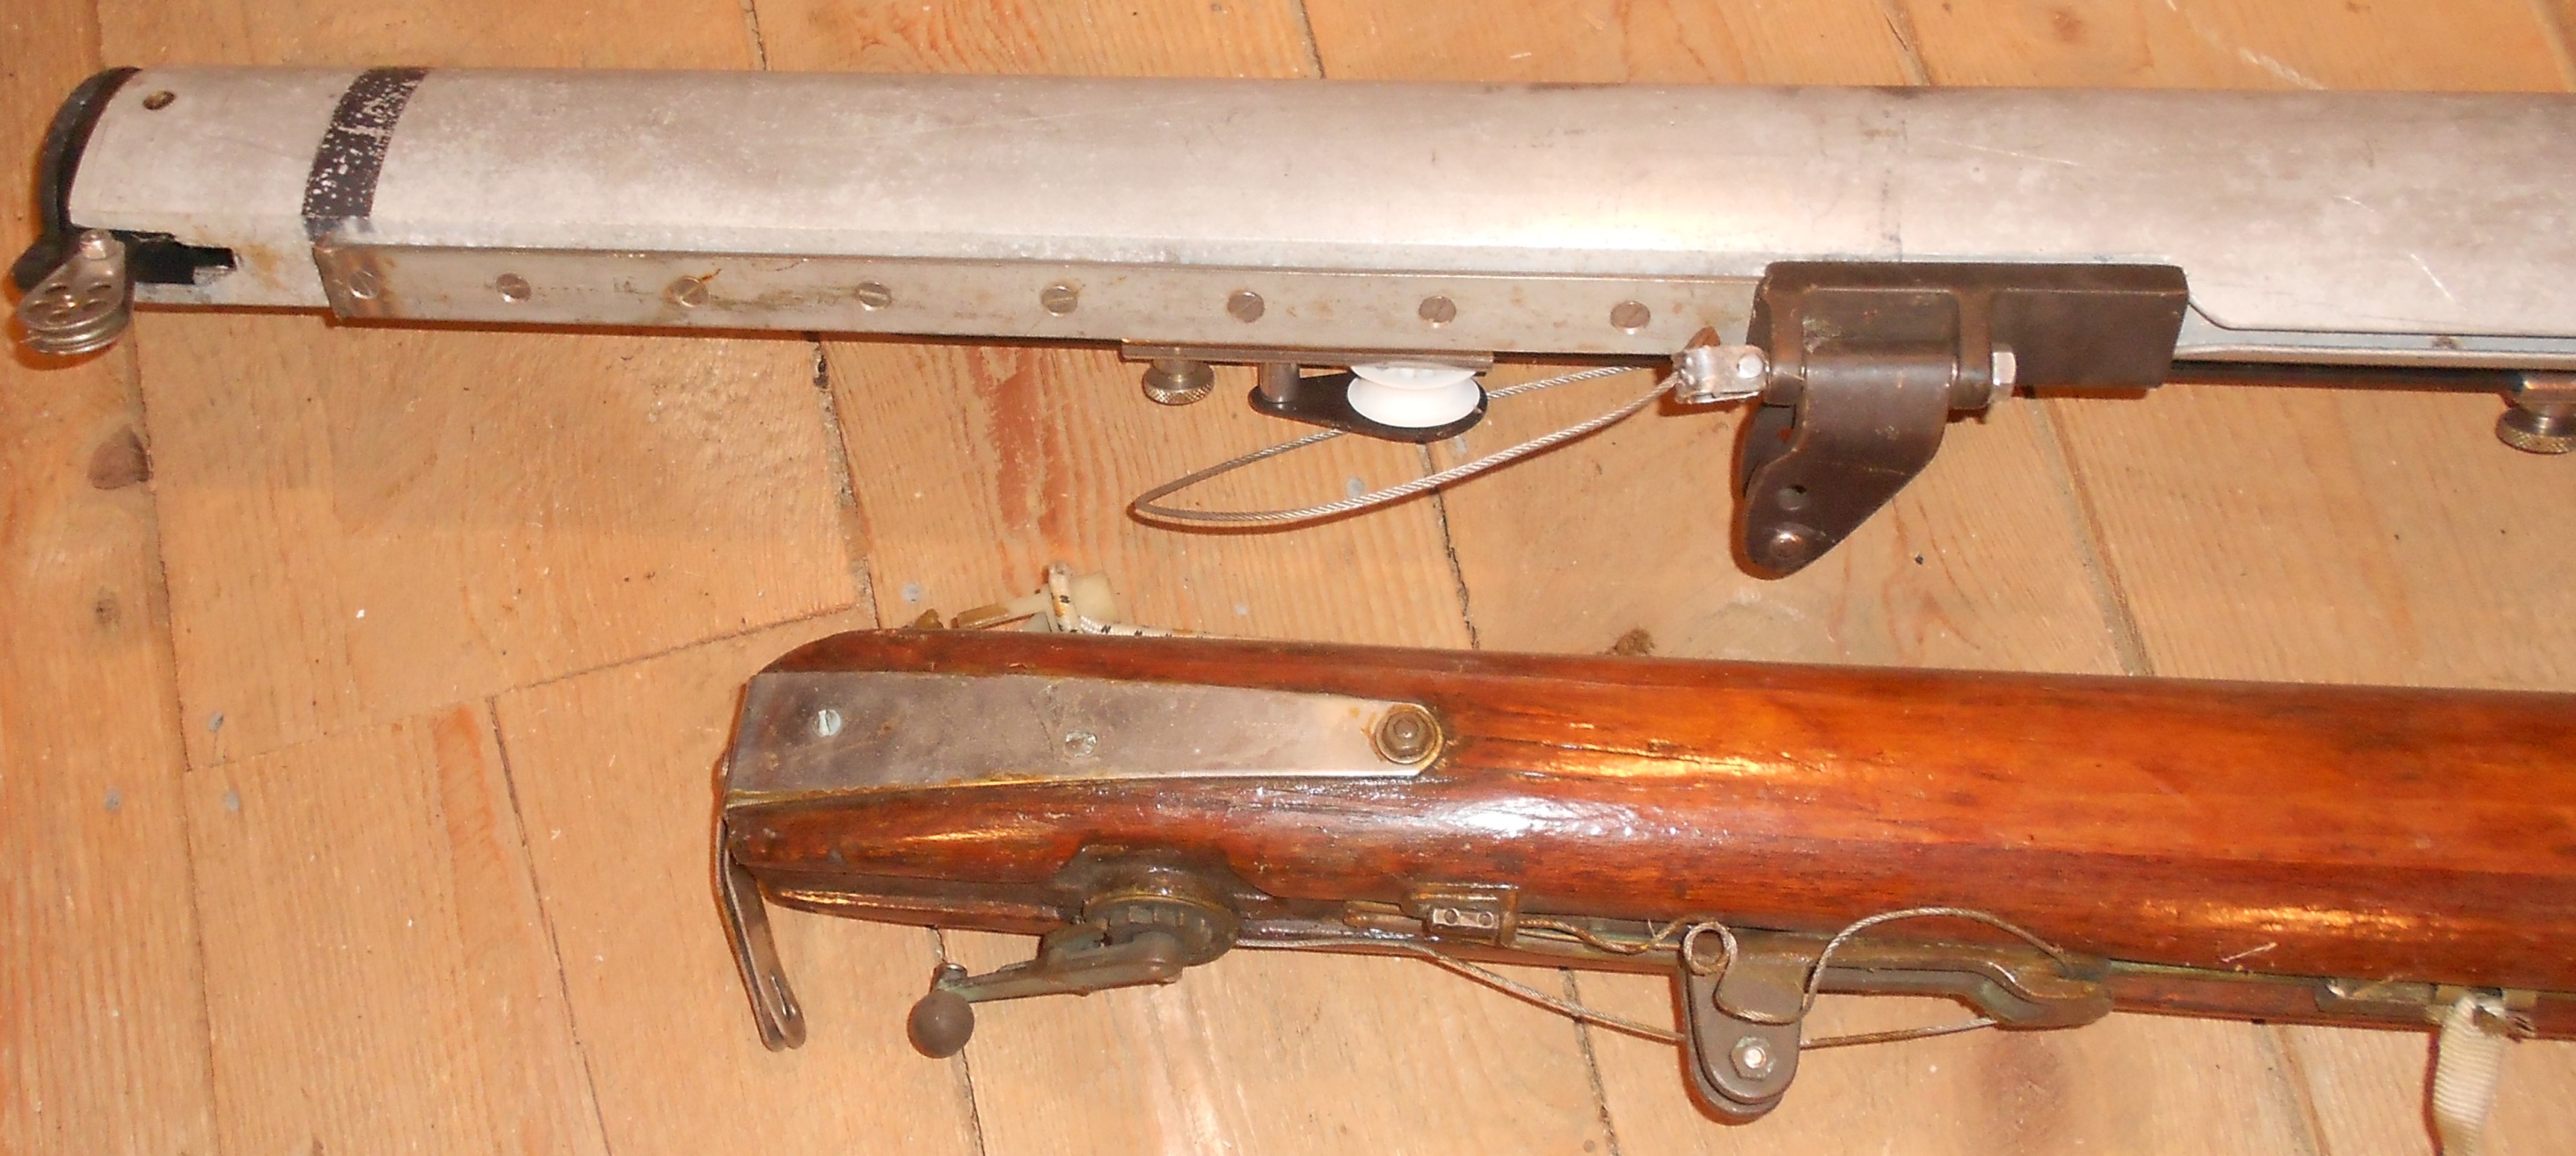
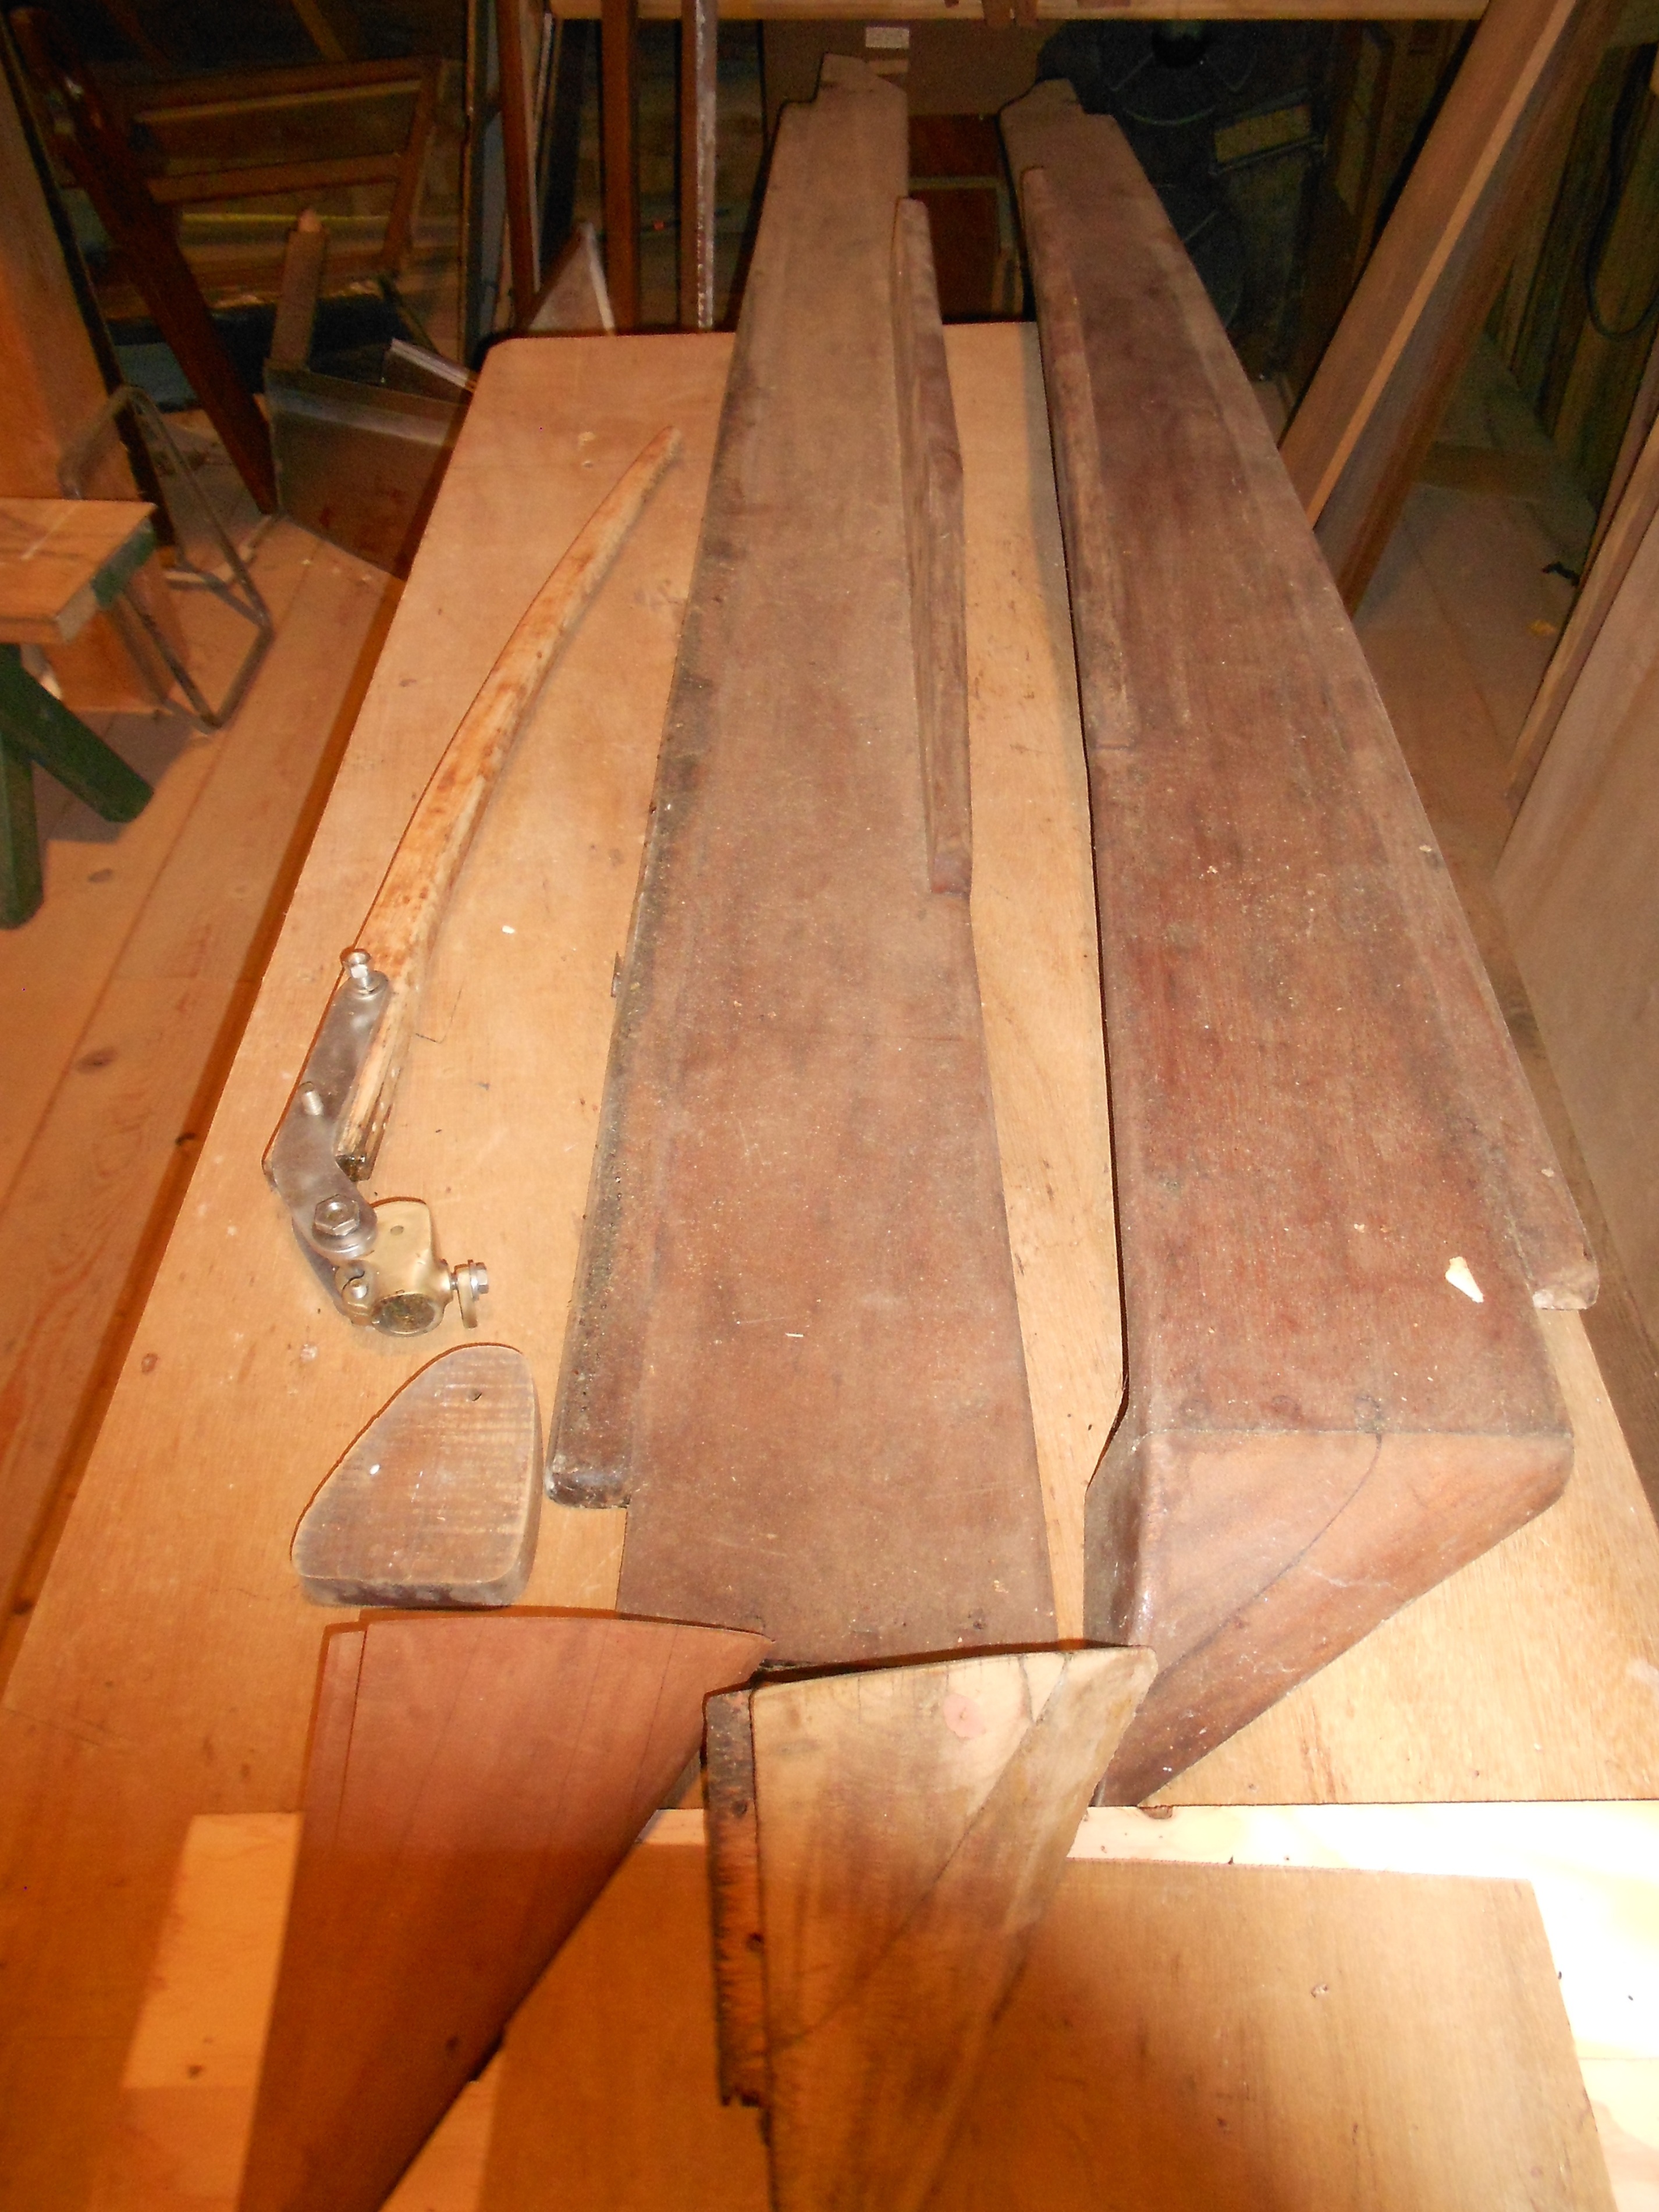
For the purists - the original wood boom and spinnaker pole - in excellent condition. Plus an aluminum boom with all fittings than can be cut to the proper length.
|
|
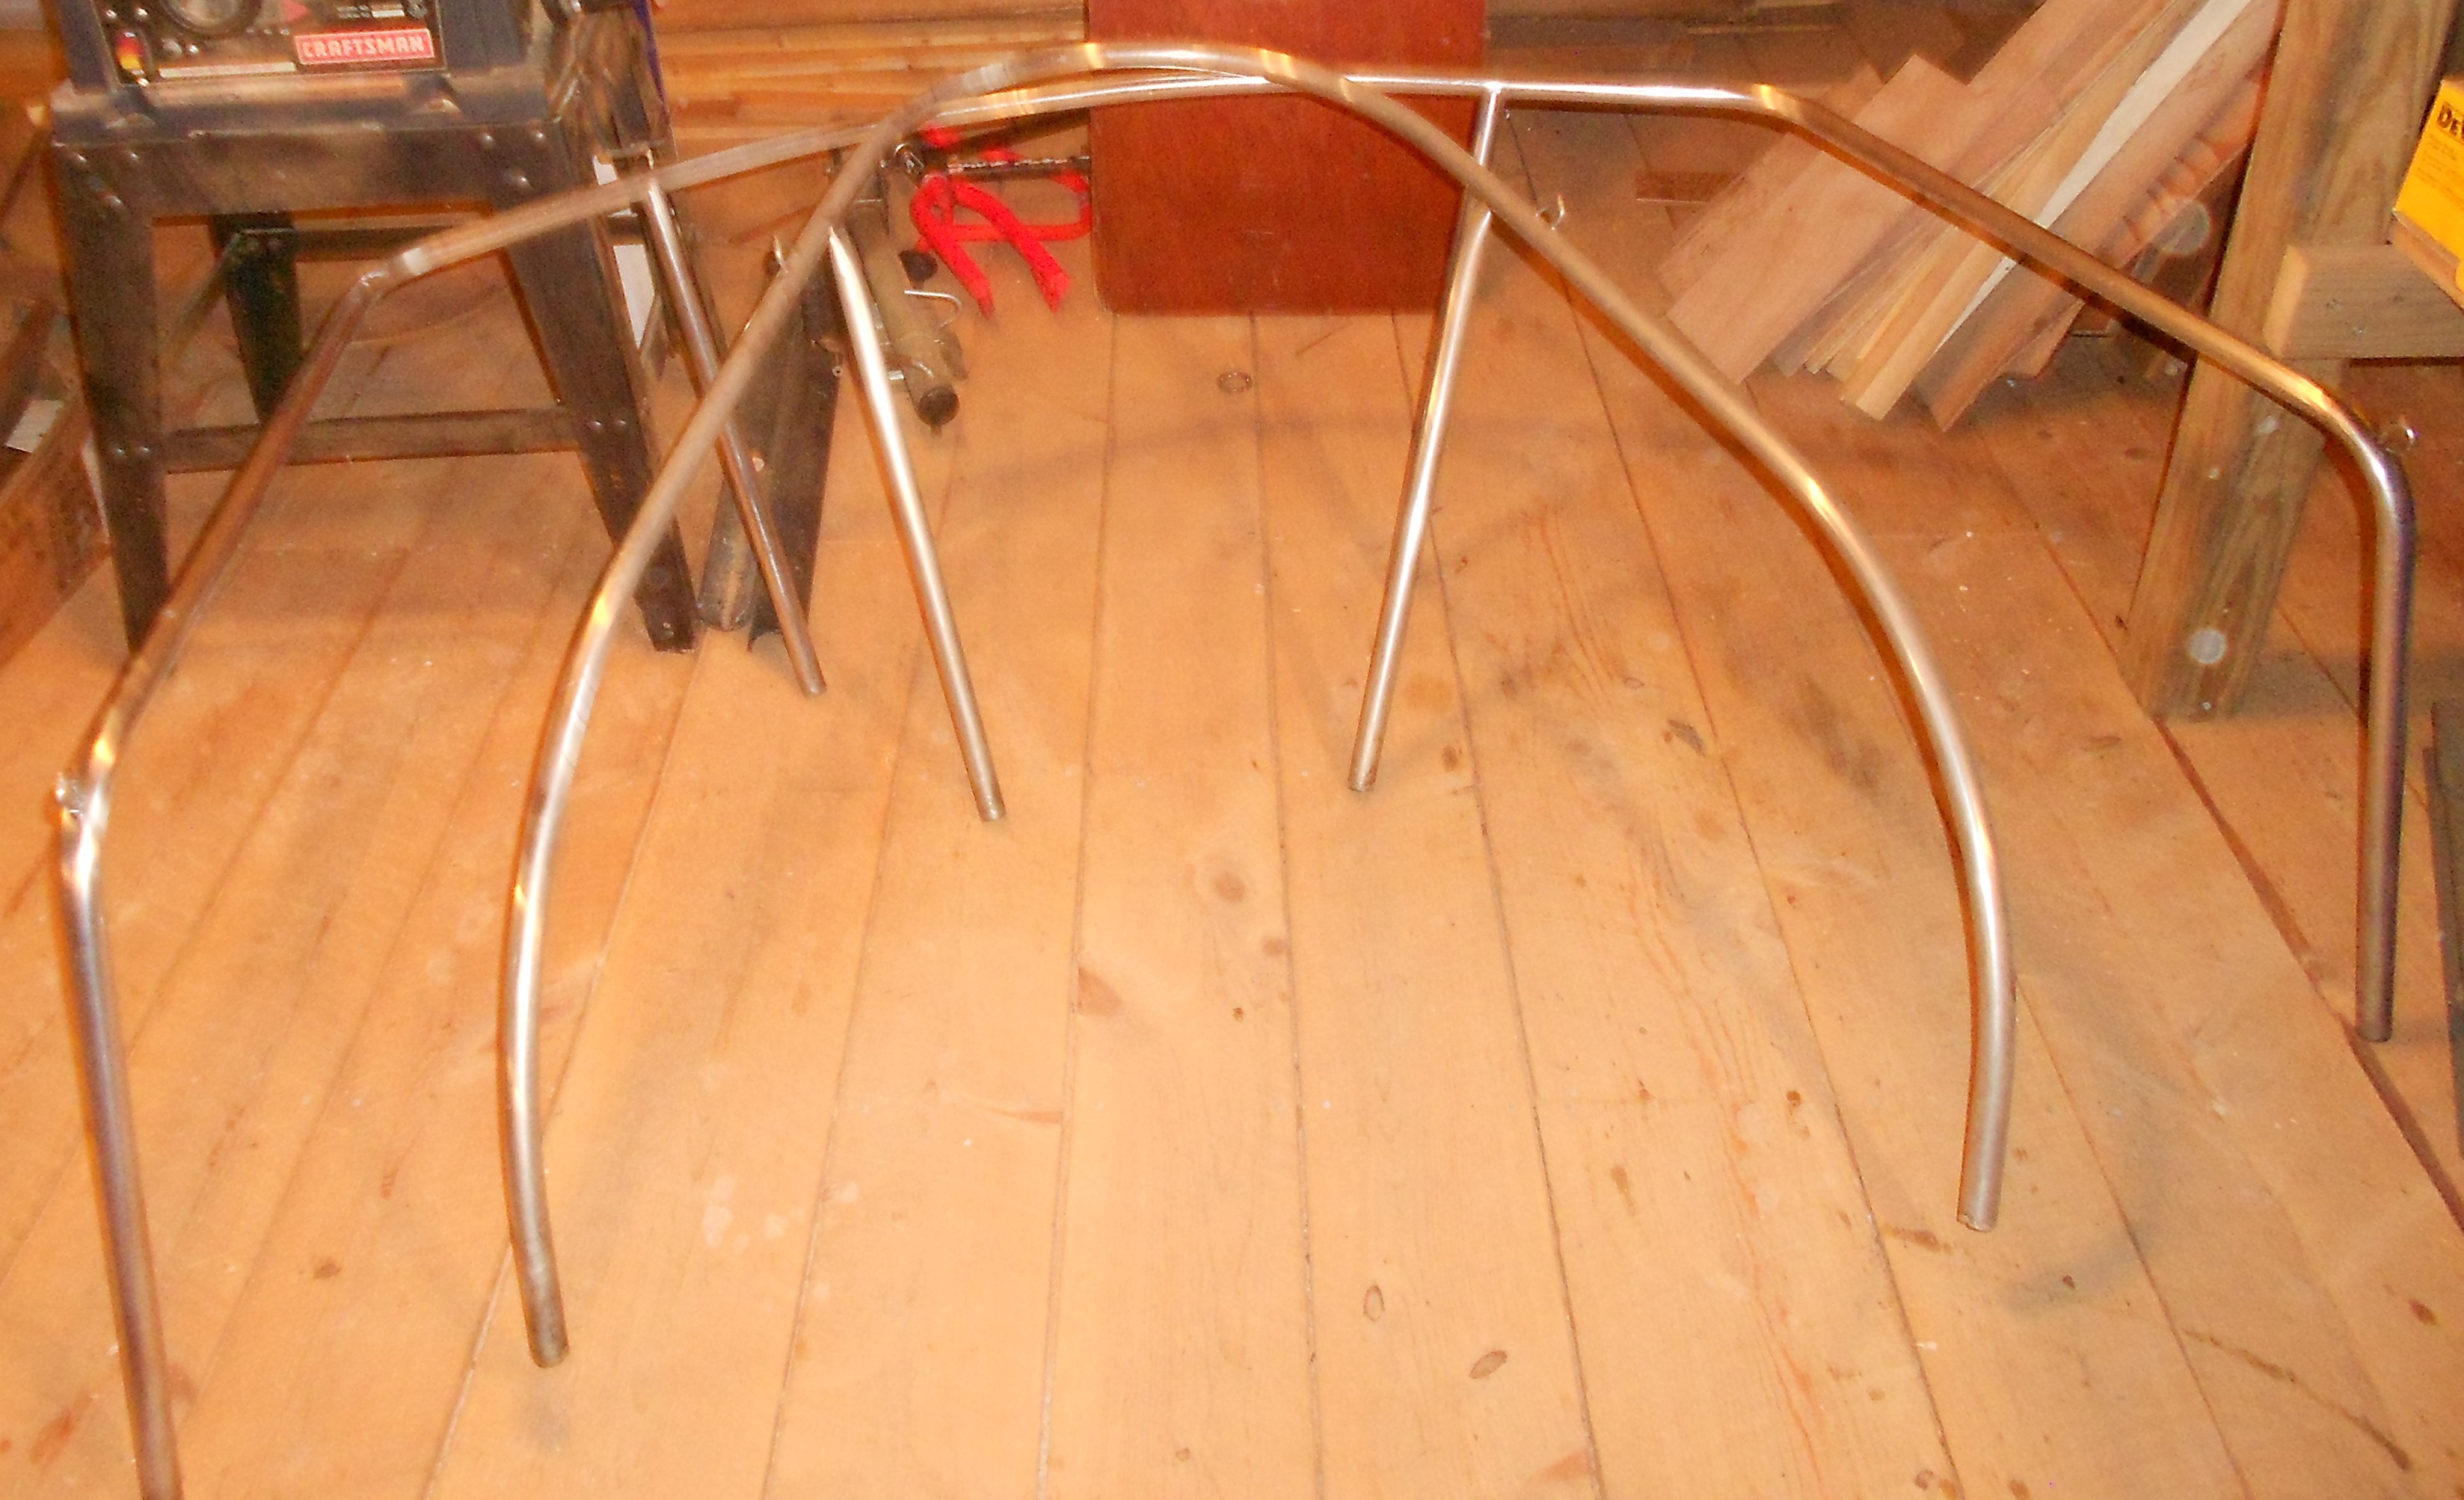
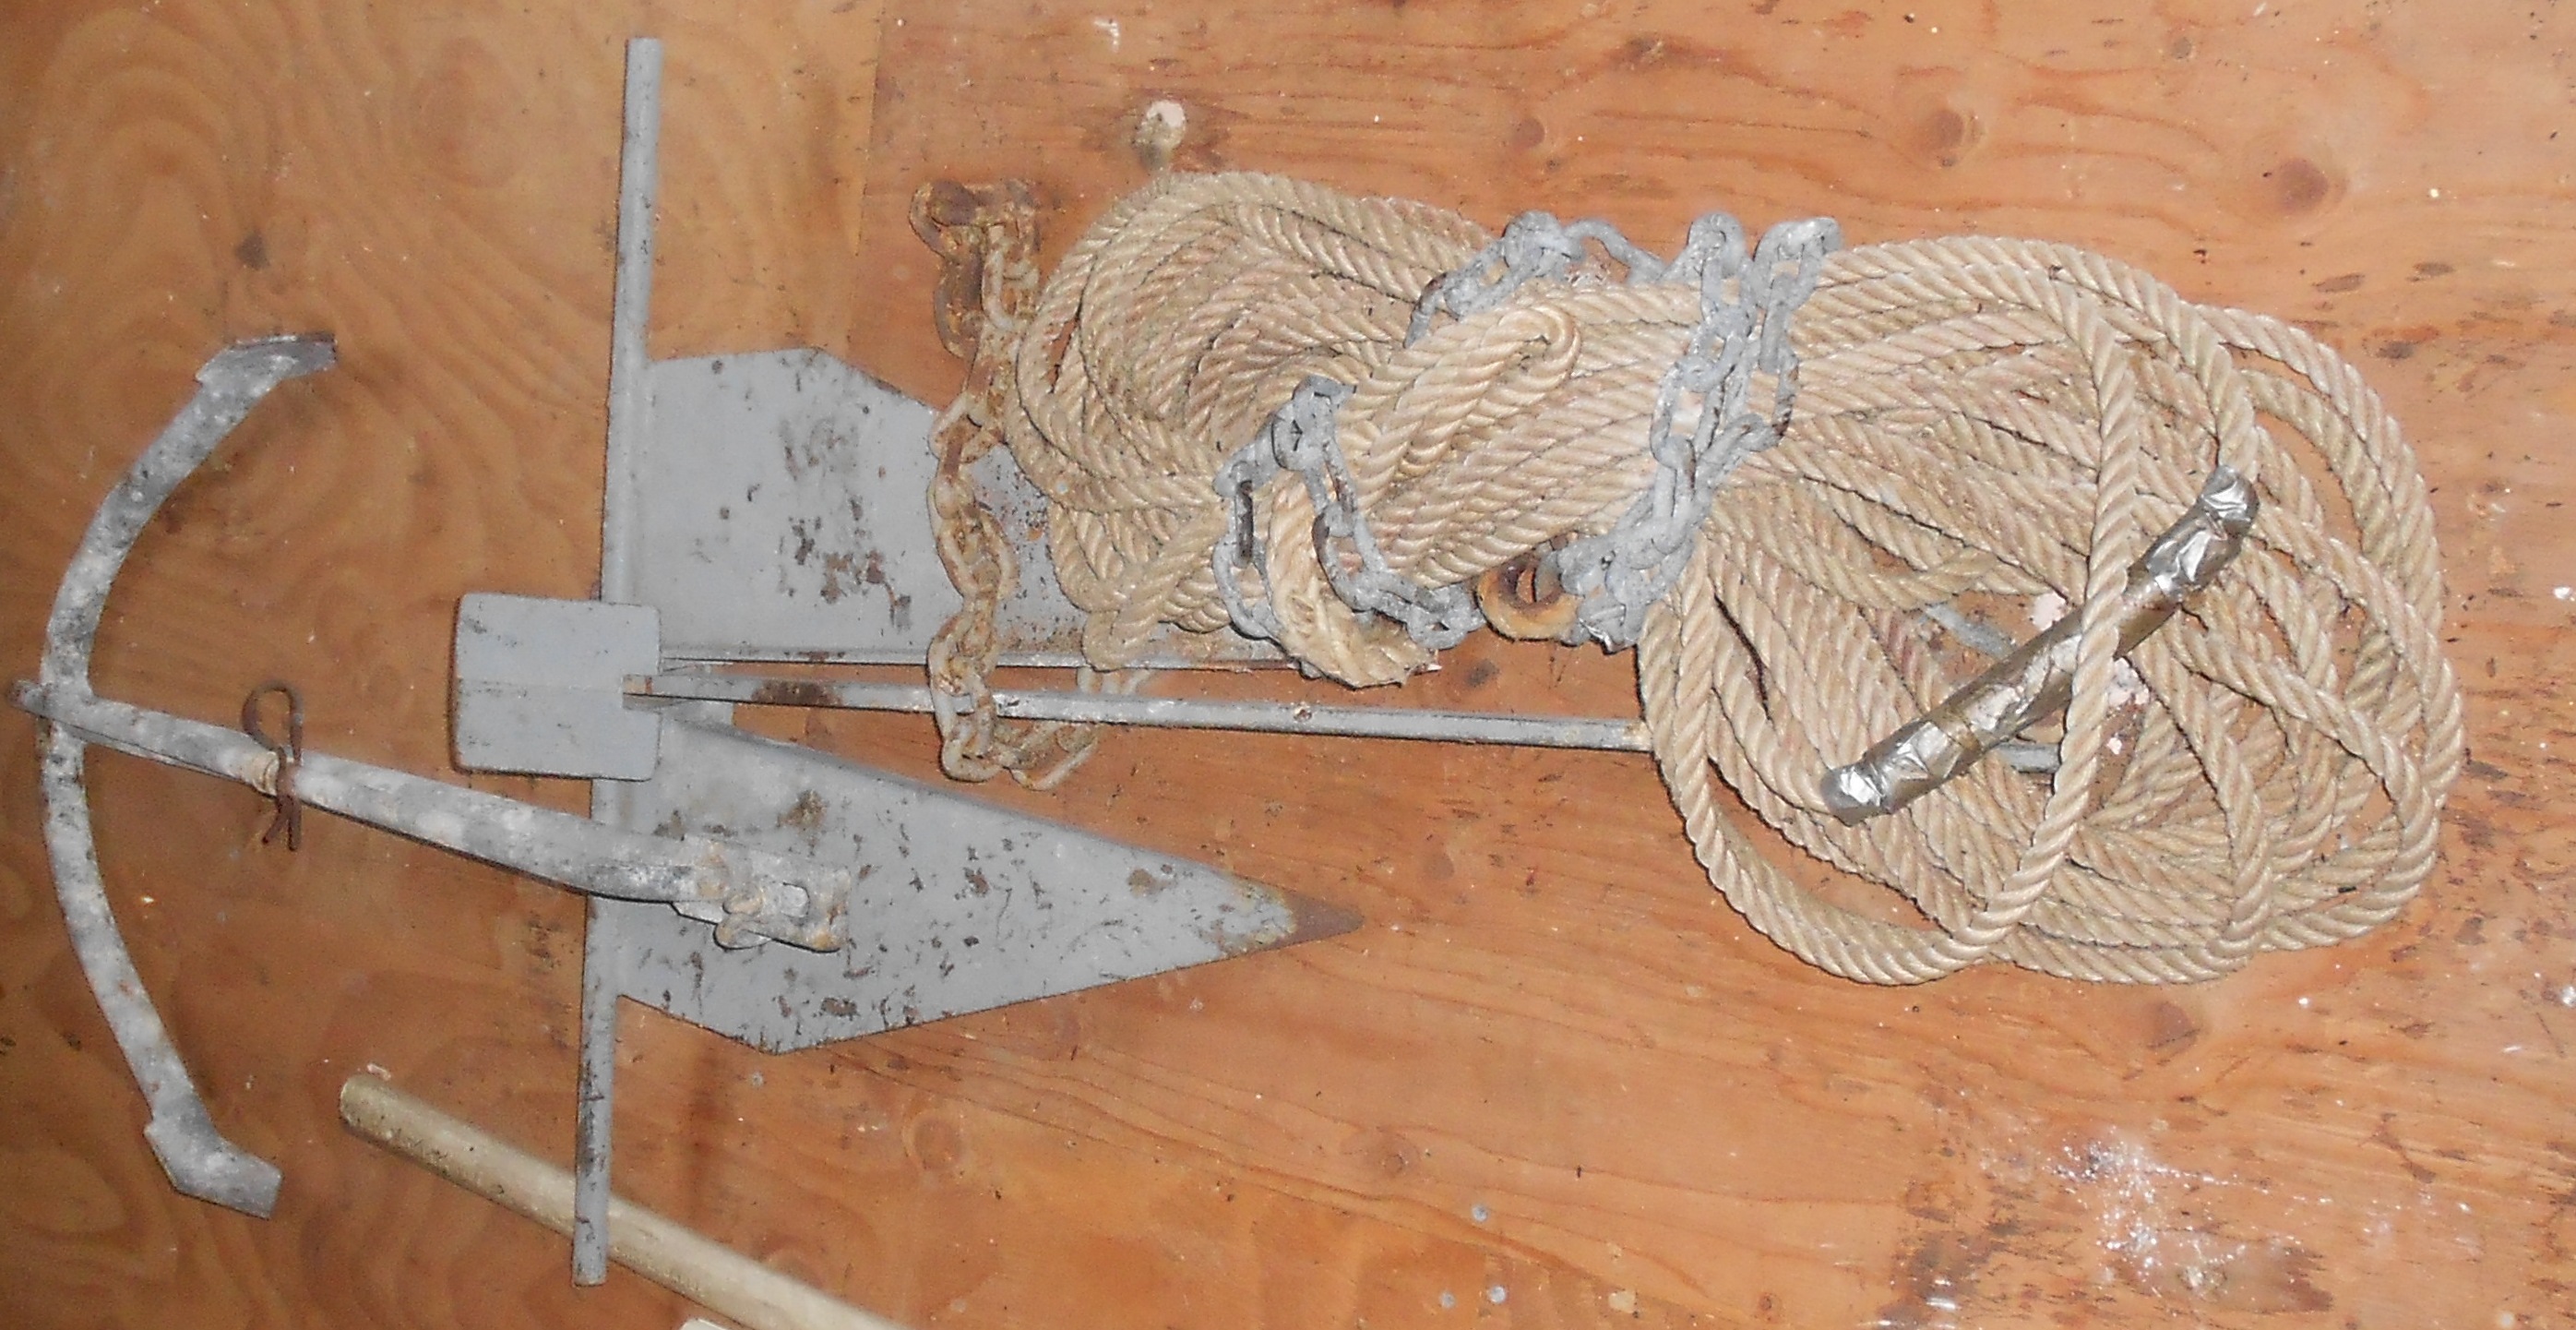
The bow/stern rails (ok pulpit/pushpit) are in excellent condition, no dents or bends. Ground tackle is good size - could be sanded and re-galvanized
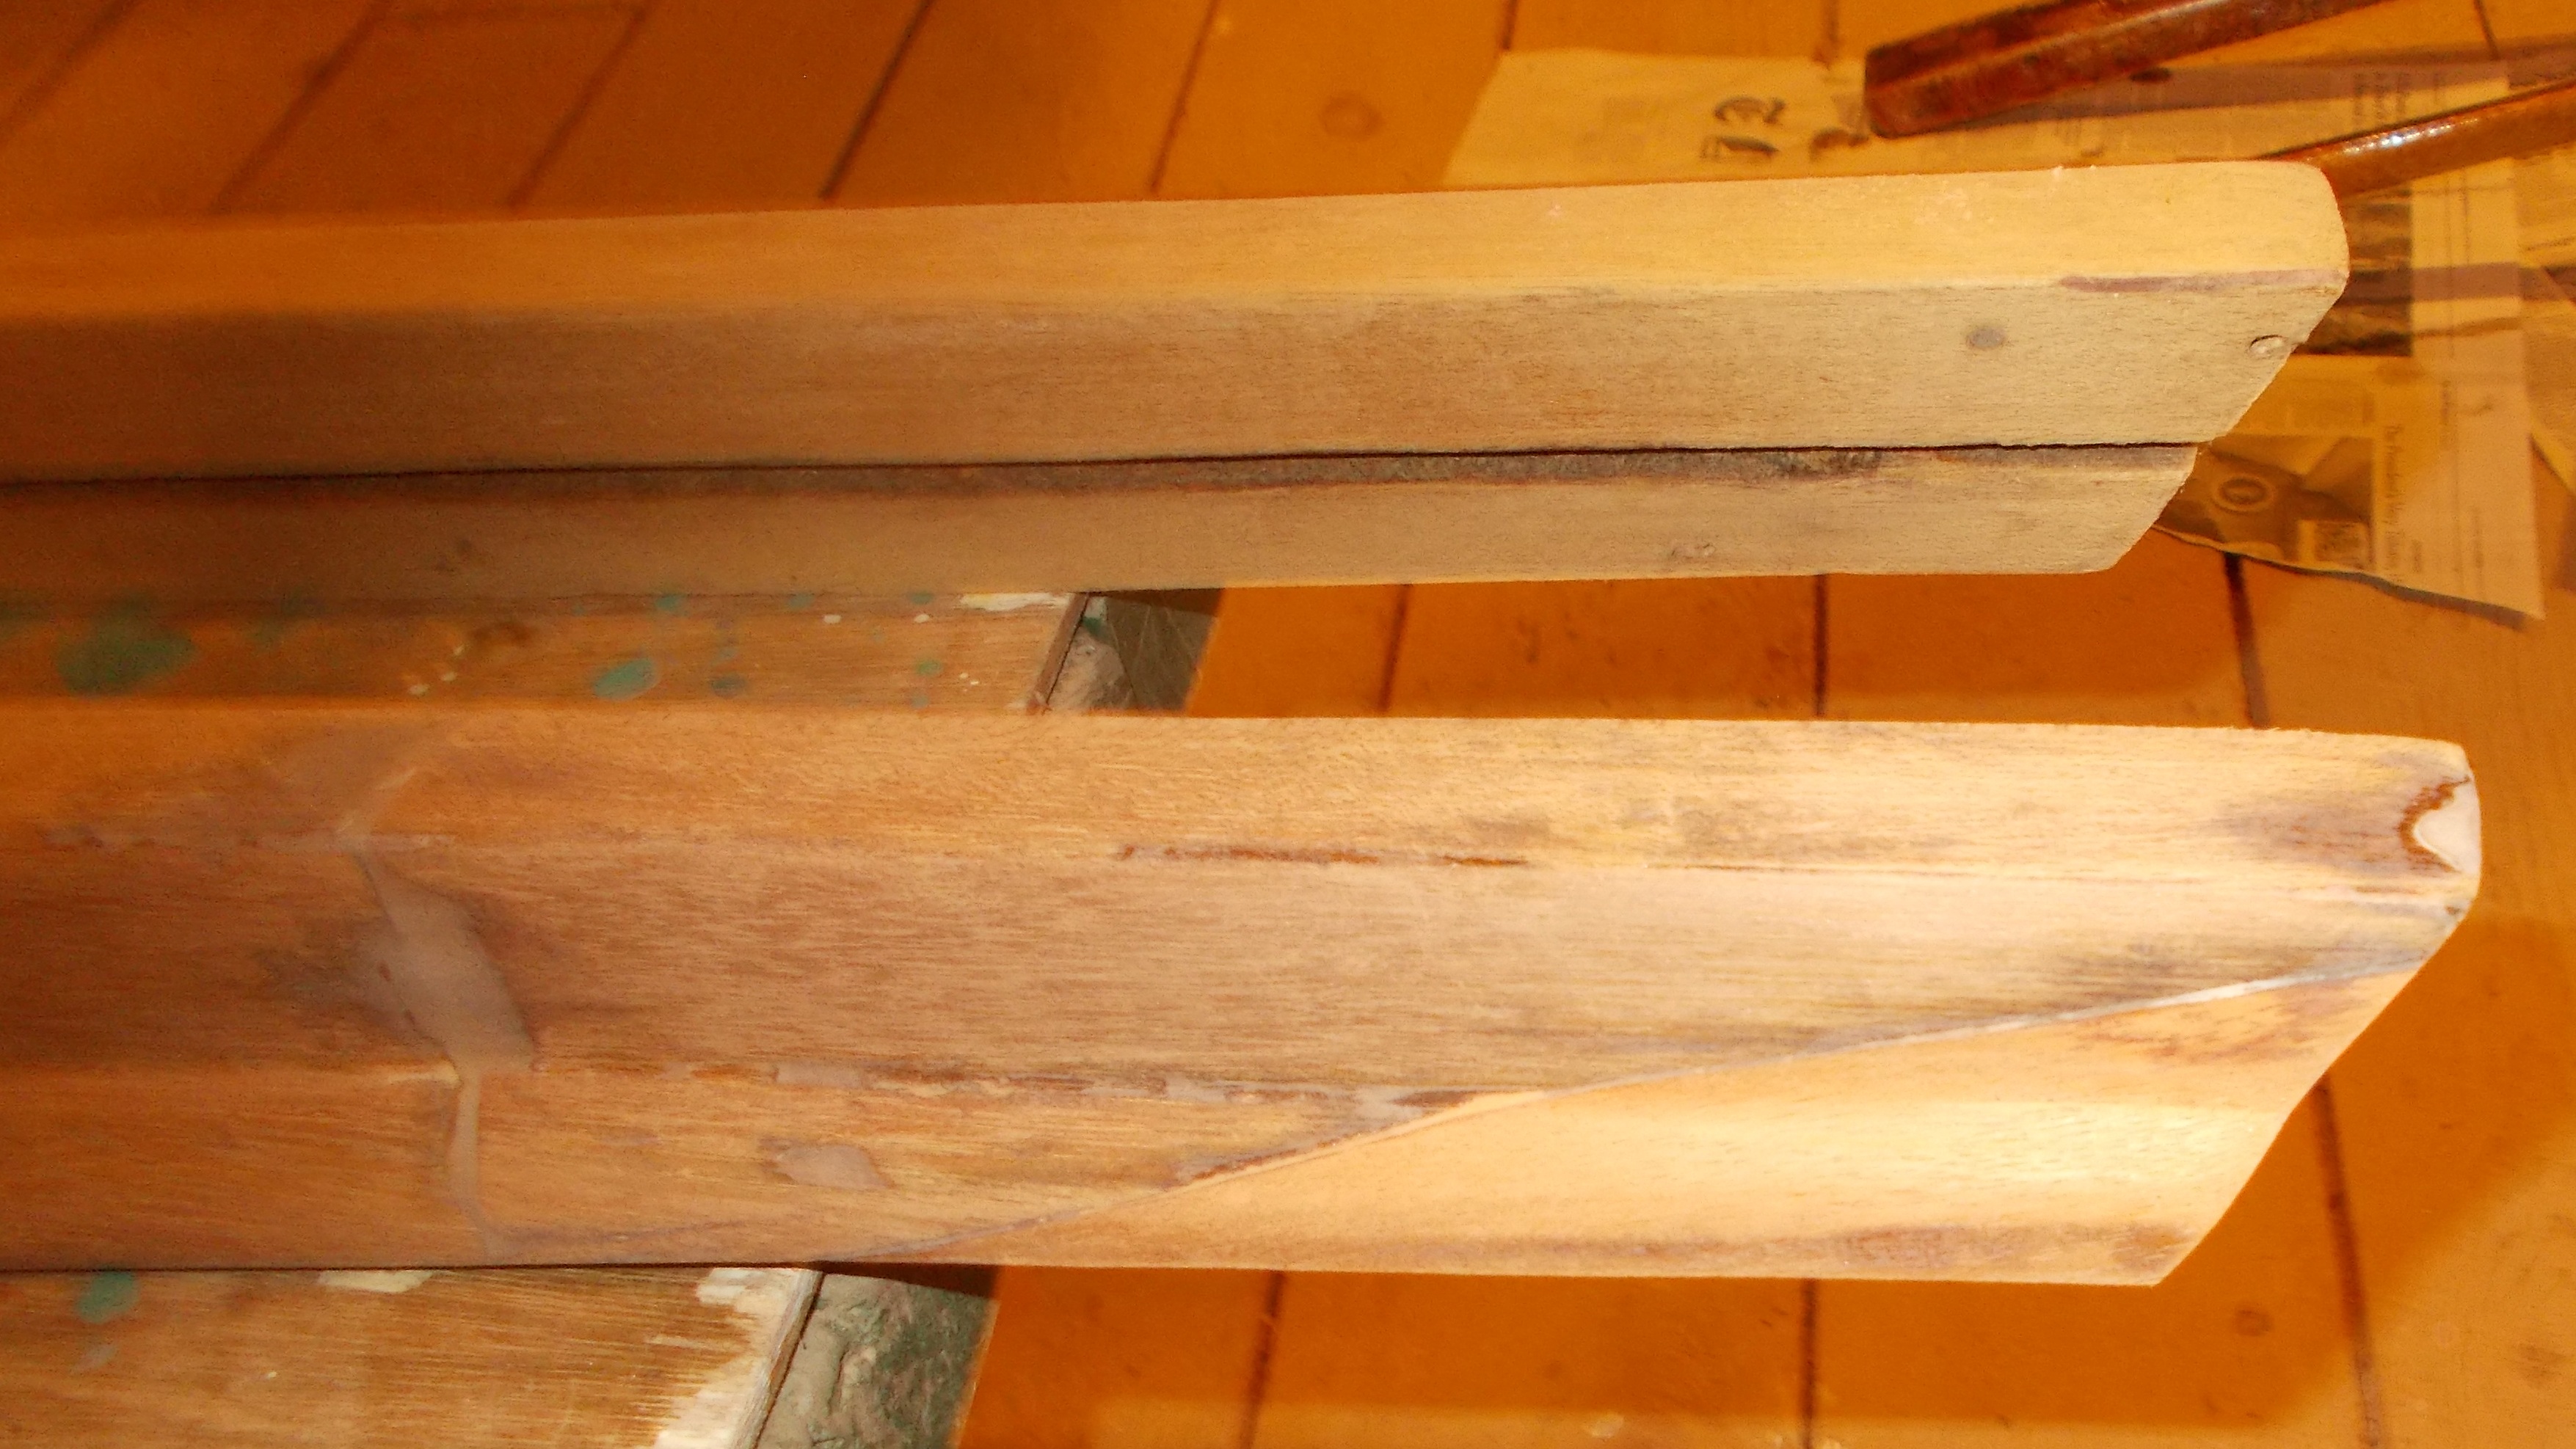
Above left are the combings and tiller. The 'shoulder' of the starboard combing had to be completely remade - an interesting wood shop project. The tiller is ready for varnishing. The fitting has a nice polished look. Above right are miscellaneous wood parts and frames.
|

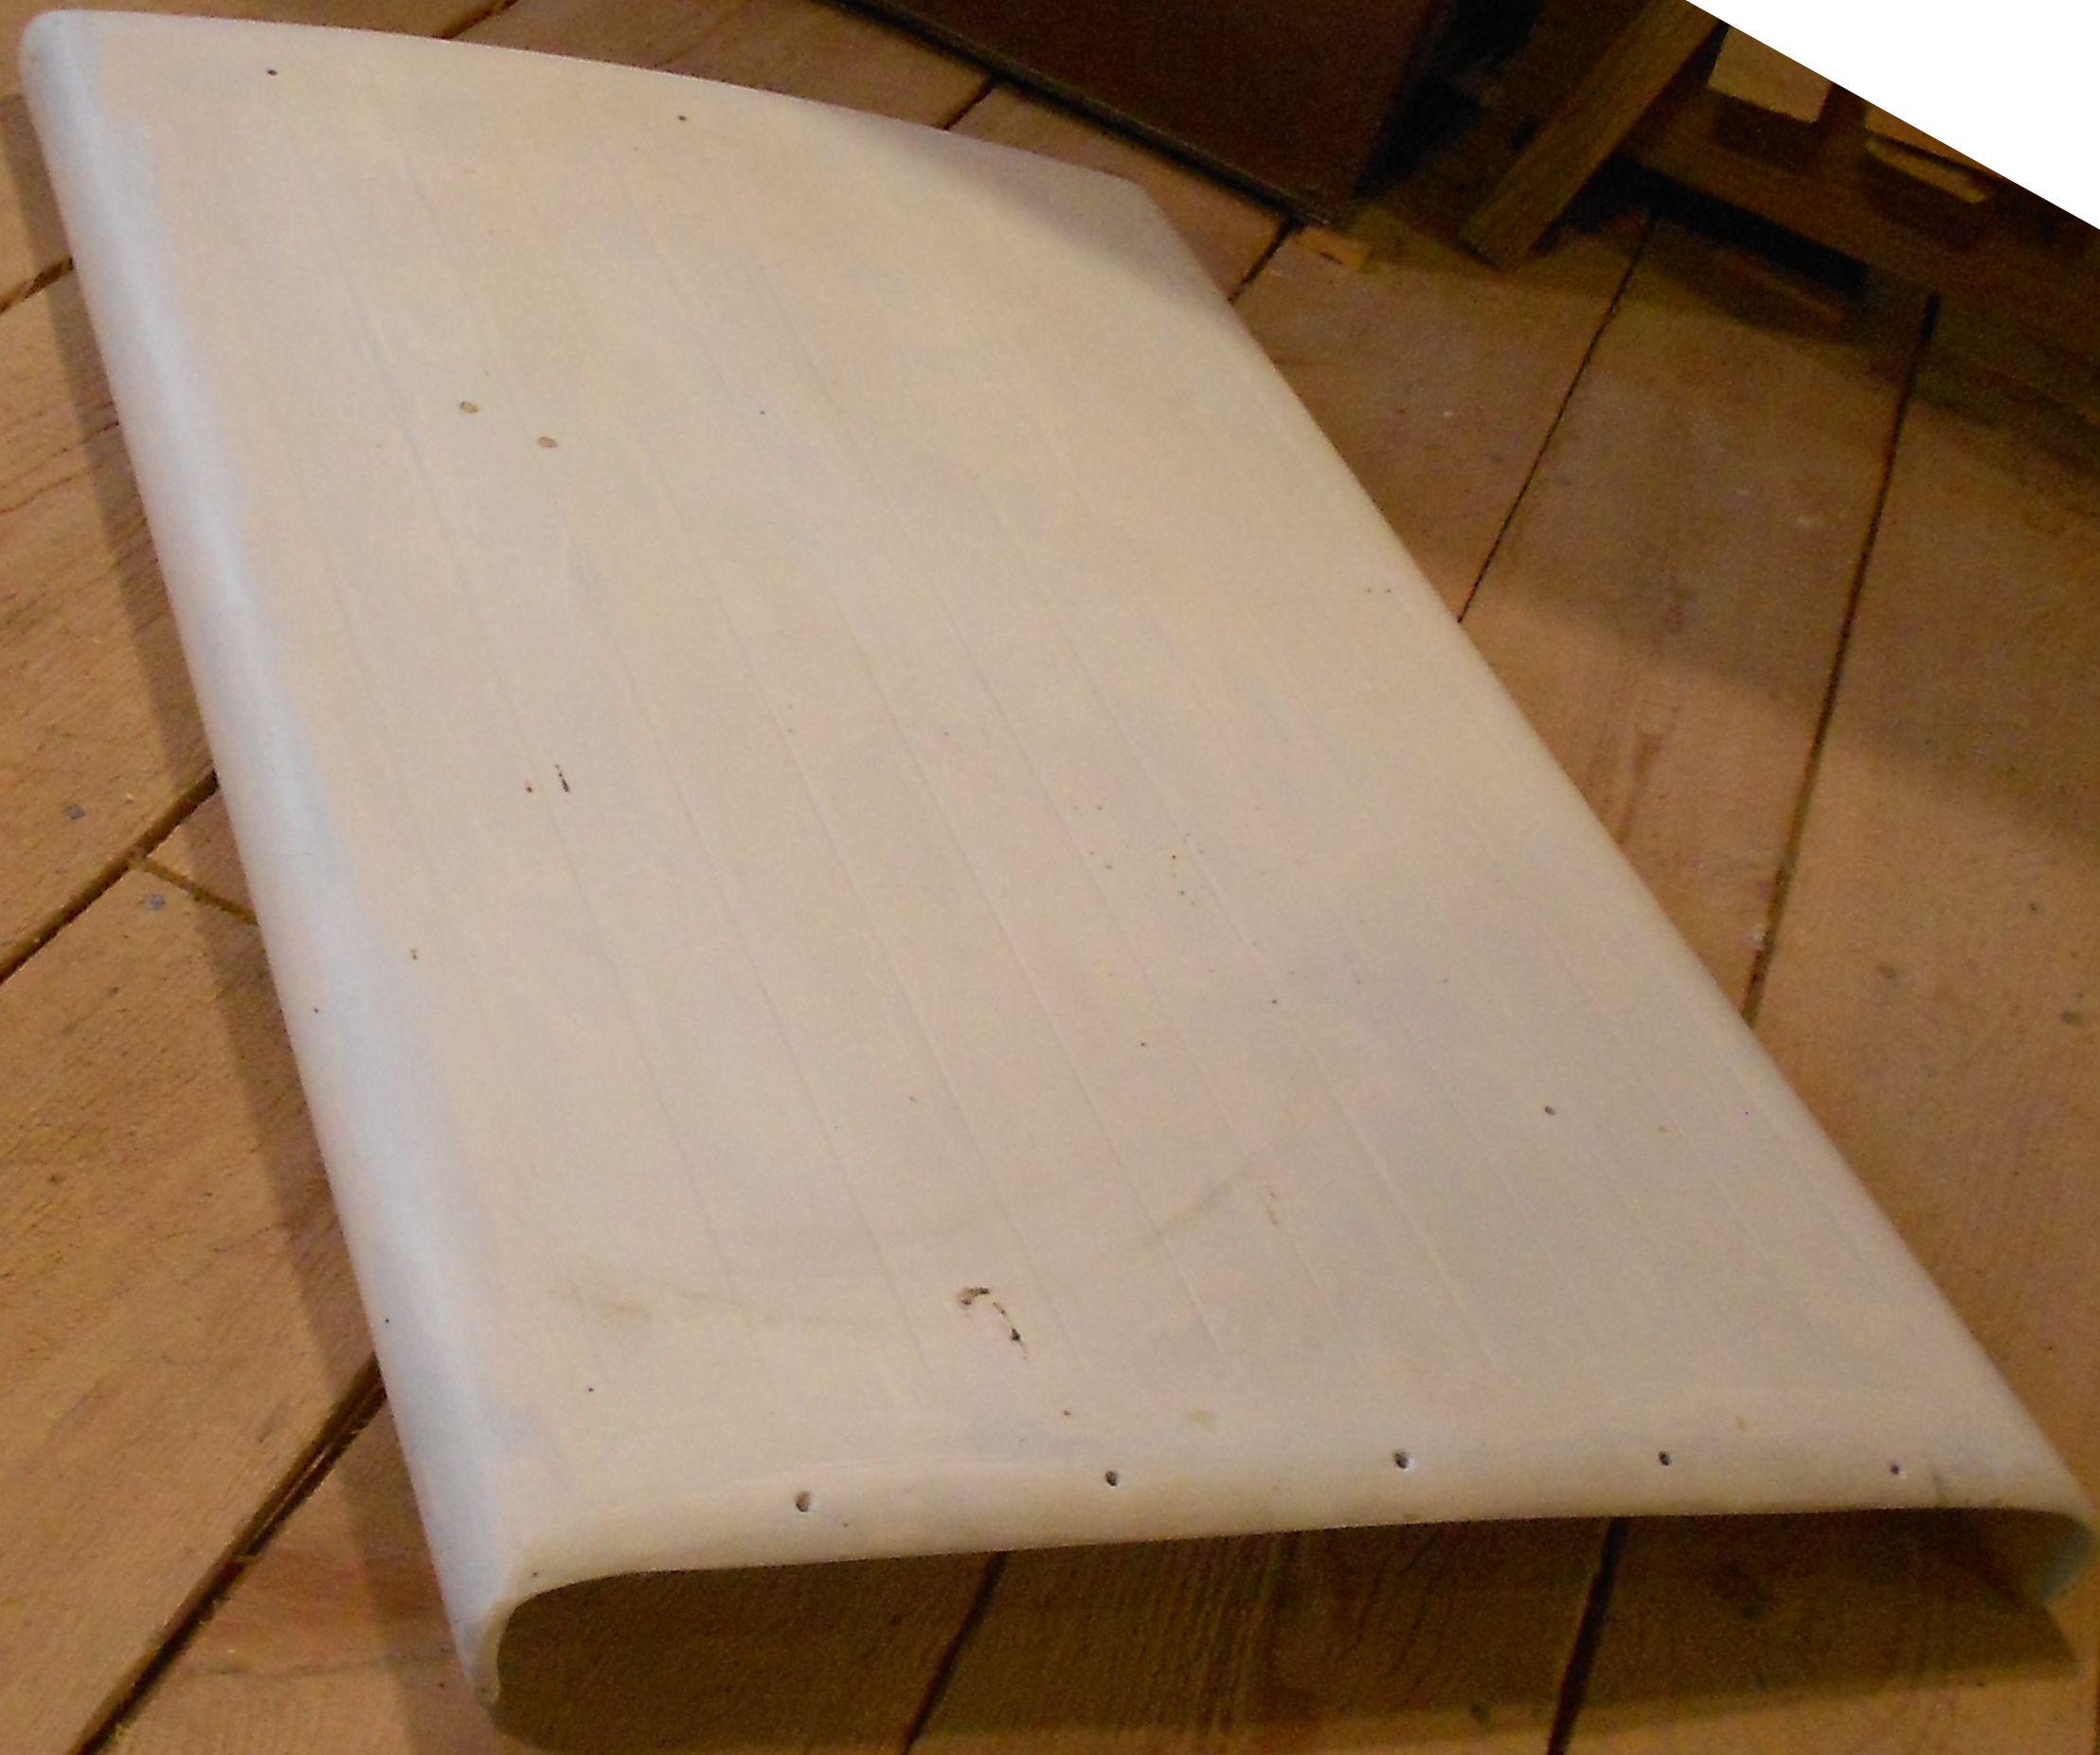
Above - The main hatch - wood trim removed. Might be nice to have a wood hatch?
Left - the companionway ladder - removable
|
Miscellaneous parts - portapotty, stanchions, a beautiful centerboard winch, running lights, Dorade box and cowl, etc.
|
|

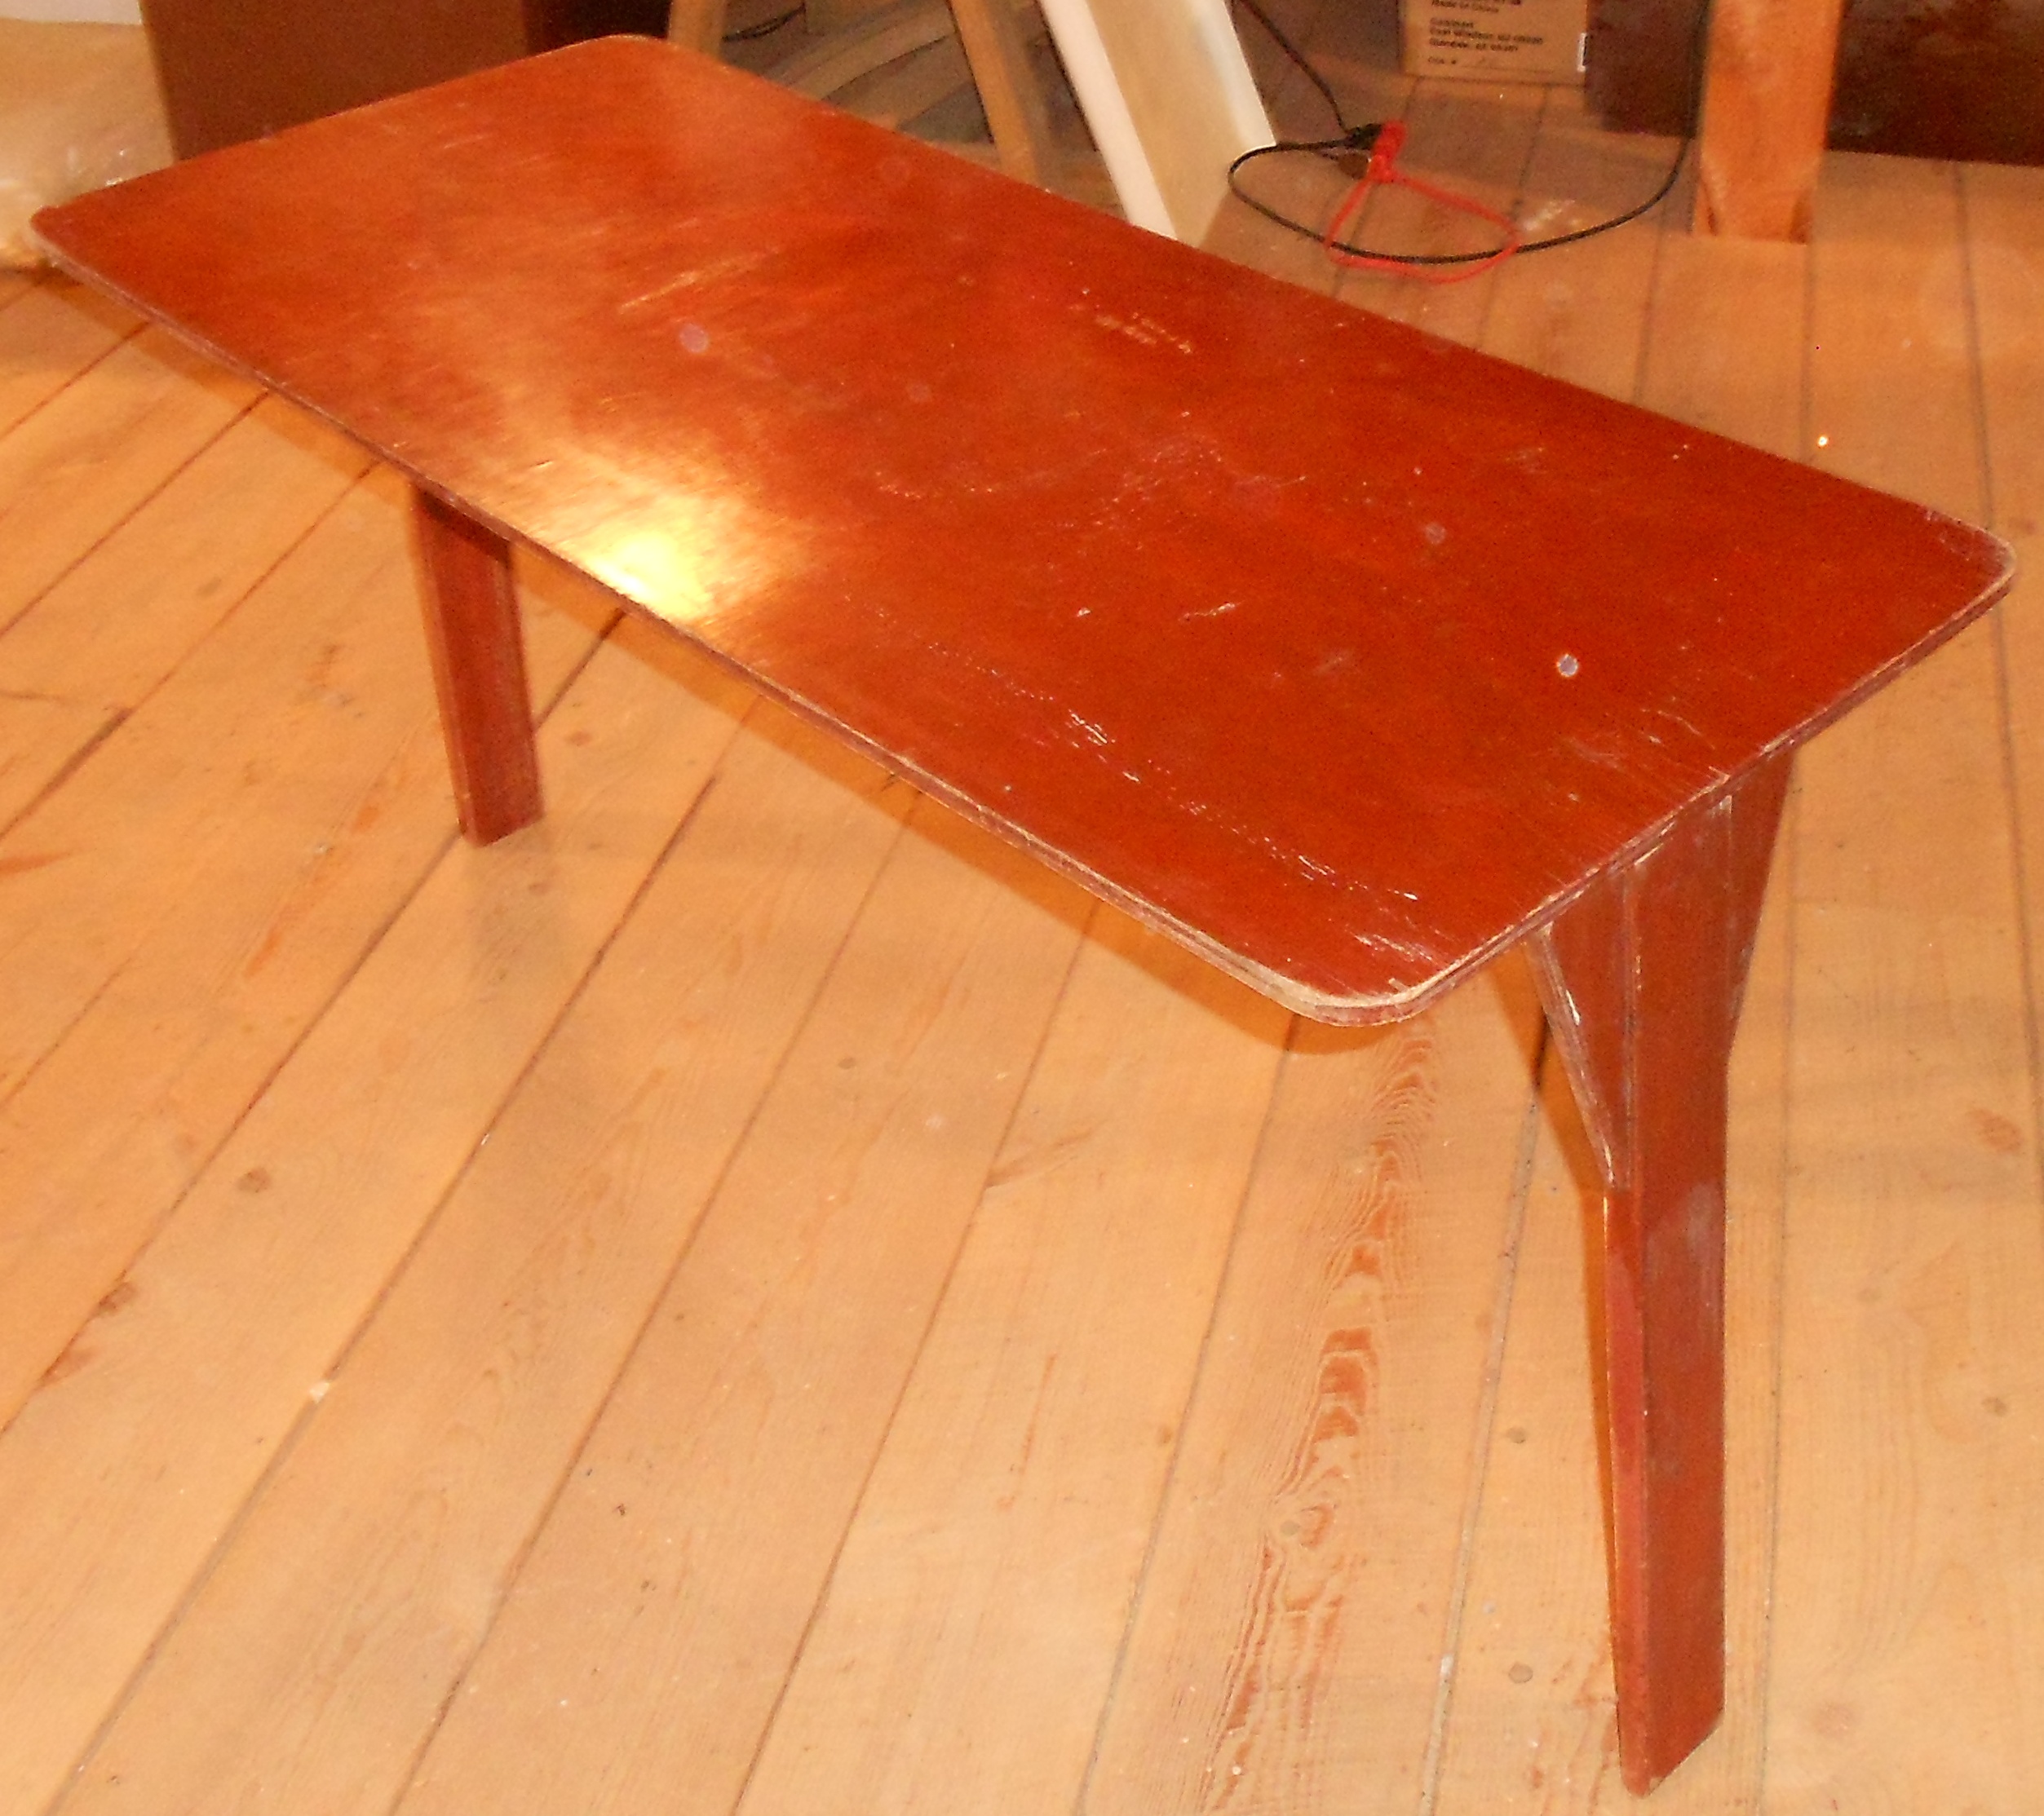
This 'portable' table has fold up legs and mounts on a center post in the main cabin - Maybe could be used in the cockpit?
. |

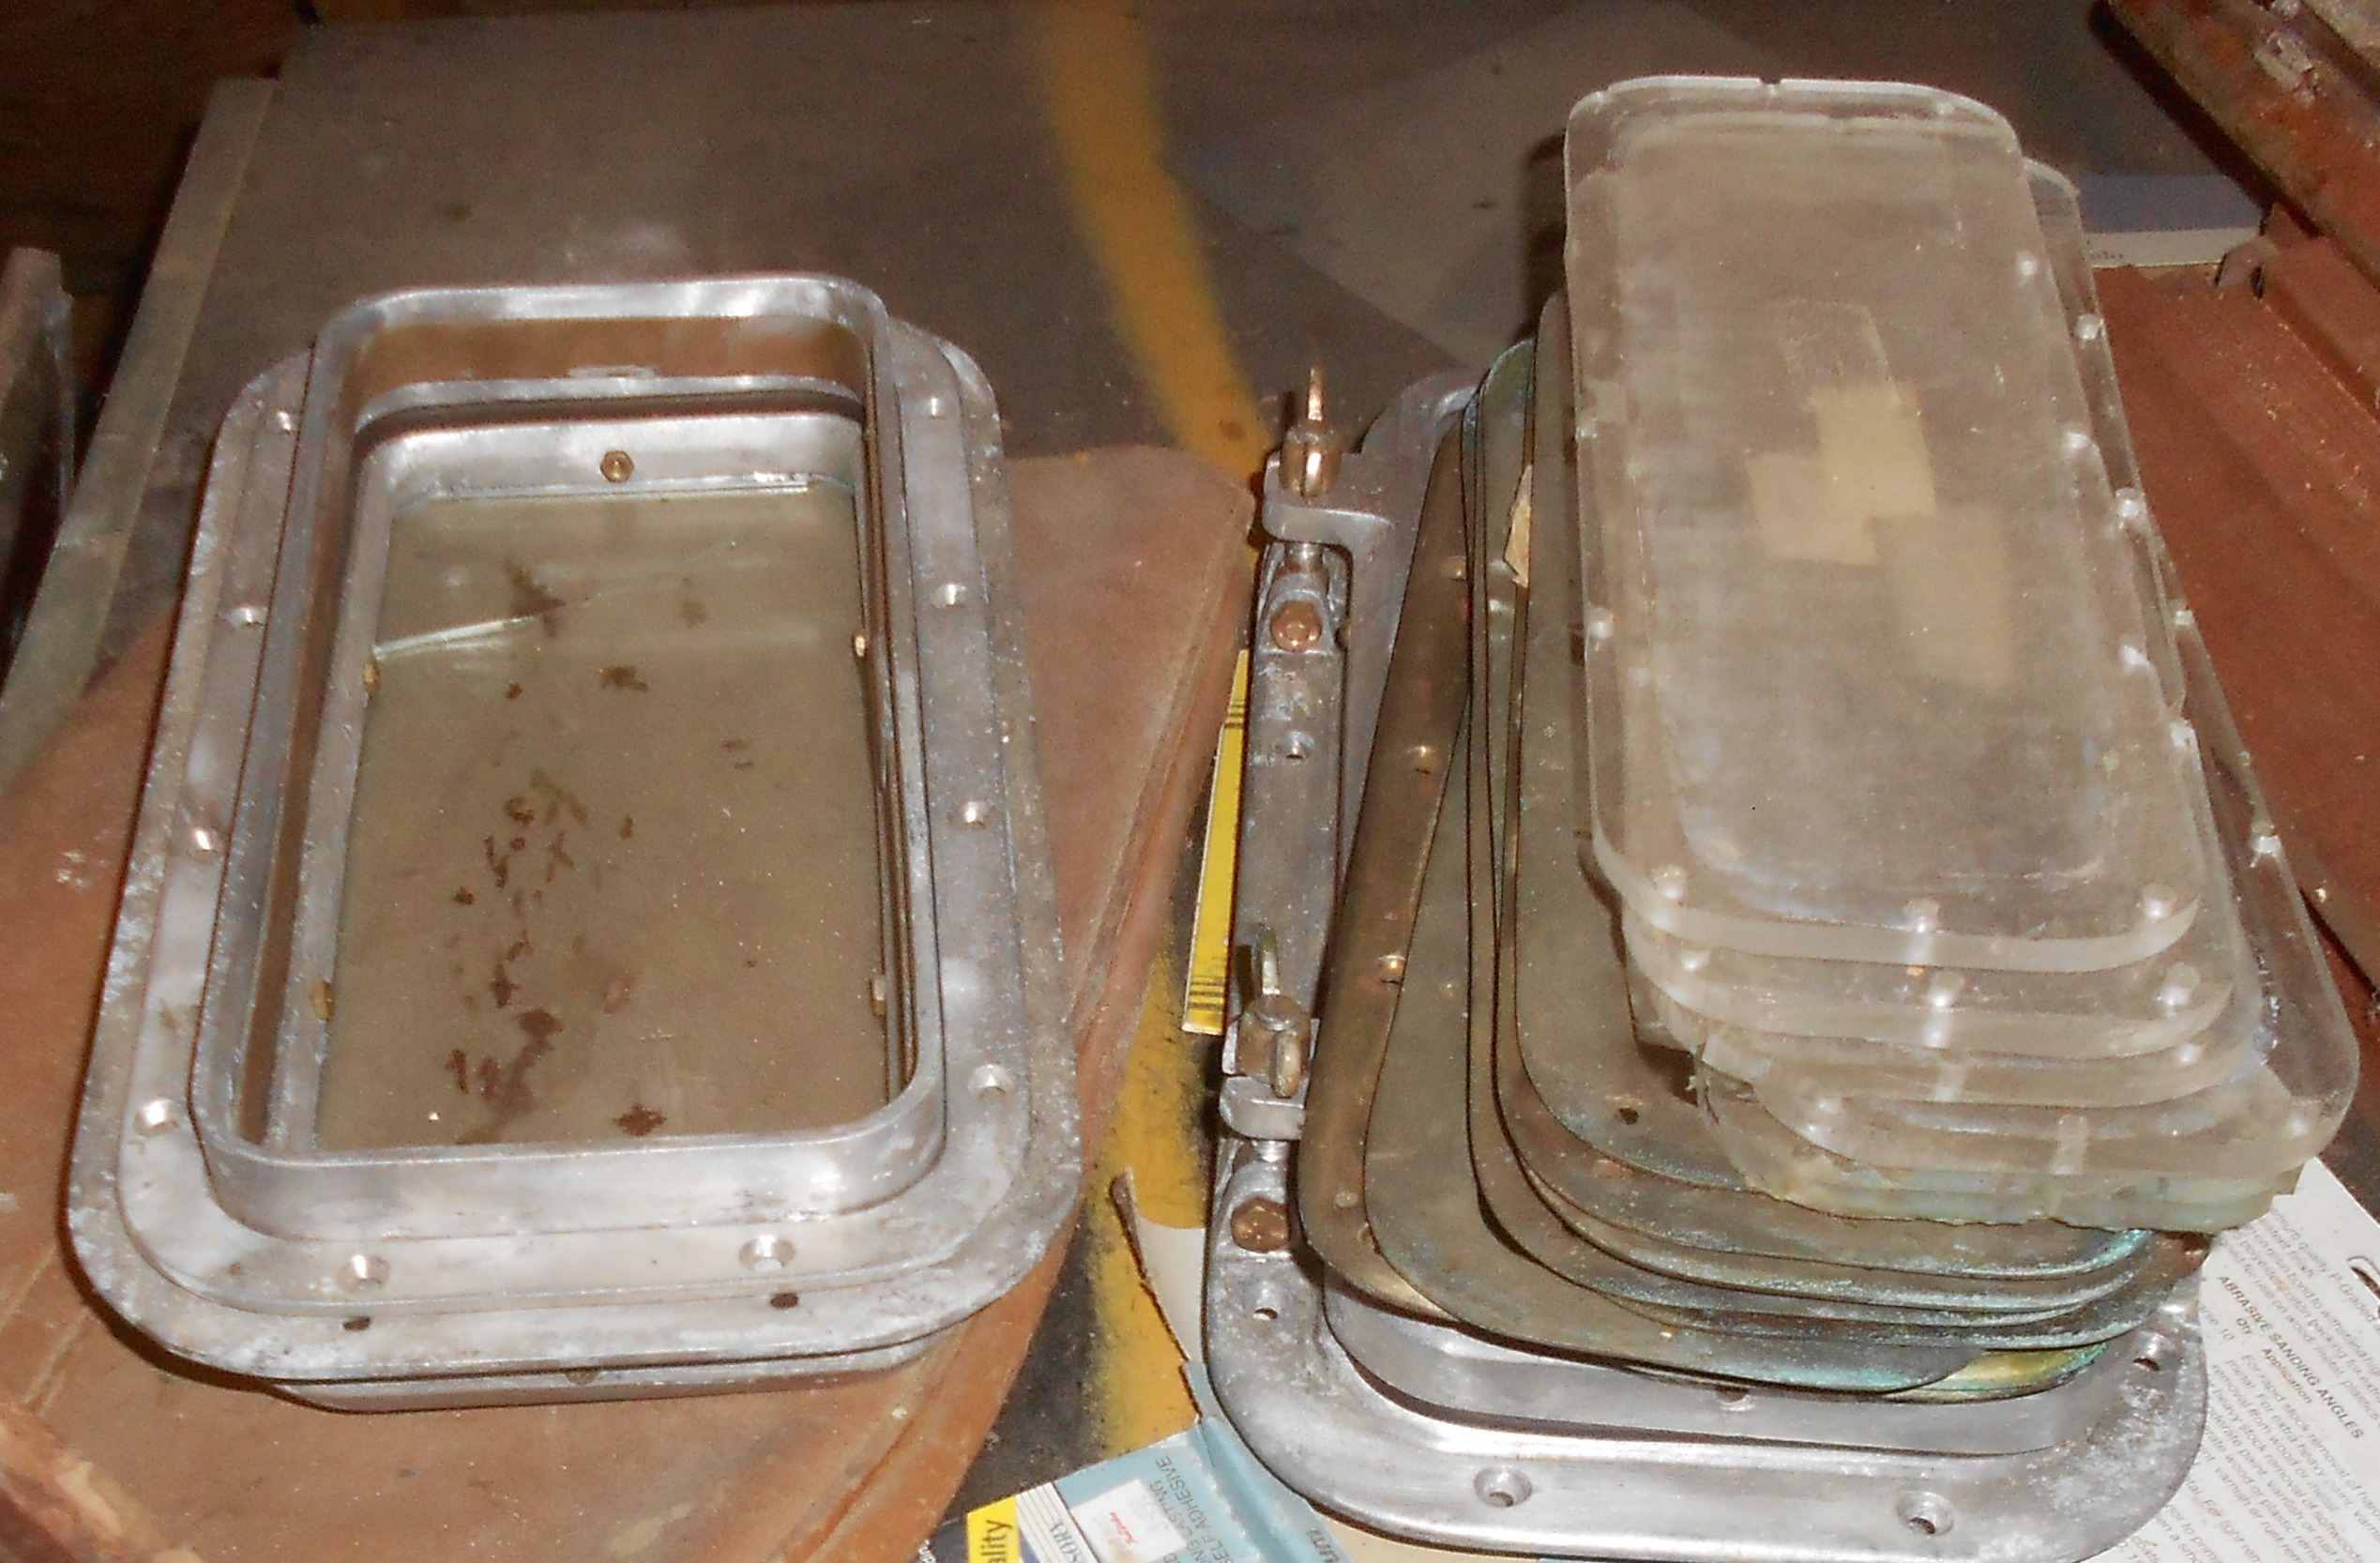
The portlight frames have been polished. The large opening frames are aluminum, the small one bronze. We were thinking of chrome plating...
The thick plastic lenses need to be replaced - unbreakable glass?
|
|
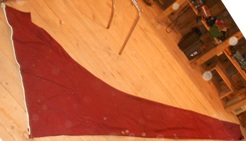
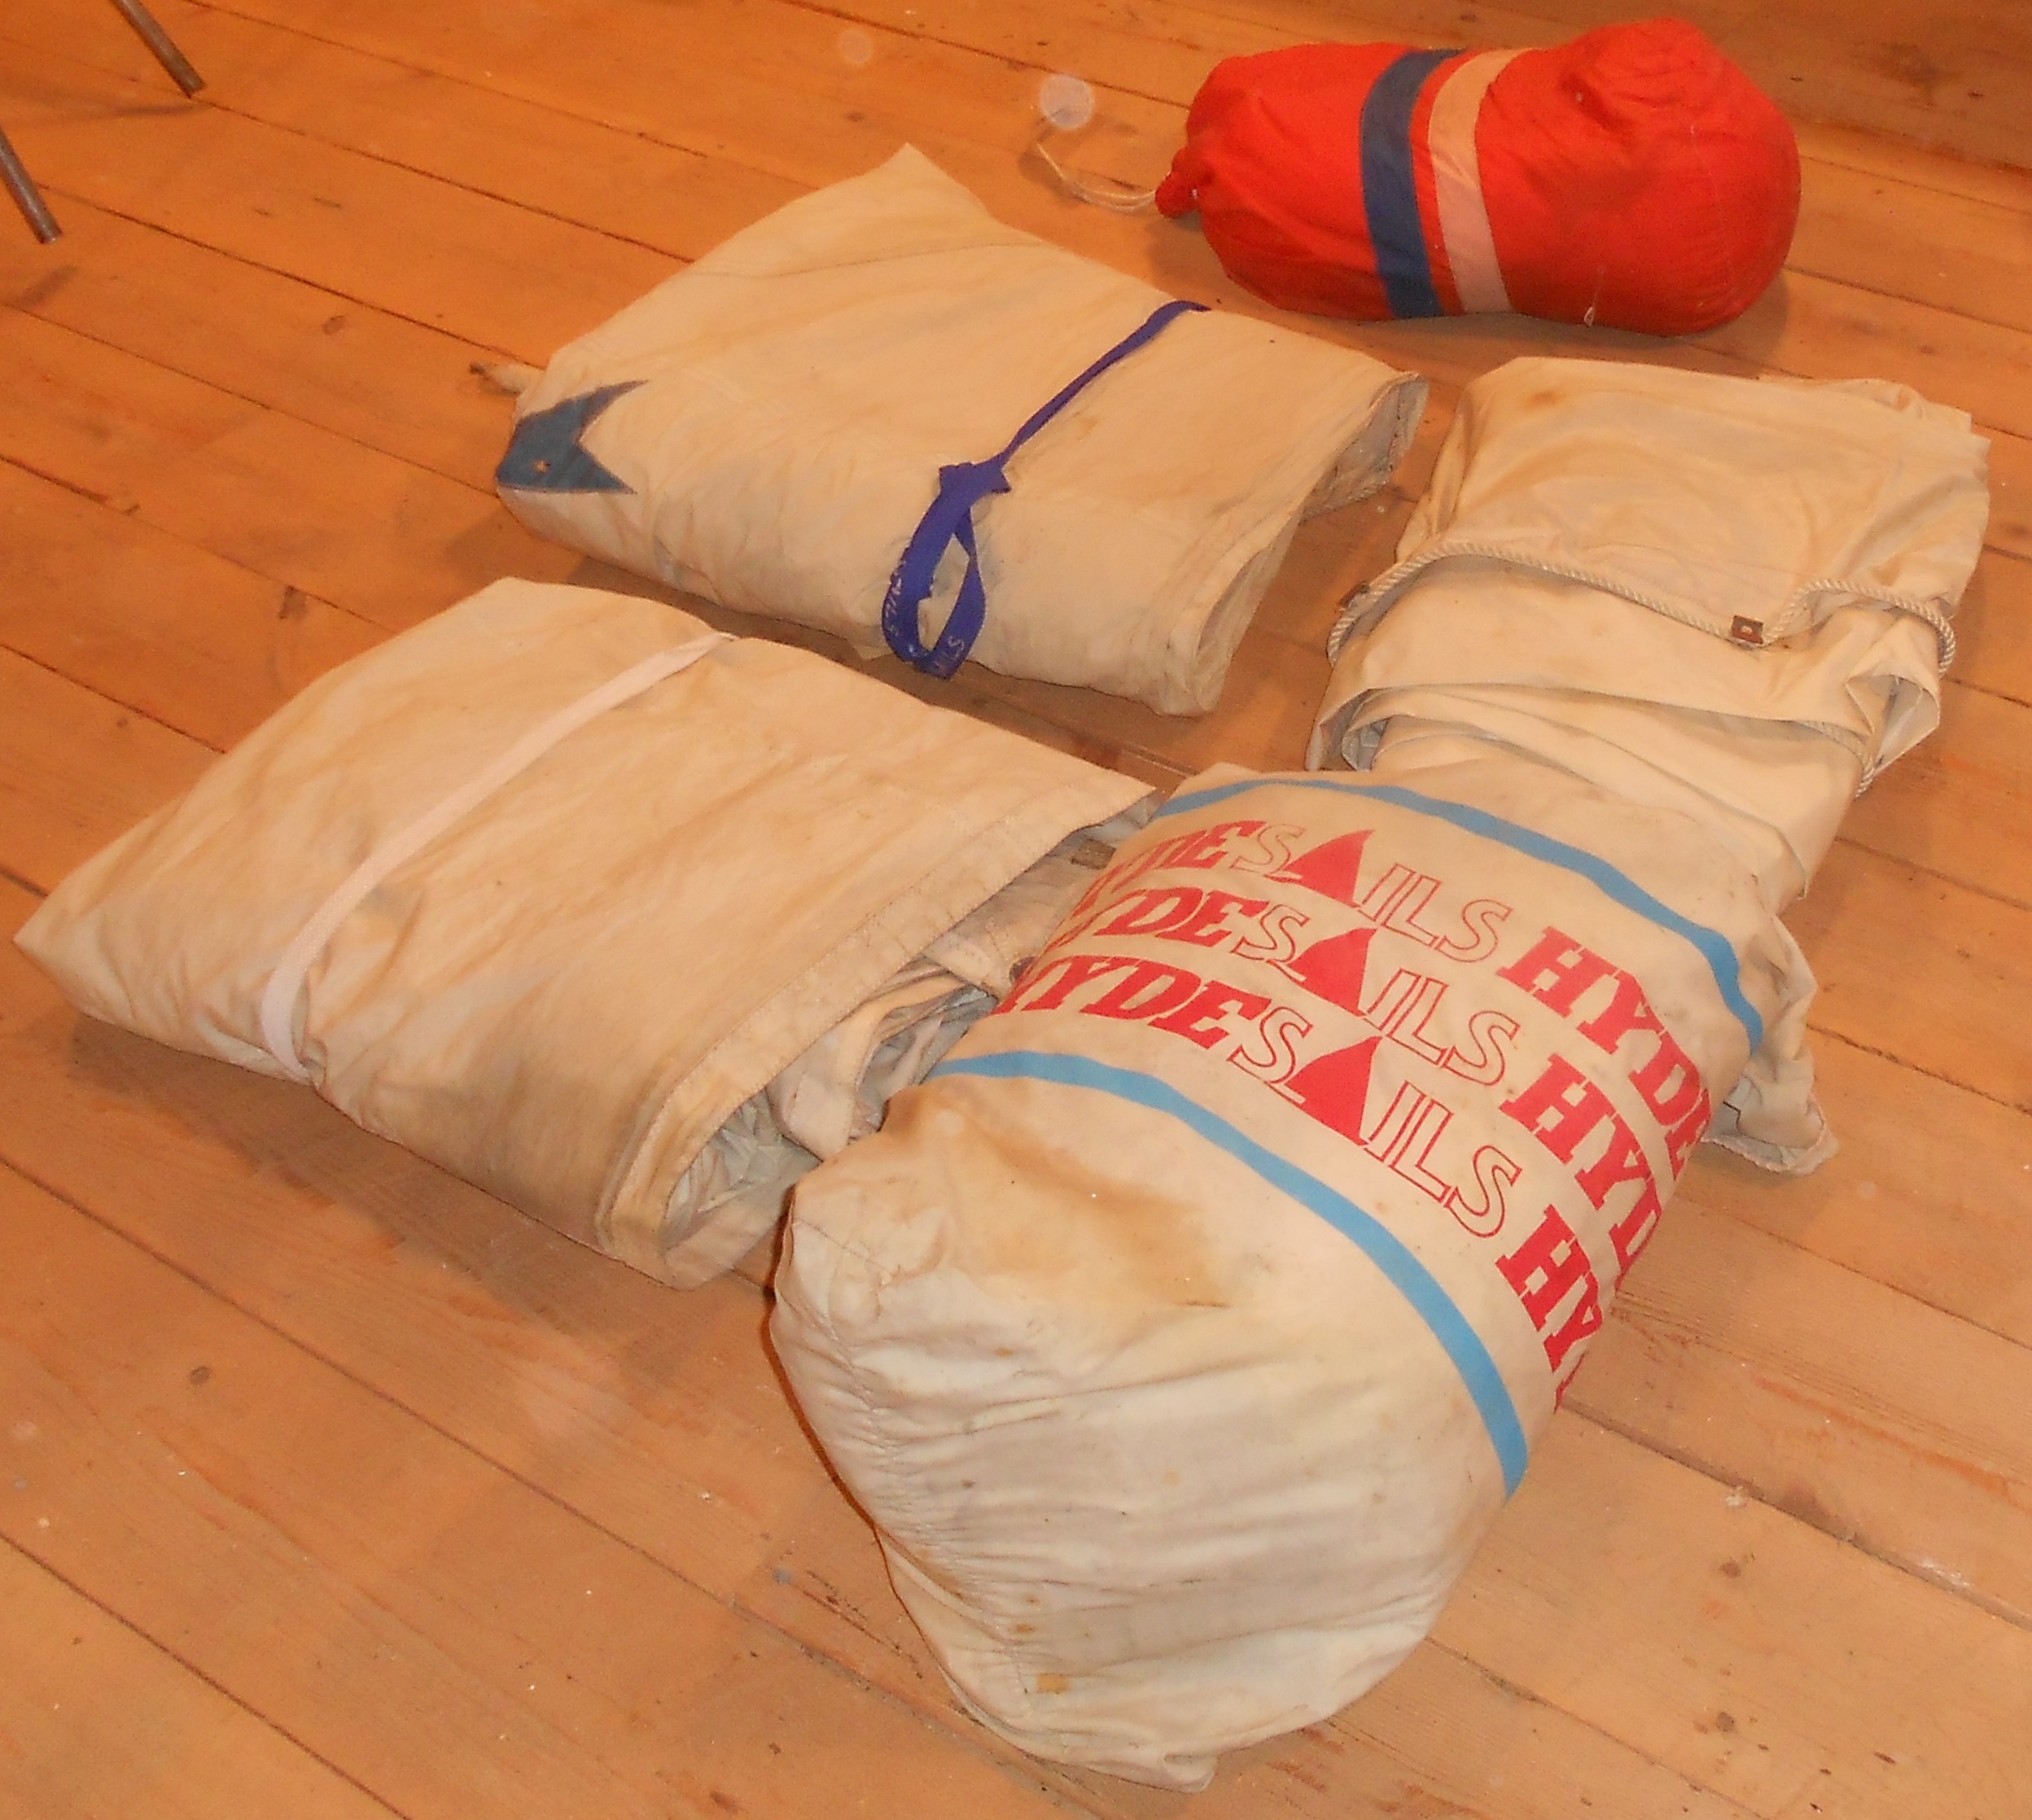
Above - mainsail cover
Left - Sails - Main, 4 jibs (2 in bag) and a spinnaker. Need a good washing. Probably ok to get started but a restored Passage will probably want a new dress.
|
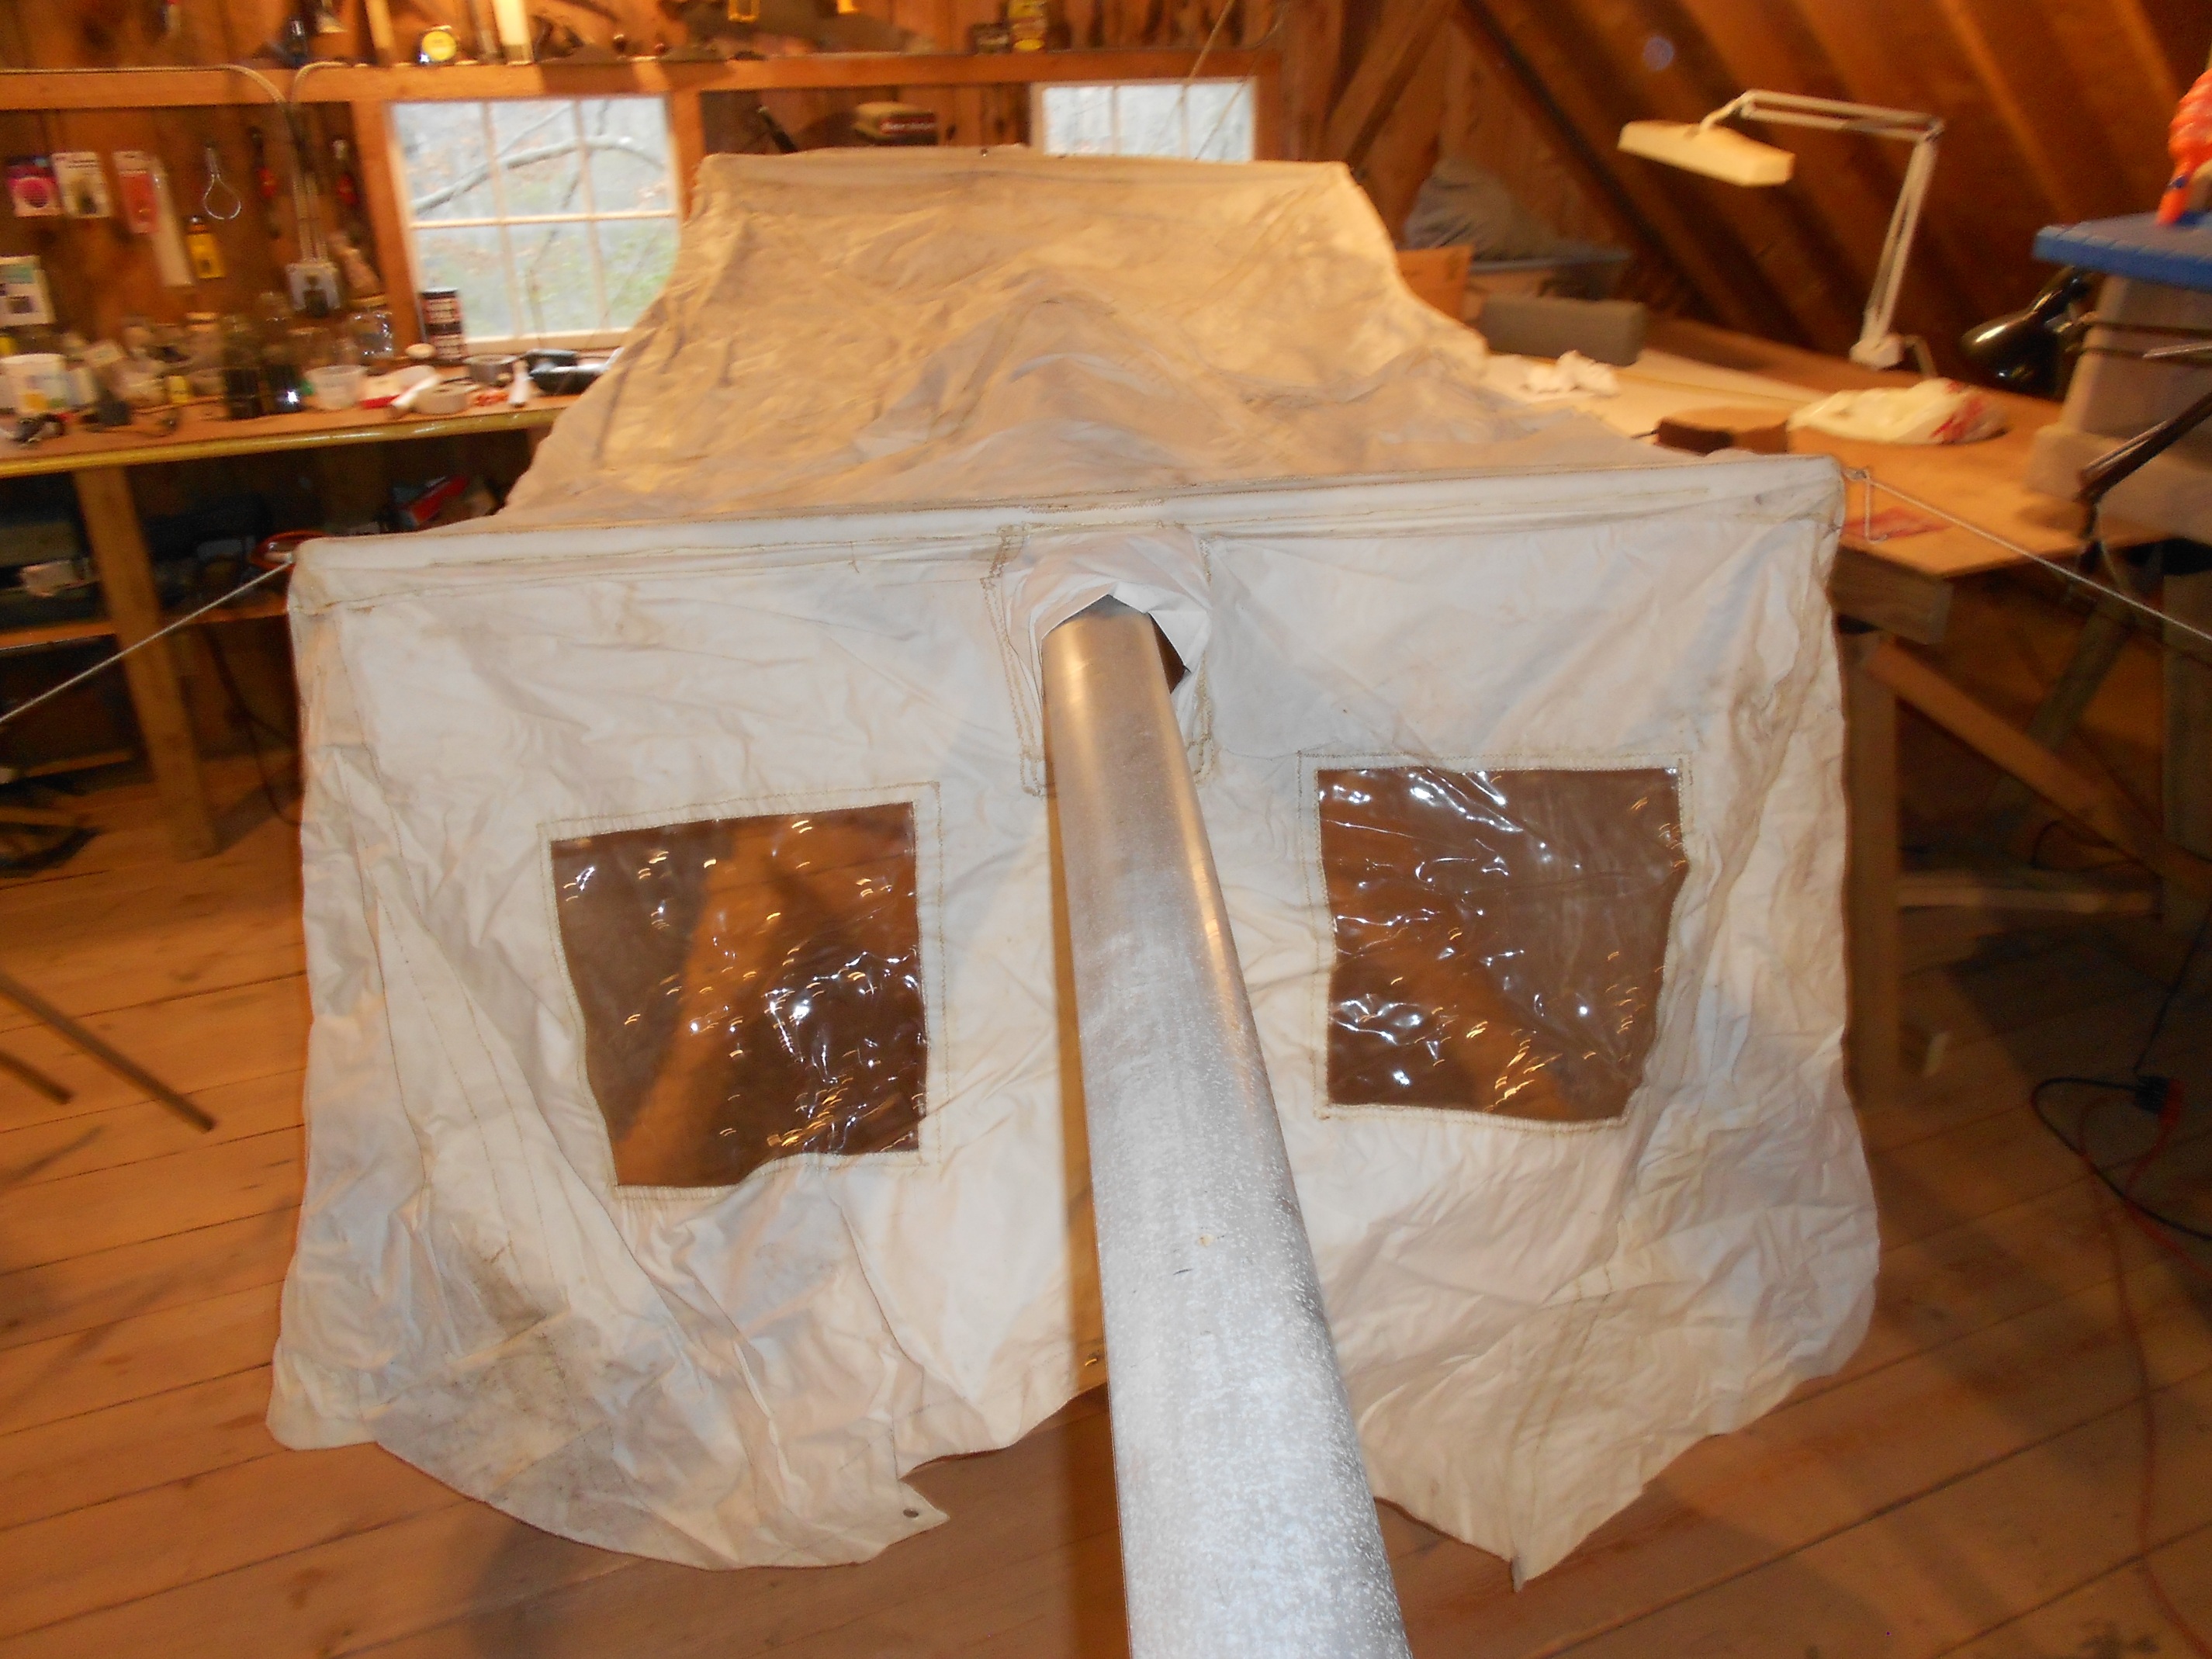
Above - This is a real bonus for the serious cruiser - a cockpit house - in great condition - needs a good cleaning
It is held together with snaps and there are 2 removable aluminum tubes athwartships fore and aft, with eyes protruding that tie off the lines to stanchions. It was set up in the barn wood shop over the aluminun boom and, with a bit of imagination, you can see the forward panel stretched out around the mast, not the boom (sorry, could not set this up) and, tapering down, reaching forward to the top of the house. There are 2 large windows port and starboard, and a door on the starboard side. It has a eye at the center top for a halyard.
|

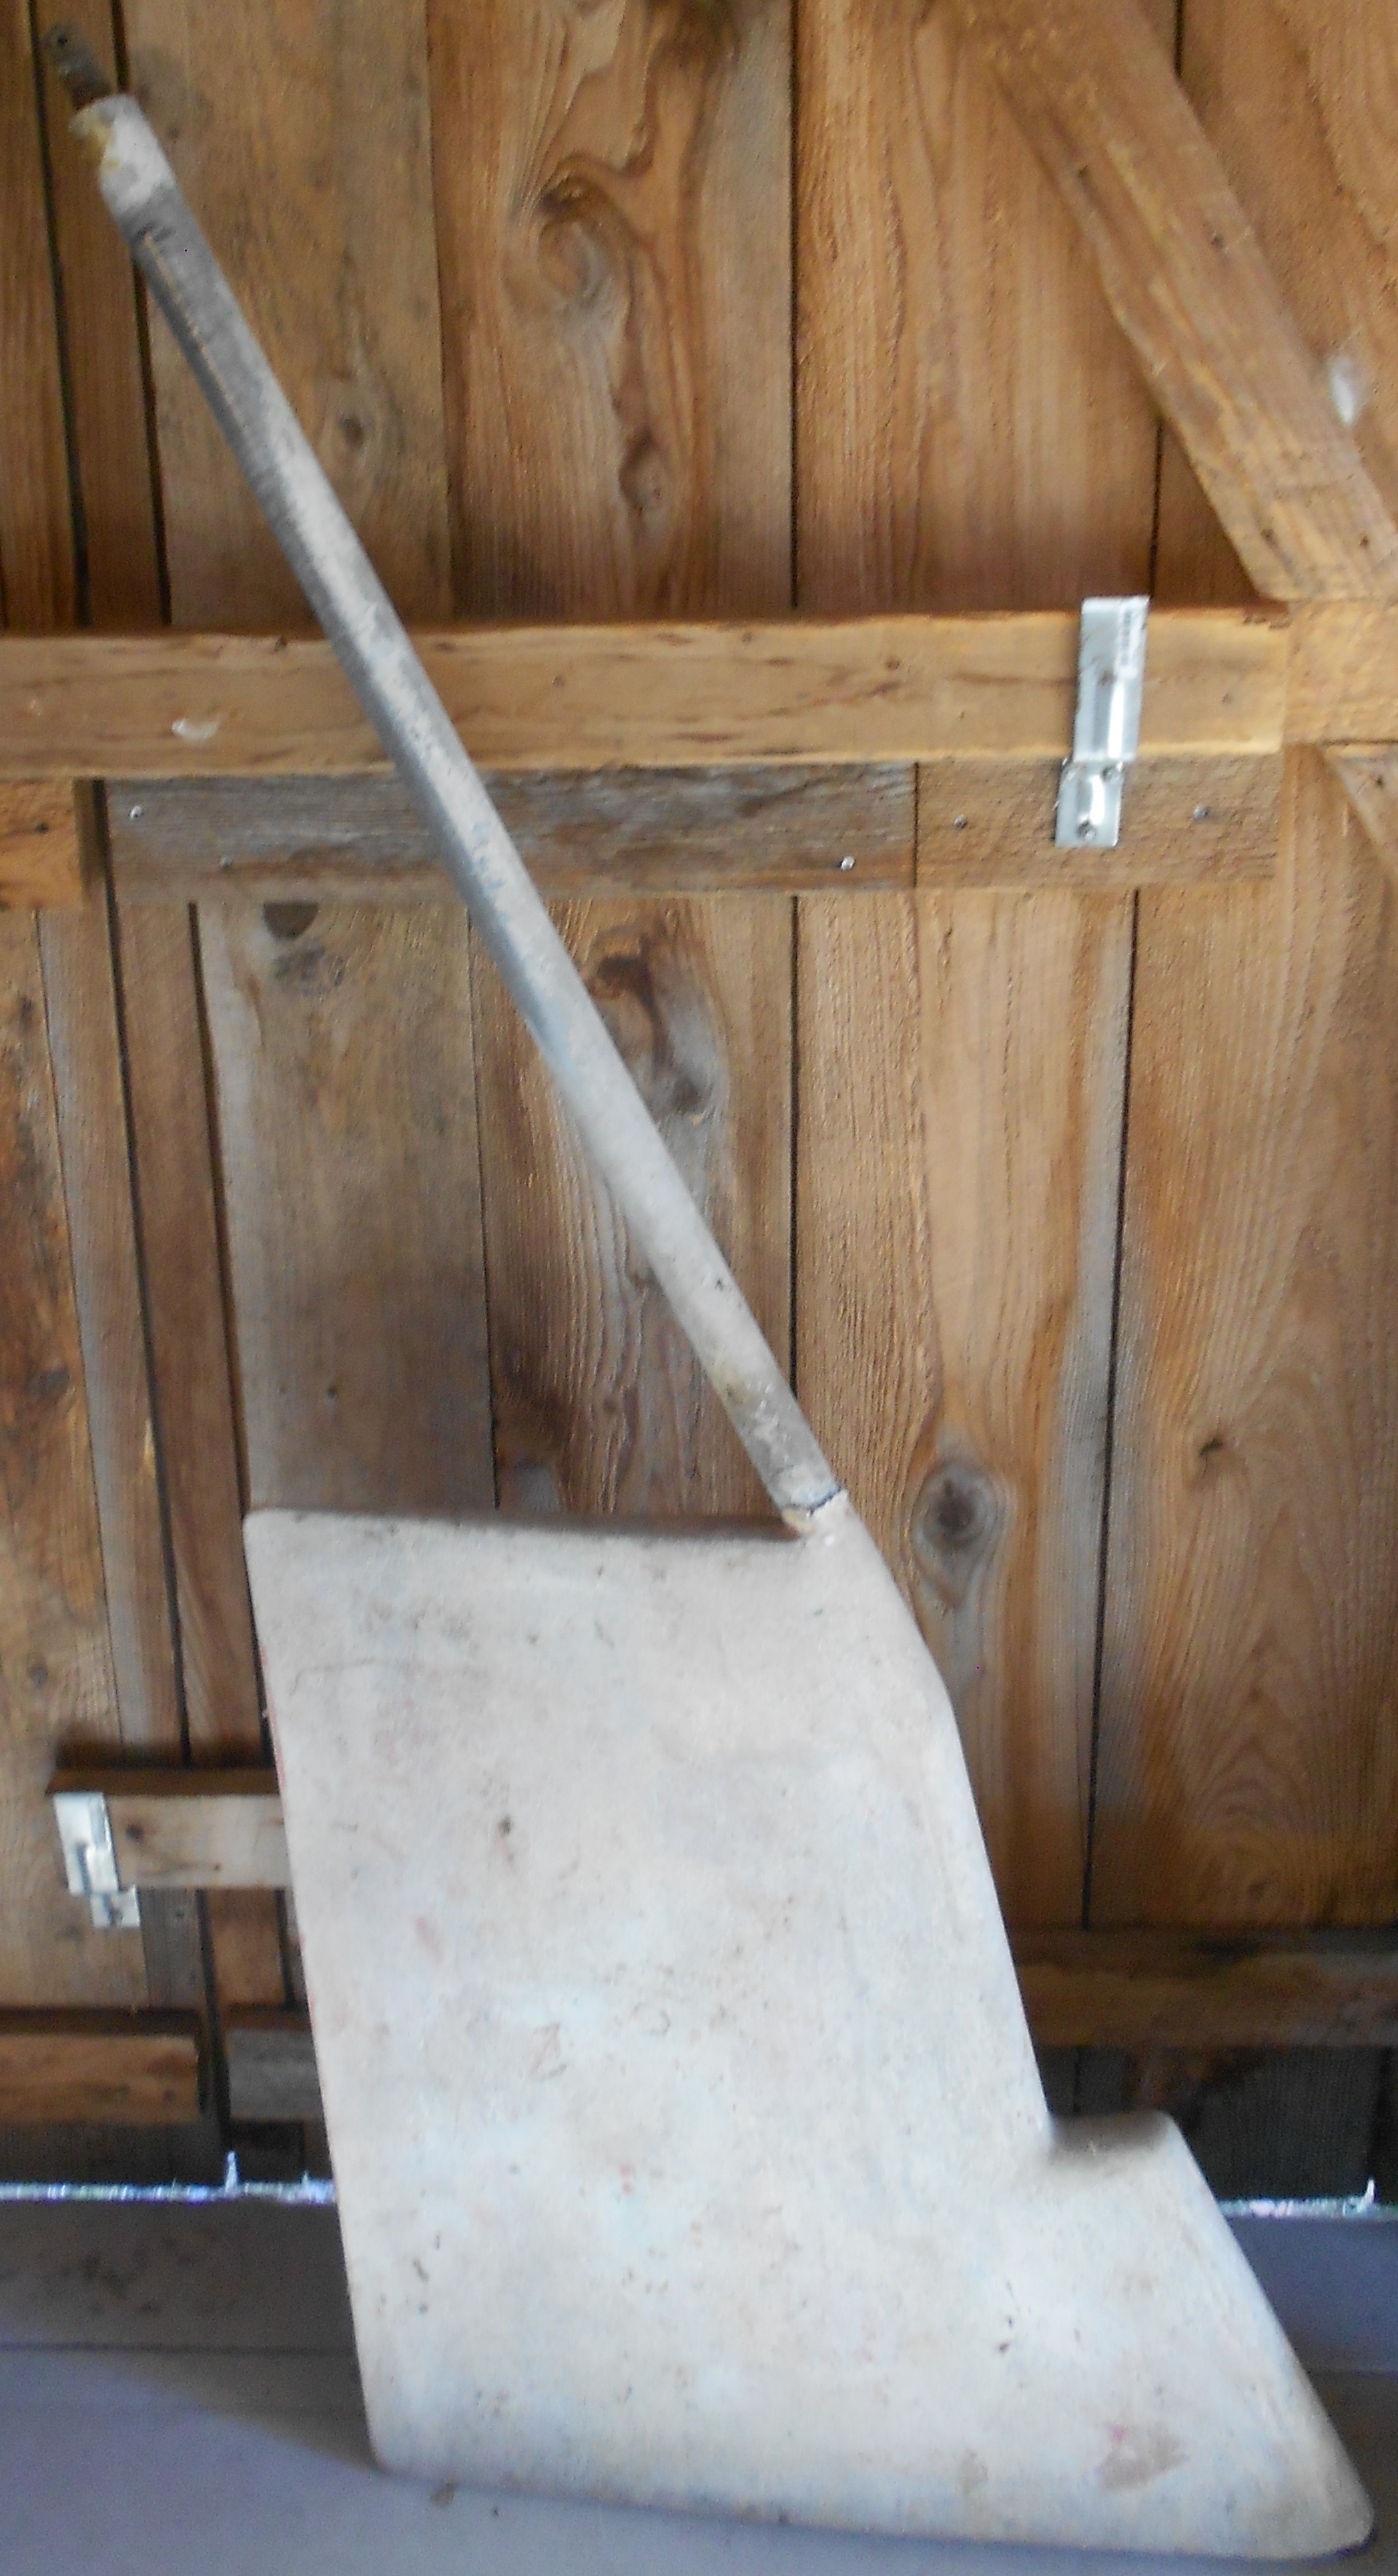
Centerboard above left, and rudder above, both rough sanded. Further down the page check out her new rudder shaft heel fitting
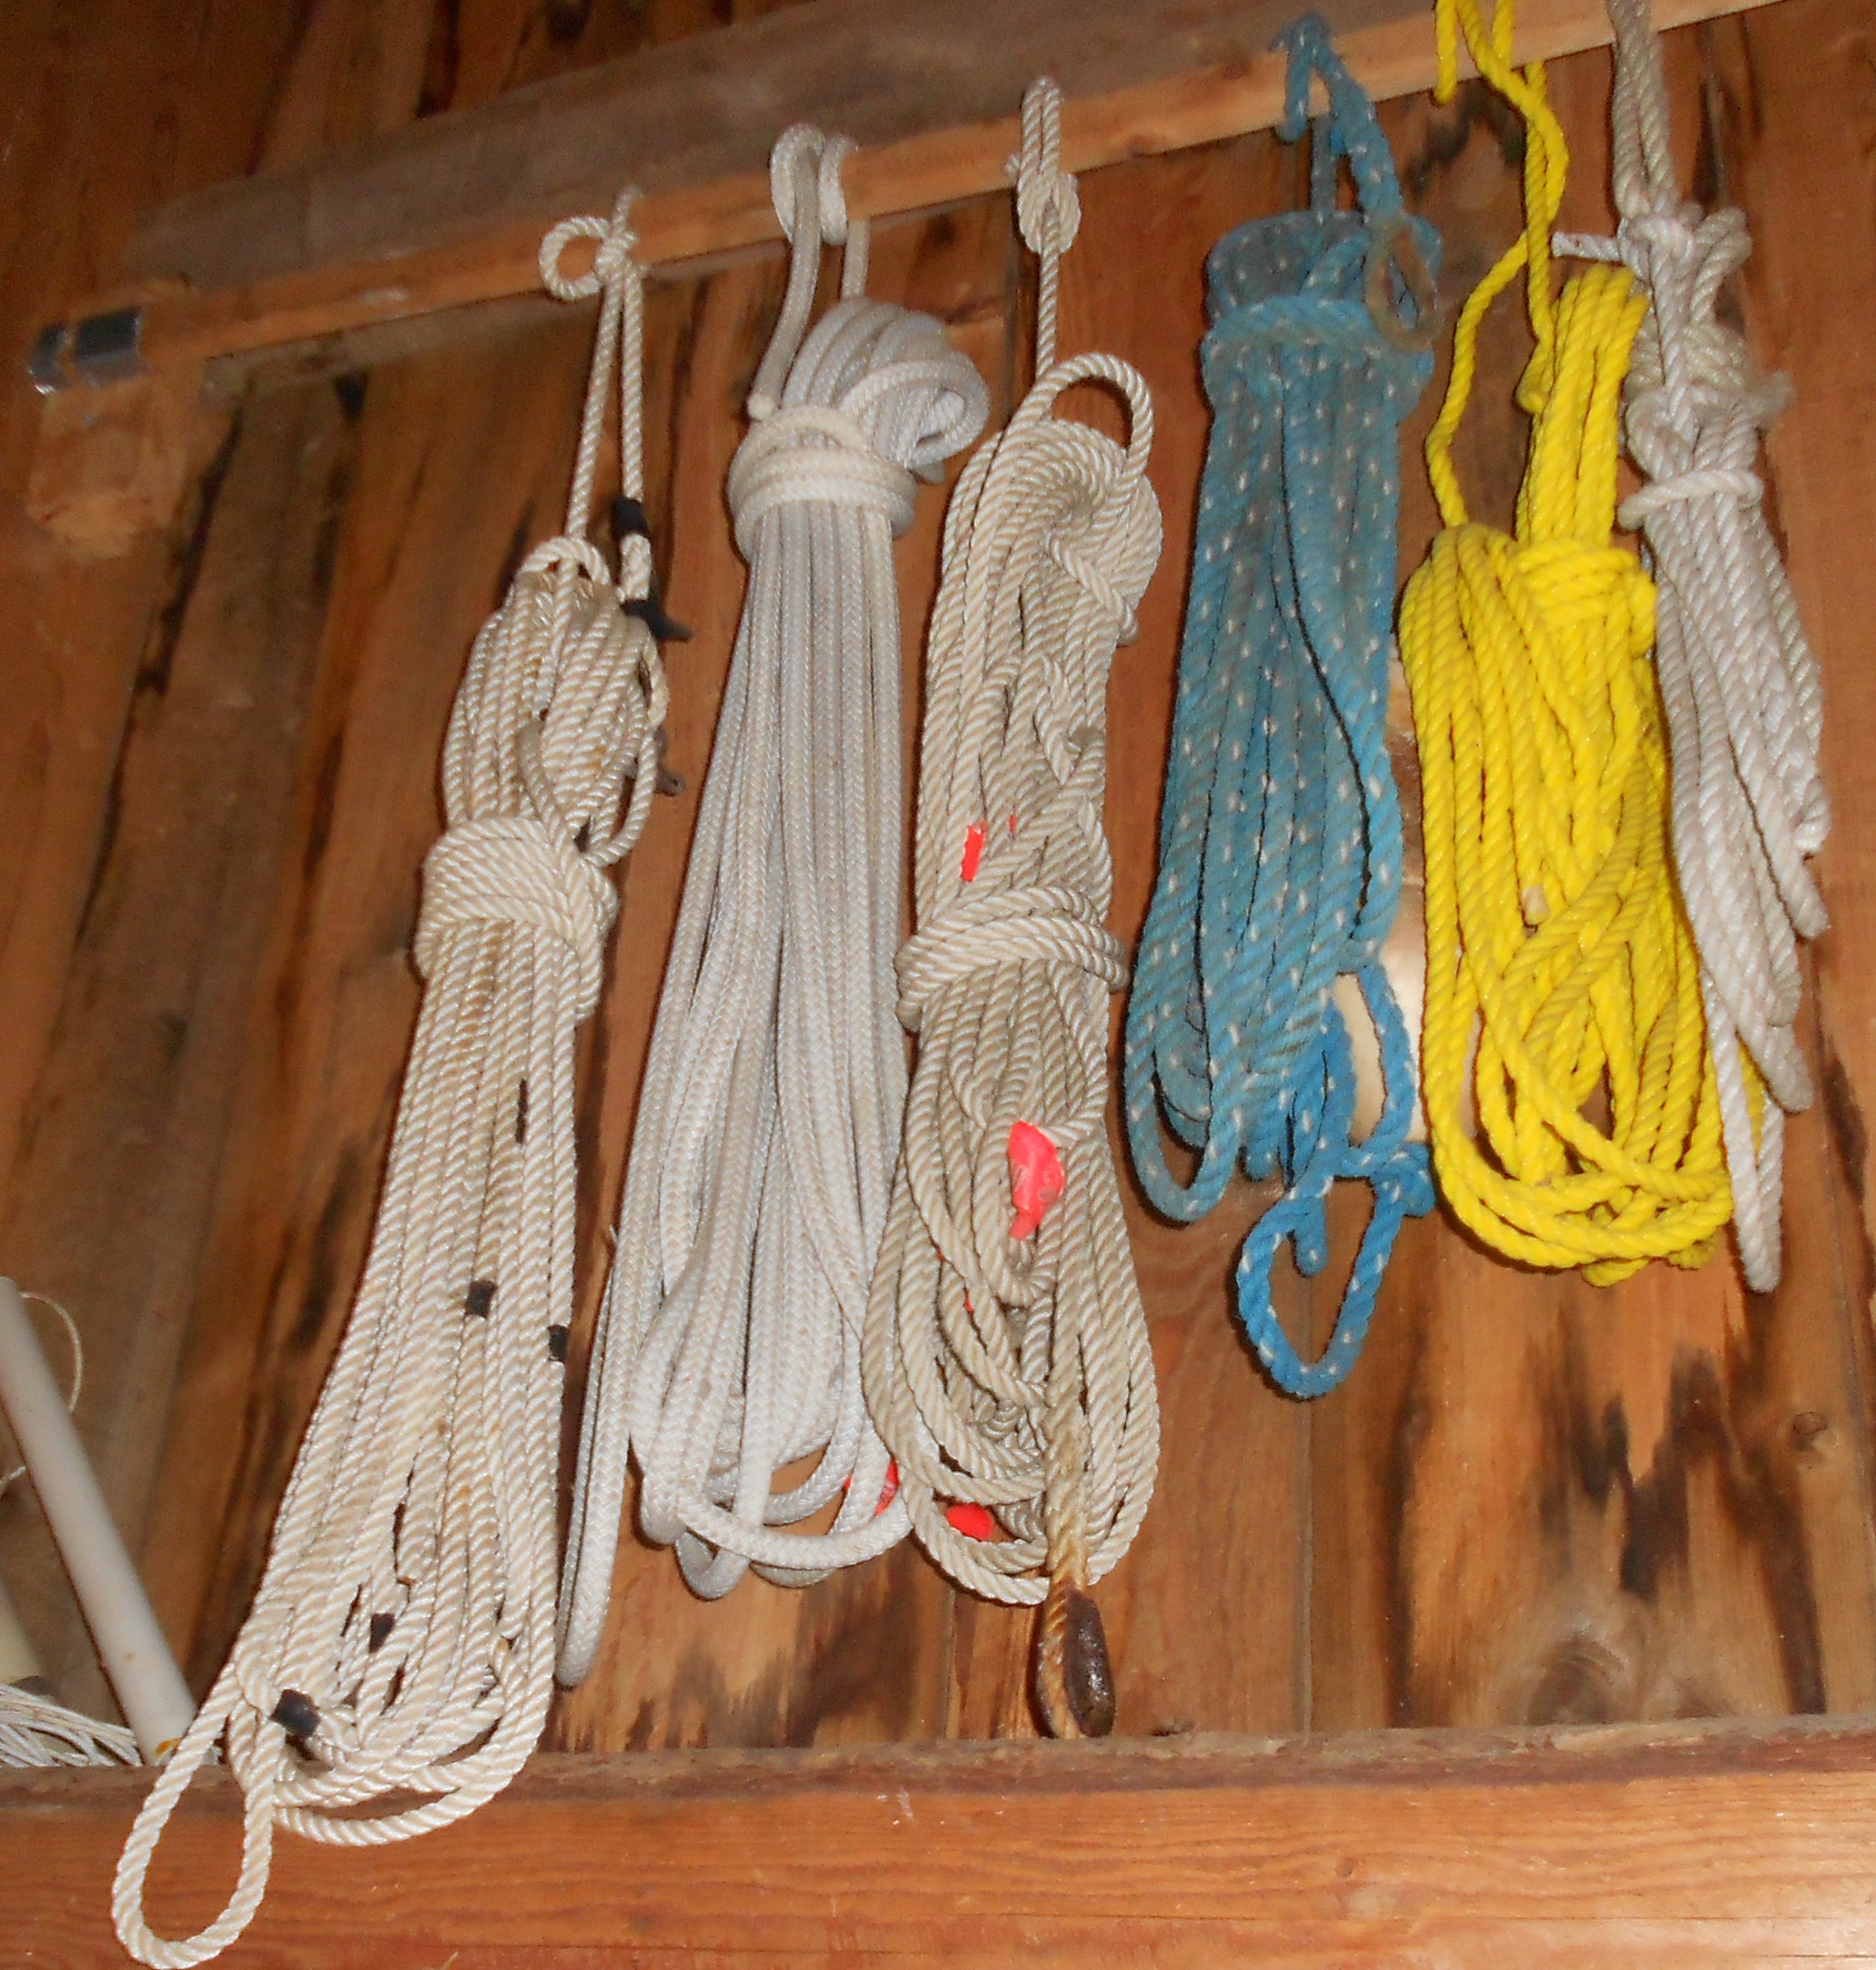
left - shrouds, lifelines and lines
|
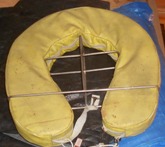
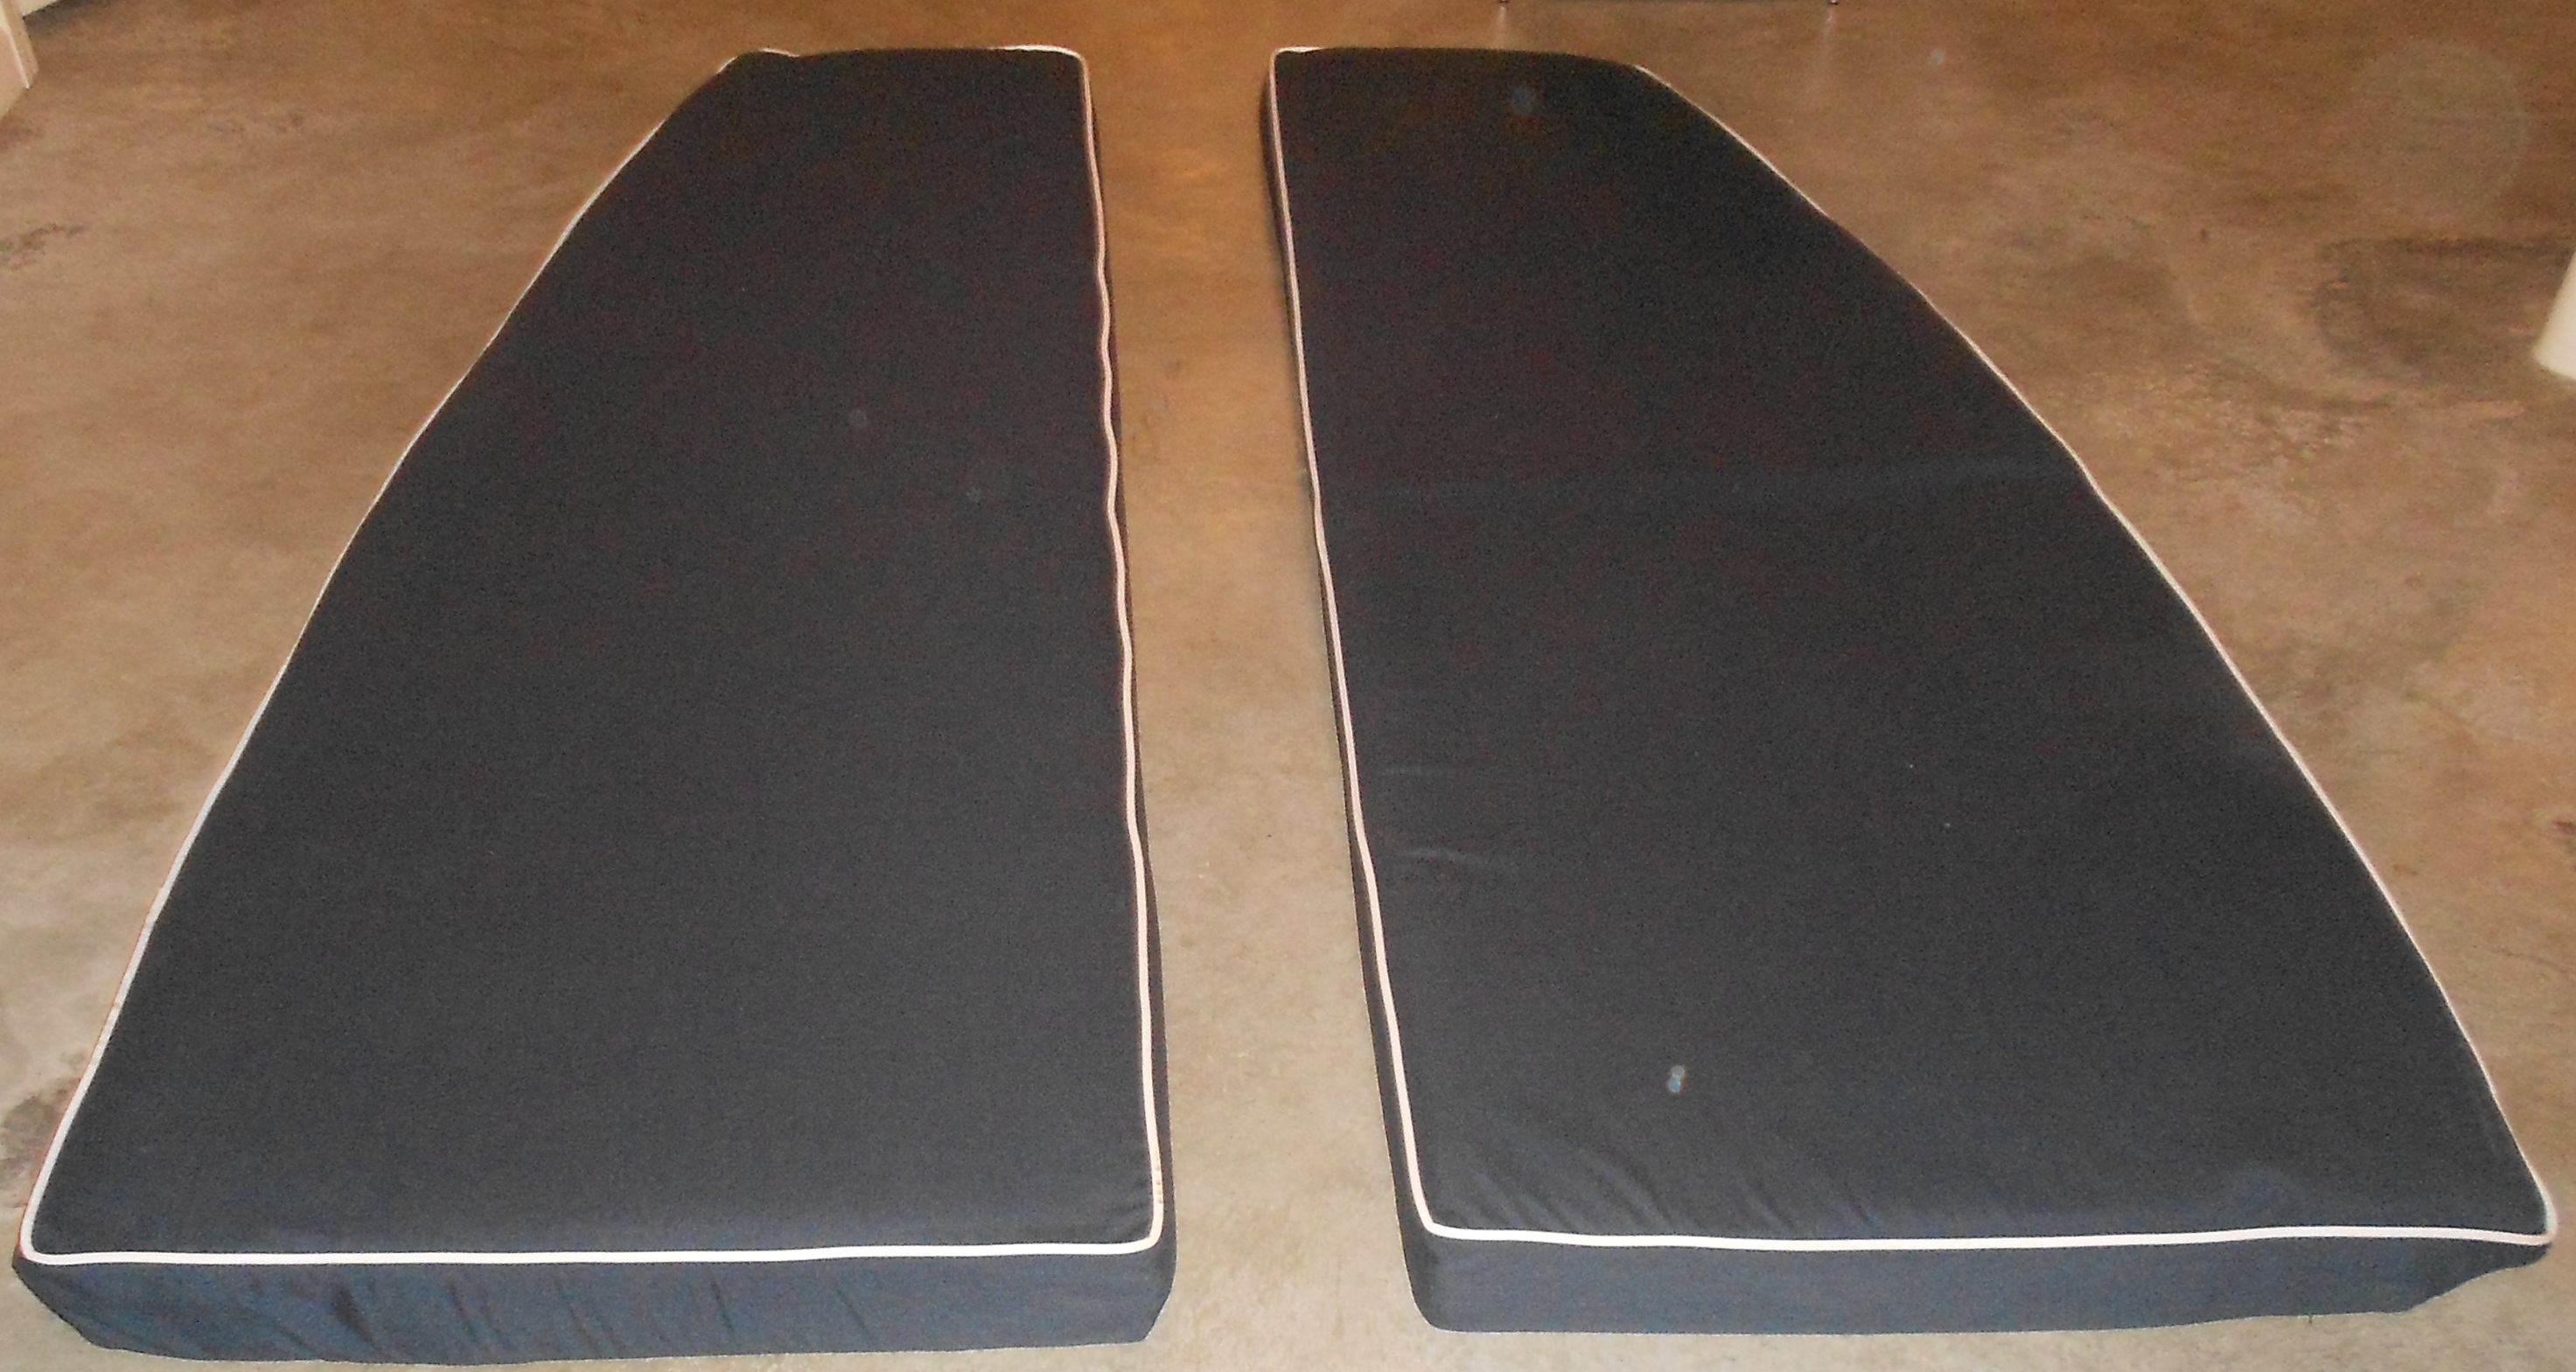
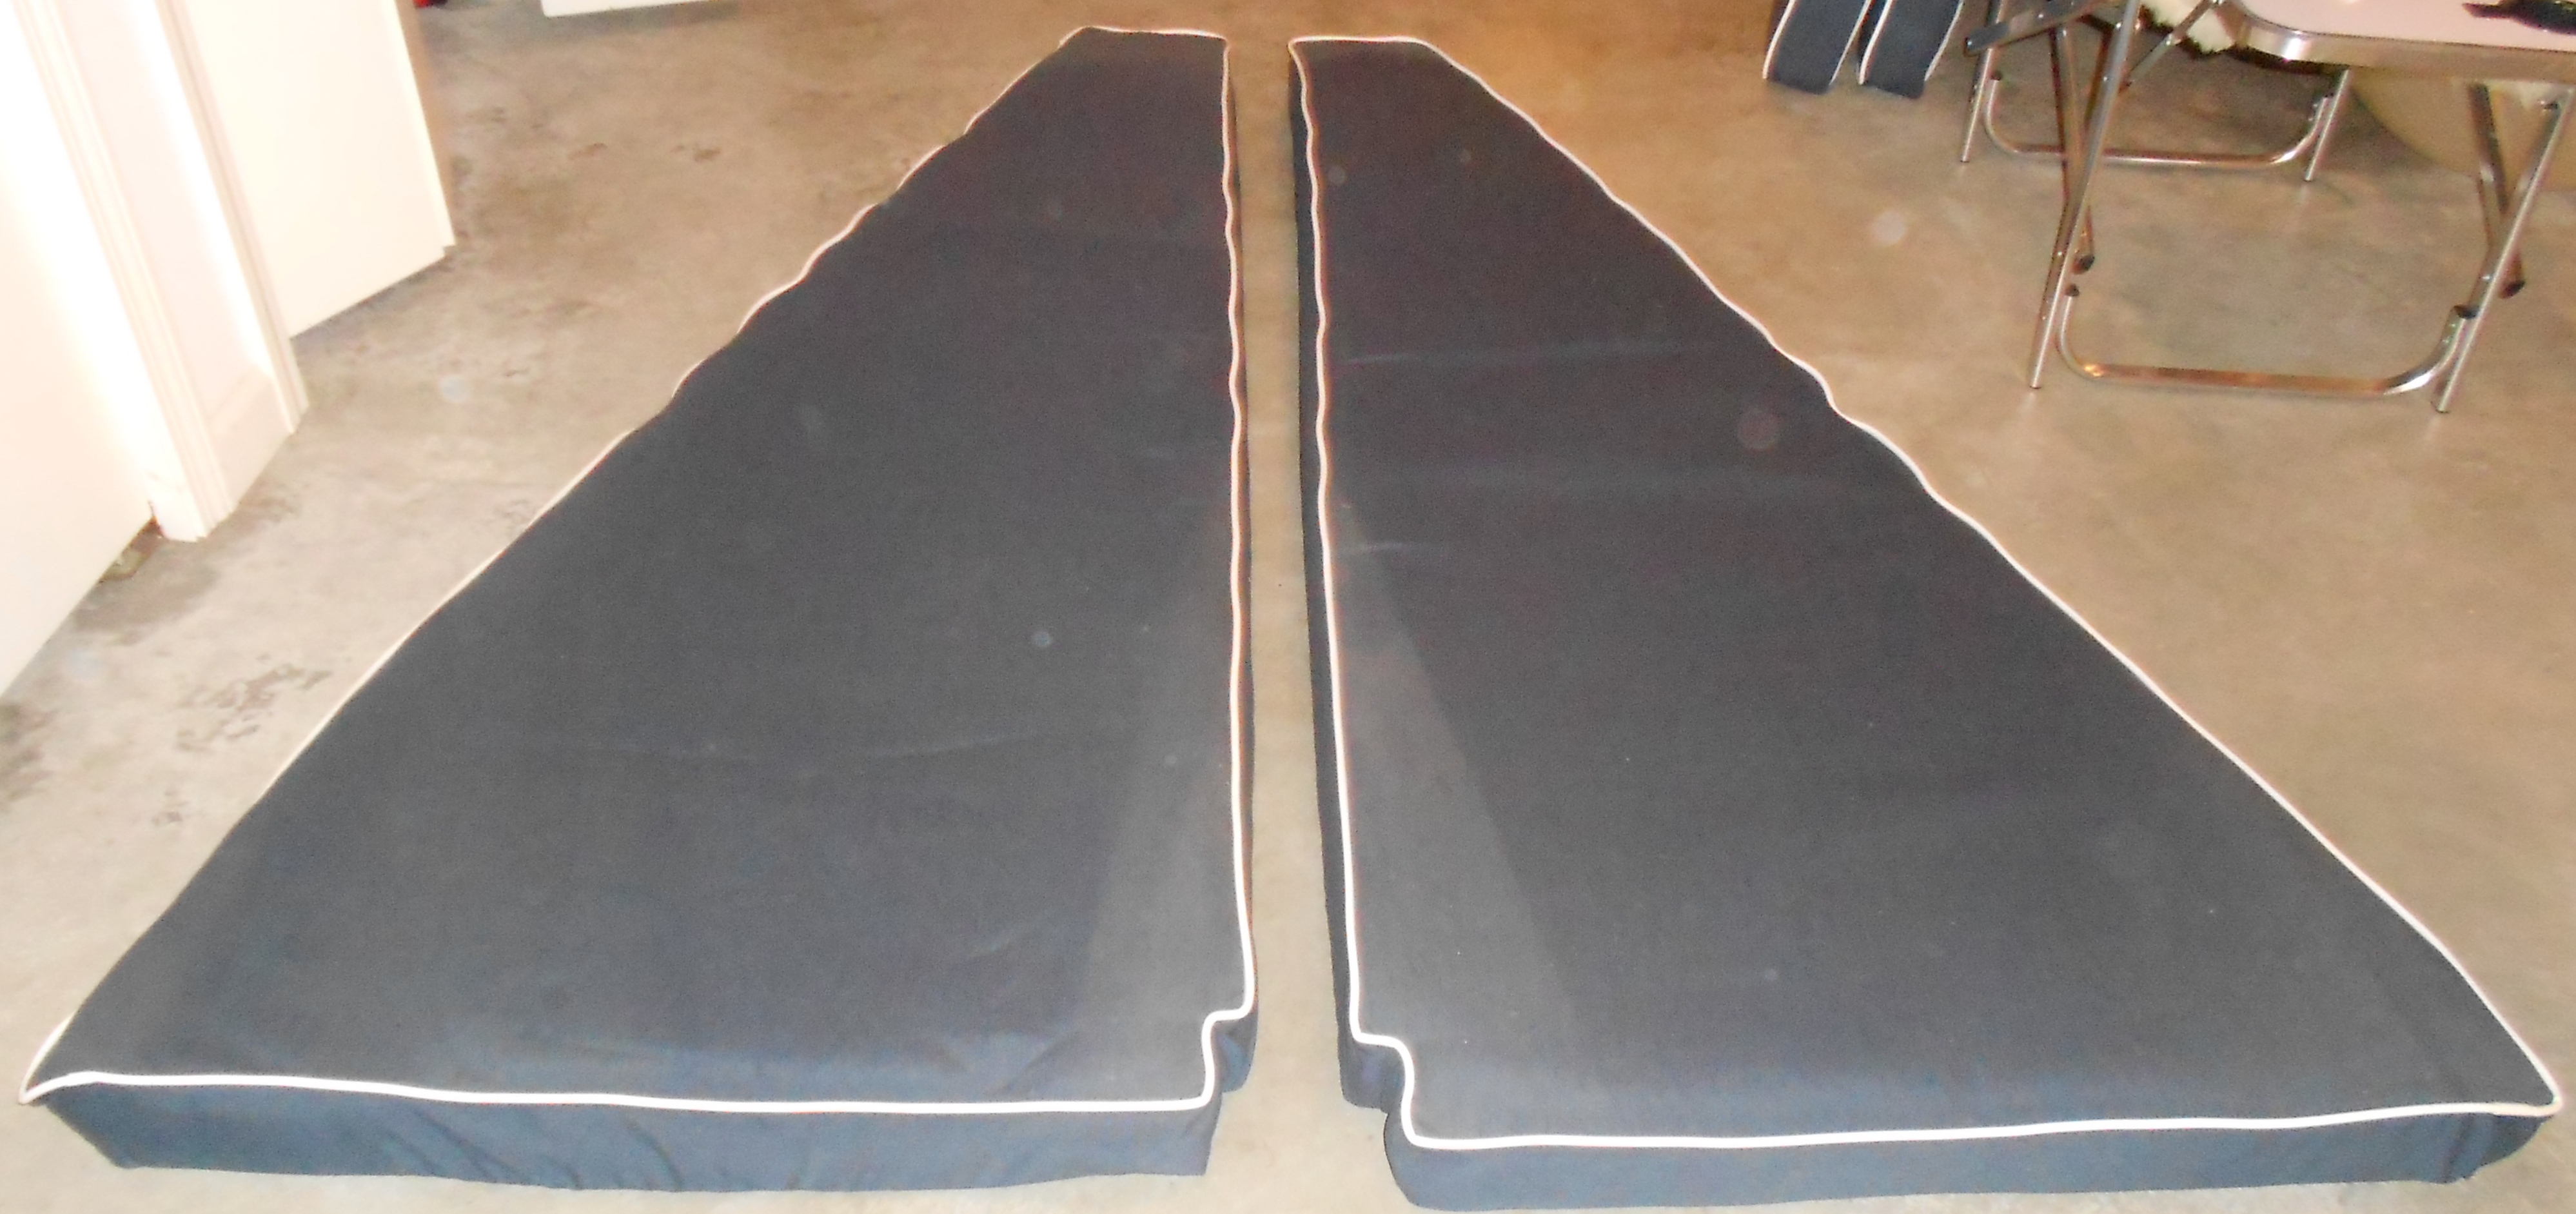
The above quarterberth (left) and v-berth (right) cushions have been recovered with the bottom panels made of a beaded vinyl material to help avoid condensation moisture absorbtion
***********************
November 19, 2018. Many of the above restoration comments are preliminary. The 'master plan' continues to evolve - in the meantime work continues primarily on cleaning up wood parts, grinding and sanding down below, undercoating the interior hull surfaces, and sanding and prepping wood parts for the the multiple varnish coats. "Teaser" photos below. Mike has prepared a detailed work plan that gets modified as time goes on. He is coming up from New York city to the Passage/Marionette barn in Old Lyme. Below is a catch up summary of his work since September 22, 2018 to date.
As you know, during July at the Camden Classic Cup, and continuing into August, I decided and then committed to working on Passage. Here is a summary of workday 'accomplishments' (excluding the 2+ hour drive each way from NYC to Old Lyme)
9/22
> Swept up years of dust and mouse droppings. Photo Right (ok we've seen this before but it is special....)
> Experimented with ways to prop up the companionway ladder that lacks a good mounting support Photo Below

9/29-30
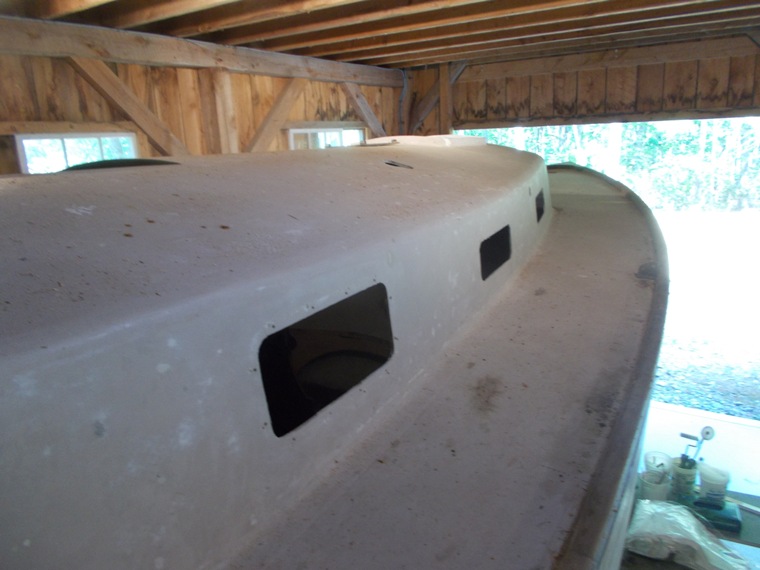
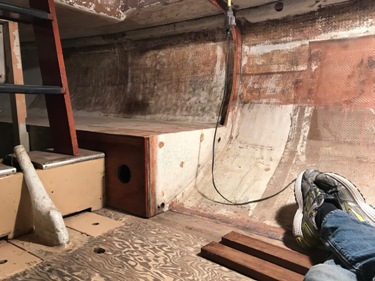
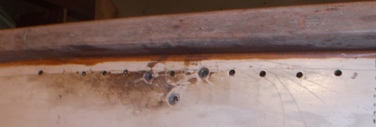
> Drilled ten 1/4-inch holes through the deck near one of the stanchions where the wood inside the hull-deck joint is known to be rotted, then filled holes with Git Rot epoxy hoping that it would seep into the wood to strengthen it and prevent further rotting. Photo below
|
> Sanded and applied wood sealer to hatch boards, tiller and various wood parts. Photo below
|
10/12-14
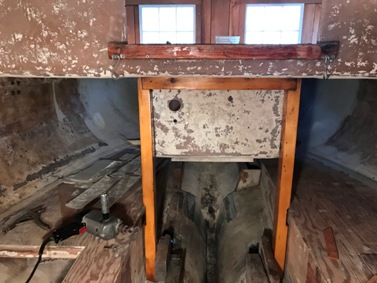
> Made a pattern in cardboard then cut out 3/4-inch plywood a forward bulkhead to support the foredeck Photo Below
More on this 'bulkhead' coming
|
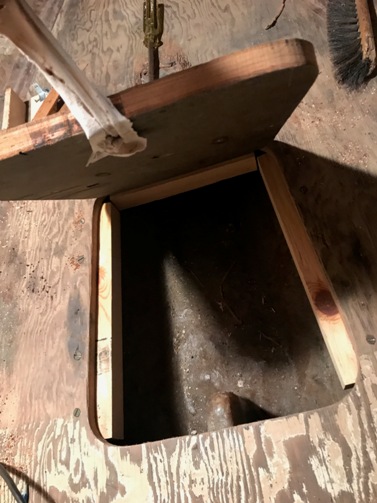
> Made supports to hold up the access hatch that was cut into the cabin floor. Photo above
|
10/17-18
> Visited Barron’s Boatyard on City Island, NY, and found a Yanmar 6HP 1GM diesel engine with a 2.62 gear ratio, not ideal for Dolphins (2.14 is best and 2.42 is ok). Photo below
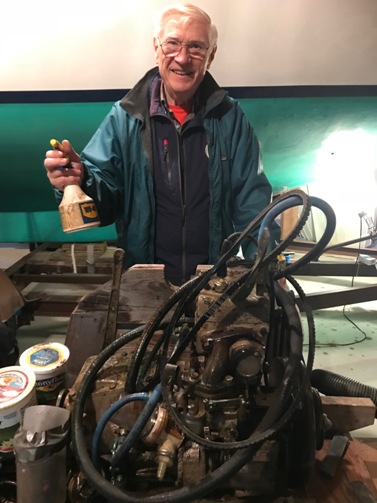
> Applied regular coating of WD-40 to the Palmer PW-27 engine that may yet go back into Passage. Photo right - Webmaster, a highly experienced WD 40 applicator.....
|
|
10/27-28
>
Over the past 2-3 weeks the Git Rot test area appeared to have hardened, so drilled 60 holes in rail at one-foot intervals and more around stanchions, then filled with multiple batches of Git Rot.
> Continued to experiment with ways to prop up the companionway ladder.
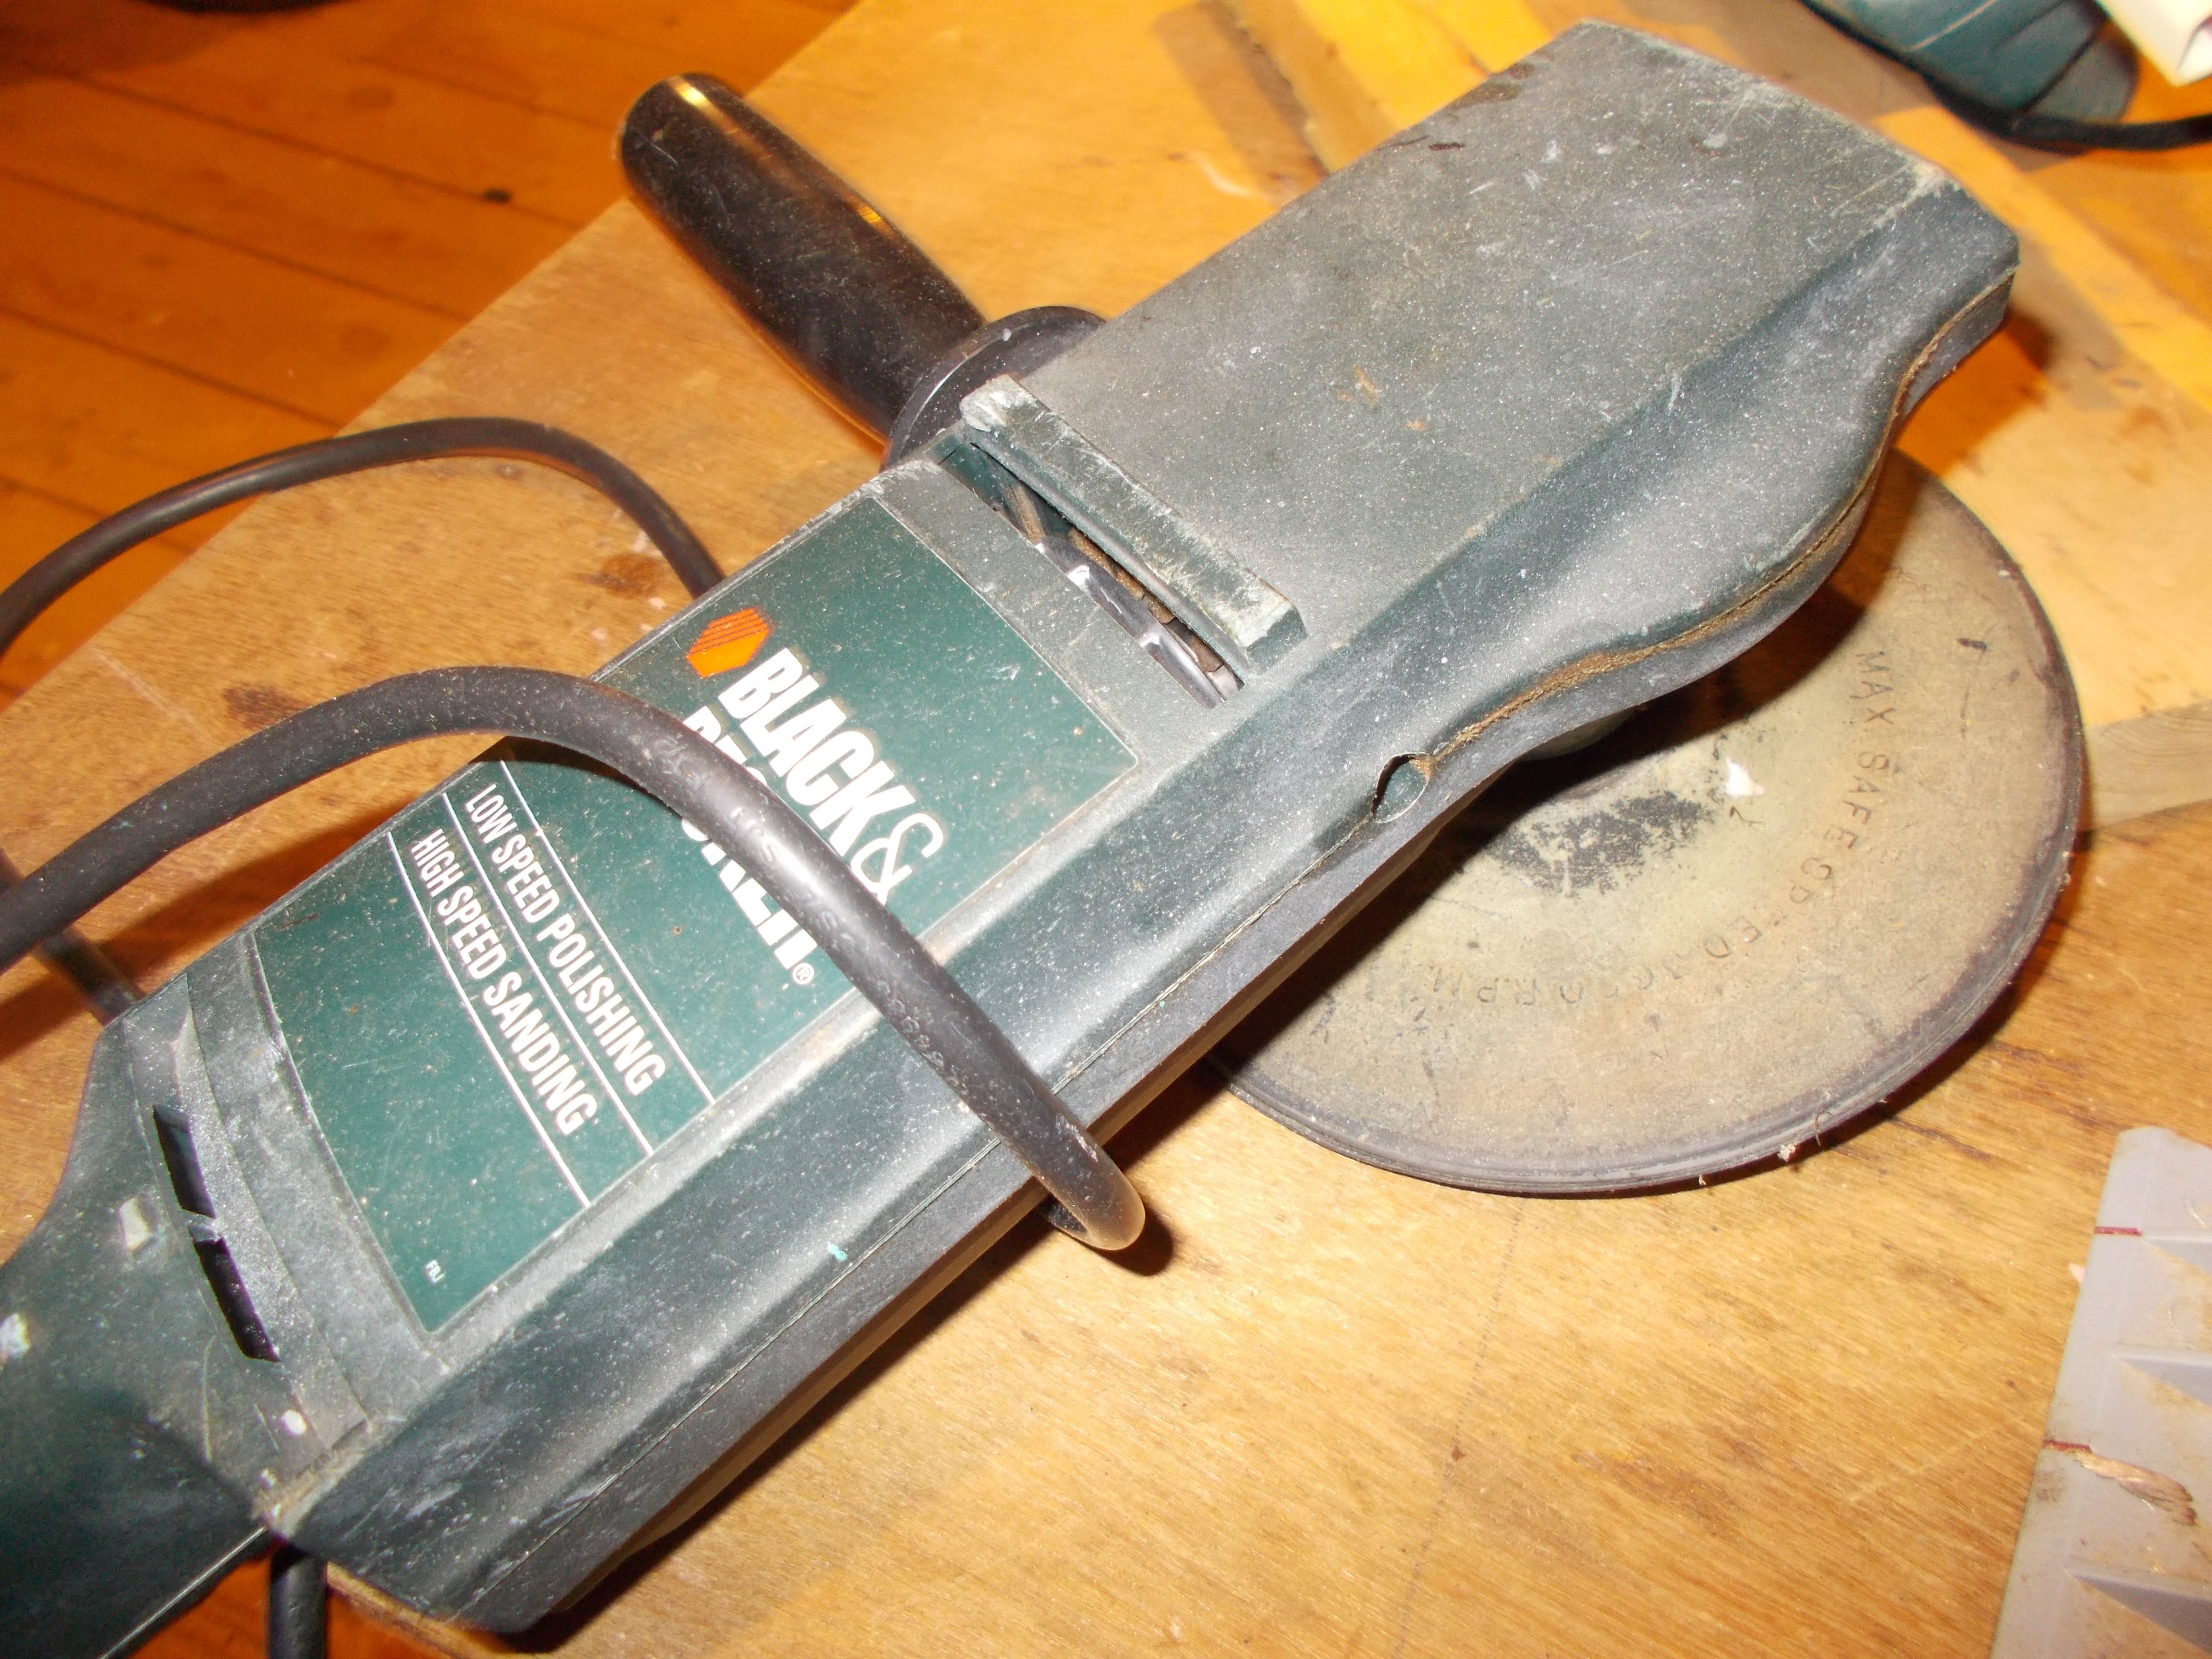
> Used a disk-sander with 80-grit to take old paint off of the cockpit support braces. Photo right |
|
11/3-4
> Used a grinder with wire brush, and the disk-sander to take old paint off of the main bulkhead and entire bow area. Photos below and above right

>
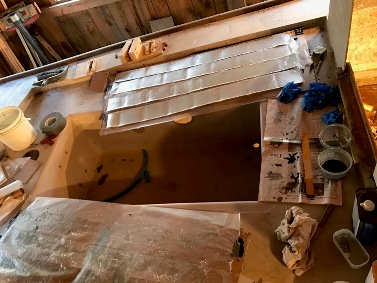
Prepared for painting by vacuuming and wiping surfaces with paint thinner, then mixed and applied Interlux epoxy Barrier Kote 2-part primer as a first coat. Photo below

|

First coats of painted forepeak Photo below

|
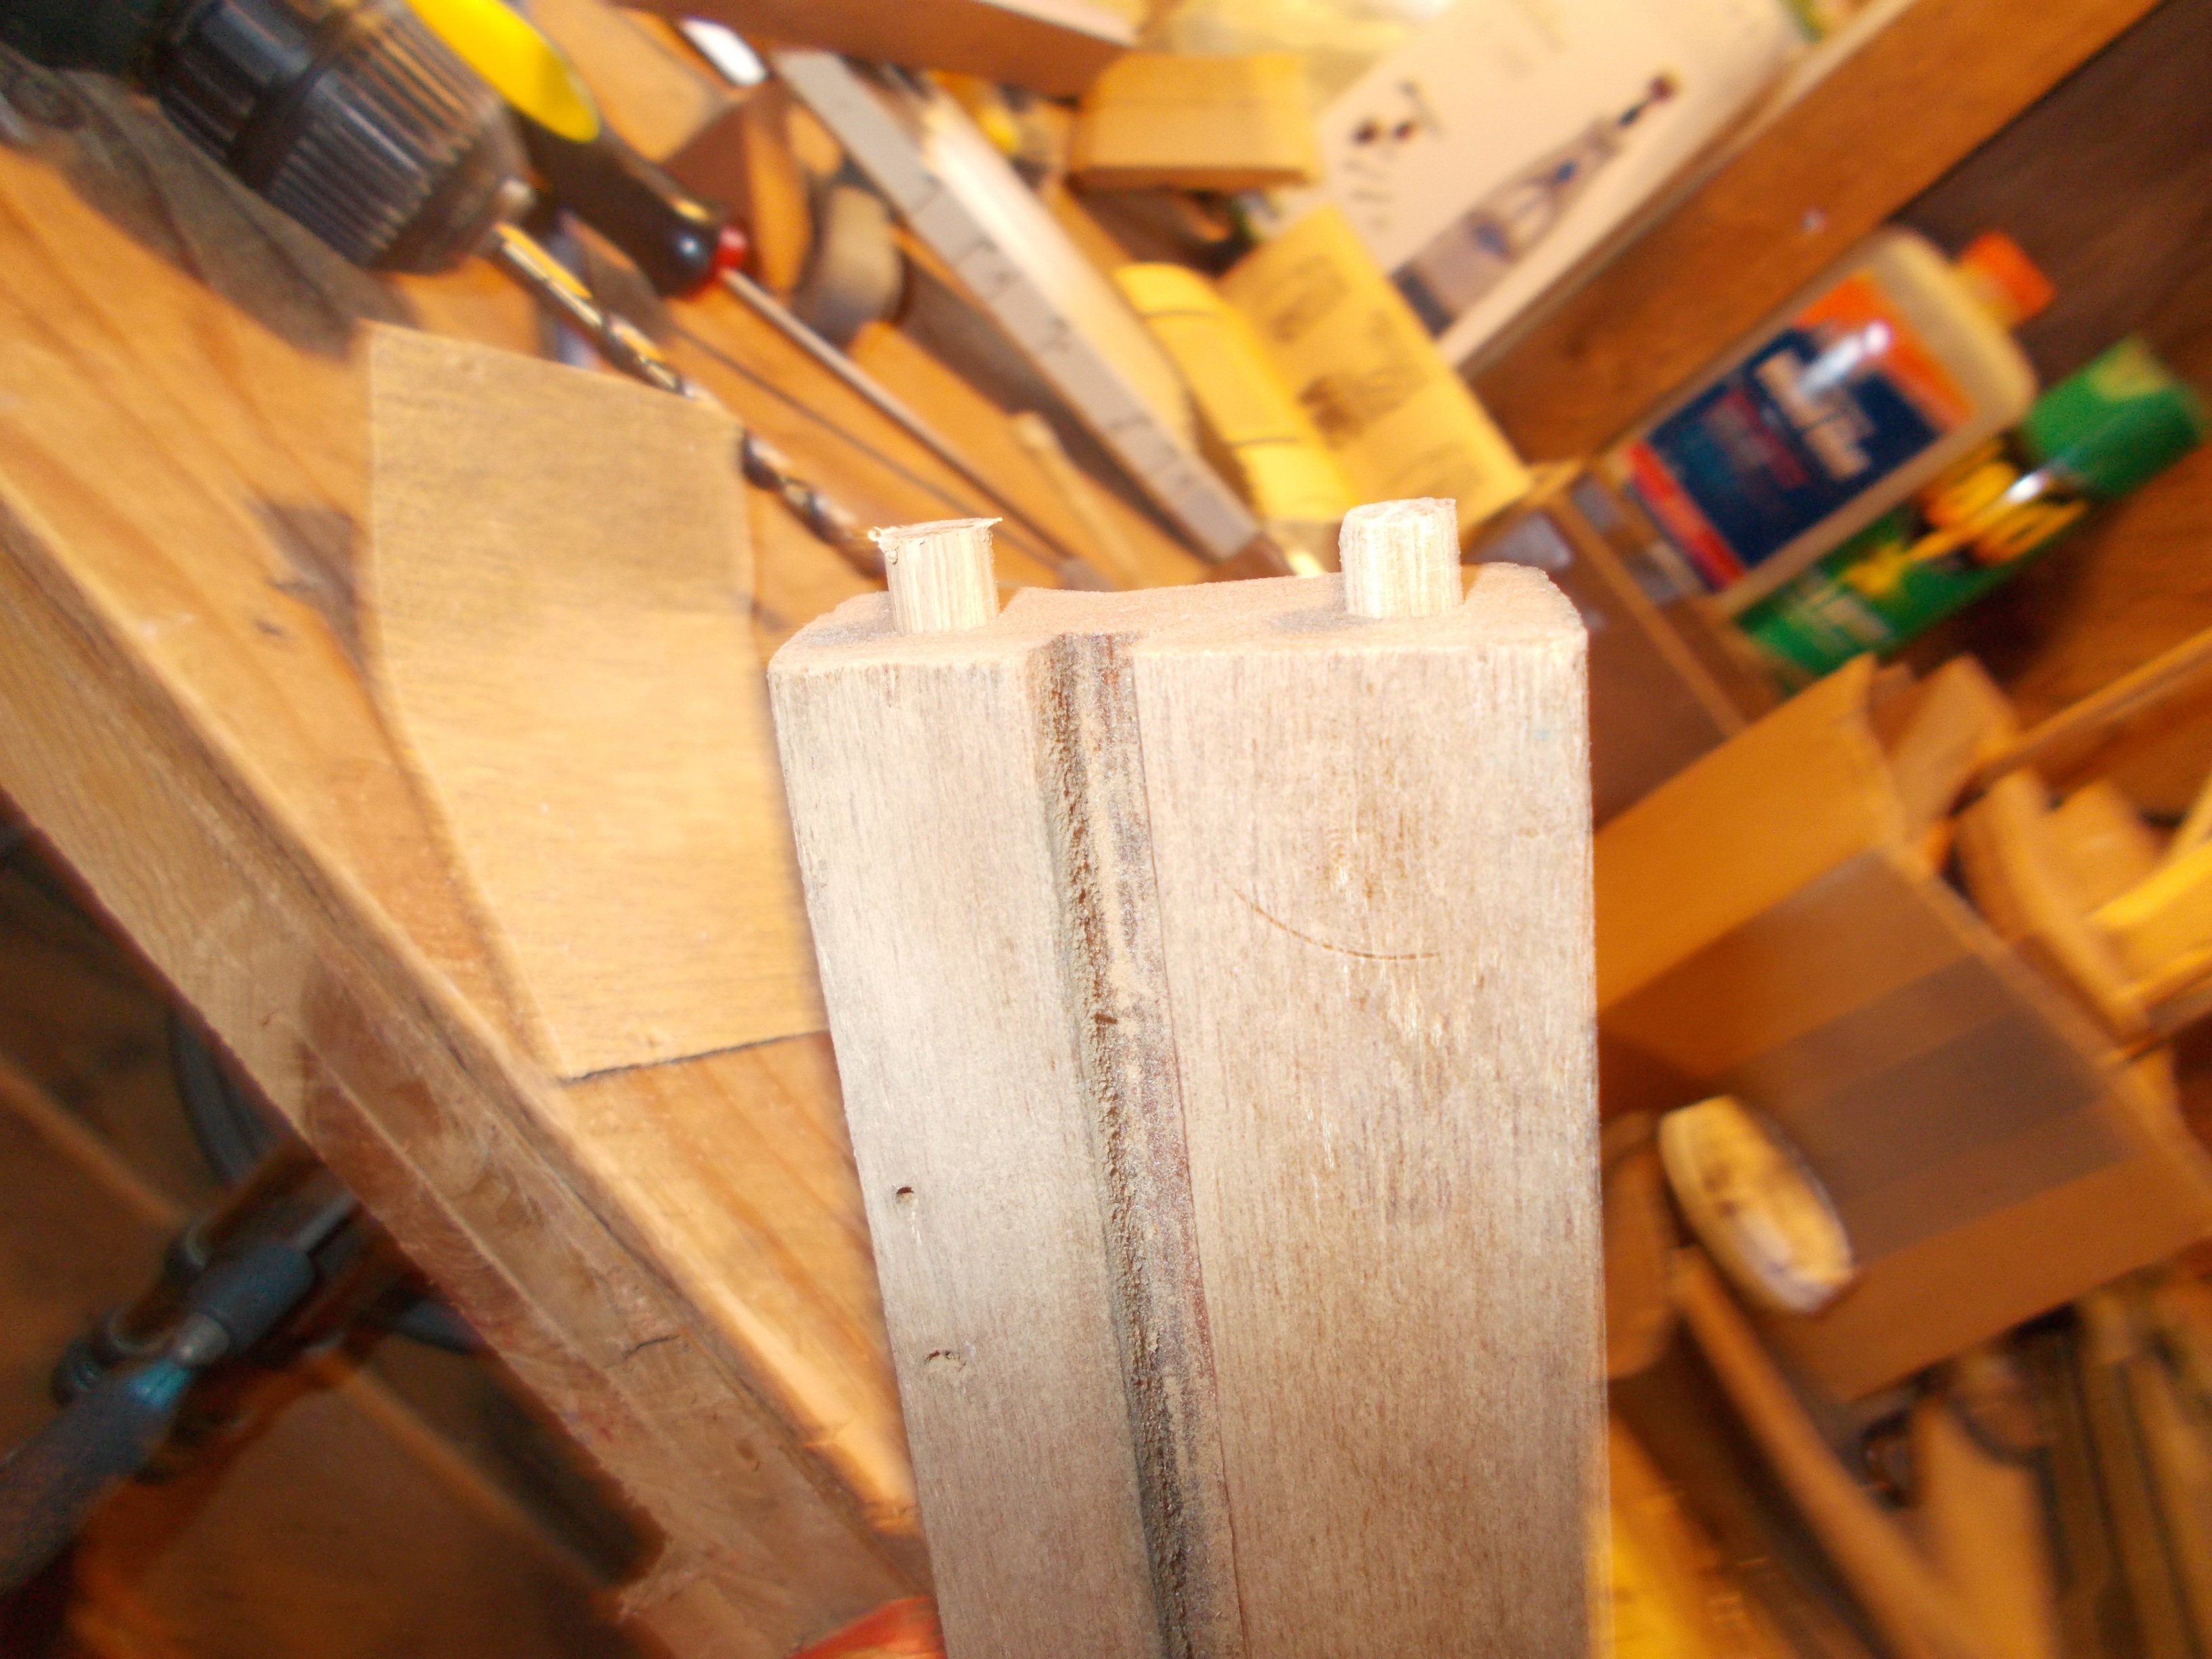
> My woodshop expert fabricated a foot-long section of the main cabin hatch slider rail that had rotted. Rotted section Photo below
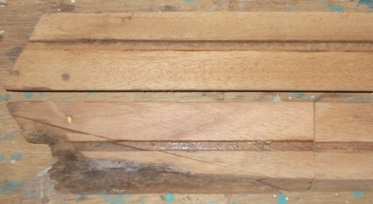
Epoxy bonded/Japanese saw/chisel/sanding....Photo below

|

Wood dowel pins help hold the remade pieces together Photo above

Next, a little staining, varnish, like new?? Photo above
|
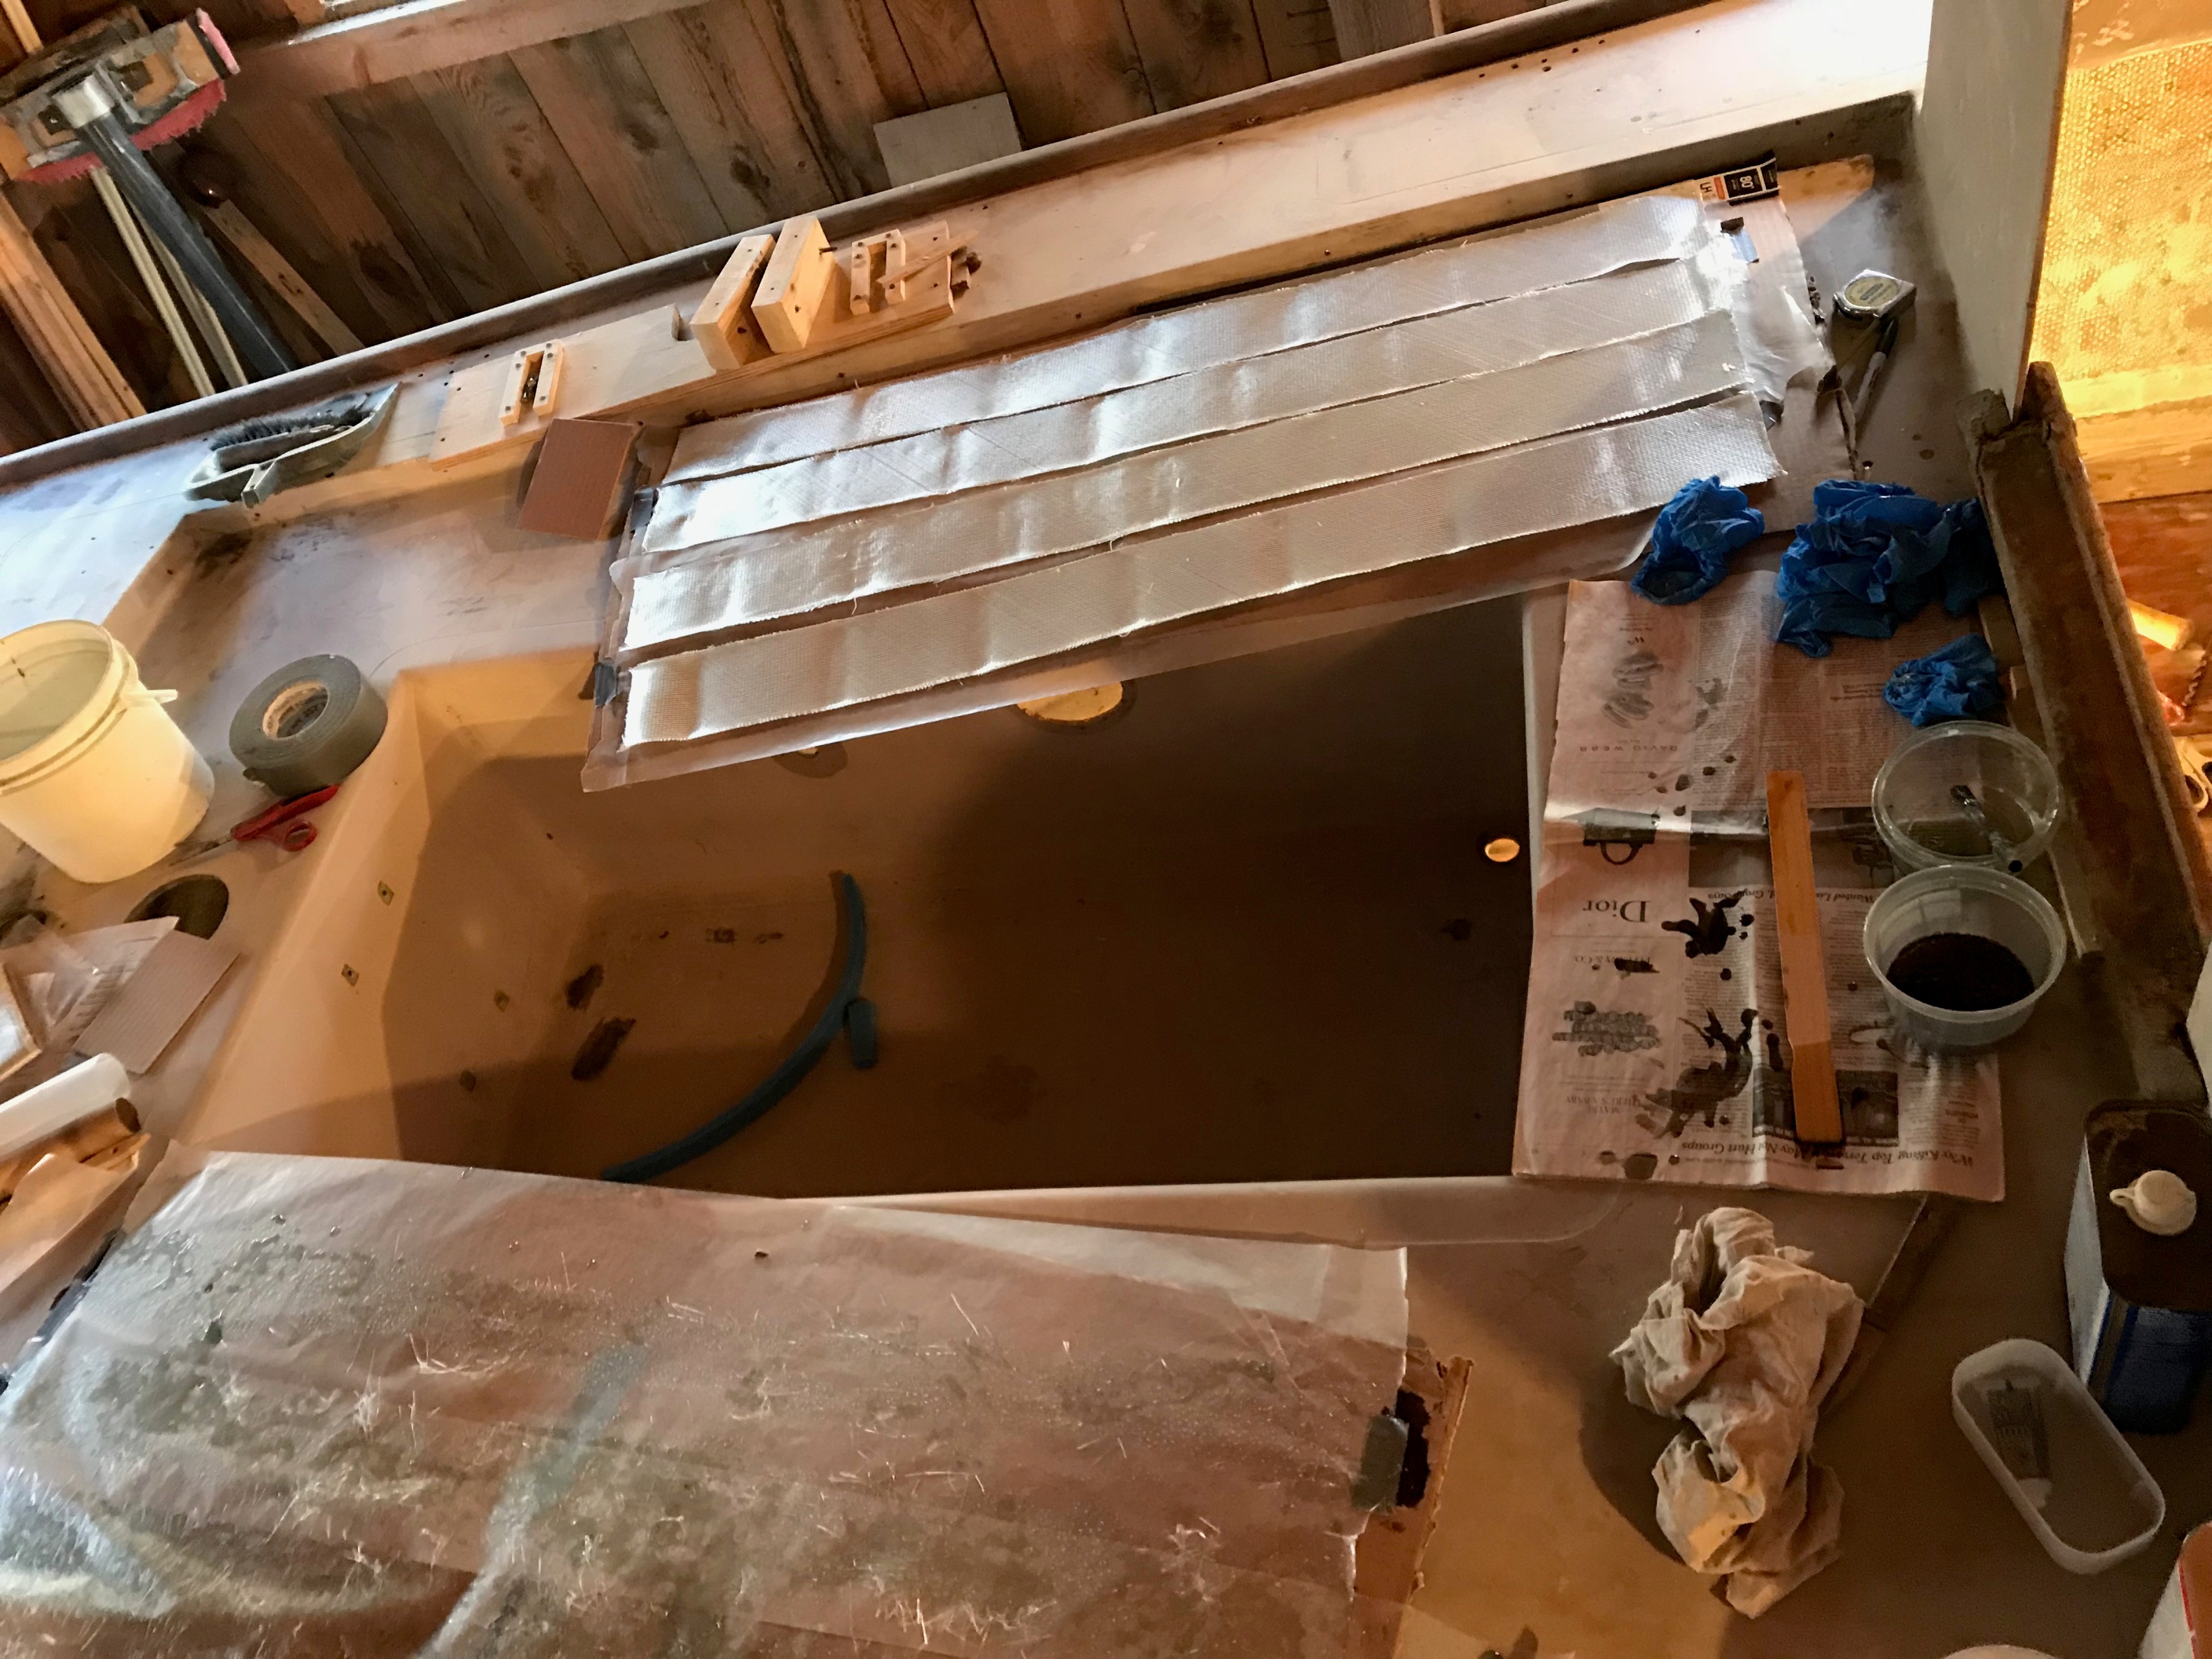
11/10-11 (November 19 postscript)
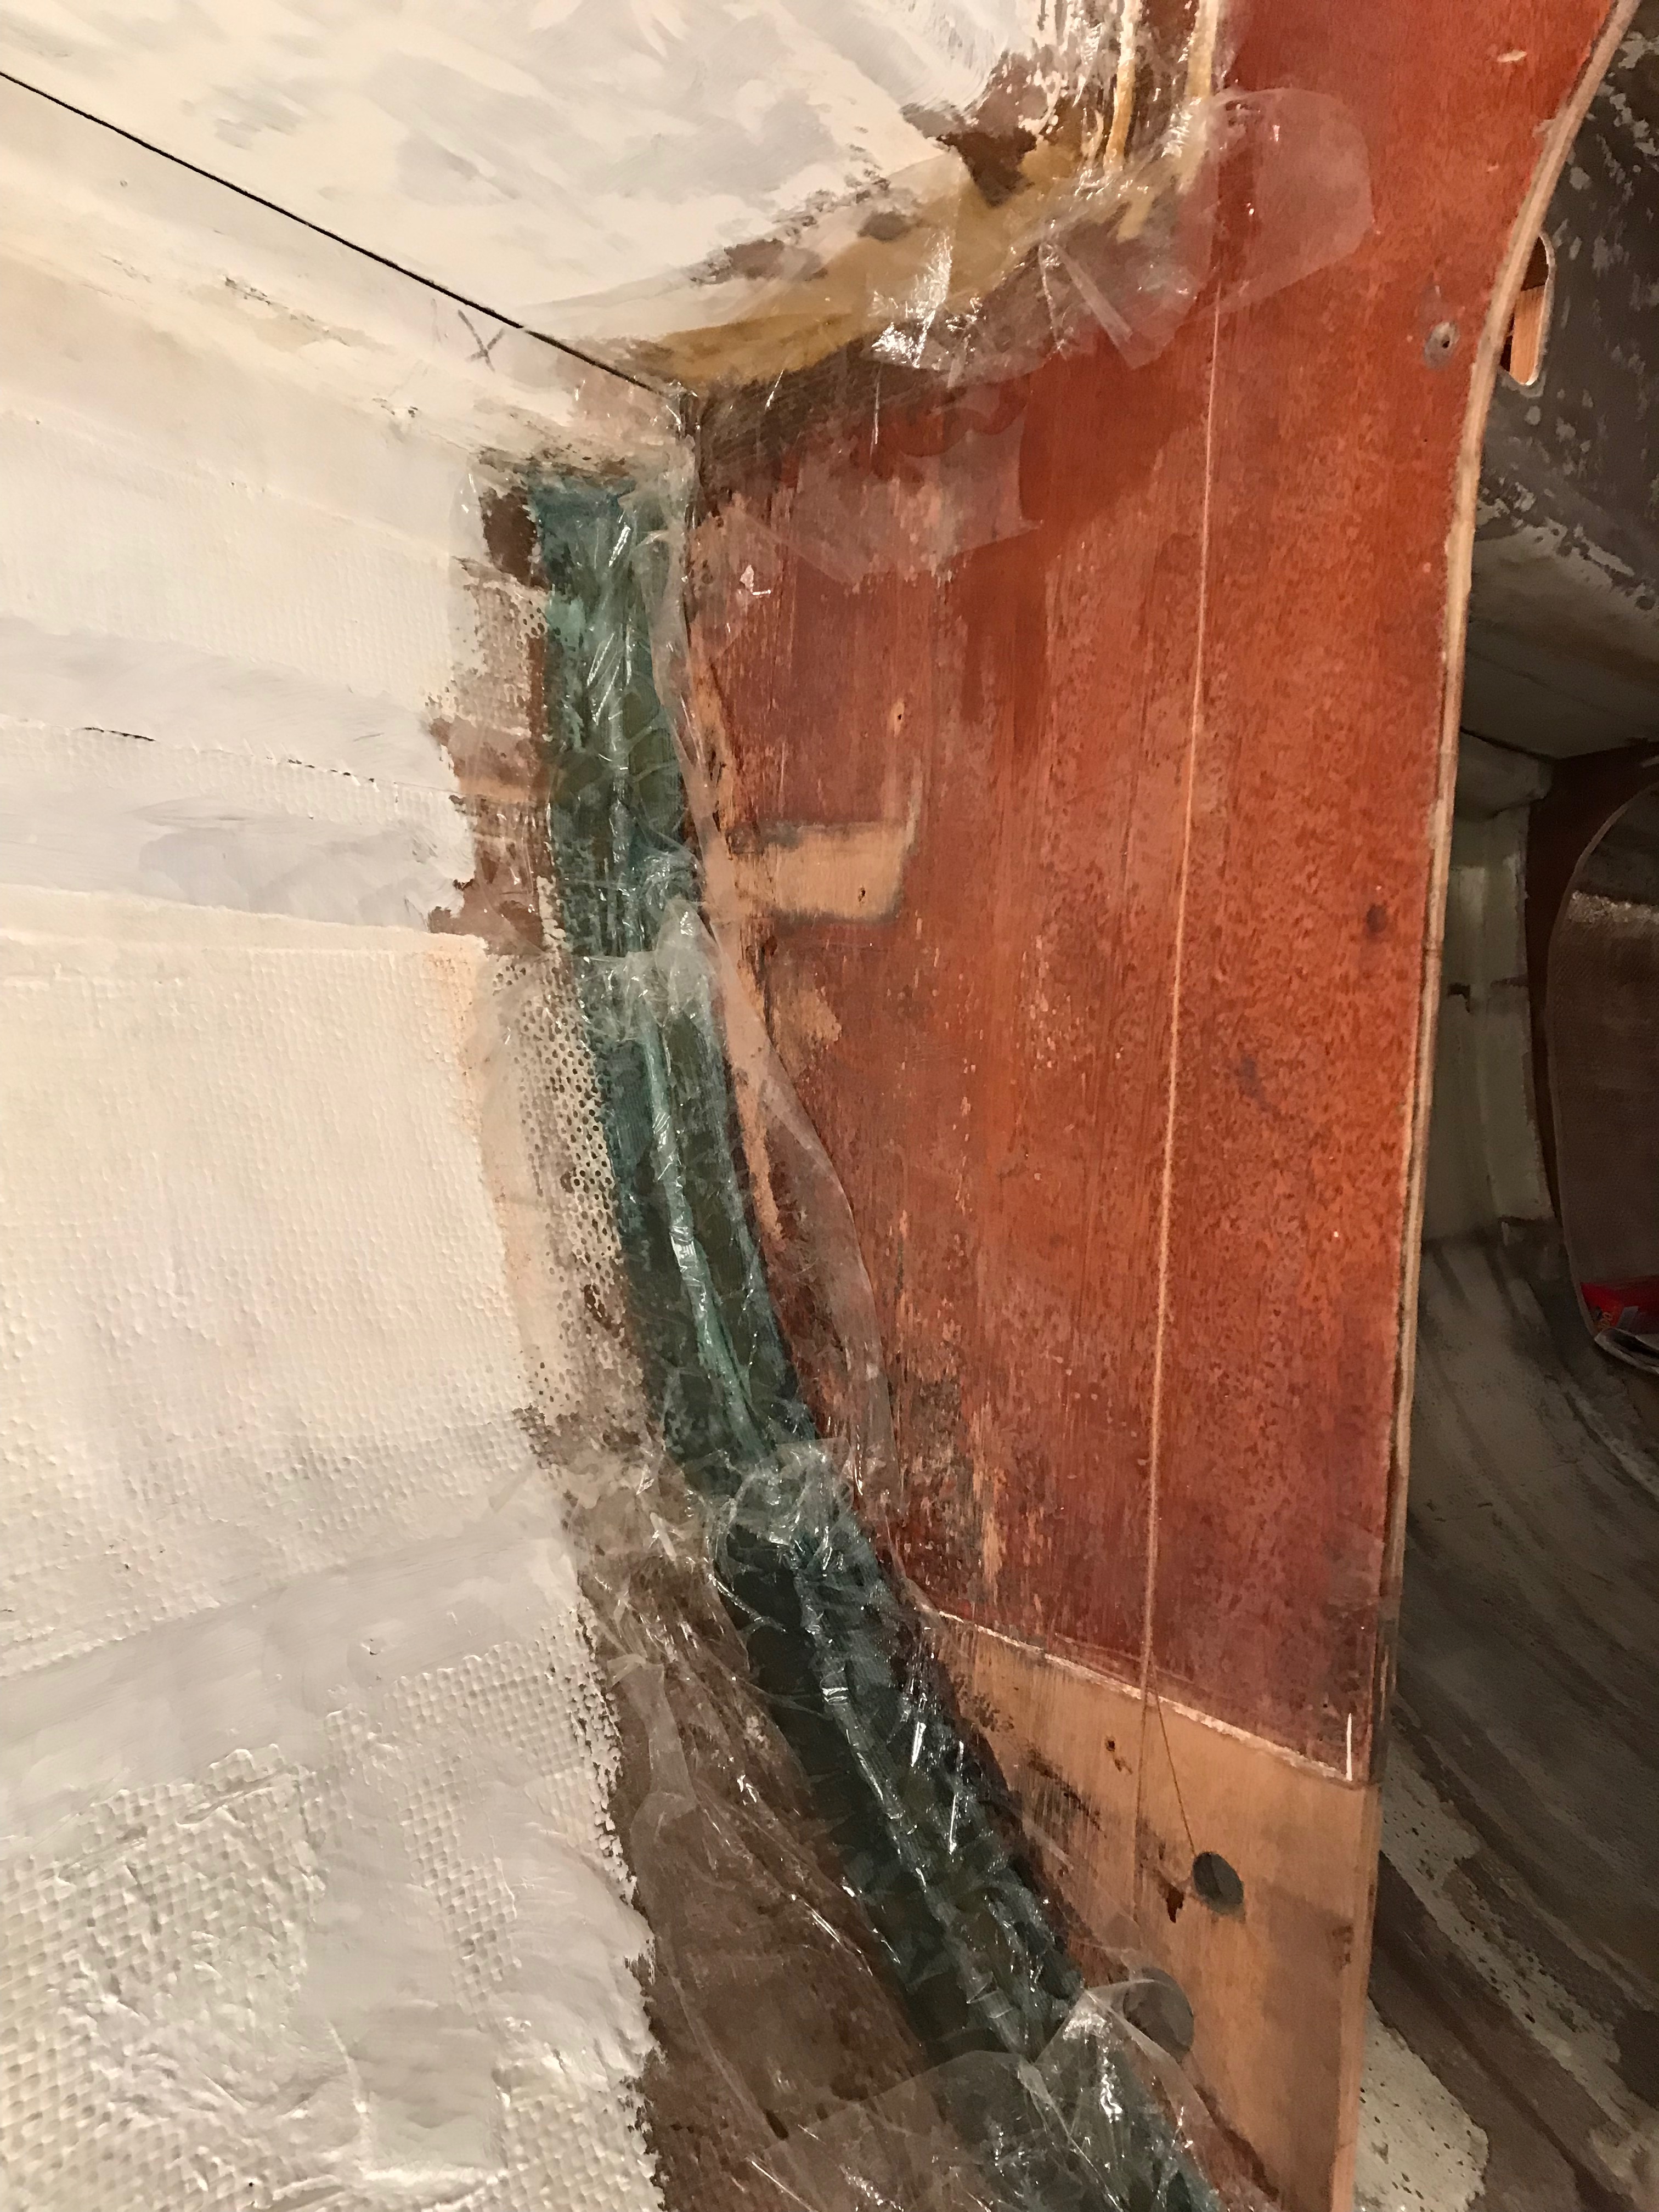
> Laid tabs on all edges fore and aft of the main bulkhead, using one layer of 1.5 ounce chopped strand mat 3 1/2 inches wide followed by a layer of West System bi-axial 4-inches wide. Used Saran Wrap to cover the wet fiberglass
Photos below
|
> Used a drill with cutting disk to cut extra-long bolts hanging down from hull-deck joint
> Glued and clamped one of the engine support blocks where the tab separated from the wood
> Cut semi-stiff foam strips and glued them to the edge of the forward bulkhead to help it fit against the hull and deck (photo coming....)
|
|
|
Click on the above photos for a larger image
> fiberglass laminates for bulkhead tabs
Click here for a larger image
|
> Re-installed cockpit support braces with new 1/4-inch carriage bolts
Click here for a larger image |
*********************
November 21, 2018 Senior DFI Mark Steinhilber sent in some comments on the above - They are included in the Technical Section and you can get to them by clicking the comments in Whats New November 20 - click here to go there.
We have a few project photos and comments to be added to the project file. This 'completes' the initial Passage Restoration restart report.
Here, photo right, (in the "does it fit"? stage) is the long waited photo of the forward bulkhead with foam strips on the edges to help distribute point contact loads on the irregular fiberglass surfaces. The upper left hand corner shows the rotted wood hull/deck clamp section that supported the old deck beam (photos below). It has been filled and glassed over. Click on the photos for a larger images


|
|
> Work continues on sanding and applying multiple coats of varnish for small wood parts.
Photo Right - Miscellaneous wood parts including the tiller.
Photo Below - forestay and backstay assemblies, polished endplates, new bolts and nuts, and varnished backplates.

Click on the photos for larger images
> Up Next
- Trim and sand new main bulkhead tabs to prepare for surface finishing, haven’t decided on painting versus using thin wood veneer with varnish.
- Re-cut and re-drill the shroud chain plate slots and bolt holes, order and test-install chain plates with bolts.
- Steel brush/sand bow area to prepare for second coat of primer.
- Additional design experiments for companionway ladder.
- Continue to fill holes in deck from Git Rot application and at bow bulkhead.
- Fit bow bulkhead - plan out 2-layer tabbing
I hope the update above, along with photos, is interesting. At least it shows some progress!
Sincerely,
Mike |
|
********************************
December 24, 2-18 Works continues despite holidays....
This is the first dry fit of a new 3/4” plywood layer added to the aft face of the main bulkhead. Together with a layer added to the forward face the total bulkhead thickness will be 2 1/4”.
It was initially a single piece but that did not fit through the hatch. Small wood wedges along the floor press the bulkhead upwards and close the gap to the cabin roof; these will be made strong with plastic furniture wedges and the bulkhead will be fiberglass tabbed into place.
The existing bulkhead has fiberglass tabs fore and aft, all the way around. Along the roof, the upper tab forms an “L” bracket that provides much of the strength needed to hold up the mast. Two new tabs (L brackets) will be added for a total of four.
The small point either side of the cutout are the end points for the port and starboard settee. The step over is about six inches. Space forward of the bulkhead is for storing sails.
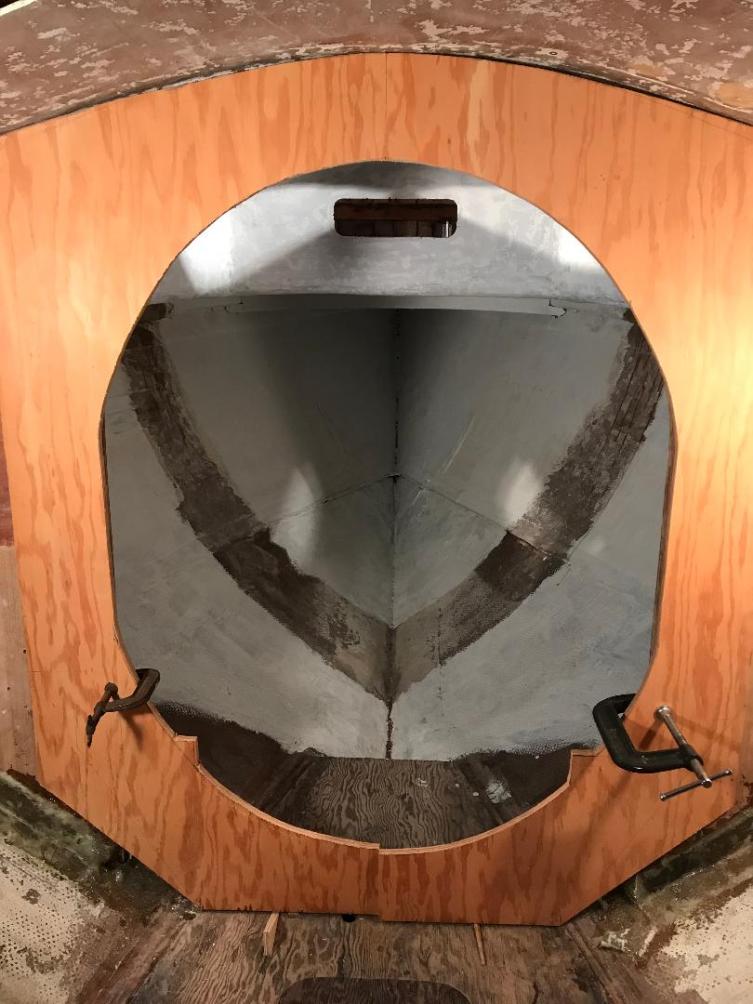

To be continued
************************************************************
********************************************************************************
**************************************************
This was the start of the original Passage's website page.
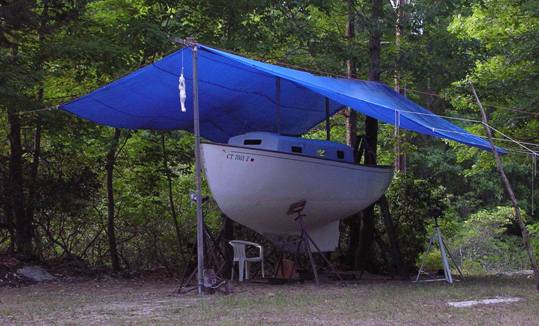
Mike bought this boat in September, 1999 and she was moved to this location - the initial Dolphin worksite... Marionette was restored in 1995/1996 in exactly this location - before we built her a barn. Webmaster note: In early September, 2008, in an effort to get the project rolling again, Passage was moved into the Barn using the No-Travel-Lift-Do-it-yourself-system. See below.
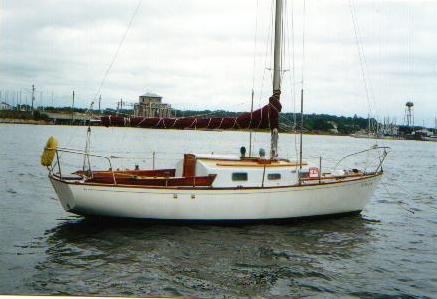
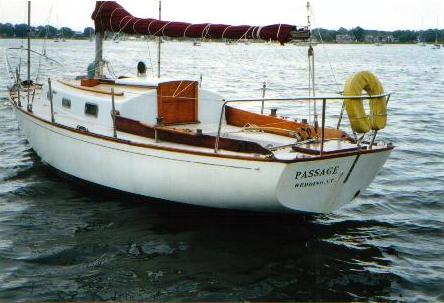
The following are two pictures of Passage as we found her on her mooring on the Mystic River in eastern Connecticut. Mike bought her from Gene Connolly of Redding, CT in September, 1999. Gene bought her from Don Gardner of Bellport, NY in November, 1977 and changed her name from Menehune to Passage. Don Gardner bought this boat from Ralph Seidenspinner in 1968 and he believes Ralph is her first owner. There is a Jack? Atherton from West Islip, New York in Passage's old files suggesting he might be the first owner, buying her in June, 1960. Stay tuned on this.
Your webmaster and Gene Connolly sailed her from the Mystic River to the Niantic Marina. There, in a slip, Gene showed me how to lower a Dolphin mast using the spinnaker pole as a gin pole and a couple of side struts. We (he) did it. Ever since, I have had a healthy respect for this manuever, and anyone who can do it successfully.
***********************
There have been a lot of fits and starts on this project. As of March, 2008 this is an overview of the status.
|
|
|
All hardware has been removed and the decks, house and cockpit sanded. Needs paint and non skid plus hardware replaced/renewed. All wood parts, except the toe rails, were removed - hand rails, dorade boxes, coamings, main hatch rails, companionway step and side trim, and forward and transom hatch trim parts. Click here for a larger image
|
The toerail track has been removed, toe rail has been sanded, filled, and varnished - a few finish coats of varnish remain.
Lots of holes still to fill and sand before painting
|
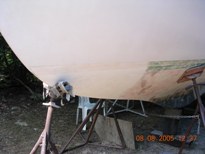
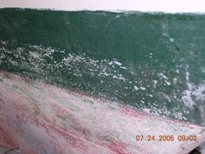
The bottom was a mess. We sandblasted which revealed lots of very bad, deep gouges/scratches from a circular grinder?, plus a lot of blisters - some bad ones. Old fitting holes like a pair of pressure differential type speedo holes had to be filled. The keel/hull joint had been filled, glassed over and needed fairing. There were lots of 'dents' in the lead keel that had to be filled and buttered. Click for larger image |
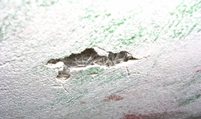
The following pictures give some idea of what we were dealing with. All these have been repaired, reglassed in some areas, epoxy filled, the bottom faired, and the first series of barriers coats applied. A few areas remain to be dealt with, ie., the centerboard holes and through hull fittings. The bottom will be resanded and barrier coated again.
That large blister at the left was pretty scary. All these blisters, gouges and scratches have been filled and resanded. Look closely at the bootstripe. It sits on top of the old scribed boot lines. We never weighed the boat but it certainly was heavy. The hull sat drying out for almost 3 years before we tackled this job. It will be interesting to see where she floats when we are done with her.
|
The bronze centerboard has been removed and the 'stop' cut off. This will allow the board to go further forward and a bit deeper. The CB had a lot of pitting and scaling most of which has been removed - this yields a lighter and thinner board - the opposite of what we want. We are 'thinking' on this. We also want to be able to remove the CB annually and are looking for a sane way to do this.
Click here to see and read more on this subject in the Technical Section
|
|
|
The rudder and rudder stock ( click here to see rudder and stock) have been removed and the prop shaft removed. The rudder stock heel fitting was badly corroded. This rather critical part was not available in the local marine supplies store so a new fitting was designed and built - this the subject of another article coming soon to the Technical Section. This picture shows the finished fitting in place. It still has to be filled and faired. Click Here to go to new rudder post heel fitting article. |
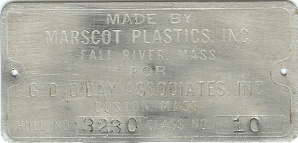
Passage had her name plate in the center of the inside edge of the aft facing wood trim piece at the leading edge of the main hatch.
It says she was made by Marscot Plastics, Inc, Fall River, MA for G. D. O'Day Associates, Inc, Boston, MA, Hull No. 3230, Class No. 10. Click here to see a large copy of the nameplate
|
***********************************
A Keeper Photo
The following photo, discovered in a 'purge files" effort, was determined to be a keeper. It was taken at the S&S 75th Anniversay celebration dinner at Mystic Seaport, July 10, 2004. Mike is certainly discussing the finer points of Dolphin design with Olin Stephens. For more about this very special event click here.

***********************
|
OK, back to work - Passage gets moved from under the tree into the barn in mid September, 08. We'll skip the steps of taking her off her poppits, getting her on the trailer, moving her into the barn, getting her off the trailer, and back on her poppits. As you can see, it was done, by one person, using the afor mentioned No-Travel-Lift-Do-it-yourself-system. It took a while, much of it looking and checking and rechecking to be sure nothing went wrong.
Click here for larger views. |
*****************
December 17, 2009. Cleaning up the back corner of the desk I came across a couple of old pictures and decided it was time for an update. The temperature in the barn is about 20, so writing about Passage is a lot easier than working on her.
First, this picture of Passage's prop when we pulled her out of the water in 1999 needs no further comment.

I thought about reducing the size of this photo but important detail would be lost...
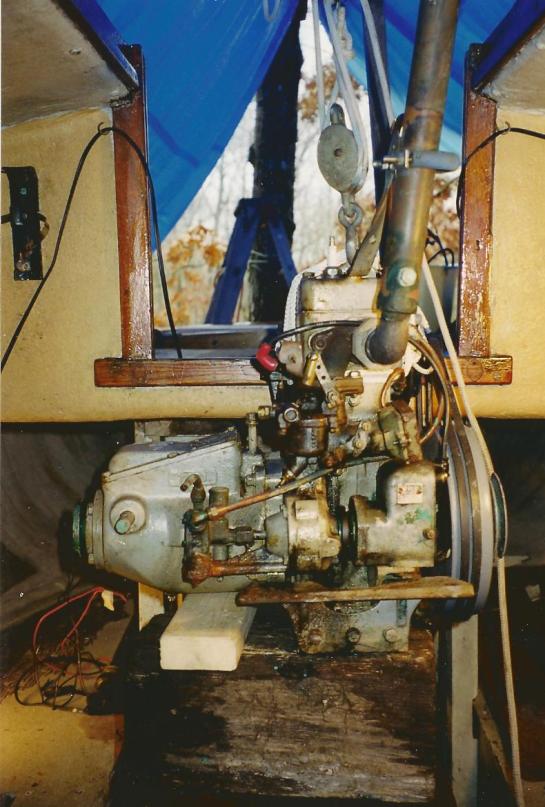
Stuck to the back of the prop photo was a shot of us pulling the original Palmer engine. Surprisingly, this was not a big problem. We reinforced the winter cover's (blue tarp) ridgepole and put a block and tackle on it. Using a friend's pickup we brought it to our local expert on these old motors and he 'reconditioned' it, running it on a bench. It cost $1000. Its been sitting on a bench in the barn for 10 years, liberally coated with WD40 and getting an occasional turn of the flywheel to keep some lubrication on the internal moving parts. For spare parts, we also bought an identical motor that had seized up. A strategic question is whether this motor will ever get back in this boat. Options - convert to a small outboard in a well like Marionette, or a small, used diesel, or electric power, or...
For more on this motor click here
**********************
February 20, 2010. Jim Homet is restoring Tiki, O'Day #28, and posted some stuff/questions on the Forum. Click here to see that exchange. This prompted a response based on our current restoration plans for Passage, a very patient lady awaiting some additional energy directed toward her situation.
The basic concept is to have a simple daysailer setup, with reasonable comfort for cruising, and especially a private head with door. The plan is to have the v-berth disappear and become instead a forward cabin with a (hidden) head, sail storage, a sink with work space, and a small pull out/down galley with storage - some details still to be worked out.
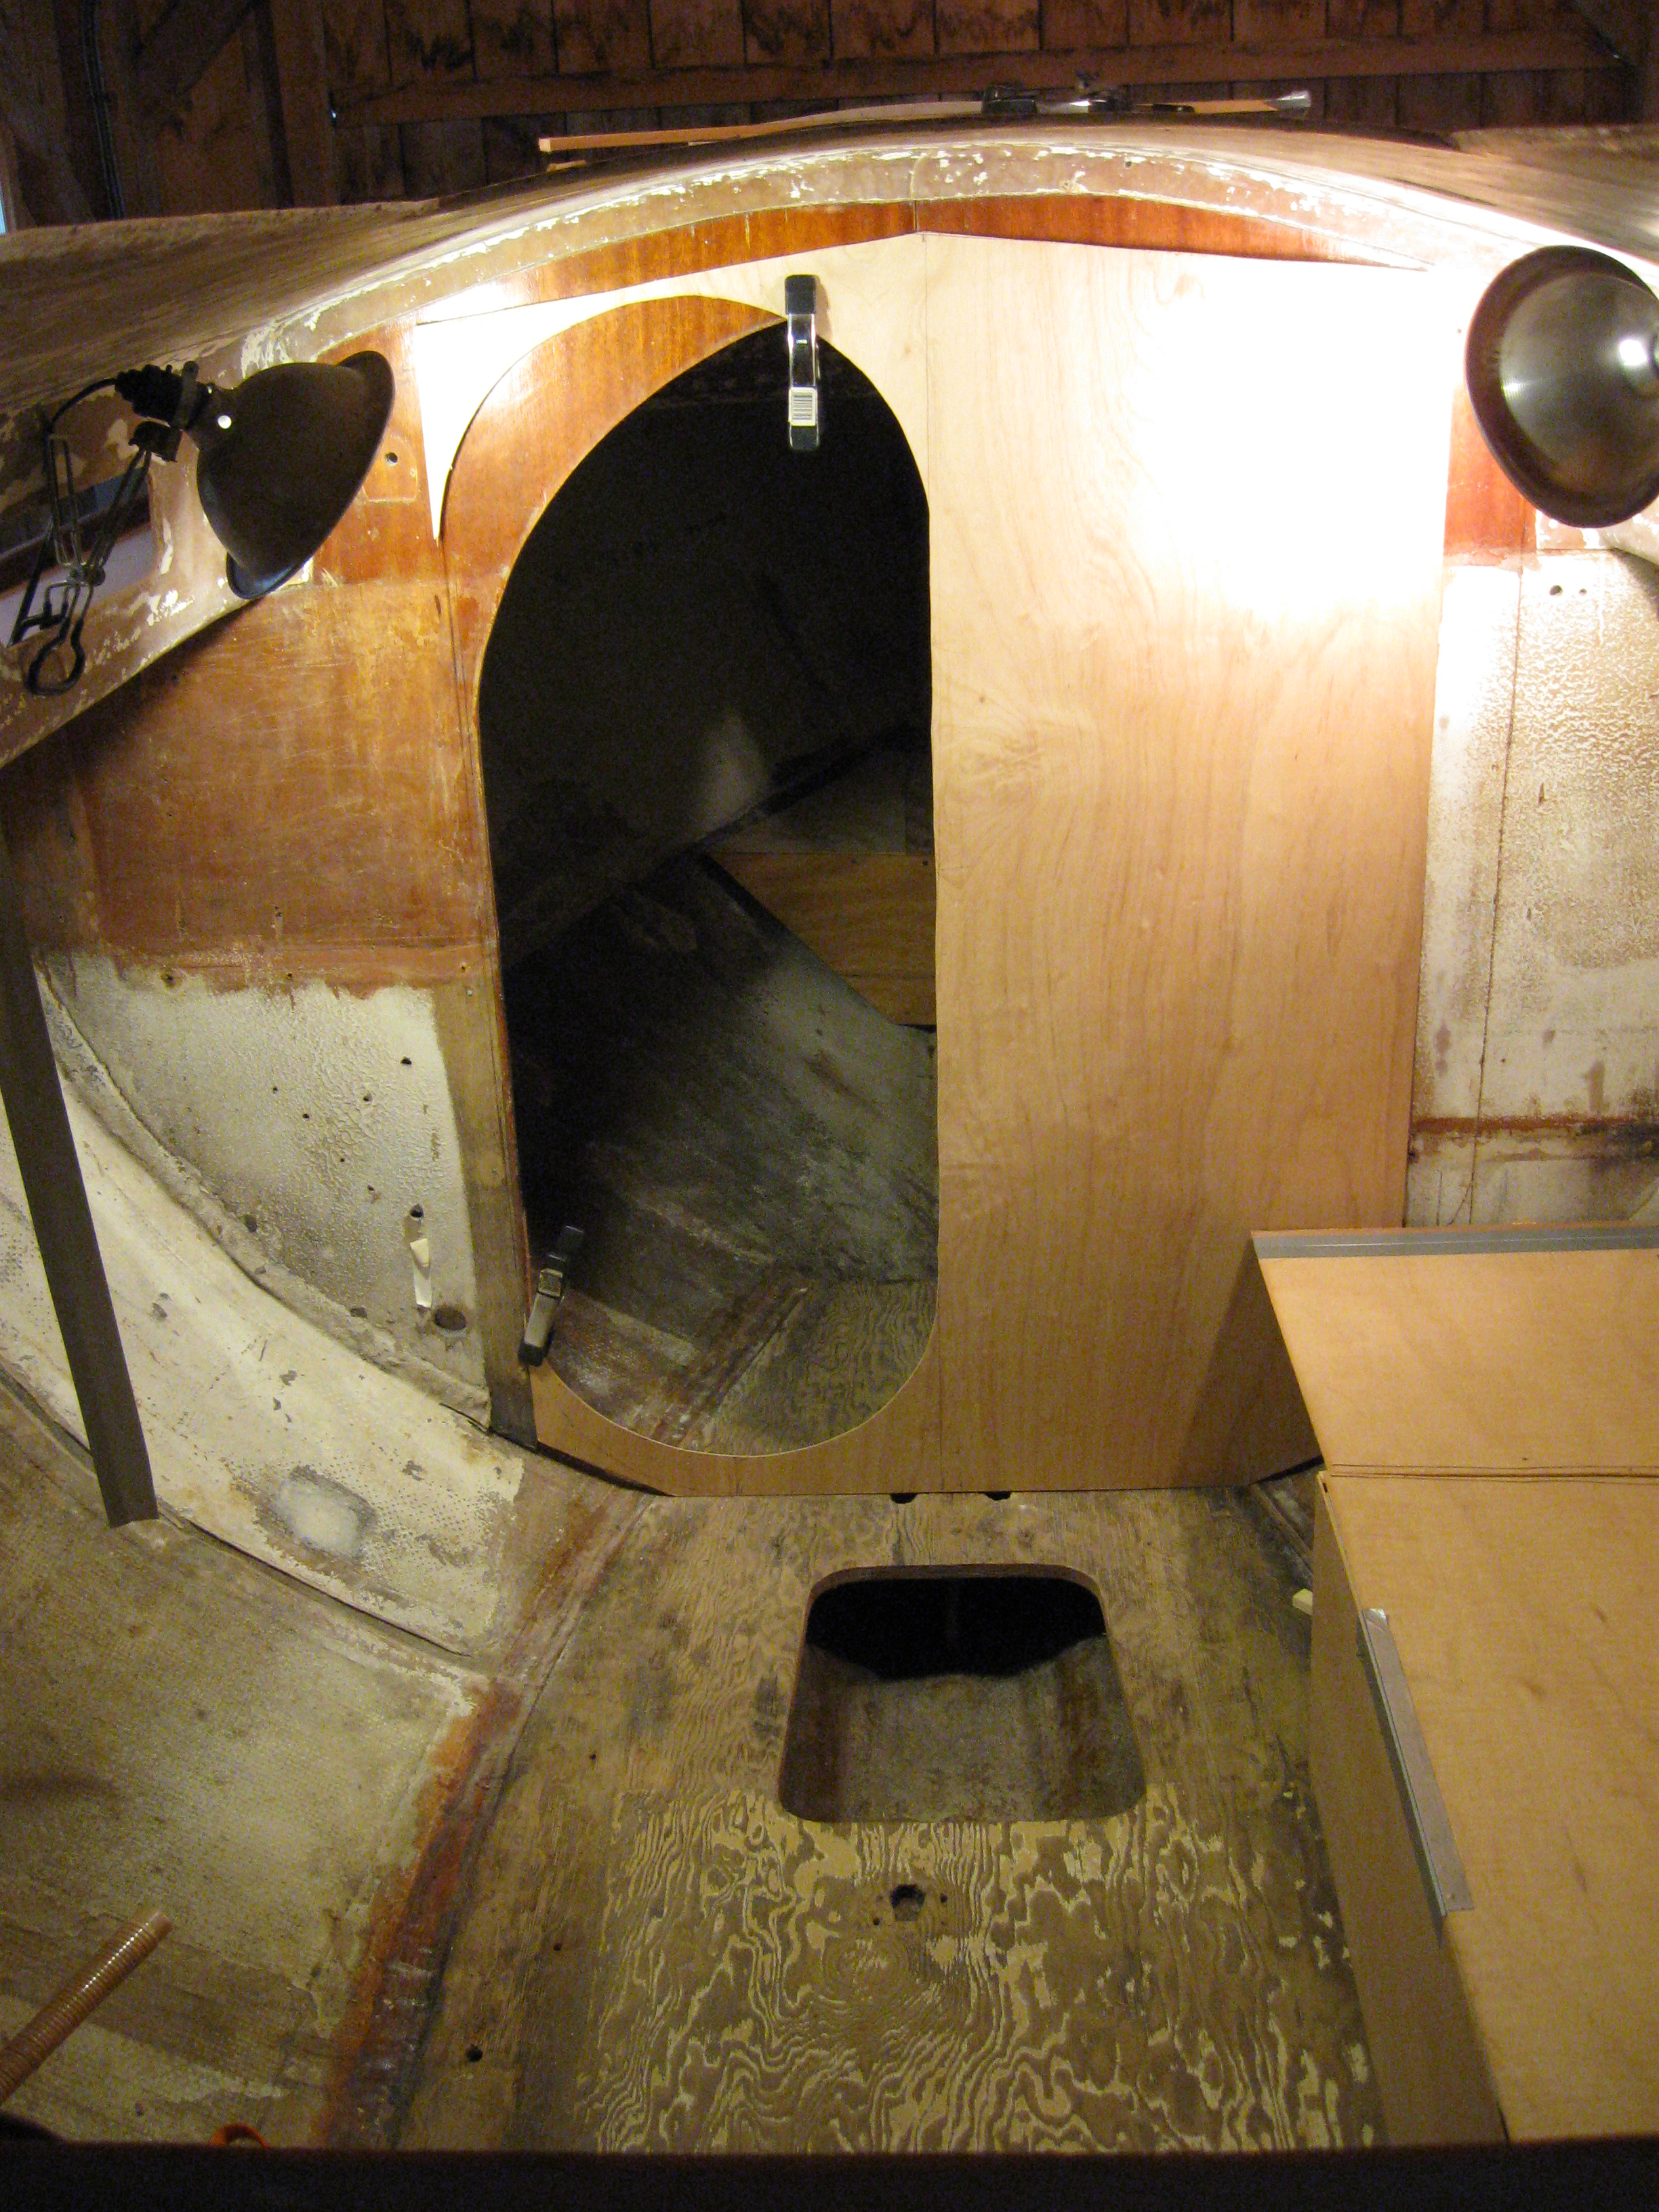
The now open bulkhead will be closed in and there will be a proper (possibly a sliding type) oval shaped door on the port side.
The main cabin will be two settees with a 'open bench type' slat backrest, storage behind and 2 shelves above. These settees will convert to a single/double bunk on the starboard side and a single on the port side - storage under both. No hanging locker - a table system is still under study. The 'fridge' will be a portable cooler under the steps. There will be no change in the quarter berths set up.
The companionway steps will be replaced with a Marionette type steps system and a set of lockers built into/below the bridgedeck.

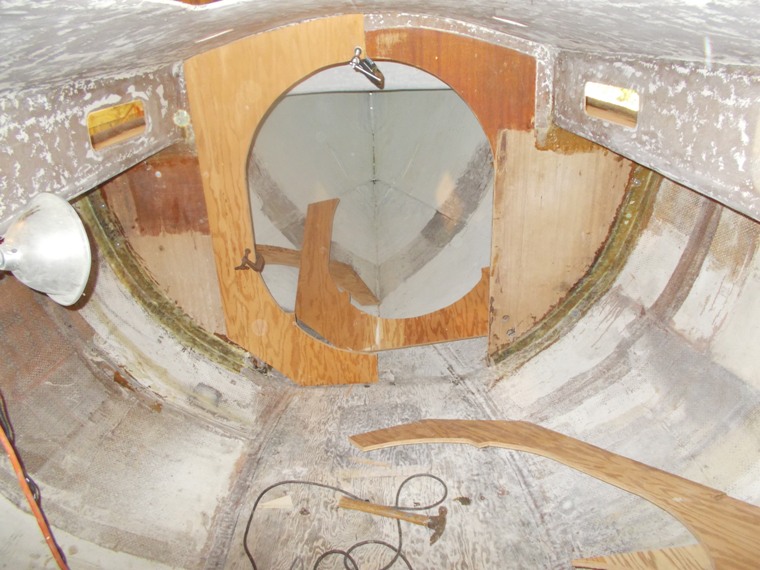
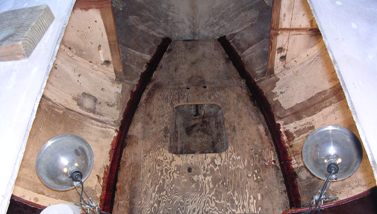
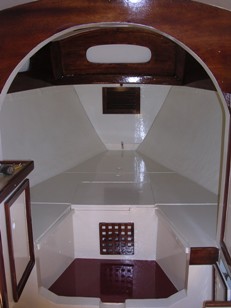
This is the interior of Passage's forward cabin. Everything has been removed. That wood 'tank" is a mock up of the 11 gallon poly holding tank I have in Marionette. We will go with the same system in Passage. Click here to see Marionette's setup

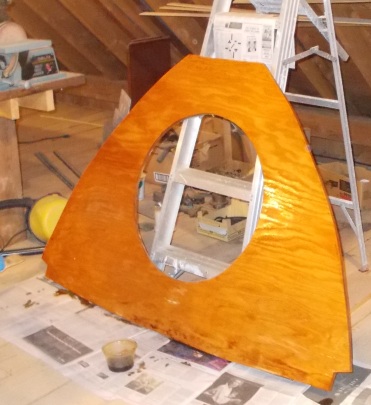
Work with me here. Above is a mock up of an oval door cut out of a thin plywood panel to see how it looked.. The door could be a slider (probably), or a folder. The panel would cover the full width of the boat and hide a strut under the mast step. The 'book' says this door should be 22" wide. We might squeak 20". The height is ok and limited anyway by the floor and by the fiberglass flange tabbing the bulkhead. We are thinking of a face trim piece of molding hiding the flange and looking like the edge of a beam. If we go with the oval door shape, when slid to the right, it duplicates the appearance of port side opening itself.
Sliding doors can be problematic. Above is a sketch of a folding door concept that could more easily yield a 22" opening. Most of the time the door would be open, folded back on itself, and a simple clasp could keep it that way. Worth thinking about - and can be easily changed if it does not work out.

|
The above picture is a mock up using Marionette's v-berth panels. More design work needs to be done on the forward cabin layout. There will be a removable panel in the peak for a chain locker ala Marionette's. Assuming the head is centered, and it probably will be, a full width seat back is envisioned in back of the head behind which sails and other stuff can be stored. We think we can also work in a convertible bunk up here for a crew, or a kid.
The sink and counter space will face forward on the starboard side backed by the bulkhead, and tucked under the deck. Shelves and built in lockers above and below are envisioned. A small fresh water tank, probably flexible, will go somewhere, hopefully low.
Looking at Marionette's v-berth at left gives a better idea of how much space there is between the forward side of the bulkhead, and the aft edge of the head compartment. Enough, I think, for a good sit down work area. |
|
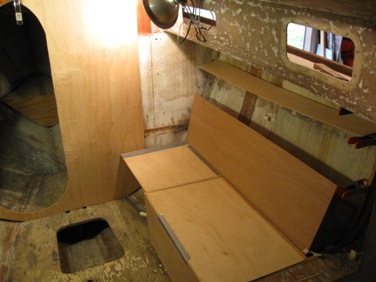
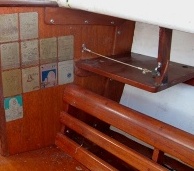
At left is a mock up of the proposed starboard settee, storage under. To make a spacious double the vertical face on this side will 'flip' up and the seat back will 'disappear" into the quarterberths.. Actually, we saw Don Barnett's (Casandra Rose #56) settee backs and really liked them (above). We plan to do something similar on both sides. We'll have shelves with fiddles full length. No hanging locker.
We are thinking about the table issue. Maybe a fold out from the main bulkhead? Sliding door issue....
|
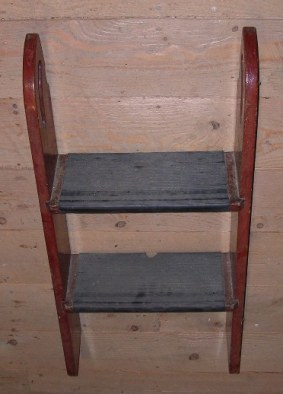
Above right are Passage's companionway steps. At left is Marionette's steps system with lockers under the bridgedeck and the electrical panel. The center locker houses the centerboard winch. A side panel behind the electrical panel provides access to wiring plus storage for fuses and flashlights. The cooler slides under the bottom step and the steps are removable. We are planning to do the same on Passage. You can see more on this system by clicking here.
The big unknown is the auxiliary power - reinstall the Palmer 27, put in an outboard in a well? how about an electric power system? Battery banks on either side just aft of the main bulkhead? This boat's primary purpose will be as a daysailor and will have a slip with power access. Still thinking about this....
**************************
November 12, 2011. Another Internet ether search of the Jim Huxford Dolphin 24 website found the following 1999 post
Subject: Dolphin registry - Marionette, Hull #12
Date: Wed, 13 Oct 1999 17:00:55 EDT
From: Ronbreault@cs.com
To: jhuxford@apci.net
Jim
What do I have to do to join the 'Association' ? My son just bought 'Passage' O'Day Hull Number 10.
Ron
****************************
|
|


