Hi Ron
Below are some notes on the dodger that are hopefully useful and happy for you to post them to the website.. I've attach some photos and drawn up some sketch plans to show as much detail as possible. While I've tried to do these to scale (where noted), please don't rely on them for accuracy. If you need any critical dimensions, I'm happy to re-measure accurately, but as noted I'd suggest many of the angles should be taken directly from your existing cabin top (Lon. I like the look of your port-lights and was trying to imagine how you can get a bit more of that classic look in a dodger). In my case, I used the narrow dark window supports to try and make the dodger roof 'float' above the rest of the boat. Happy to answer any questions. Good luck with your project! Oh and PS, I love the Port Townsend and Port Stephens area, will try to visit if I'm over there again. Here are some notes regarding the dodger
Design
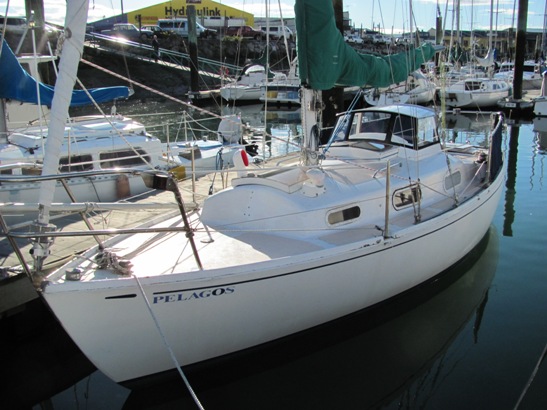
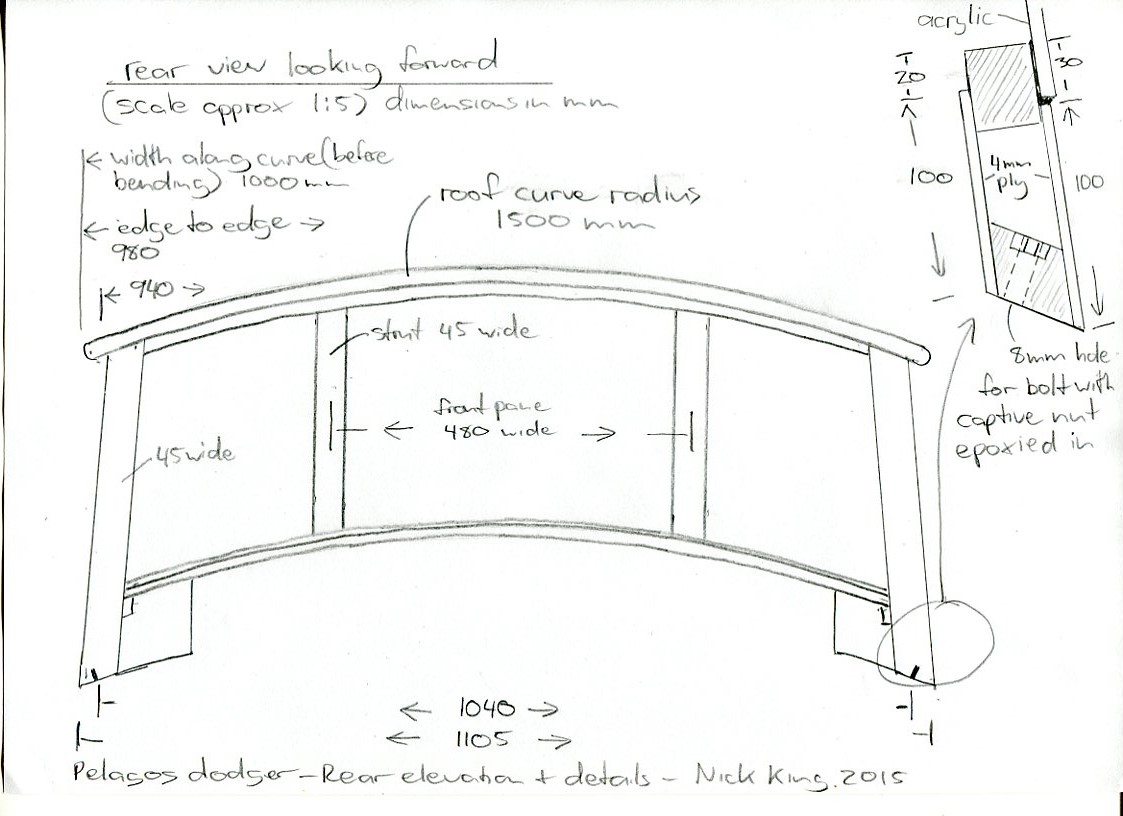
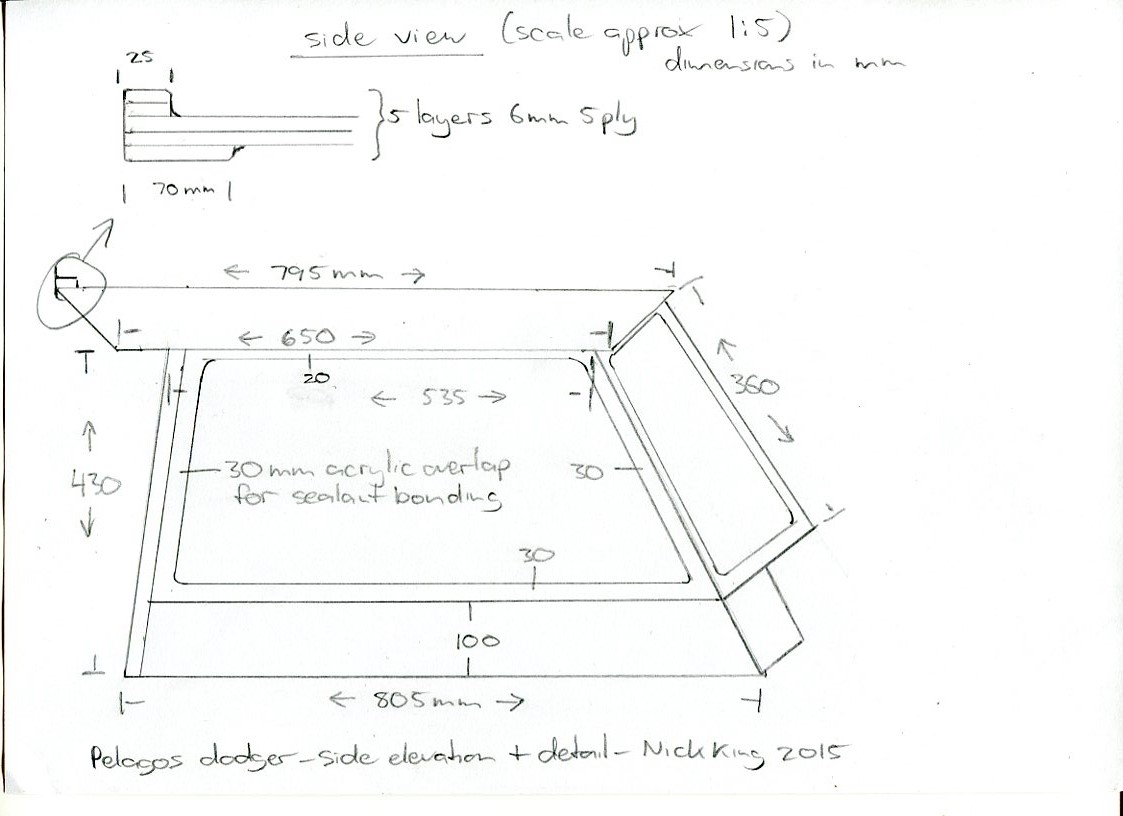
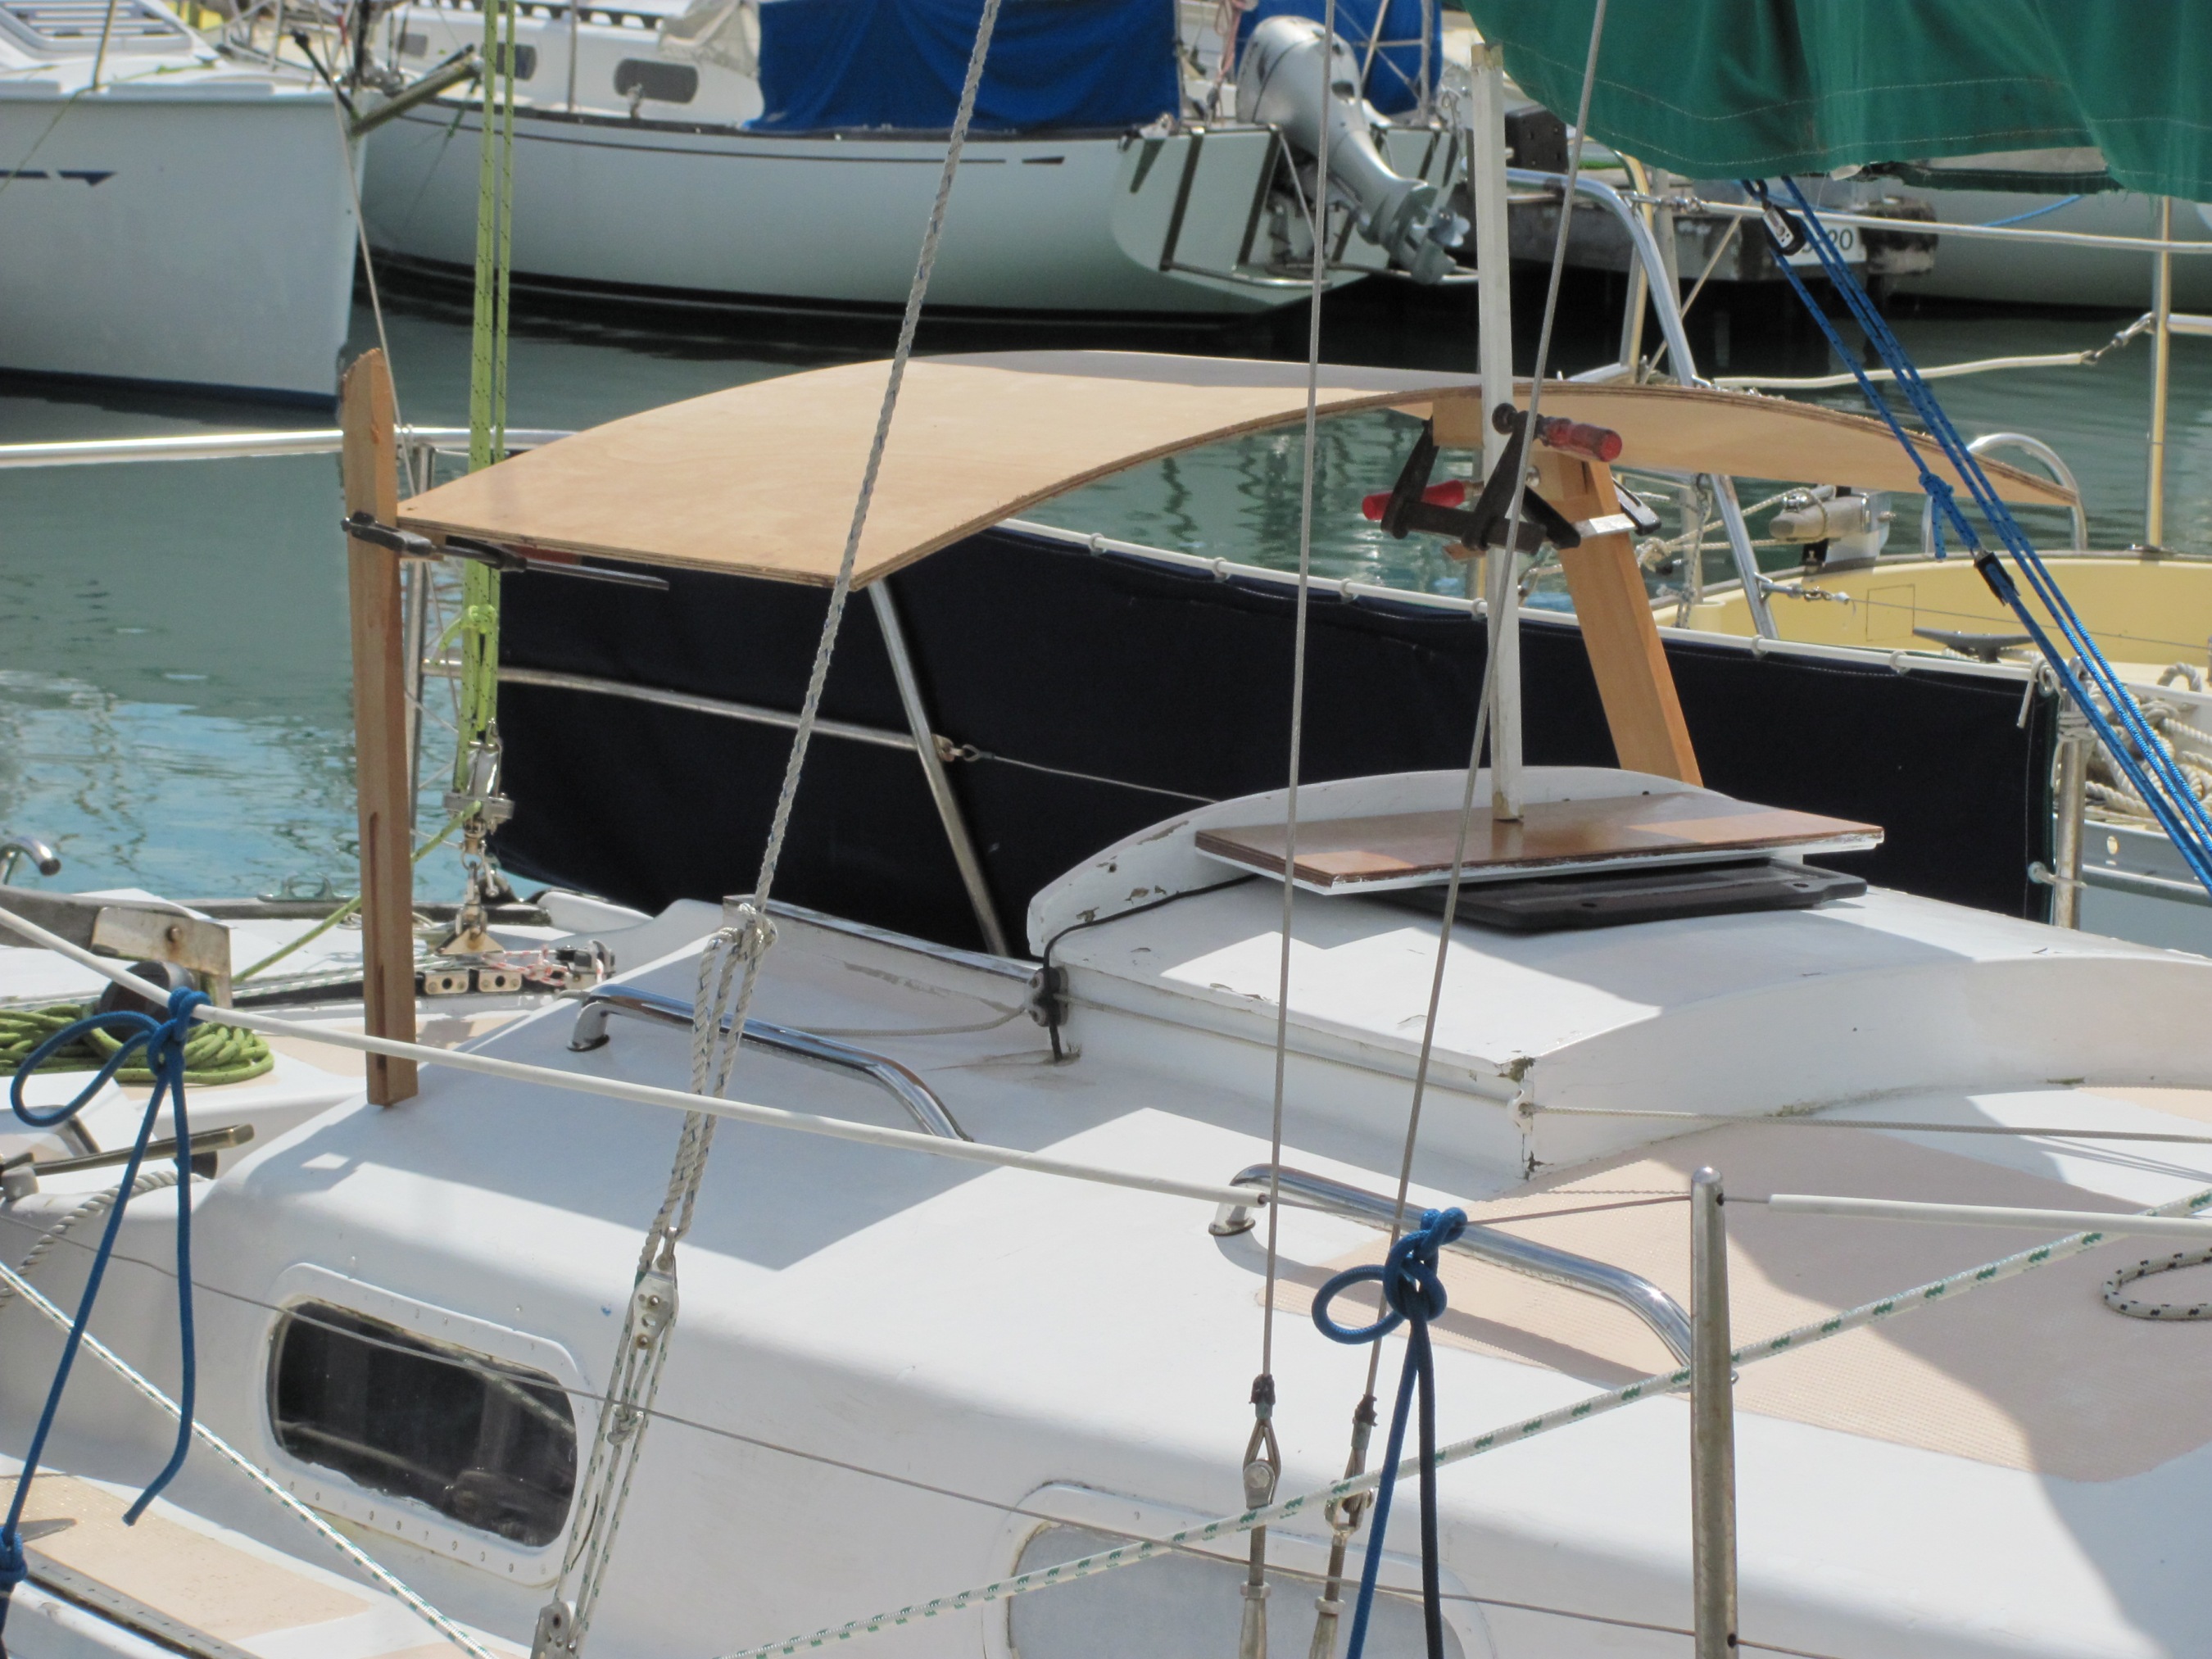
In my view, many dodgers look like an after-thought so played around a lot trying to get the look right. In the end I realised the best result would be achieved using the existing lines and curves of the boat. The main decision to make was the height of the dodger. I figured the best way to do this was to make the curved top and then test it on the boat to get the height right. Once the height was OK, I built the sides and attached them temporarily. Then back to the boat to work out the angles of the two struts at the front and the dimensions of the curved shelf connecting the bottom of the struts. Most of the design was made up as the building progressed. I figured it's much easier to work this way when there are so many compound angles and curves. I wanted the dodger to be removable so I used the 4 mounting holes for the cabin top rails for attachment and these set the width at the base of the dodger.
Click on the drawings above for a larger view - click the return arrow on your browser to get back here
Materials
I'm a great fan of epoxy (West System) even though I developed a skin allergy to the stuff from careless use in the '80s. Always use disposable gloves! The entire dodger is epoxy glued and coated, with a minimum of fastenings: 4 screws each side of the roof to attach the sides, 5 to attach the roof beam, and 2 each side to attach the shelf. The paint coat is two coats of two pack polyurethane directly applied to the sanded epoxy sealing coat. I use Resene's industrial Uracryl series which is cheaper than any marine paint, available in almost any color, and I've never had any issues with quality. Even brush painted, it looks great.
Most of the timber is 6mm (1/4") marine 5 ply, mahogany I think. I used this for the roof, the shelf, roof beam across the front, and struts. I used radiata pine for some of the side structure laminated with ply. Radiata (Monterey) pine is the most common construction material in NZ but rarely used for boat building because it's quite light and not especially durable. Sealed with epoxy, it should be fine but in hindsight I would have used something tougher like macrocarpa or spruce.
The windows are 6mm acrylic and because these are glued to the epoxy coated timber, they provide much of the strength and rigidity of the structure.
Construction
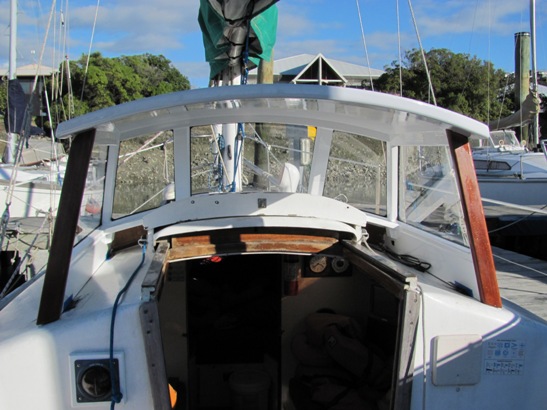
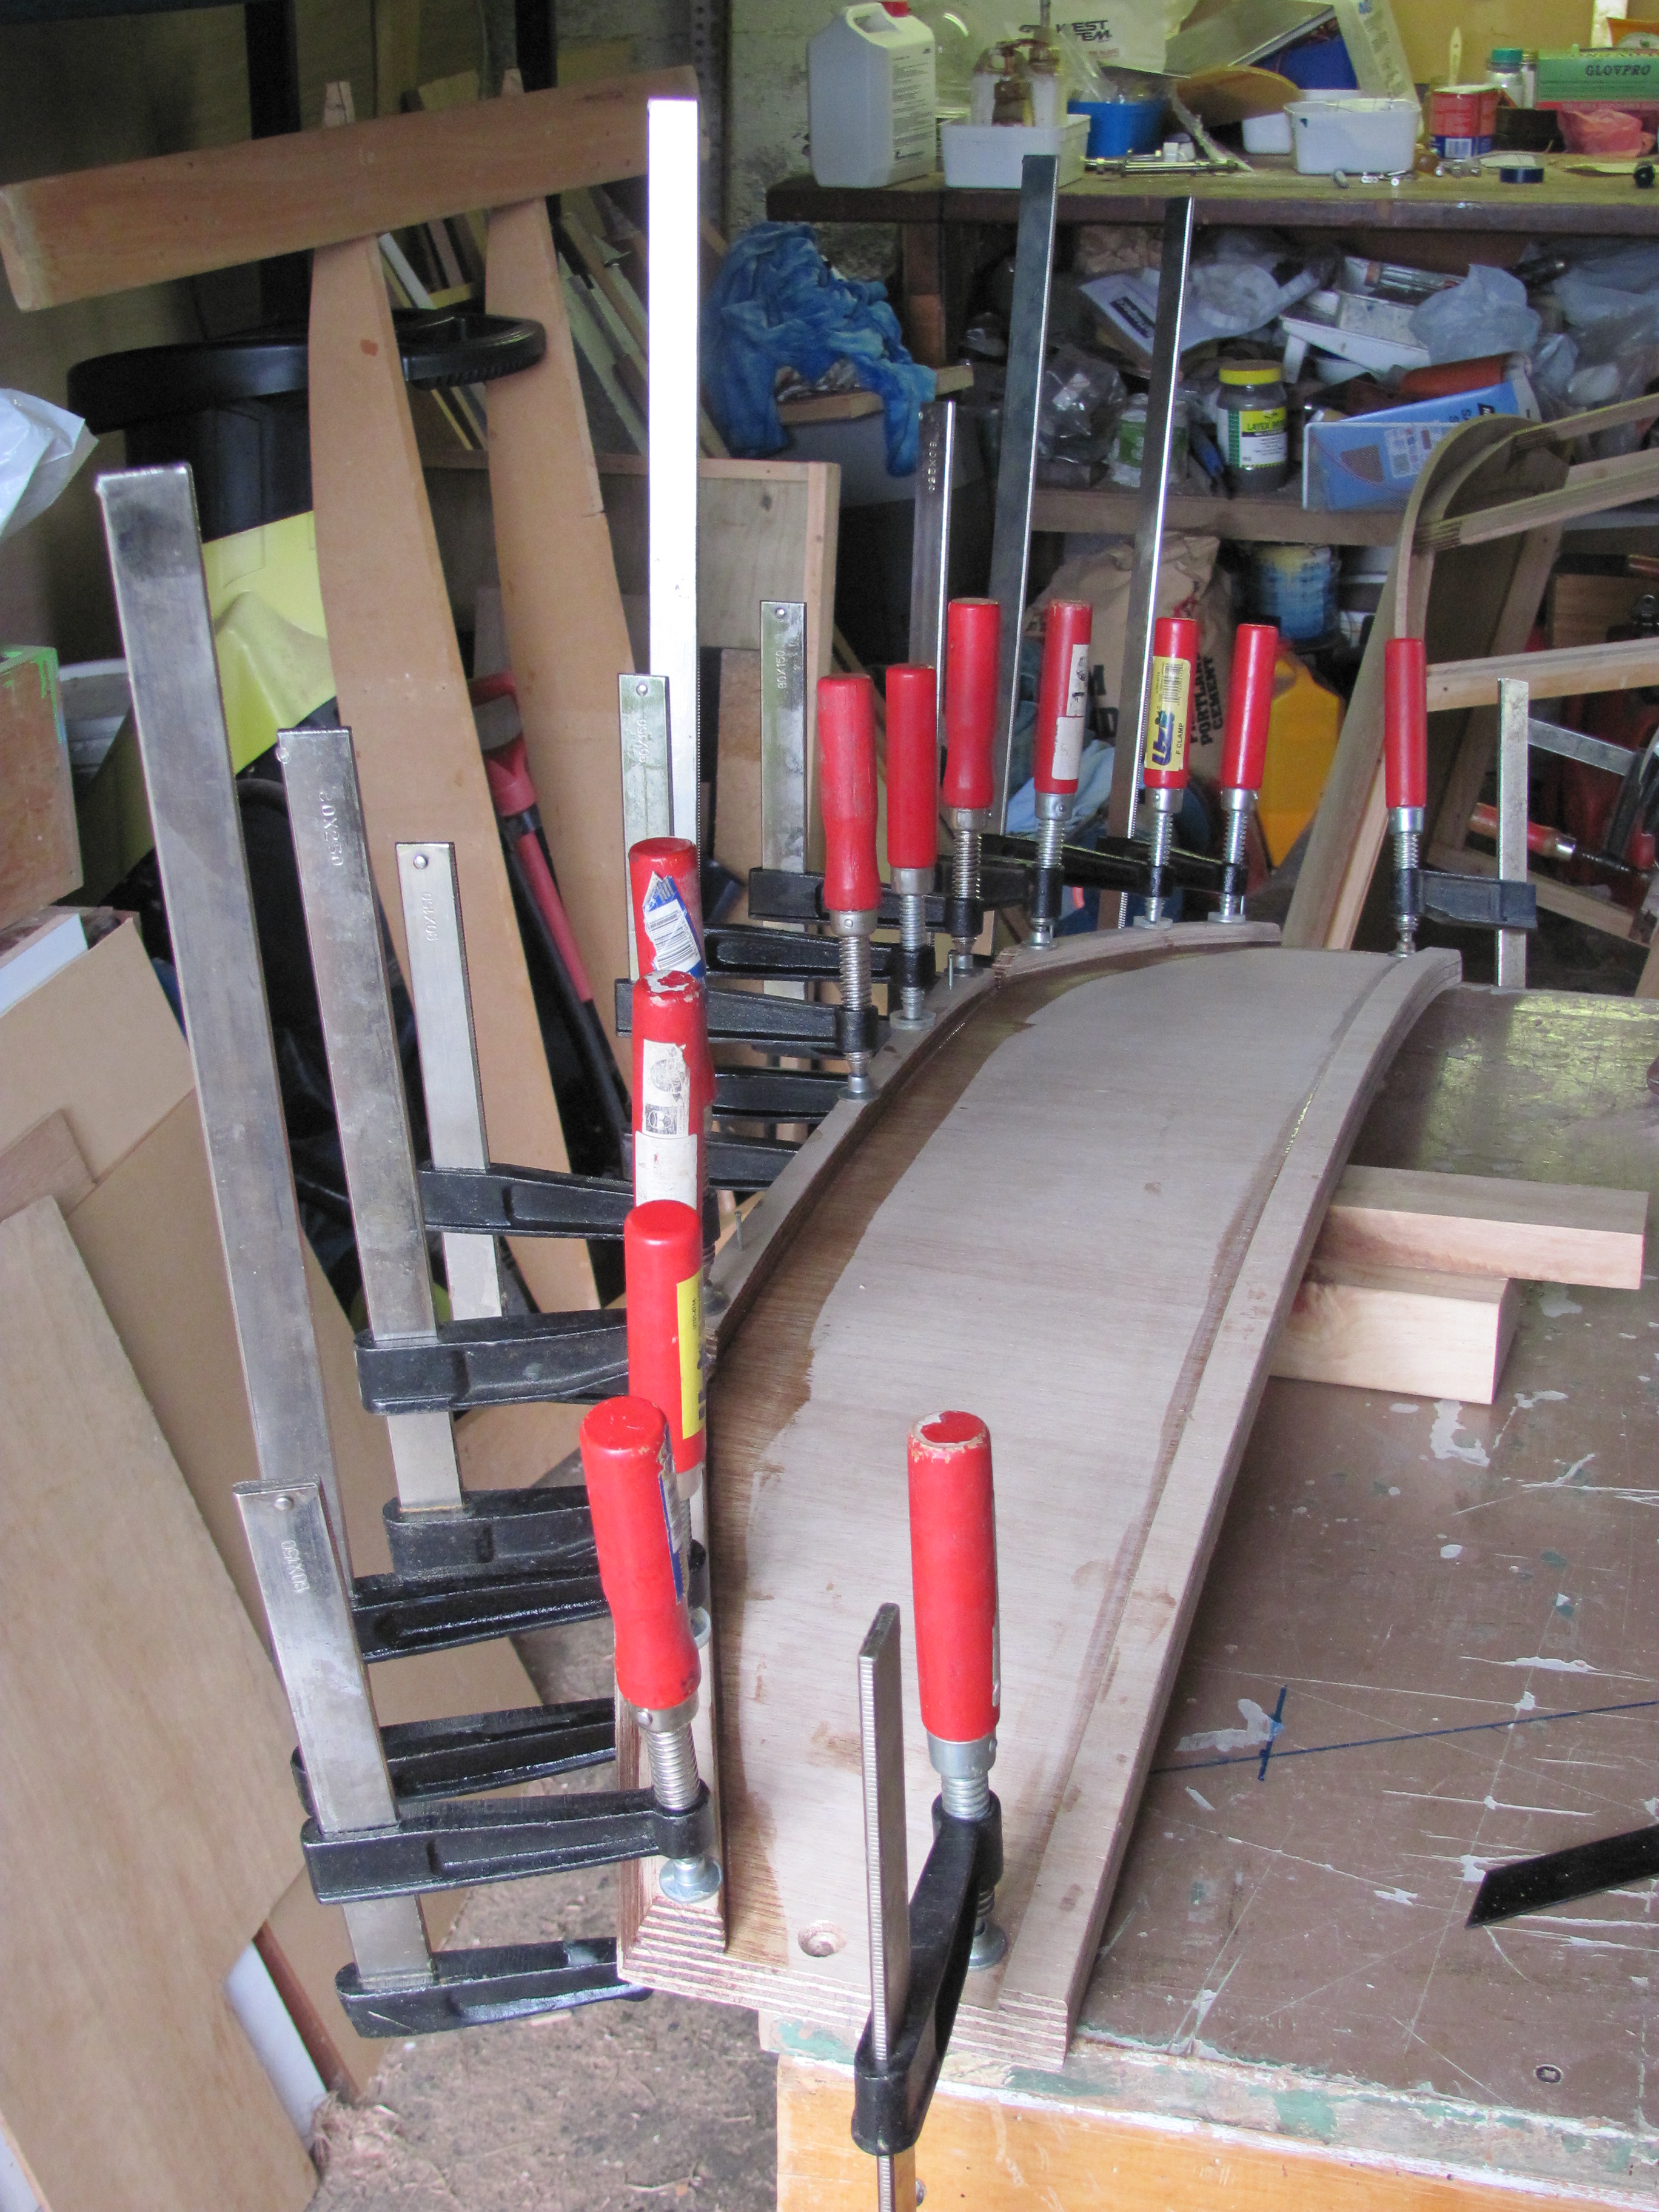
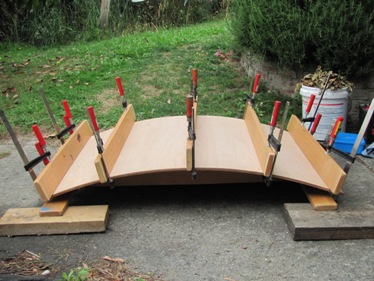
As mentioned, I started by epoxy laminating the roof from two thicknesses of oversize 6mm ply. These were cut roughly to size, and then glue laminated using two slightly over-curved forms. When unclamped, the ply sprung back slightly to the correct curve, and was surprisingly rigid. I took the dodger roof to the boat and set it up over the hatch with some scraps of wood, clamps etc to make sure it looked right, and that there wouldn't be too much head-bumping getting in and out of the hatch.
|
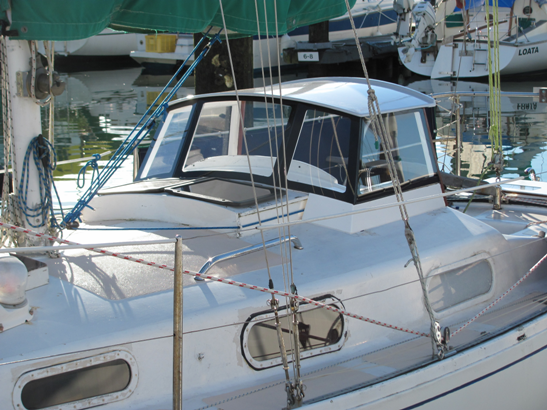
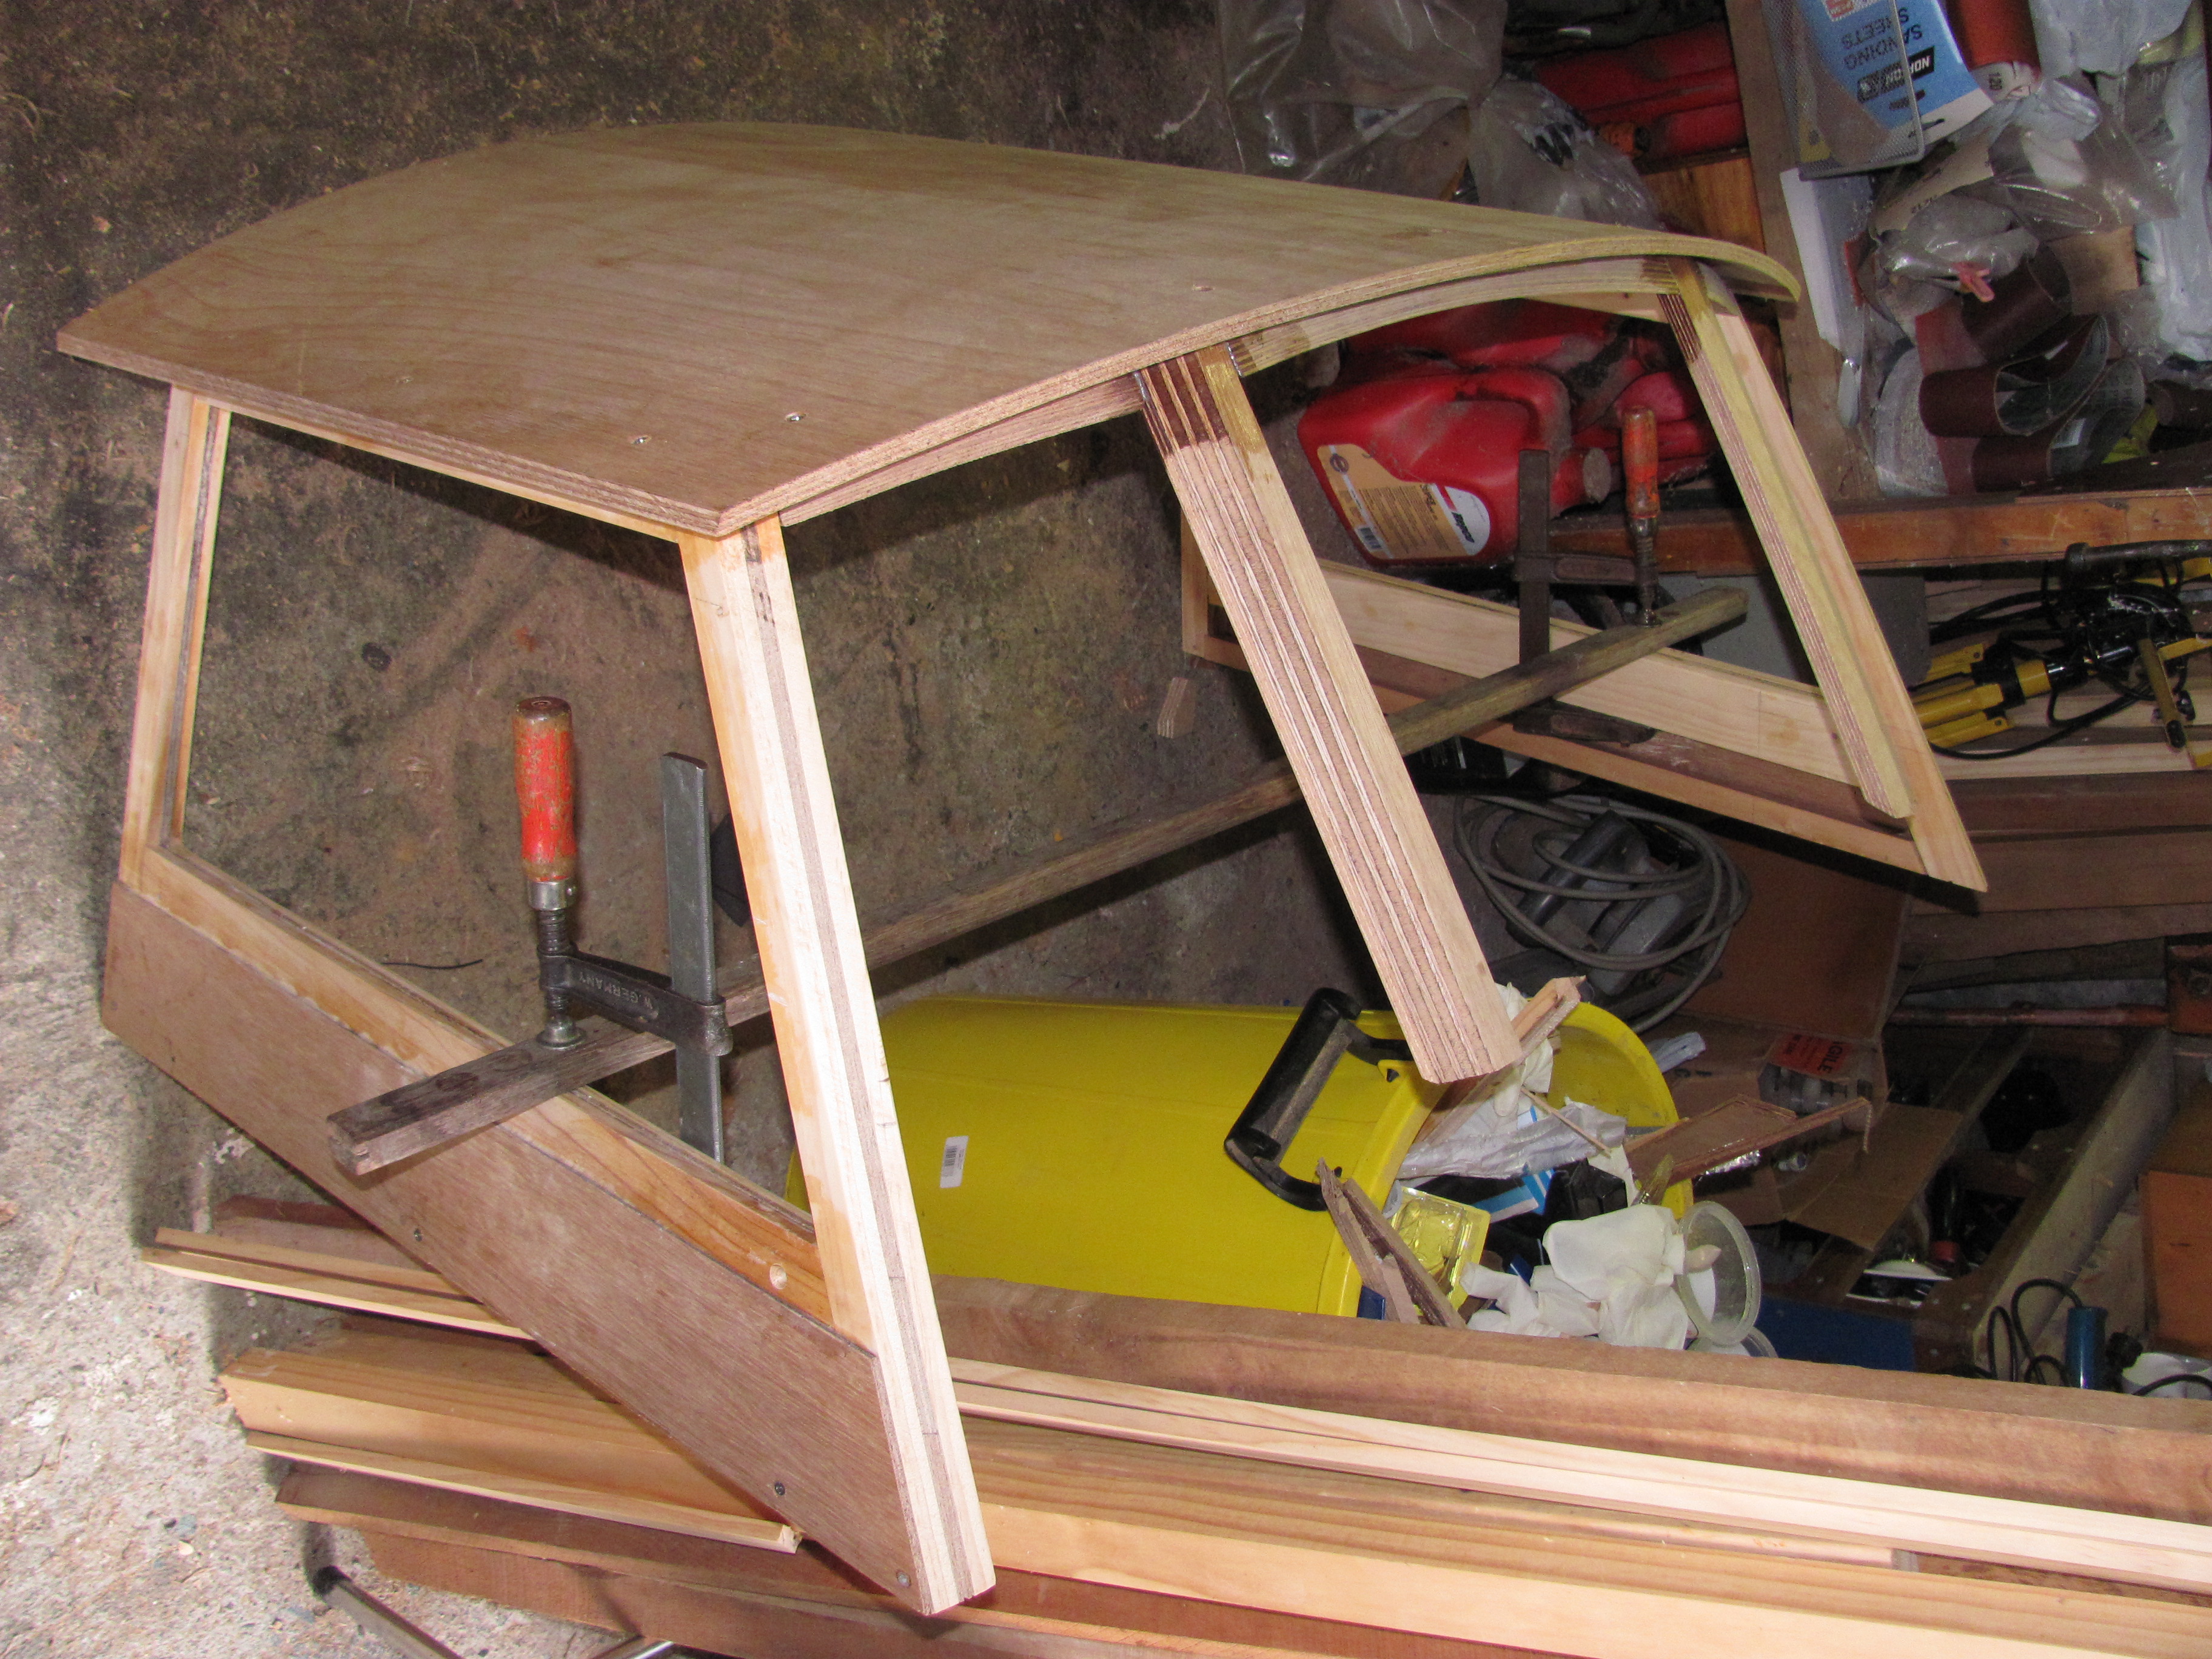
Next step was to make the side panels. Each panel was made from a pine-ply-pine frame, with ply panels to cover the non-window areas at the bottom. Once these were glued up, I temporarily screwed them to the roof and went back to the boat to check the alignment and measure up the struts etc for the front.
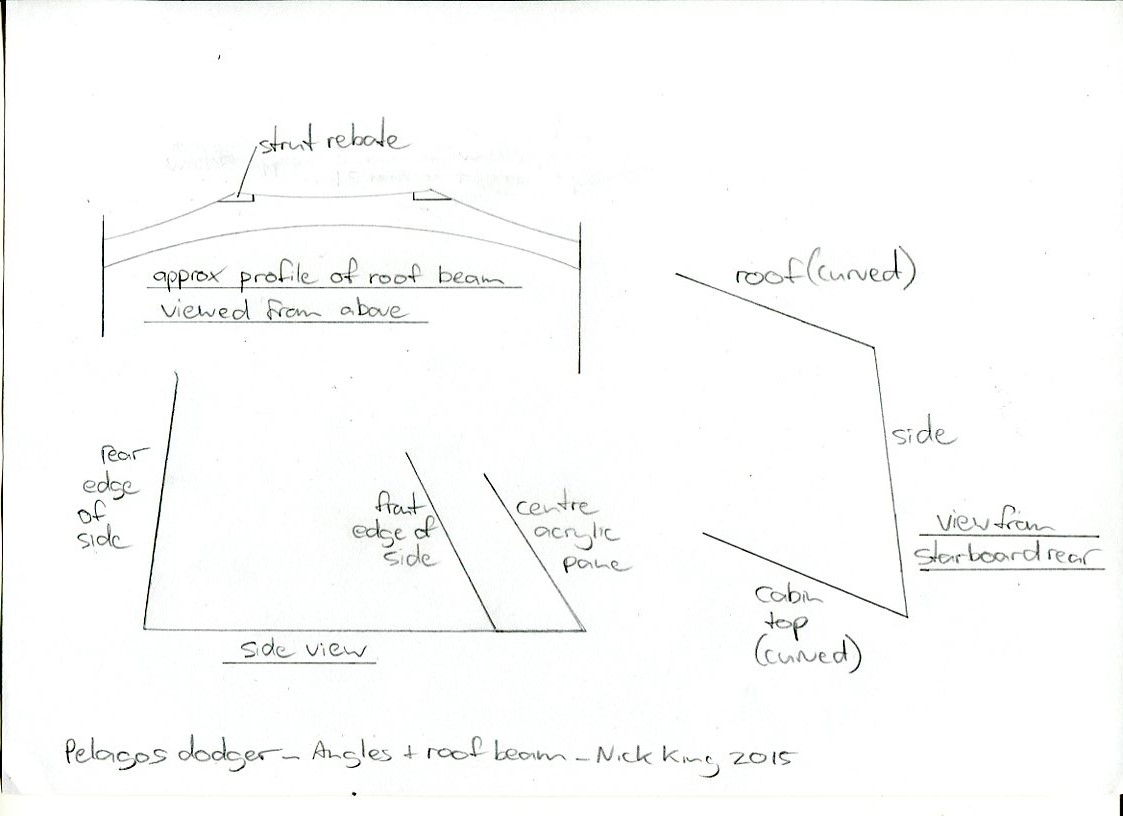
The next bit was the hardest and most complex. On the boat, I decided on the position and angle of the struts, making sure that each window pane was a pleasing shape, but also would have a flat frame for attachment. You need to keep checking each imaginary pane as you move things around, and it's surprising how just a few mm make a big difference.
|
|
|
Click on the photos above for a larger view - click the return arrow on your browser to get back here
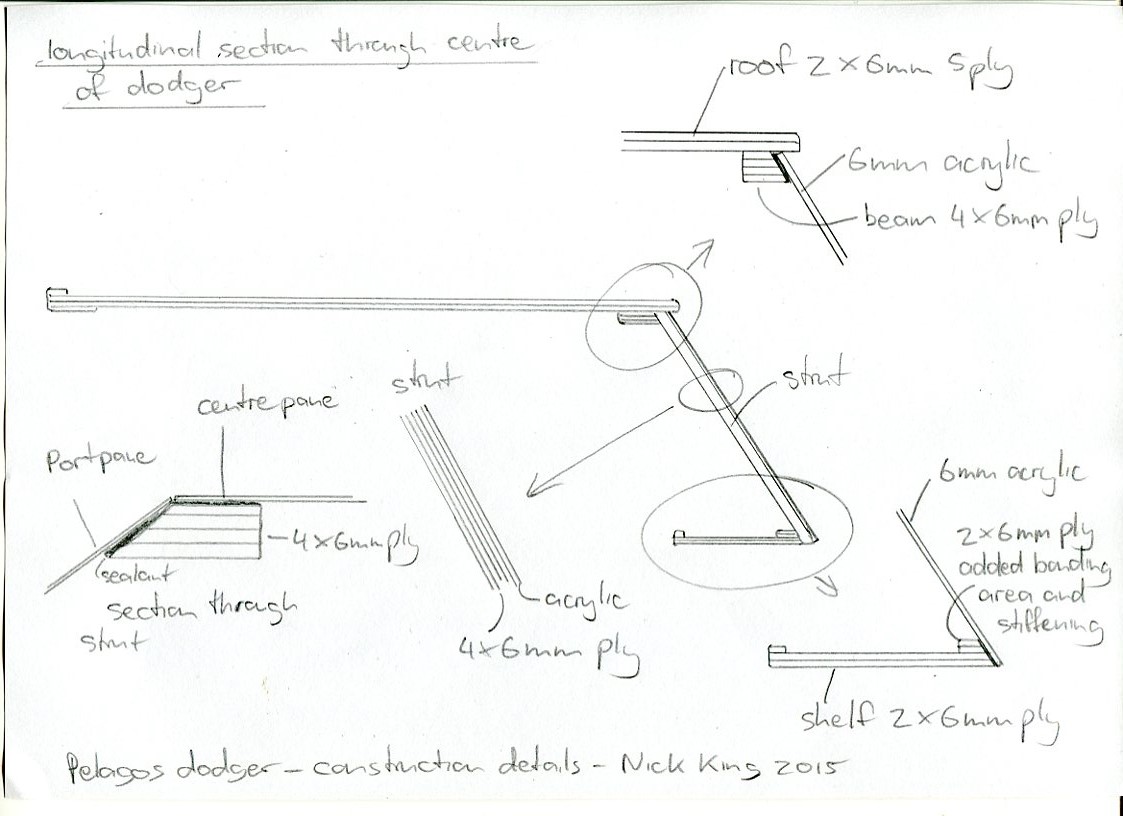
At this point I took the dodger back home and set it up again with mock-up struts to work out the dimensions for the shelf and beam that the struts connect to. Having got this approximately right, I laminated up the beam to fit the underneath of the front of the roof from 4 thicknesses of 6mm ply, using the roof as a mould. I also laminated the struts at this point from 4 thicknesses of 6mm ply. It may seem strange to use ply for this when timber would have probably been fine. However I had the ply on hand and figured the strength to weight ratio would be pretty good. Since much of the strength of the structure comes from the acrylic windows anyway, I wasn't too worried about needing big, solid timbers. At this point, I carefully shaped the struts to fit the window pane angles and the angle of the roof. Then shaped the roof beam to fit the roof and made the cut-outs for inserting the struts into the beam.
Once this was done and checked on the boat, I made the shelf which supports the bottom of the windows and struts, and connects the two sides of the dodger together. The shelf is formed from 2 thicknesses of 6mm ply, with 2 extra thicknesses along the front edge to form the window frame, and 1 thickness along the back edge for stiffness and to stop things falling off the shelf. I cut the inserts in the shelf for the struts and on the boat again, made sure the shelf was the correct width to maintain the shape of the dodger sides and roof, and that the shelf cleared the hatch cover.
Next step was to glue the shelf onto the dodger and ensure the window mounting surfaces were accurately in-plane, so the windows would glue on without any tension from bending. Then I glued 2 strips of ply along the top of the rear roof edge to keep spray and rain from running back off the dodger, and another strip on the rear underside to ensure the edge was really stiff.
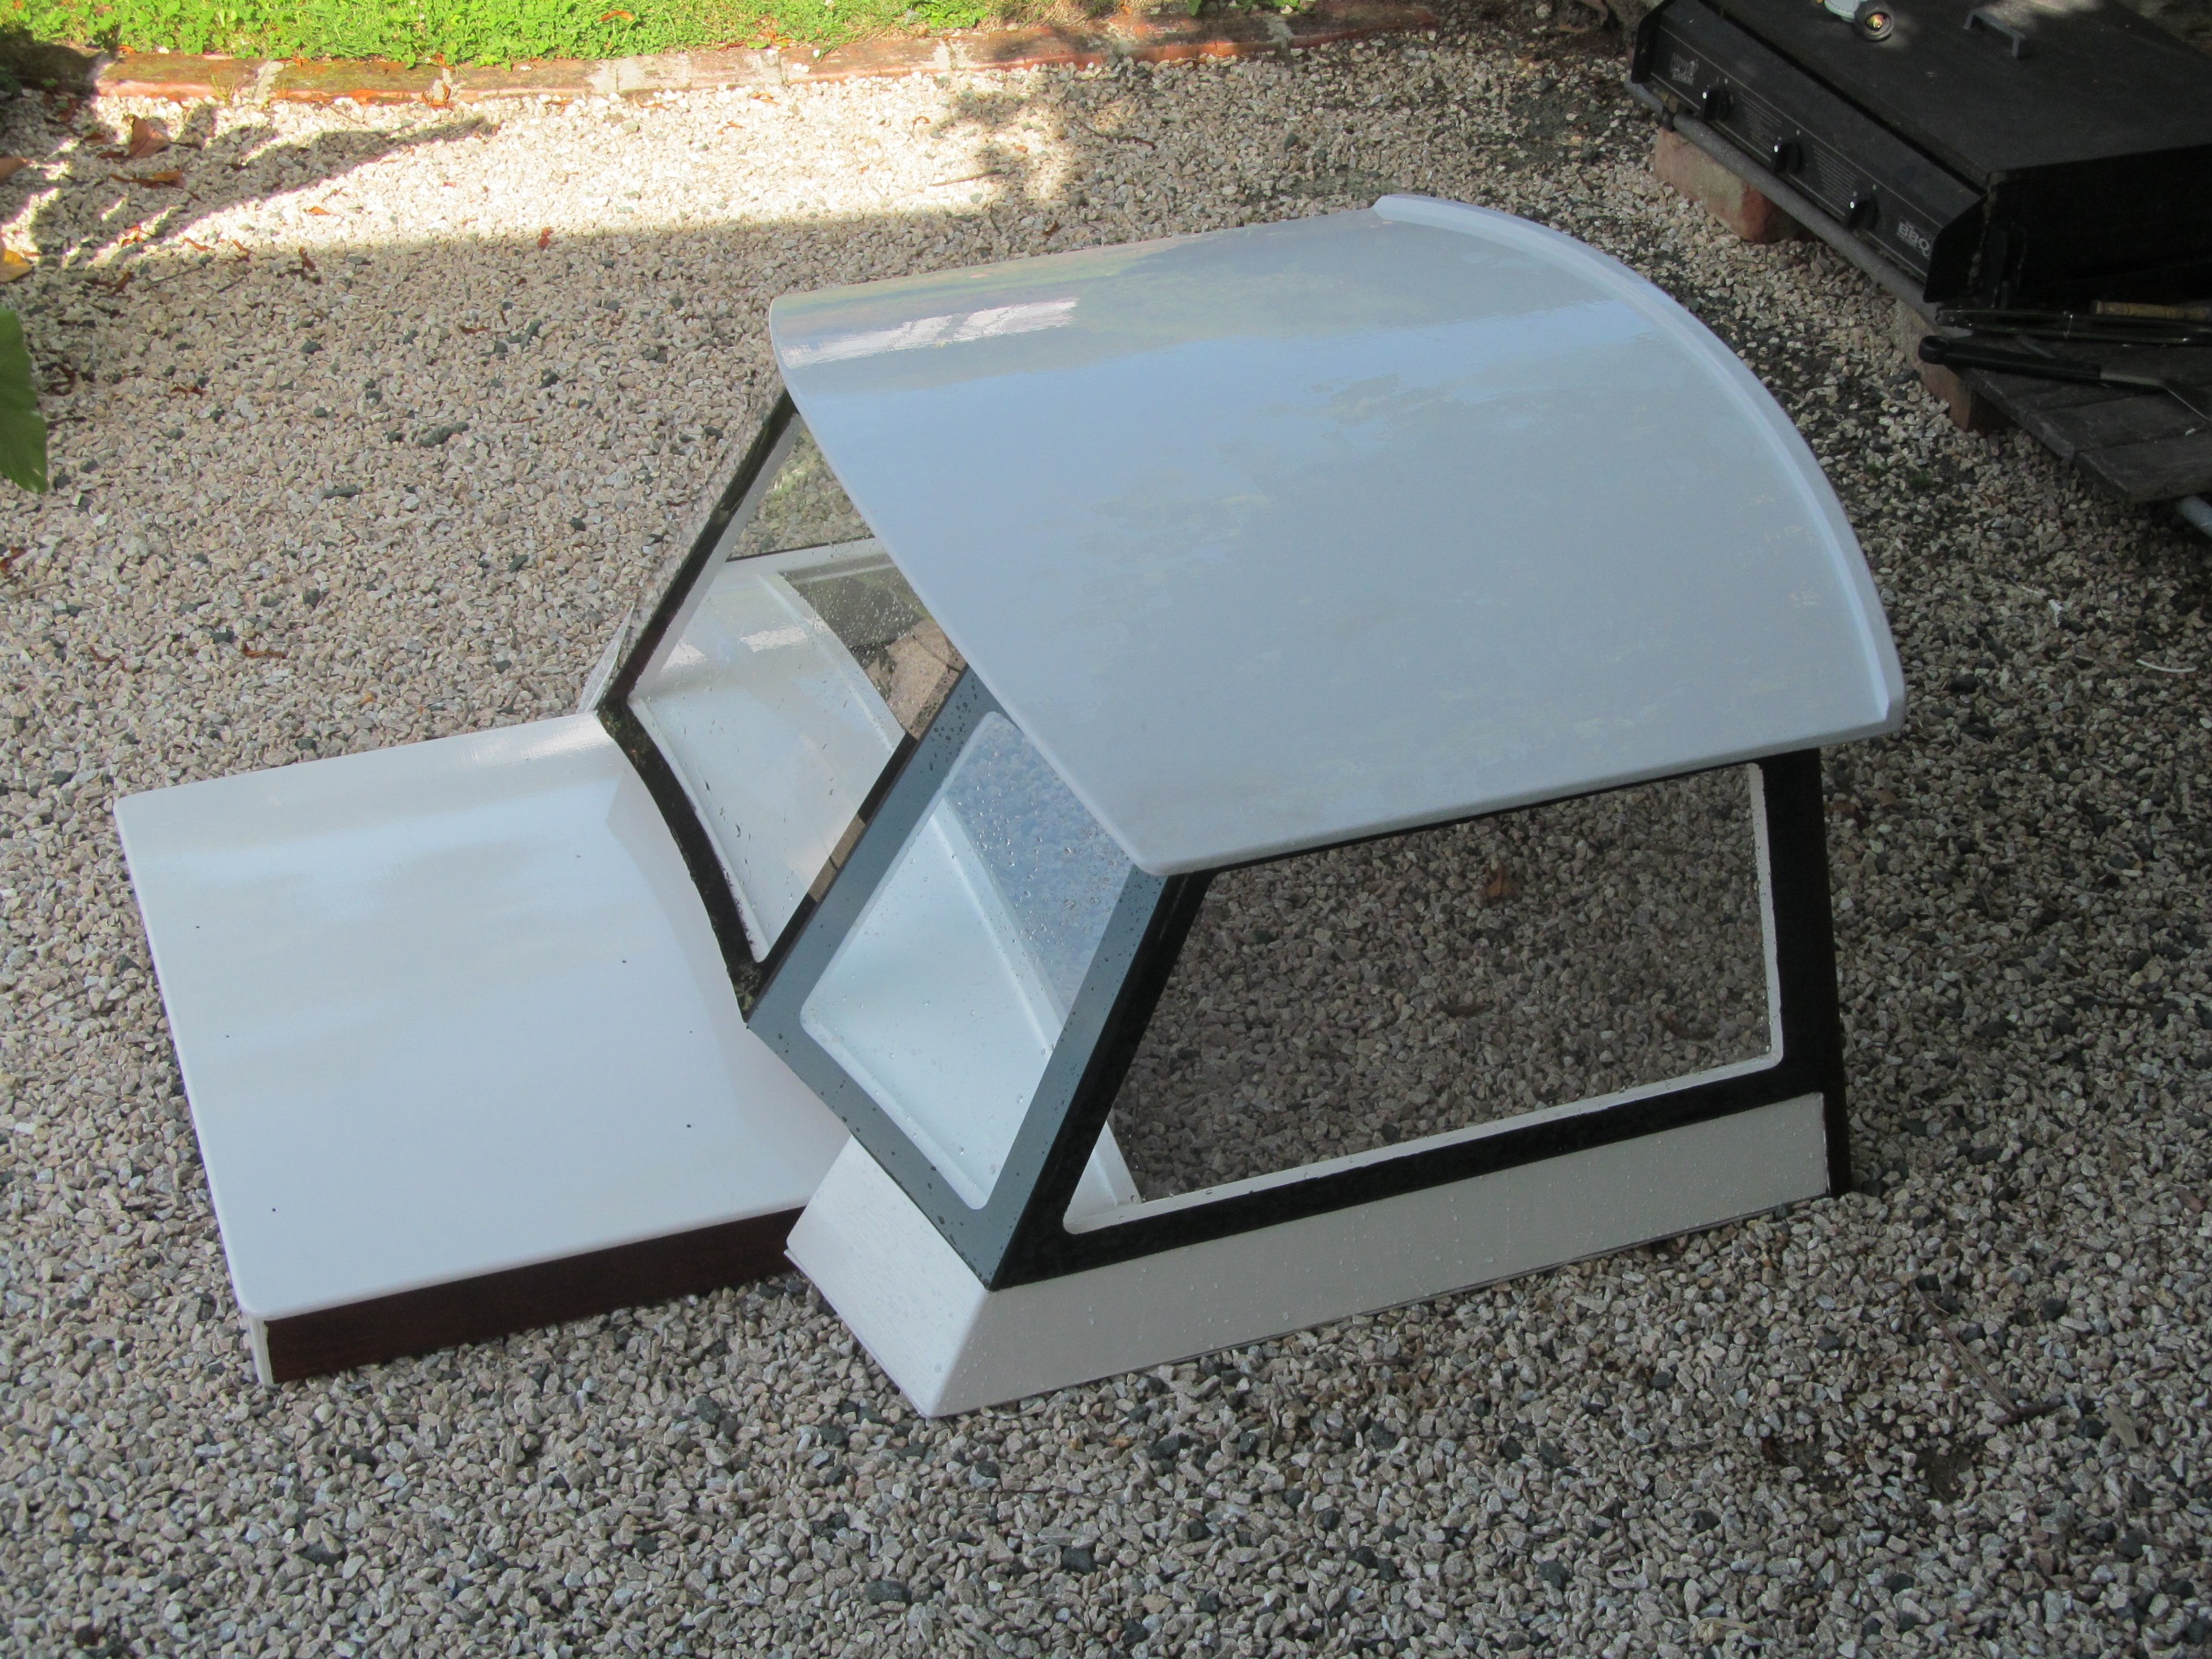
Once all the wood work was complete, I ran a curved router bit around the edges, filleted any sharp corners, and sanded the whole structure. Then gave it 2 sealing coats of epoxy, another good sanding, and then two coats of two pot polyurethane. Finally I glued the acrylic windows onto the frame. To do this, I unmasked the areas to be bonded and applied a UV stable primer to the inside of the acrylic pane.
I then used a polyurethane adhesive sealant (Sikaflex 291) to glue the primed surface to the epoxy sealed timber frame. The primer bonds to the acrylic and provides UV protection for the primer/sealant bond. I really like this system, similar to that used for automobile windshields, but unfortunately this primer is no longer recommended by Sika and instead they suggest using UV resistant tape over the outside of the acrylic. It's a pity because the primer method looks really tidy. Peeling the masking of the acrylic was a highlight of the project, revealing the finished dodger. I'd glued fastening nuts inside the side panels so fixing the dodger was a simple matter of applying a sealing strip to the bottom edge, and then winding in the 4 bolts that hold the dodger to the cabin top. Finished!
Click on the photos above for a larger view - click the return arrow on your browser to get back here
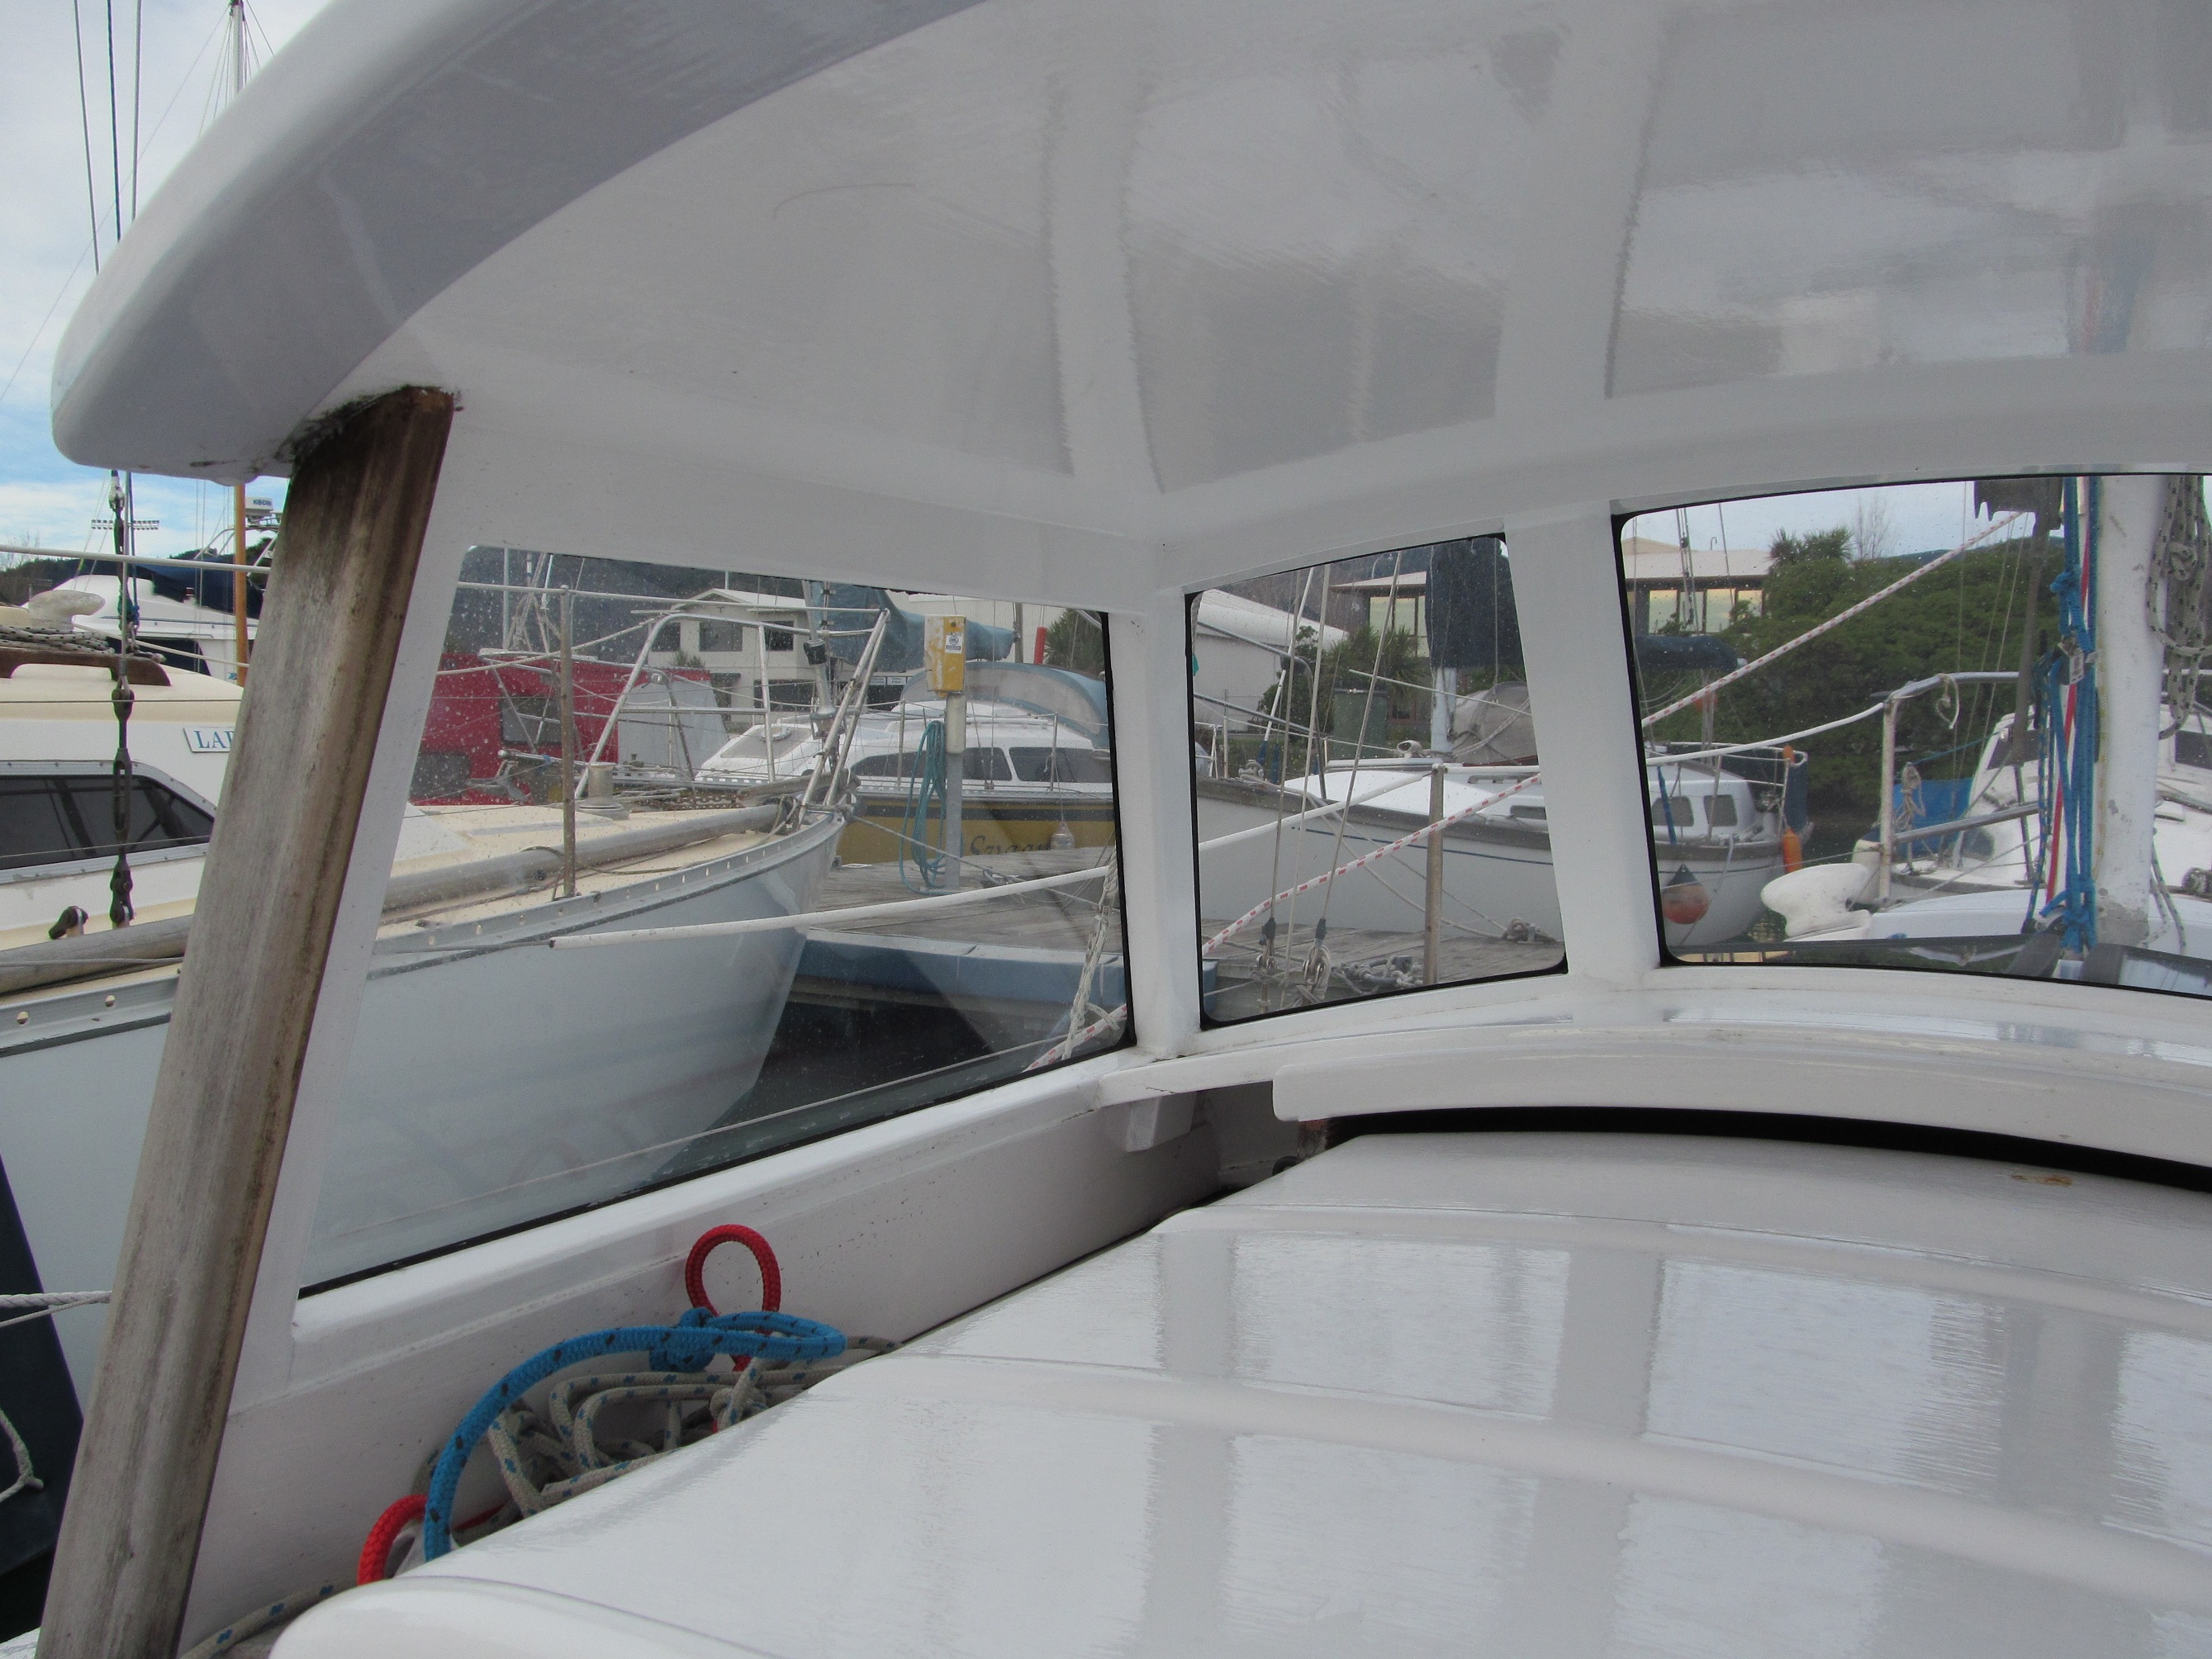
If I was going to do it again, I wouldn't change the overall design and have had lots of positive comments. I'd have used mahogany or some other tropical hardwood in lieu of pine and the exposed oiled rimu edges. Overall the dodger works really well, has great visibility, and is very strong. I love being able to sit in it while sailing or motoring on a cold rainy day.
Nick