|
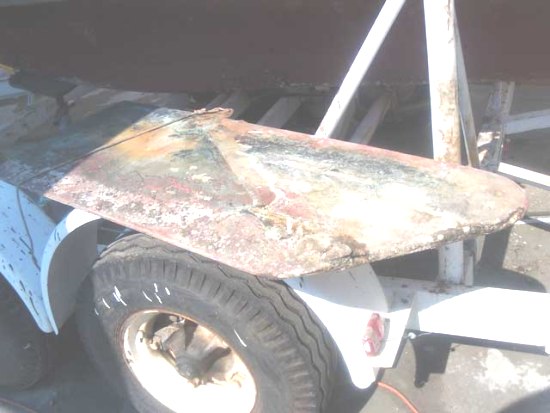
October 14, 2010. Jonnie Walker (Yankee #227) has sent in reports on the repair of # 227's centerboard trunk and inevitably had to repair the centerboard as well. He contacted S&S and confirmed that the Yankee CB trunk, and presumably the centerboard, had been redesigned in 1966. He also found out that the relevant drawing, #1497-10, had been lost.
Here is an edited compilation of his emails and some of his photos to date.
Hey Ron!
My board is in rough shape.....but the strangest part is a white waxy substance in the board itself....it doesn't melt under heat but rather burns. When left laying out in sunlight it turns green. I don't know if this was some sort of filler.........no idea.
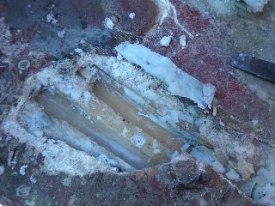
I started grinding the glass away and the weird waxy white stuff turns green in the sun - it was in channels in the forward section of the board.
|
There was another crack on the other side so I turned it over and started grinding there and got that pulled off...and there is a lead bar that I surmise runs all the way back to the tail of the centerboard. The board is heavier in the aft end. BTW, the board is 1" thick at the center - the trunk is 1 3/4".
|
**************************
November 10, 2010, Our technical staff has been been working on the white waxy stuff/green goo. Here is an email from Mark Steinhilber (Rascal) inserted here that might help shed some light on this mysterious stuff.
My guess is that the green liquid oozing out of the board is actually seawater that had worked its way in by osmosis or through small hairline or larger cracks. It looks like that was occurring by the metal tab that the pennant connects to. As seawater reacts with fiberglass, it can cause blisters in the resin rich parts of the layup and the liquid certainly won’t stay clear like water. I’d expect it to come oozing out black or green as a wild guess. Let’s go with green. It was probably getting into the voids inside the board. The white wax like filler inside the board was exactly that, filler in what would otherwise be a void. The builder probably did not want to make the board solid because of the time or expense of the resin and the glass cloth. So an inexpensive filler was probably used between ribs of solid glass. The seawater that sneaks in probably turns green. The voids probably have some moisture content from seawater that enters by osmosis or other means. Gee, what color should the white stuff turn after seawater gets in and stays a while? Let’s go with green…
I think Johnny’s on the right track. Get the crud out, fill up the voids with good materials that are osmosis blister resistant, add lead down low if desired, and grind down the board to look for and remove any structural cracks. I’d be concerned with any cracks in the board that align with the bottom edge of the trunk or keel. The boat may have been moving sideways while grounding, weakening the board. Replace any ground out layup using an equivalent fiber layup schedule. West system epoxy is good because it is stronger than polyester resin and much less susceptible to osmotic blistering (so I’m told). It sounds like he has plenty of clearance on either side of the board if he wants to wrap more cloth around the entire board, building it up even thicker. The angled front notch face of the board looks like it is supposed to land against the front edge of the trunk as a stop when the board is about 45 degrees down (down full). Probably can’t get it to swing more vertical like the older boats with the bronze boards for this reason. The board looks damaged from either the grounding I described above, or by letting the board drop rapidly against the forward stop.
J/24 rudders are not solid either. They have a balsa core and are notorious for cracking right near the lower hinge pintle. I lost my rudder from the waterline downward on a spinnaker reach in 20-25 kts in San Francisco Bay in a 50 boat class race years ago. Things get very exciting for both you and the other boats, with successive roundups caused by having no rudder, I’d say 30 sec to a minute till you dump the chute halyard, then the main. Rudders that show these stress fractures at the hardware can be ground down and repaired, stiffened by removing balsa and replacing with solid glass in this area, and then proper repair of the layup laminations. Unfortunately they are usually a little over class minimum weight. But weight’s not a problem with a Dolphin CB. Johnny’s board needs a good grinding to bare glass to show the fiber and any whitish stress cracks. The added lead only means taking more care not to let the centerboard pennant run free allowing the board to slam against the forward stops….
Looks like Johnny’s doing a great job with the painting and refurbishment. I’d hope the board has a bronze or stainless bushing at the pivot with a bronze or 316 stainless bolt for a pin.
Mark
Ok, back to Jonnie's email
|
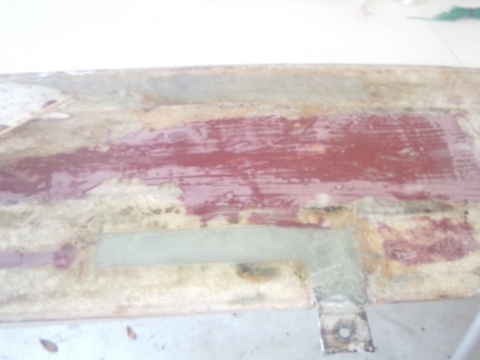
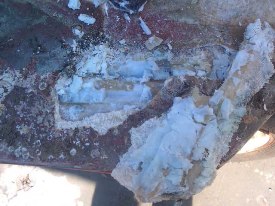
Then my wife started tapping around and found a hollow sound around the middle of the centerboard....I worried that water had made its way in, so I ground out a square directly over that dead sound....inside I found beach sand!
I guess this was a filler.....but otherwise it looked good. I decided that since my board only weighs 50 lbs...a little extra would be a good thing, so I shop vacced out all the sand and filled the void with some lead shot I had laying around. I think I added close to 10 lbs.
I glassed the square back on and let that set up.....I think I may also put lead shot as the filler for the section in the front and may be able to add a pound or two.
|
***********************
November 15, 2010. Some interesting analysis of #227's centerboard. Here's Jonnie's email and a couple of pictures icluding an x-ray of the centerboard.
Hi Ron,
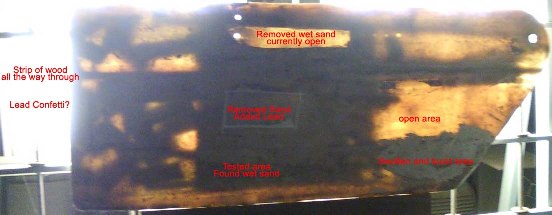
Started digging. Found wet sand. Took an xray and found a questionable dark spot. Drilled it. Found more wet sand. Take a look! Click here for a larger view of this xray
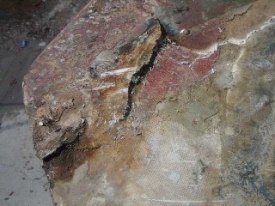
I sanded the board down...most of it looks good.... Its an odd use of lead parts and a wooden stick running all the way through front to back. And the huge dark center section was several sections of sand pockets - separated by lead bars.
Cool huh! Jonnie
***************************
June 23, 2011. Continued from consolidated emails (minor edits)
Hi Ron!
Finally got the camera to talk to the computer. I didn't take as many pics as I should have.....but the basics are covered....there was a large patch that I didn't document - you can see it on the front of the board through the fairing....but I didn't take a single pic of it...

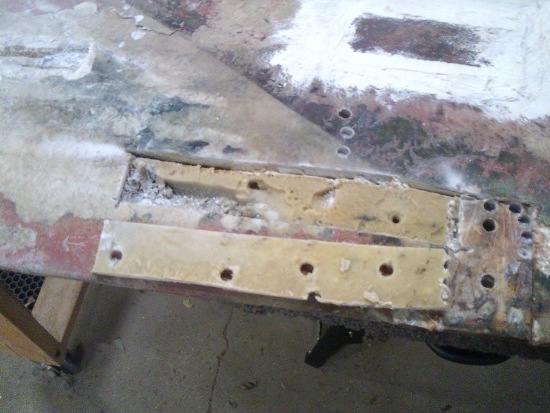
This is the new pennant attachment plate I made....its got two pins that you can't see that slip under the lead bar to add stability.
This is the attachment plate placed in its recess
This is the attachment plate glassed in

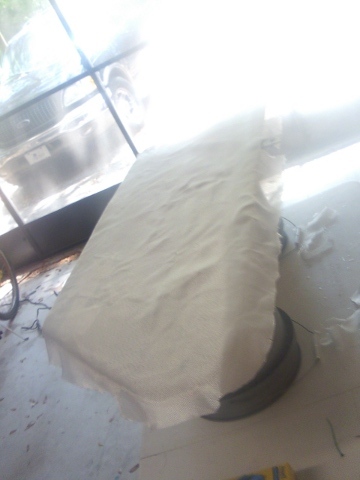
Here the board is layed over with 6oz fiberglass cloth.
I actually put 3 strips of glass on the leading edge and the bottom before wrapping the whole board....with the two wraps of glass for the final covering. The board has 5 added layers of 6oz cloth on the leading edge.....I hit stuff!!.....I thought about adding metal to it....but that was complex.
The glass cloth is epoxied on the board before fairing
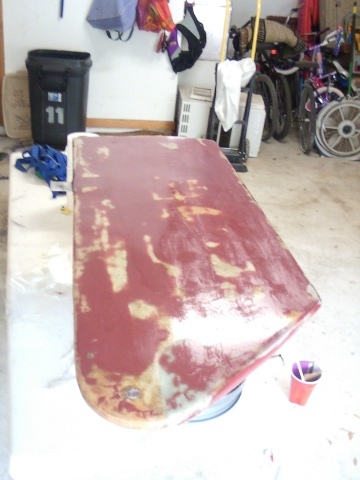
The fairing compound on the board
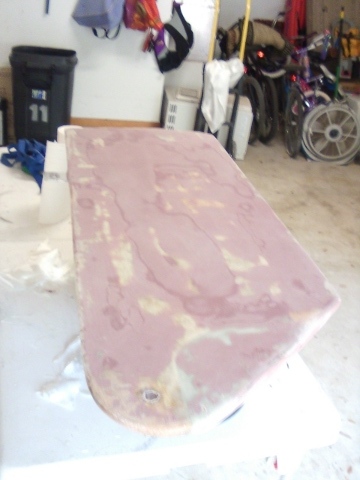
The board is faired
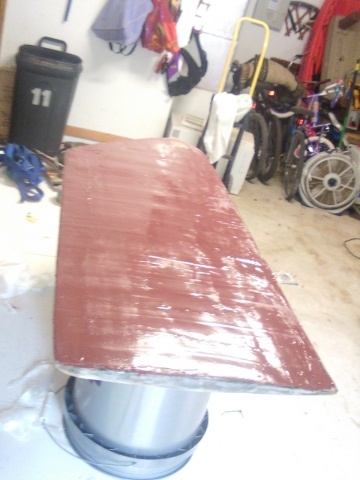
The faired board sealed with epoxy
Once I get to doing the bottom of the boat I will barrier coat the CB and paint it, along with the hull, and then reinstall.
This is an airfoil shaped centerboard which is the reason for its complicated construction, and the reason why #227 will point so high. Here is a picture of the board laying on its side.
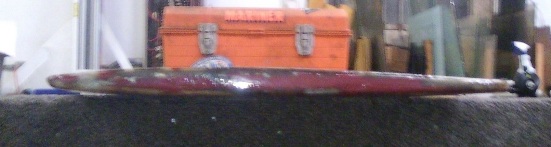
The board is thickest, 1 1/16", at the bottom of the board (the side protruding when down). The thickest part is about 8 inches from the leading edge....the board is 18" wide so it is just forward of center....the bulk of the thickness is forward, with the taper to the trailing edge being more gradual than the taper to the leading edge.
In other words it gets thick fast, and then tapers off.....wing shaped. The trailing edge is about 5/16", the leading edge is about 5/16th
We have come up with the following description of the board's rather complicated construction.
A composite fiberglass board built over wood ribs with internal lead ribs and chunks, sand, and mystery goo filler bonded with resin. The sand voids have been cleared and the lead shot has been epoxied in place to add some weight (10 lbs). The mystery goo filler has been cleared and the voids filled with thickened epoxy. The pennant attachment is a flat L shaped stainless steel piece fitted into the previously sand filled void and glassed in permanently.
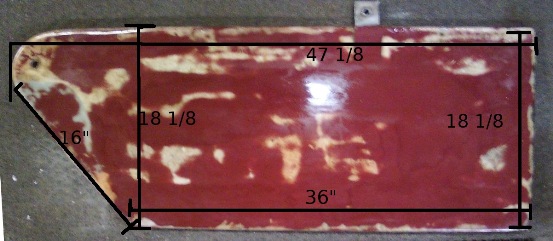
Here are some measurements which may prove helpful to those contemplating a repair of a similar construction centerboard.
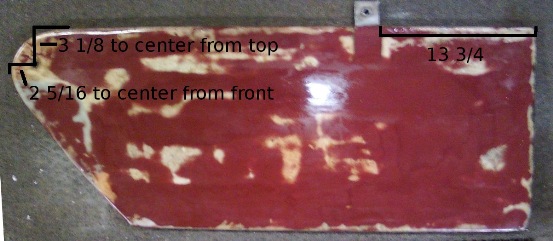
The following picture shows the location on the pin and the attachment plate.
|
This is what I pulled out of the pivot hole.....I believe it is a hdpe type material. (think white cutting board)
O.D. is 7/8 - I.D. is 9/16. The bolt was 1/2"
I have been debating what to replace the sleeve with....a stainless tube was my first thought, but the more I've thought about hdpe the more I think I may fab a replacement out of it.....it will wear....but no corosion...and its pretty slick...so it should move very well....and that one has been in there for years and worn only 1/16". The wall is 3/16".....so I think it would last 10-20 years.....maybe.... Any thoughts? The Webmaster agrees with Jonnie's approach
-jonnie
|
September 24, 2012. ps The final weight of the board is 61.6 lbs
Webmaster Note: This is a herculean effort by Jonnie building our knowledge base for this kind of project. Thanks!
*********************************
|


