Hi Ron,
It's been a quick summer with lots of work of the sustenance kind -I mean the grind kind not the oh the joy of sailing/working on the sailboat kind! I am grateful though as many in contracting have little work. The other day I had just about enough of that stuff and tackled the first item on my to do list for Canopache - the centerboard!
First I moved all of the staging and exterior wood that had been stored under Canopache's protective shadow. (This is what happens when a project sits for awhile) I studied the S&S plan set and checked the website for pertinent information, gathered my tools and began to observe, tap, measure, scratch, ponder and wonder.... According to the plans the pivot pin should have been located about 8" form the bottom of the keel at a point approximately the same distance aft of the forward end of the centerboard trunk aperture. All efforts revealed nothing.
|
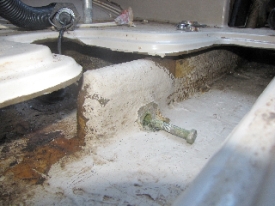
A stainless or bronze pin would not show using a magnet so I used a piece of wood lattice probe to slide between the centerboard and the wall of the trunk "looking for the pin. I found it way up at the top of the centerboard trunk and marked the location on the keel for and aft and also used the stick to gauge the pin's distance above the bottom of the keel. Transferring these measurements to the outside of the hull put the location above the "garboard plank" somewhere inside the volume of the boat. Inside, I pulled up the floor board and observed the top forward end of the centerboard trunk. It had "aftermarket " glass mat applied over two opposing lumps. THE PIN?? I drilled and hit metal! I chiseled out the glass from around a hex bolt head and backed it out and I heard the centerboard drop to the ground. Woo who!!!!!! |
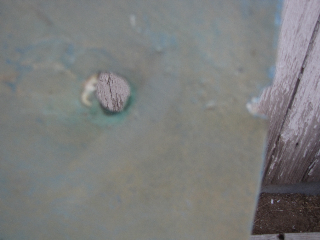
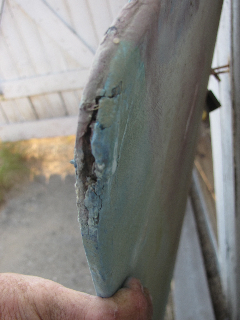
A little digging for wriggle room and the attachment point for the control cable was revealed. It was a loop in the end of the SS control cable that had a copper crimp to hold the loop (see pic). So with side cutters in hand I released the copper's grip and the centerboard was free!The wire was simply run down through the hole in the (top)trailing edged of the board and out through the starboard side of a hole drilled all the way through the board. It was looped back on itself and crimped. The crimped end was stuffed back into the hole through board. It was to big to fit up through the hole through the top/trailing edge so it became the "ball-end" upon which rested the weight of the CB. Here is another picture of this area without the wire and crimp. The hole through the edge terminates at the hole through the board where the crimp was located. It had been working in the hole and the glass there is frayed. I envision some sort of method that would not rub as much, but I can't see it yet...
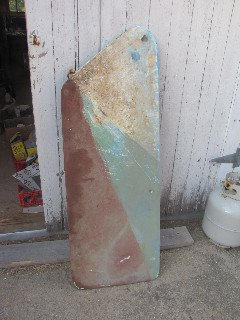
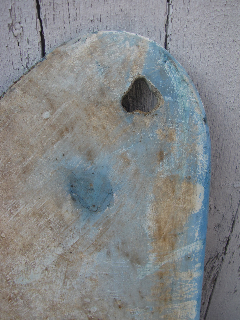
One and one half hours total working time. The shape of the board differs from the S&S design and it has no stop or cable attachment tabs. Also, the centerboard trunk front end surface does not match the shape shown in the plans. It rises straight up from the aperture with no seat for the stop (which is absent from Canopache's board.
I believe that the original was lost and one was transplanted from a "donor". It was probably installed by the owner or a yard of lesser standards. The pivot pin is a SS bolt with threads, not smooth shafted with threads on either end, as specified by S&S.
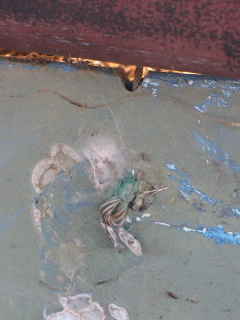
That bolt wallowed out a triangular hole in the board. It was glassed in at an odd angle (assumably to get the hole low enough in the trunk and to allow a drill access in the tight space in the bilge). The hole where the cable is attached has some fraying there as well, though this arrangement seems to have performed satisfactorily.
One and one half hours total working time. The shape of the board differs from the S&S design and it has no stop or cable attachment tabs. Also, the centerboard trunk front end surface does not match the shape shown in the plans. It rises straight up from the aperture with no seat for the stop (which is absent from Canopache's board.
I believe that the original was lost and one was transplanted from a "donor". It was probably installed by the owner or a yard of lesser standards. The pivot pin is a SS bolt with threads, not smooth shafted with threads on either end, as specified by S&S.
 That bolt wallowed out a triangular hole in the board. It was glassed in at an odd angle (assumably to get the hole low enough in the trunk and to allow a drill access in the tight space in the bilge). The hole where the cable is attached has some fraying there as well, though this arrangement seems to have performed satisfactorily.
The board weighs 88 pounds and is glass laminated over stainless steel plate [I drilled and found white metal that is non-magnetic]. I plan on re-installing this board, correcting damage and engineering deficiencies as the system seems to be sound. In taking measurements it appears that when fully extended this CB will only provide an additional 26" draft as configured. Considering what would be involved to get the additional designed draft (Webmaster Note: 28") I will be content with it as it is.
There are frayed edges that need repair , and, I think, the wallowed out hole should be fitted with a properly sized bronze or stainless bushing (of a size that will allow for side to side movement of the board in the trunk) glassed in to the current location. A new smooth pin will be installed square to the board and glassed into the trunk top. I should probably recalculate and adjust it's location so the board when fully extended rests true to the forward end of the trunk to maximize depth and to minimize point stress loading on the edge of the board. I am not sure of the cable attachment method that I will employ. I plan on cleaning the inside of the trunk and coating it and the restored centerboard with anti- fouling paint.
Then It will be time to build the no-travel lift (Webmaster Note: Click here to see that system) and fit the boat to the trailer. But that is a project left to next season as the winter winds are fixin' to blow this boy south for the winter! It feels good to have started, even though it was only 1.5 hours out of the 2000 needed. But it IS a start!
Fair Winds, Eric